Documentation Index
Fetch the complete documentation index at: https://docs.kibocommerce.com/llms.txt
Use this file to discover all available pages before exploring further.
| Platforms: Legacy eCommerce, KCCP eCommerce and eCommerce+OMS |
Looking for Cybersource Payment Gateway? See the Payment Gateways documentation.
Application Features
- Automatically sends information about submitted orders to Decision Manager, including the shopper’s browser type, IP address, device type, billing information, etc.
- Validates orders against your Decision Manager rules to determine a fraud score and validation result.
- Updates order status in eCommerce to Accepted, Pending Review, or Cancelled based on Decision Manager validation results.
- Syncs order status information with Decision Manager at scheduled intervals.
- Avoids excessive overhead for low-value orders by allowing you to set a monetary threshold below which orders are not screened for fraud.
- Maps eCommerce data to Decision Manager to facilitate the creation of fraud detection rules based on fields such as a shopper’s email address or payment type.
- Complete a combined authorization and fraud validation check in one call from eCommerce to Decision Manager. In this scenario, if you capture a partial payment, Kibo will send the authorization and fraud validation check to Decision Manager. At this stage, the Decision Manager Application status is Review and the Kibo order status is Pending Review. Then, if you capture more of the payment with the same credit card, Kibo will NOT resend the fraud validation check to Decision Manager. For subsequent payment captures on the order, the Kibo status is Processing and the DM status is Accepted. This functionality requires set up on your tenant. Submit a Kibo Support ticket to request this functionality.
Install the Application
As of Version 3.0.0, the application is integrated with CyberSource’s REST APIs. Previous versions utilized SOAP APIs with different authentication keys, which is now being deprecated by CyberSource. You can self-install Version 3.0.0 here. If the link redirects you to the launchpad, select any developer account and it will take you to the Marketplace where you can select your tenant. For assistance, please reach out to your SI partner or Kibo’s professional services and enablement team.Configure Decision Manager
To begin setting up Decision Manager in Kibo, ensure that you have the following requirements:- The Cybersource Decision Manager application must be installed on your tenant.
- You must have an active Decision Manager account
- Obtain Decision Manager Account Information
- Provide Applications Credentials
- Configure Fraud Detection and Order Synch
- Map Kibo eCommerce Fields to Custom Fraud Detection Rules
- Enable the Application
Obtain Decision Manager Account Information
Note your Decision Manager account credentials. You will enter these credentials in eCommerce.- Log in to Cybersource. Note the Account ID and Merchant ID in the top banner of the dashboard; this is the Merchant ID that will soon be used for the gateway in KCCP.
- Generate a REST API Key and Shared Secret according to Cybersource’s instructions.
- If you have already generated these credentials while setting up a payment gateway, you can reuse them for Decision Manager.
Provide Application Credentials
- In Admin, go to System > Customization > Applications.
- Click Cybersource Decision Manager 3.0.0.
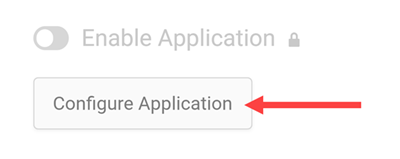
- Click Configure Application.
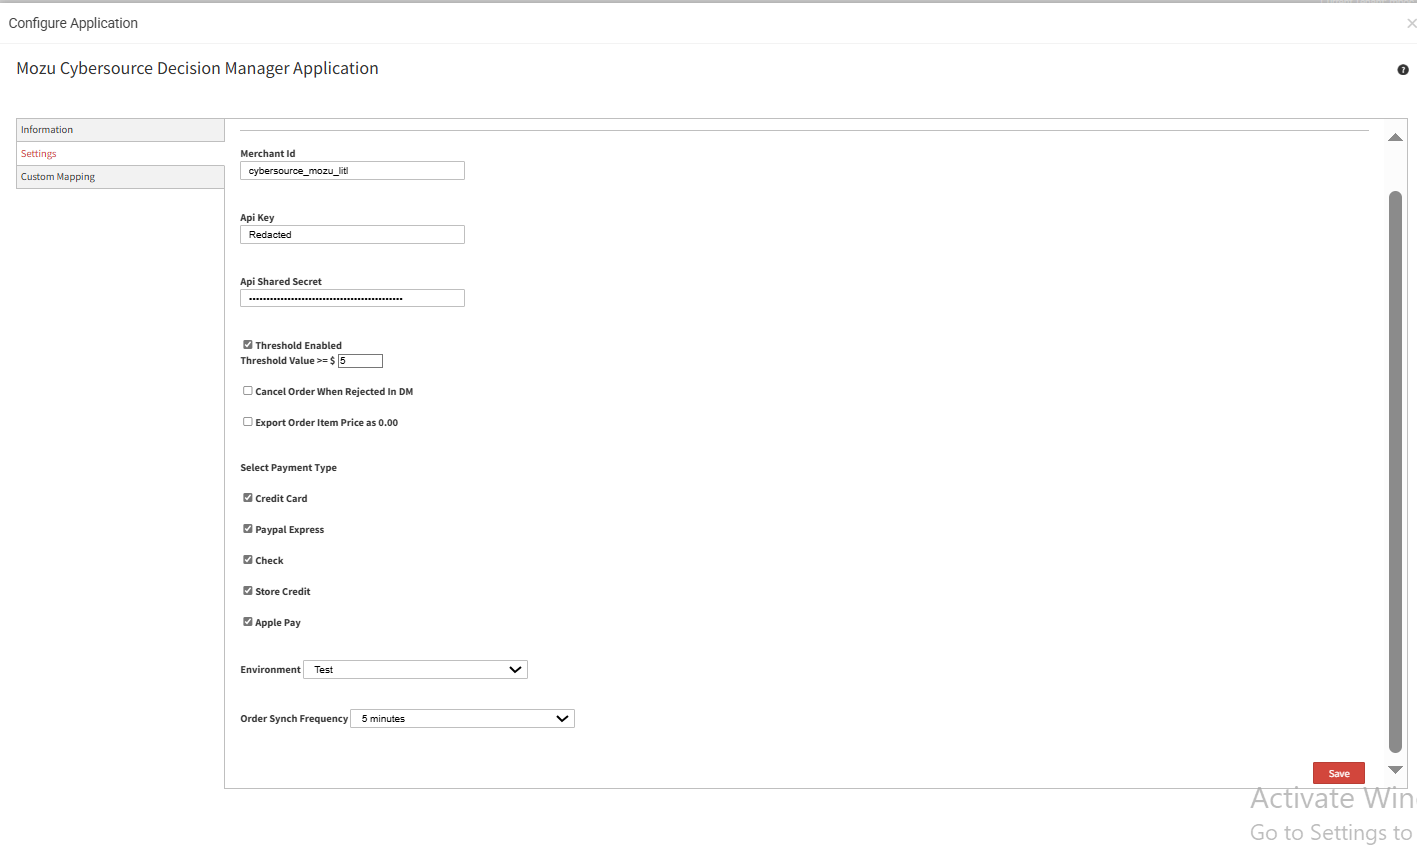
- Go to the Settings tab.
- Enter your Merchant Id, API Key, and API Shared Secret.
- Continue with the other configurations detailed below before clicking Save.
Configure Fraud Detection and Order Synch
In the Settings tab of the Configure Application modal, set the following options as needed to configure your fraud detection and order synchronization.| Setting | Description |
|---|---|
| Threshold Enabled | (Optional) Sets a monetary value below which orders are not sent to Decision Manager. You can use this setting to optimize performance for customers making low-value orders that do not carry significant fraud risk. The Threshold Value only applies to the largest payment that is an enabled payment type (7) for fraud validation. |
| Cancel Order When Rejected in DM | (Optional) Specifies to automatically cancel orders in Kibo that are rejected by Decision Manager. If not enabled, orders rejected by Decision Manager are set to Pending Review. Cancelled orders cannot be reverted to a non-cancelled state. |
| Export Order Item Price as 0.00 | (Optional) Specifies to export orders to Decision Manager with the price for individual line items set to 0.00. Selecting this option will make the total amount of the order 0.00 in Decision Manager. If you want to zero out line items but still see the full order amount in Decision Manager, you can add the Order Total as a custom mapping. |
| Select Payment Type | Specifies the payment types to check for fraud in Decision Manager. Kibo sends ONLY the payment types you select to Decision Manager. If you select multiple payment types, Kibo sends only the largest selected payment type applied to a given order to Decision Manager for screening. Note that PayPal Express is only supported for the legacy version of Kibo eCommerce PayPal, implemented through Kibo eCommerce Core 8 and earlier. If you are implementing PayPal support through the PayPal Express Certified Kibo eCommerce Application, Decision Manager does not check PayPal payments for potential fraud. Cybersource’s current tooling requires a billing address with every order. PayPal Express obscures billing information for security reasons, so Kibo cannot provide it to Cybersource. |
| Environment | Specifies the Decision Manager environment to use for fraud checking. If you select Test, the application sends order information to Decision Manager’s test site, where you can evaluate fraud detection rules in a sandbox setting. When you are satisfied with the rules you set in Decision Manager, choose Production to enable live fraud detection on your site. |
| Order Synch Frequency | (Optional) Specifies how often Kibo queries Decision Manager for updates on orders. If you accept or reject an order in Decision Manager that is Pending Review in Kibo eCommerce, the order synch frequency determines how long it takes for the order status to update in Kibo eCommerce. If this option is Disabled, Kibo does not query Decision Manager, and you must manually process the order in Kibo eCommerce. |
Create Custom Rules
If you want to add to the rules that Decision Manager uses to screen an order for fraud risk, you can use the Cybersource Business Center to modify the existing rules or create new custom rules. To help you build custom rules, you can map eCommerce fields, such as email address and payment types, to available merchant-defined data (MDD) fields in Decision Manager. Afterwards, you can associate the MDD fields with custom fields in Decision Manager and use the custom fields in your fraud detection rules. At least one rule must exist in order for the transaction to go through the Decision Manager. To create custom mappings:- Open the Decision Manager app configuration settings dialog.
- Go to the Custom Mapping tab. This tab only appears after you configure and save your account information on the Settings tab.
- Select the Merchant ID for the Cybersource account you are mapping.
-
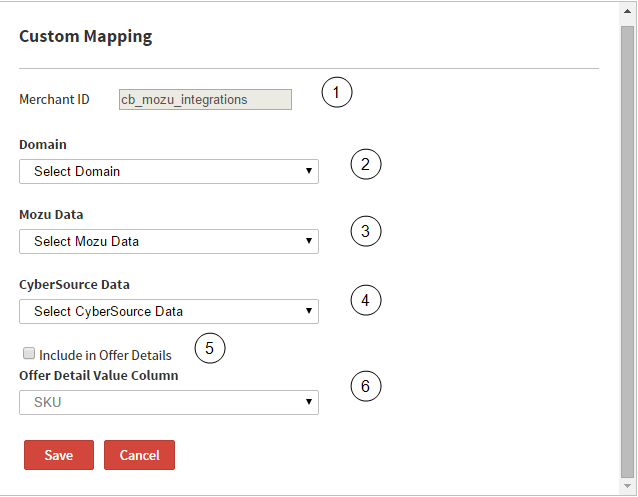
Click Add Custom Mapping and fill in the following fields.
- Merchant ID: The Decision Manager Merchant ID you selected on the previous page.
- Domain: The type of eCommerce data you are mapping. The value you choose determines the options that appear in the Mozu Data menu.
- Mozu Data: The specific order or customer data field from eCommerce. Once a field is mapped, it no longer appears in the list.
- Cybersource Data: The Decision Manager merchant-defined data field to which you are mapping the Mozu Data. Only available fields appear in the list.
- Include in Offer Details: Specifies whether to include the custom mapping as a column in the Decision Manager Offer Details table.
- Offer Detail Value Column: Specifies which column in the Decision Manager Offer Details table displays the mapped data. If you select Price, the mapped data must be a decimal. SKU can display any data type.
- Log in to the Cybersource Business Center.
- Go to Decision Manager > Configuration > Custom Fields.
- Click Add Custom Field.
- Select merchant_defined_data7 as the Order Element and give the field a logical name, such as Email.
- Click Save to create the field.
Enable the Application
If you were previously using Version 2.0.0 of the Decision Manager application, you must disable it before enabling the new one:- Go to System > Customization > Applications.
- Click Cybersource Decision Manager 2.0.0.
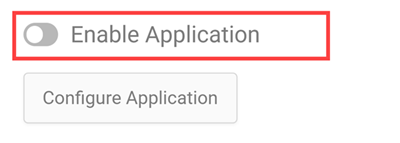
- Toggle off Enable Application.
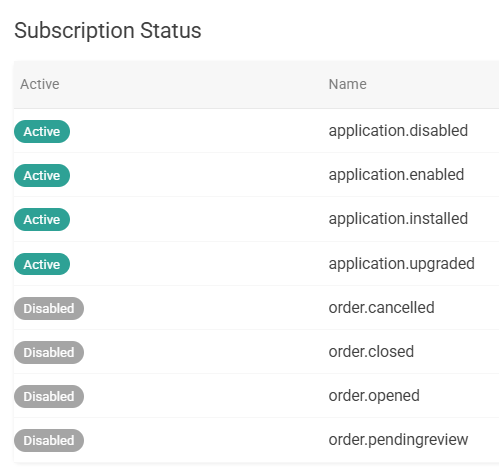
- Ensure that all Order events are disabled for this application.
- Go to System > Customization > Applications.
- Click Cybersource Decision Manager 3.0.0.
- Toggle on Enable Application.
-
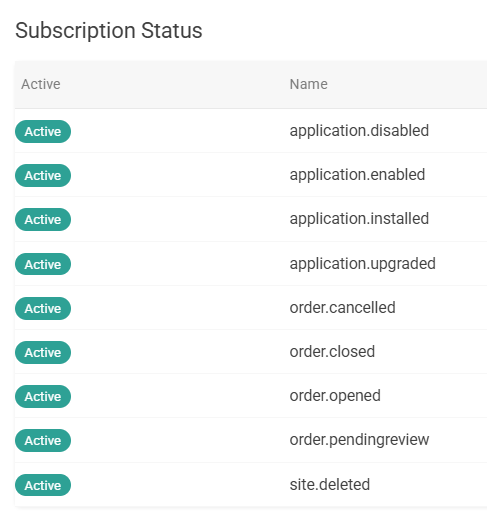
Ensure that all events are enabled for this application.
- Install this Dev Center application. If the link redirects you to the launchpad, select any developer account and it will take you to the Marketplace where you can select your tenant.
-
Go to System > Customization > API Extensions and update the Payment Action (Before) API Extension to reference the new application key, if it wasn’t automatically updated. See Getting Started with API Extensions for more details.
- If you are using a custom implementation of the Decision Manager API Extension and migrating from SOAP to REST versions of Cybersource, modify the following lines by removing those marked with
-and adding the+lines. If you are setting up a new instance, your code should already contain the correct lines.
- If you are using a custom implementation of the Decision Manager API Extension and migrating from SOAP to REST versions of Cybersource, modify the following lines by removing those marked with
-
Log into Cybersource and go to Decision Manager > Configuration > Extended Settings and update the Notification URL to the appropriate CSDM3 address (where
{tenant}may betp1,tp2,tp3, or so forth depending on your environment).- Sandbox:
https://integrations2-sb.mozu.com/CSDM3/listener/<tenantId> - Production:
https://integrations2-{tenant}.mozu.com/CSDM3/listener/<tenantId>\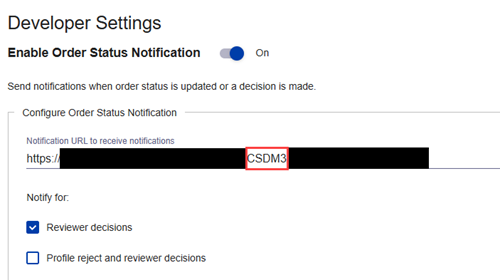
- Sandbox:
Add the Decision Manager Widget to Your Theme
For each fraud screen it performs, Decision Manager requires a device fingerprint that helps identify the computer or device from which an order originates. You must add the Decision Manager Widget, available on GitHub, to the checkout page of your eCommerce site(s) to capture each customer’s device fingerprint and send it to Decision Manager. The Mozu/Integration-DecisionManagerWidget repository is private. Contact Kibo Support with your GitHub username to request access to this repo.Update Your Theme
- Clone or download the GitHub repository.
- Add or merge the files listed above.
- Run Grunt to build the theme.
- Upload the resulting ZIP file to Dev Center.
- Install the updated theme to the sandbox you’re working in.
- In Admin, go to Main > Content > Themes, right-click the new theme, and click Apply.
Add the Widget to Your Checkout Page
You can only perform this step if you are using a Kibo site.- In Admin, go to Content > Editor.
- In the Site tree, navigate to Templates > Checkout.
- Click Widgets at the top of the editor.
- Drag the DecisionManager Device Fingerprint widget to any dropzone on the checkout page. The widget is not visible to customers, so placement on the page is not important.
Use the App
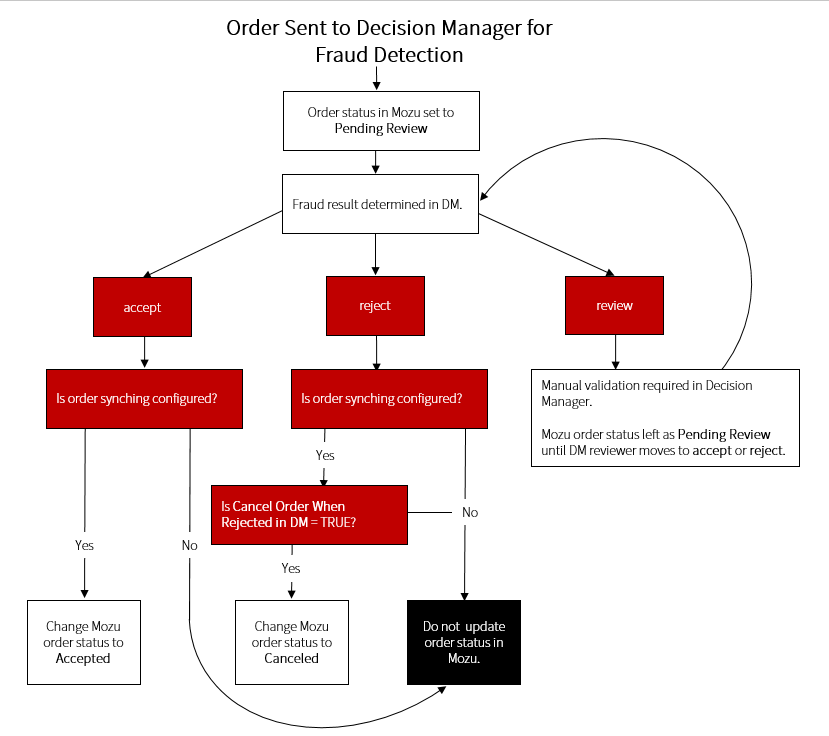
Once you have installed, configured, and enabled the Cybersource Decision Manager Application, the app automatically begins sending eCommerce orders to Decision Manager for fraud detection. The amount of work you must do to process orders depends on your app configuration. For example, in the most streamlined scenario (you enabled both an Order Synch Frequency and Cancel Order When Rejected in DM), you only have to process orders in Decision Manager. Refer to the Application Logic section at the end of this document for a diagram of the order status change process. When an order is sent to Decision Manager, the status of the order in Kibo changes toPending Review. Decision Manager screens the order and attaches one of the following validation results: accept, review, or reject. If the validation result is review, further action is required in Decision Manager to either accept or reject the order.
Process Orders in Decision Manager
In Decision Manager, Kibo orders appear with their Kibo order number as the Merchant Reference Number. This makes it easy for users to locate the order in Decision Manager:-
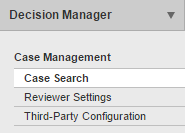
Log in to Decision Manager and navigate to Case Management > Case Search in the left navigation menu.
-
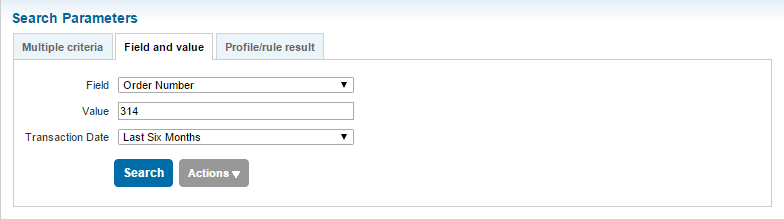
Use the Search Parameters to locate the order(S) that need processing. If you know the order number, you can search for it explicitly using the Field and value search.
- (Optional) If your search returns multiple results, click the order number in the Results table to view the Case Management Details.
-
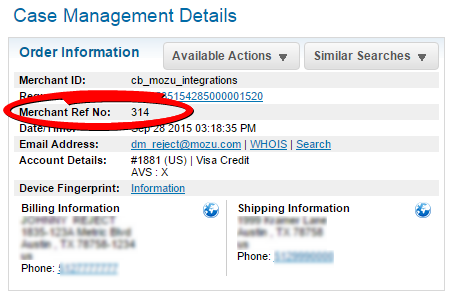
Review the order. Note that the Case Management Details list the order number as the Merchant Ref Number.
- Process the order in Decision Manager as you normally would.
Process Orders in Kibo eCommerce
Automatic Order Processing
All orders are set toPending Review when they are sent to Decision Manager. If you configured order synching, the Decision Manager App automatically updates the order status after a Decision Manager result is received.
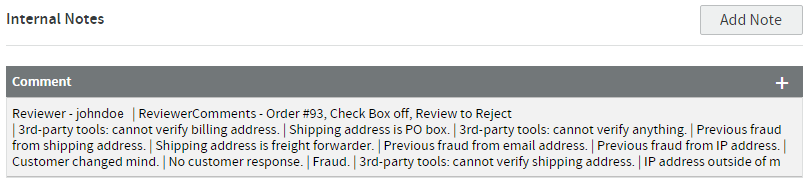
Additionally, if the order was manually reviewed in Decision Manager, the reviewer name and comments from Decision Manager appear in the Orders module in Admin, on the Order Details tab:
| Decision Manager Validation Result | Kibo Order Status |
|---|---|
| accept | Accepted |
| review | Pending Review |
| reject | Cancelled1 |
Manual Order Processing
If you did not enable order synching, all orders sent to Decision Manager remain inPending Review until you manually process them in Admin:
- In Admin, go to Main > Fulfillment > Orders.
- Locate the order and click the row to open the Orders editor.
- On the Order Details tab, locate Attributes.
-
Use the Decision Manager Fraud Results to review the reasons the order is pending review.
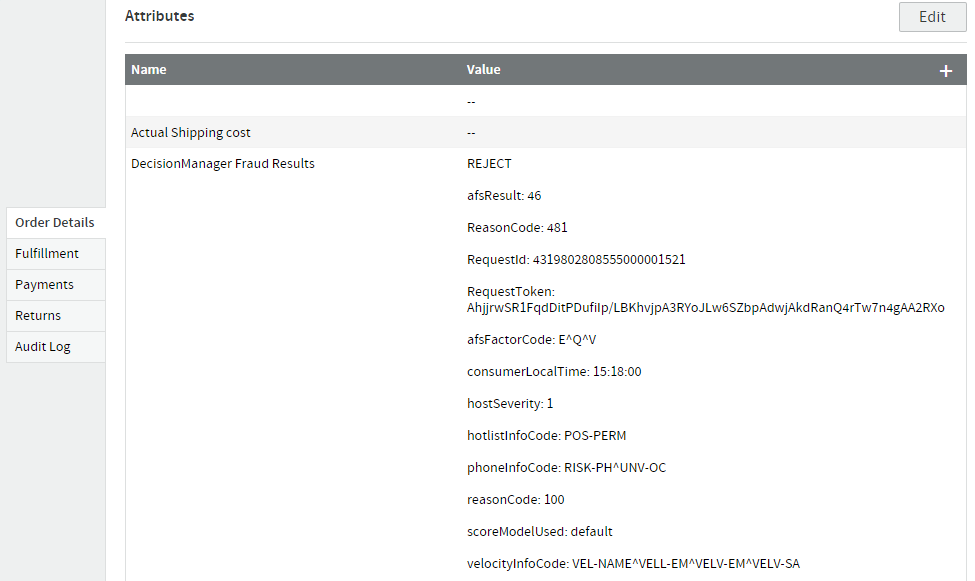
- Note whether Decision Manager accepted, rejected, or marked the order for further review.
- Consider fraud risk information such as the fraud score result (afsResult), risk factor codes (afsFactorCode), and reason code (ReasonCode). For example, in the preceding screenshot, you can determine that Decision Manager rejected the order due to a fraud score result that may be above your ignore threshold based on risk factor codes that include phone inconsistencies and high account usage. For help interpreting all the values listed in the Decision Manager results, refer to the Decision Manager Developer Guide: Using the Simple Order API available through the Cybersource Business Center.
- If you think the order is fraudulent, click Cancel Order. Otherwise, click Accept Order.
Application Logic
This section provides decision trees to help illustrate how the Cybersource Decision Manager Application makes two key decisions:- Whether send an order to Decision Manager for fraud detection.
- How to change the status of a Kibo order based on the fraud detection results.
Perform Fraud Detection?
 Figure 1:
Process for determining whether to send an order to Decision Manager for fraud detection.
Figure 1:
Process for determining whether to send an order to Decision Manager for fraud detection.
Update Order Status?