

How Delivery Works
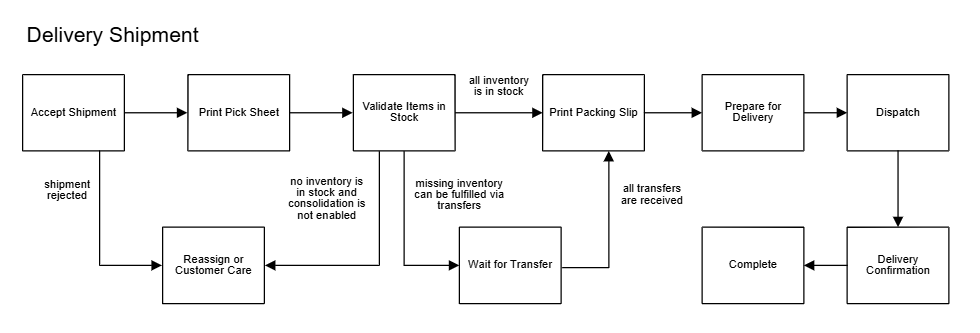
All items that are ordered for delivery will be grouped into a shipment of the Delivery fulfillment type. This fulfillment process is initially similar to Ship to Home, but includes additional steps to prepare, dispatch, and confirm the delivery via either the fulfiller’s own trucks or a delivery provider.- Accept Shipment: The order has been accepted and is ready to be sent through fulfillment.
- Print Pick Sheet: The pick sheet is generated for store associates to collect shipment items. You can also include Delivery shipments in pick waves.
- Validate Items in Stock: Confirm whether all items were available for picking. If not all items are in stock and Delivery Consolidation is not enabled, then you will be prompted to split the shipment (if you have partial inventory available) or reassign it to a new location (if you have none of the inventory available).
- Wait for Transfer: The shipment goes through this optional state if inventory was not available and a transfer is requested.
- Print Packing Slip: All items are at the fulfillment location and the packing slip is printed.
- Prepare for Delivery: The shipment has been packed and is ready to be delivered. If the shipment includes assembly, then that must be completed.
- Dispatch: The items are ready to hand off to a delivery provider.
- Delivery Confirmation: The shipment is pending delivery confirmation from the provider.
- Complete: The shipment has been successfully delivered to the customer.
Configure Delivery Fulfillment
The Delivery fulfillment type is available out-of-the-box alongside STH and BOPIS. Fees are determined by the delivery provider’s shipping method rates, which can be retrieved via the Get Rates API. The API documentation will be updated soon with the associated fields.Enable Locations for Delivery
Delivery fulfillment must be configured at both the product and location level. Fulfillment locations that offer this service must have the Delivery fulfillment type enabled:- Go to Main > Orders > Locations.
- Click a location (or click Edit from the dropdown menu on that location in the table).
- From the Fulfillment Types drop-down menu, select Delivery.
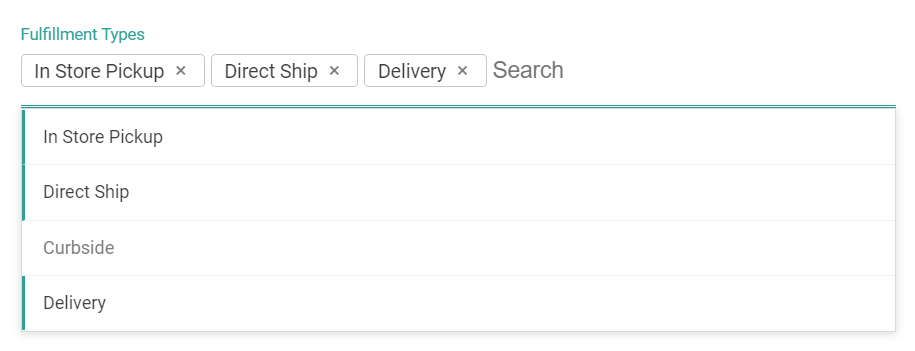
- Click Save.
Enable Products for Delivery
In order for a product to be purchased for delivery, that fulfillment option must also be available for the product in the catalog. To enable this option for a specific product:- Go to Main > Catalog > Products.
- Click the product that will allow delivery (or click Edit from the dropdown menu on that product in the table).
- Under the Shipping section, check Delivery.
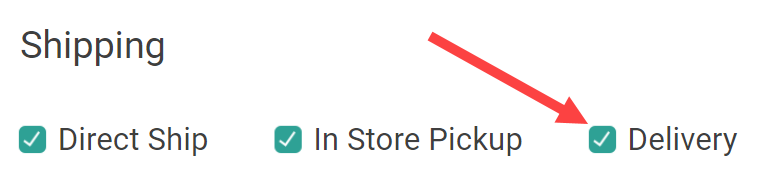
- Click Save.
Configure Routing Logic
Delivery routing scenarios should be configured to handle shipment assignment cases if the customer does not specify one, as well as if you want the optimal delivery location to be displayed on the storefront based on the shopper’s address. This logic will determine how a location is selected to assign Delivery shipments to, such as by prioritizing the closest distance from the shopper’s address.Optional: Enable Consolidation
Delivery also supports consolidation via transfers. If the delivery location doesn’t have any inventory available but there is inventory at transfer locations, then transfers will be created to consolidate all items at one location (either the delivery location selected by the customer or the location determined to have the shortest distance from the customer). If you want to use this feature, refer to the Consolidation guide for more details and configurations instructions.Storefront Options
Once set up in your tenant, the shopper can opt into delivery as their fulfillment method. You can modify your storefront product details and/or cart pages to ask the shopper for their zip code (or use a saved address, if applicable), which Order Routing will use to suggest the optimal delivery location. This is done via the Suggest Candidates API, which you can integrate with using the Suggest Candidates API Extensions to display its suggestion on the page.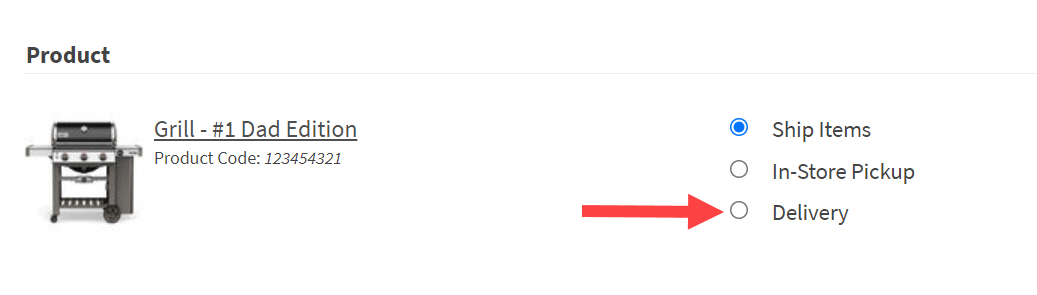
Fulfillment Example
For more information about fulfillment flows, see the Fulfillment Method Types guide. Any customer emails that notify the customer their shipment is ready for delivery or out for delivery should be sent by your delivery provider or third-party integration.View Delivery Information
On the Fulfiller UI homepage, there is a card for the Delivery fulfillment type that lists the number of shipments in each step of that process. Click a step on the card to be taken to the list of shipments in that step. When viewing shipment details, any delivery information is displayed at the top indicating the expected date, delivery instructions, and any other notes.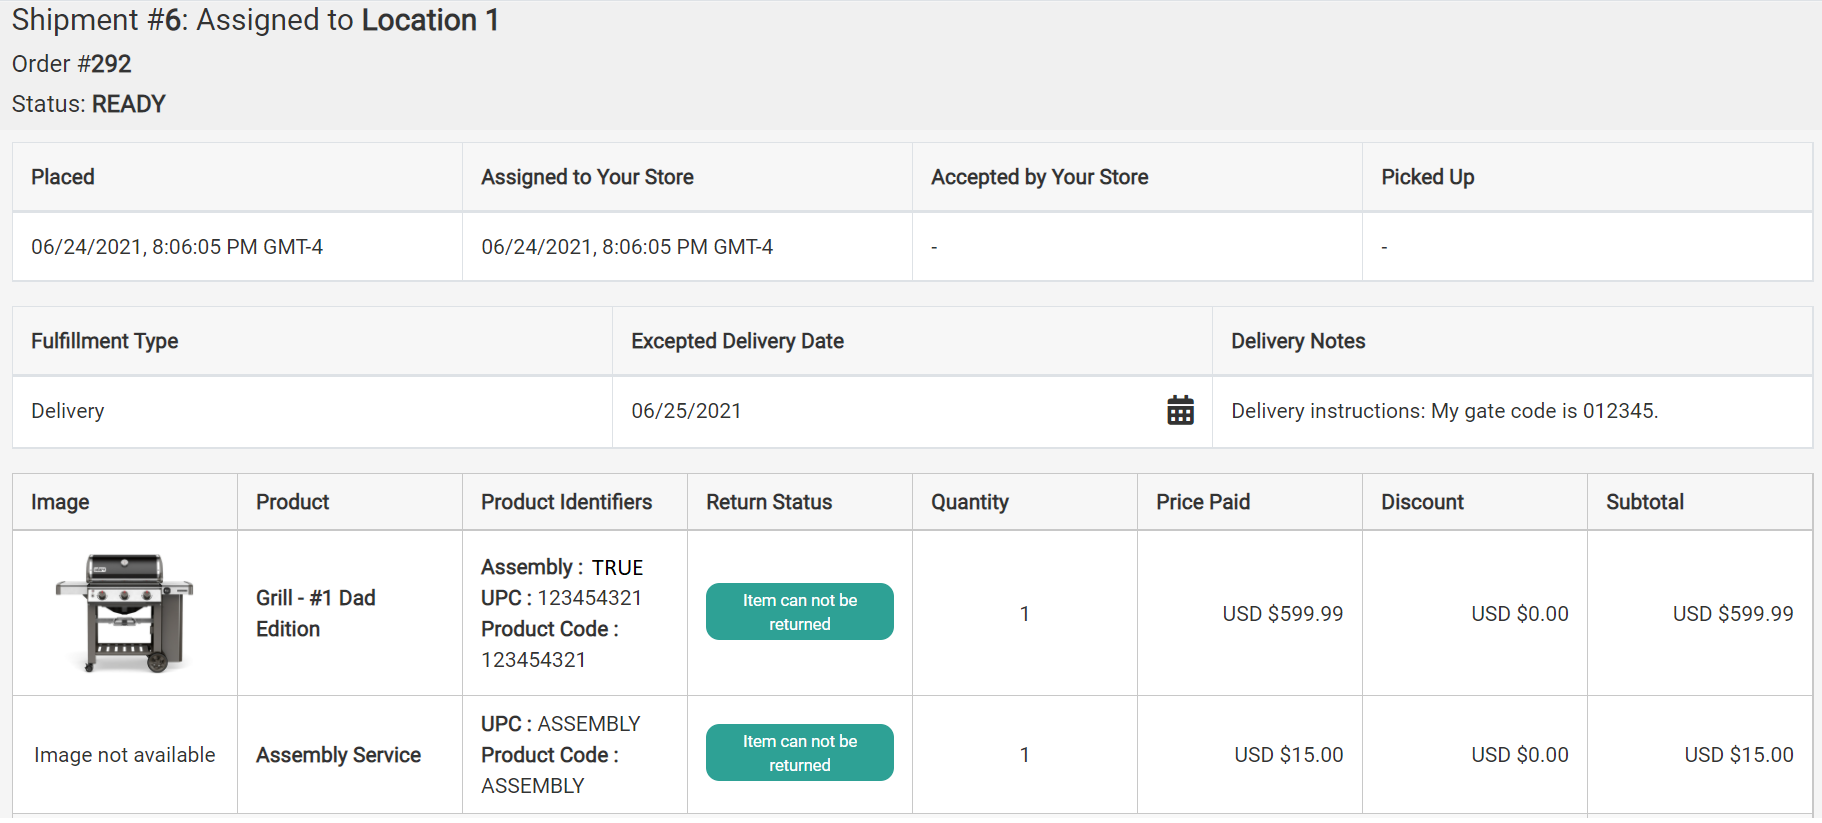
Initial Fulfillment Steps
The Accept Shipment, Print Pick Sheet, Validate Items in Stock, Wait for Transfer (if applicable), and Print Packing Slip sections of a Delivery shipment are the same as those of the Ship to Home process. If Package Consolidation is enabled for your implementation, that will be available to Delivery shipments if there are other qualifying shipments for the same customer to consolidate with. If not all inventory is available during the Validate Stock step, while rejecting a shipment, or substituting an item, then you can choose to temporarily block any further assignments to that location. This is done using the same options as when splitting Ship to Home shipments.Prepare for Delivery
When a Delivery shipment enters the Prepare for Delivery step, all items should be packed and made ready for dispatch. Enter the details of each package such as the dimensions and weight, then print the delivery label(s). You can also reprint a packing slip if needed. If the shipment includes a service such as assembly, then that should be performed as well. Click Ready for Dispatch when everything is complete.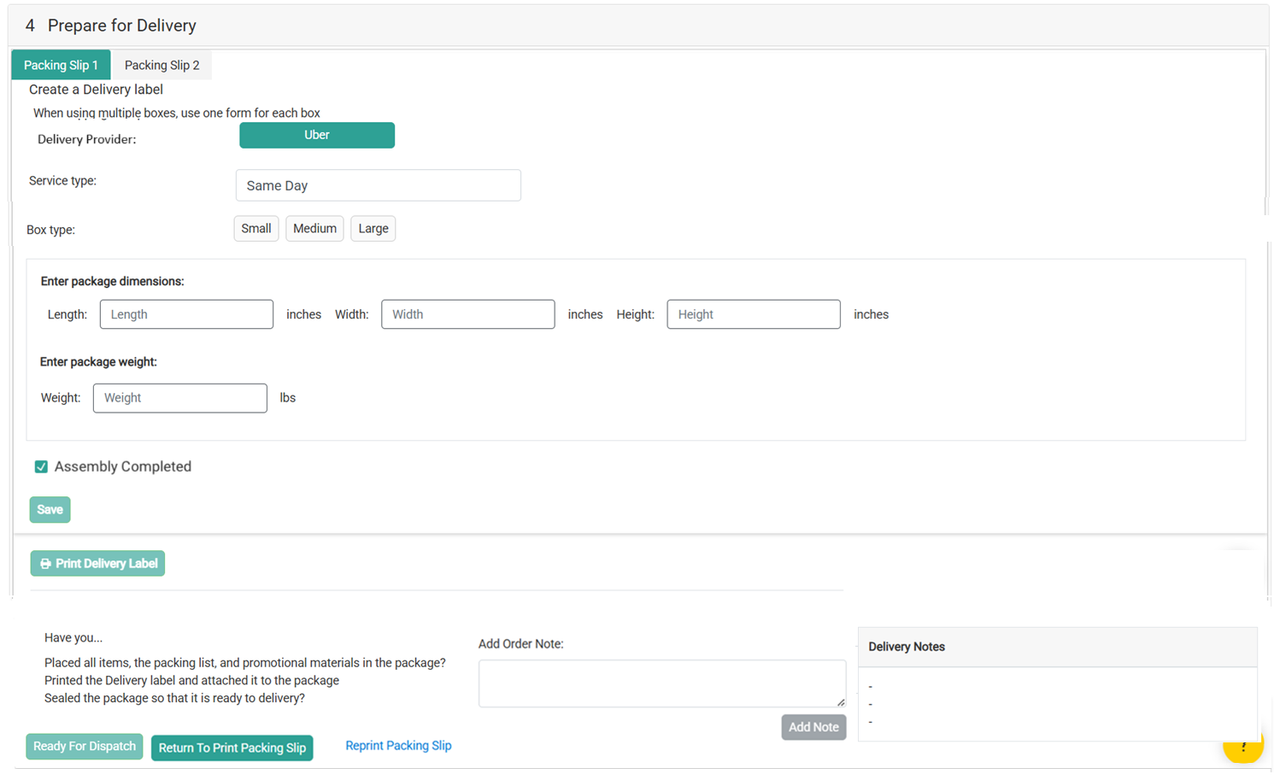
Dispatch
During the Dispatch step, place the prepared shipment into the delivery area of your fulfillment location and click either Handover to Delivery Provider or Return to Preparation for Delivery (if corrections to the package are needed). Once handed over, the shipment will be marked with the Dispatched status and you will be redirected back to the FFUI dashboard. You can return to the shipment for the next step once delivery is completed.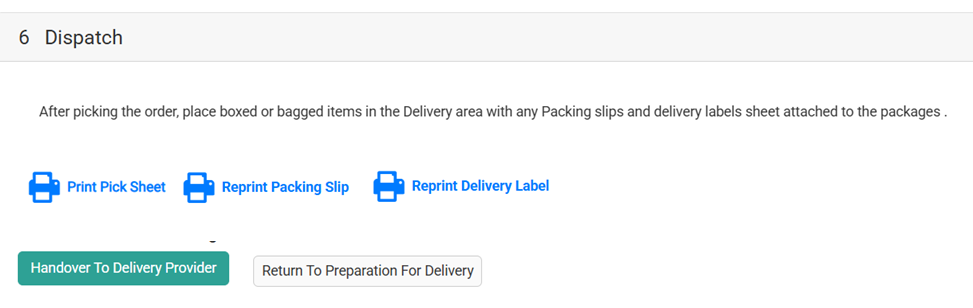
Delivery Confirmation
This step displays all of the delivery information and the current status (such as Dispatched). Click Order Was Delivered to manually confirm that delivery is complete and mark the shipment Fulfilled.