Catalogs and Sites
Refer to the following table for more information about master catalogs, catalogs, and sites:| Element | Description |
|---|---|
| Master catalog | A master catalog is a set of products that multiple catalogs can inherit from, with or without overridden properties. You can set global product properties that are shared across all associated catalogs at the master catalog level. |
| Catalog | A catalog is a subset of products tied to a specific site. You can override global product properties at the catalog level, such as price and description. |
| Sites | Sites are places from which you conduct transactions. You must tie each site to one and only one catalog. |
System Structure Settings
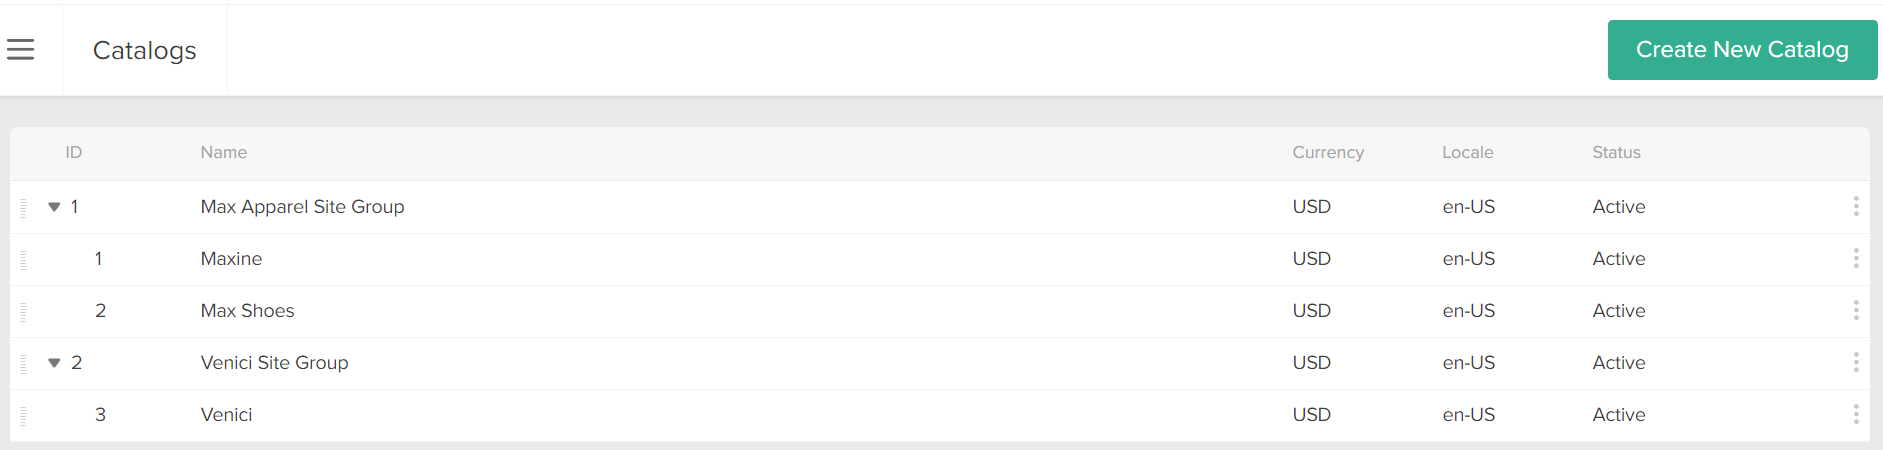
Go to System > Structure in the Admin UI to find three sections.-
Sites: Lists your sites that are currently tied to a catalog.

-
Catalogs: Lists your master catalogs and catalogs.
-
Channels: Lists the channels your sites are associated with, such as online, kiosk, brick and mortar, etc.


Create Catalogs and Sites
You can create additional catalogs within your master catalog, or additional master catalogs with as many catalogs as you like. For each catalog, you must create a corresponding site.Create Master Catalogs
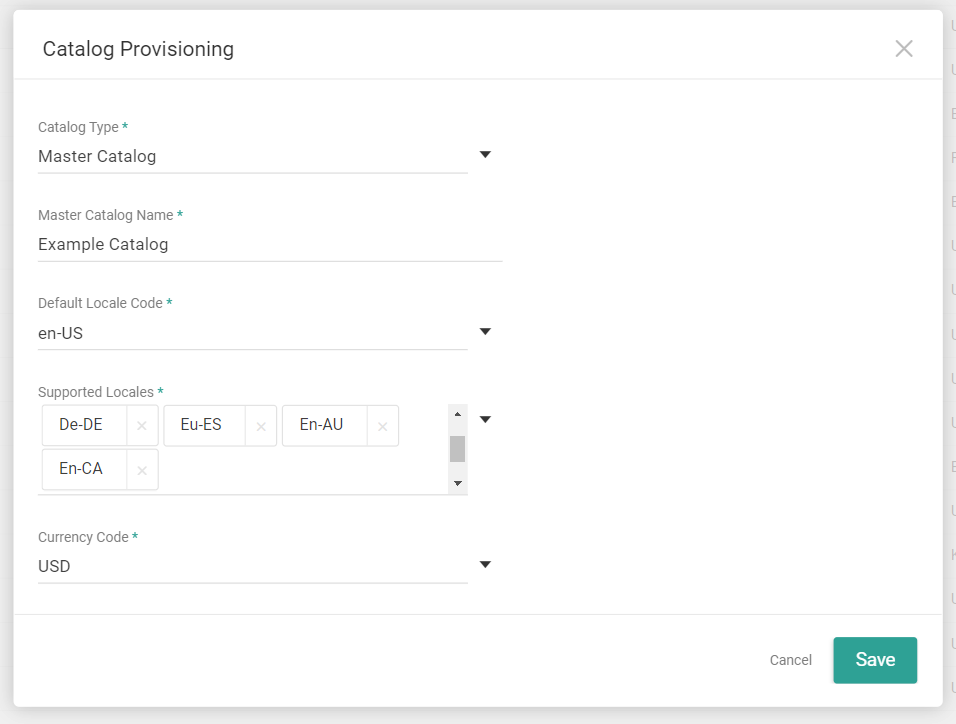
To create master catalogs:- Go to System > Structure > Catalogs.
- Click Create New Catalog.
- From the Catalog Type drop-down menu, choose Master Catalog.
- Enter a Master Catalog Name.
- Select a Default Locale Code.
- Select all additional Supported Locales that child catalogs will be able to localize product data for.
- Select a Currency Code.
- Click Save.
Create a Child Catalog
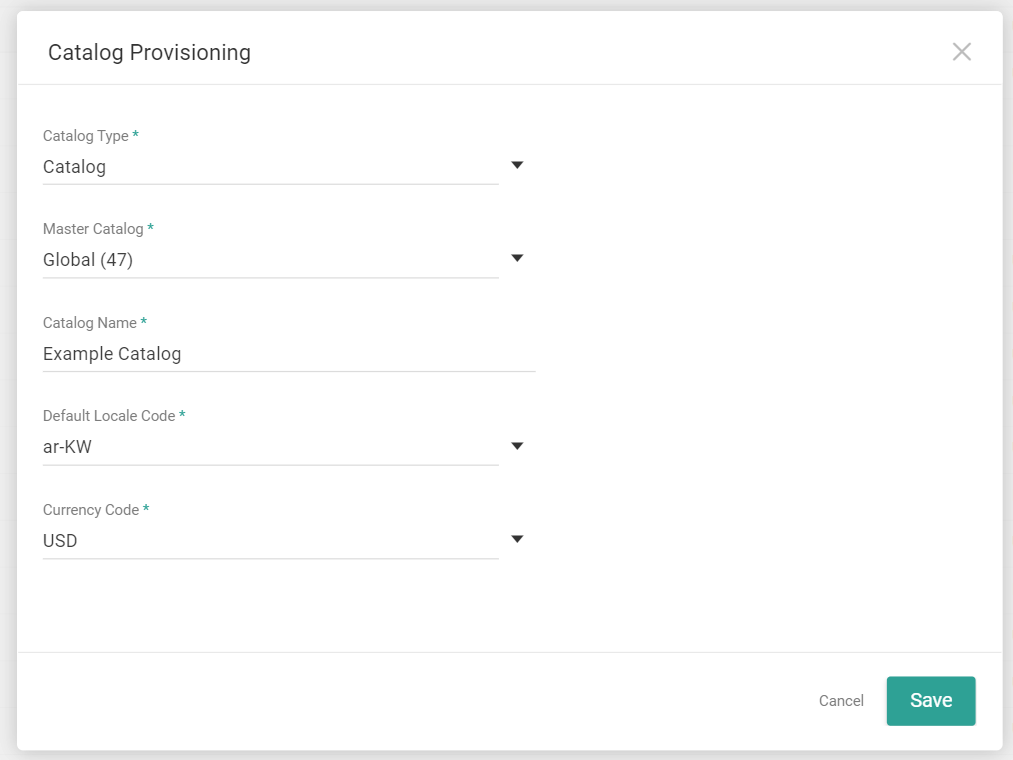
To create a child catalog:- Go to System > Structure > Catalogs.
- Click Create New Catalog.
- From the Catalog Type drop-down menu, choose Catalog.
- Select a Master Catalog for the catalog to inherit.
- Enter a Catalog Name.
- Select a Default Locale Code. This must be one of the locales supported by the master catalog.
- Select a Currency Code.
- Click Save.
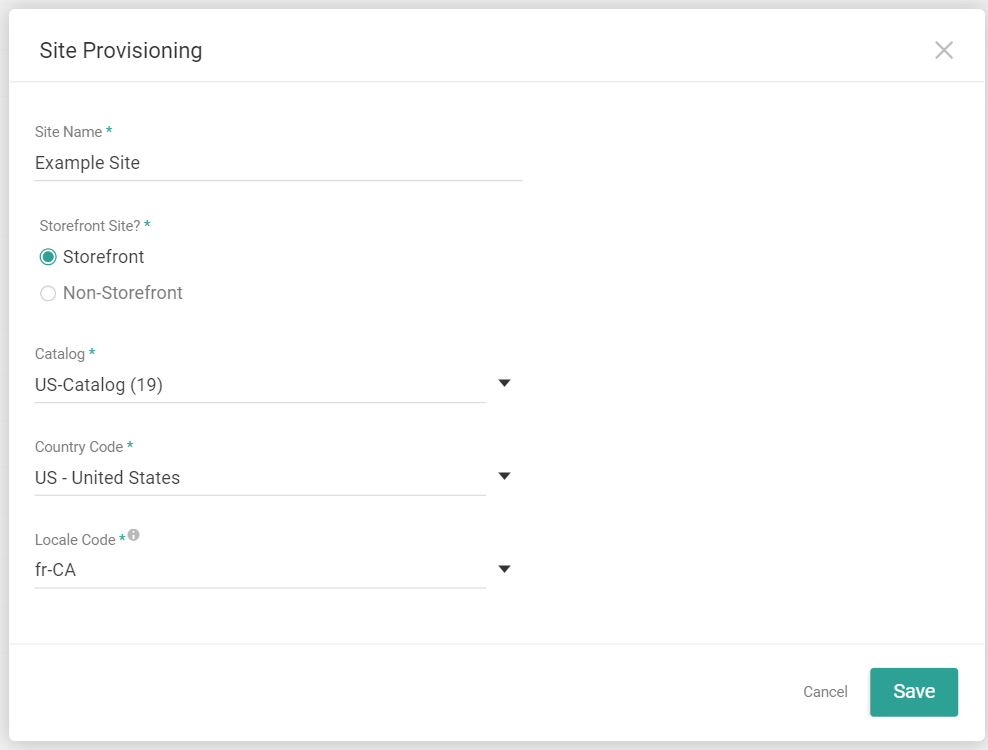
Create a Site
To create a site:- Go to System > Structure > Sites.
- Click Create New Site.
- Enter a Site Name.
You use this value to identify the site in the context switcher throughout Admin. - Choose whether or not the site represents a storefront that online shoppers can visit.
- Choose a Catalog to associate with the site.
- Choose a Country Code.
- Select a Locale Code. This must be one of the locales supported by the catalog.
- Click Save.