

This guide explains how to interact with the import/export tool. For help understanding the template files that the tools use, refer to the individual template file topics. If you are using these tools for the first time, also refer to the Prepare Your Tenant for Initial Import section to ensure a smooth import/export process.Documentation Index
Fetch the complete documentation index at: https://docs.kibocommerce.com/llms.txt
Use this file to discover all available pages before exploring further.
The Import-Export Process
Current data should always be exported before any import is performed. When you edit a file and re-import it, the import process compares the differences between the old export data and the new import data to determine what should be updated on the tenant. Exporting your data before re-importing also helps ensure that you are using all of the required sheets and values in your import, that the column headers match, and that files are imported in the same order—all of which is required for a successful import. Keep the following behaviors in mind:- When importing data that already exists, the existing data will be overwritten.
- The Import/Export Tool only exports products that are live on your site(s). Products in a draft or staged state do not get exported. If you make edits to an existing product but do not push them live, the Import/Export Tool exports the old live data for that product.
- When making edits, do not use Microsoft Excel. Excel formats are not supported by the .csv file requirements of other templates.
Enable the Application
The Import-Export Application adds an Import/Export link in the Admin navigation menu for every module that is supports, but you must enable the app for these extensions to appear:- In Admin, go to System > Customization > Applications.
- Click Mozu Import-Export Application (3.0).
- Toggle Enable Application on in the top right.
- Refresh the browser to display the new menu items.
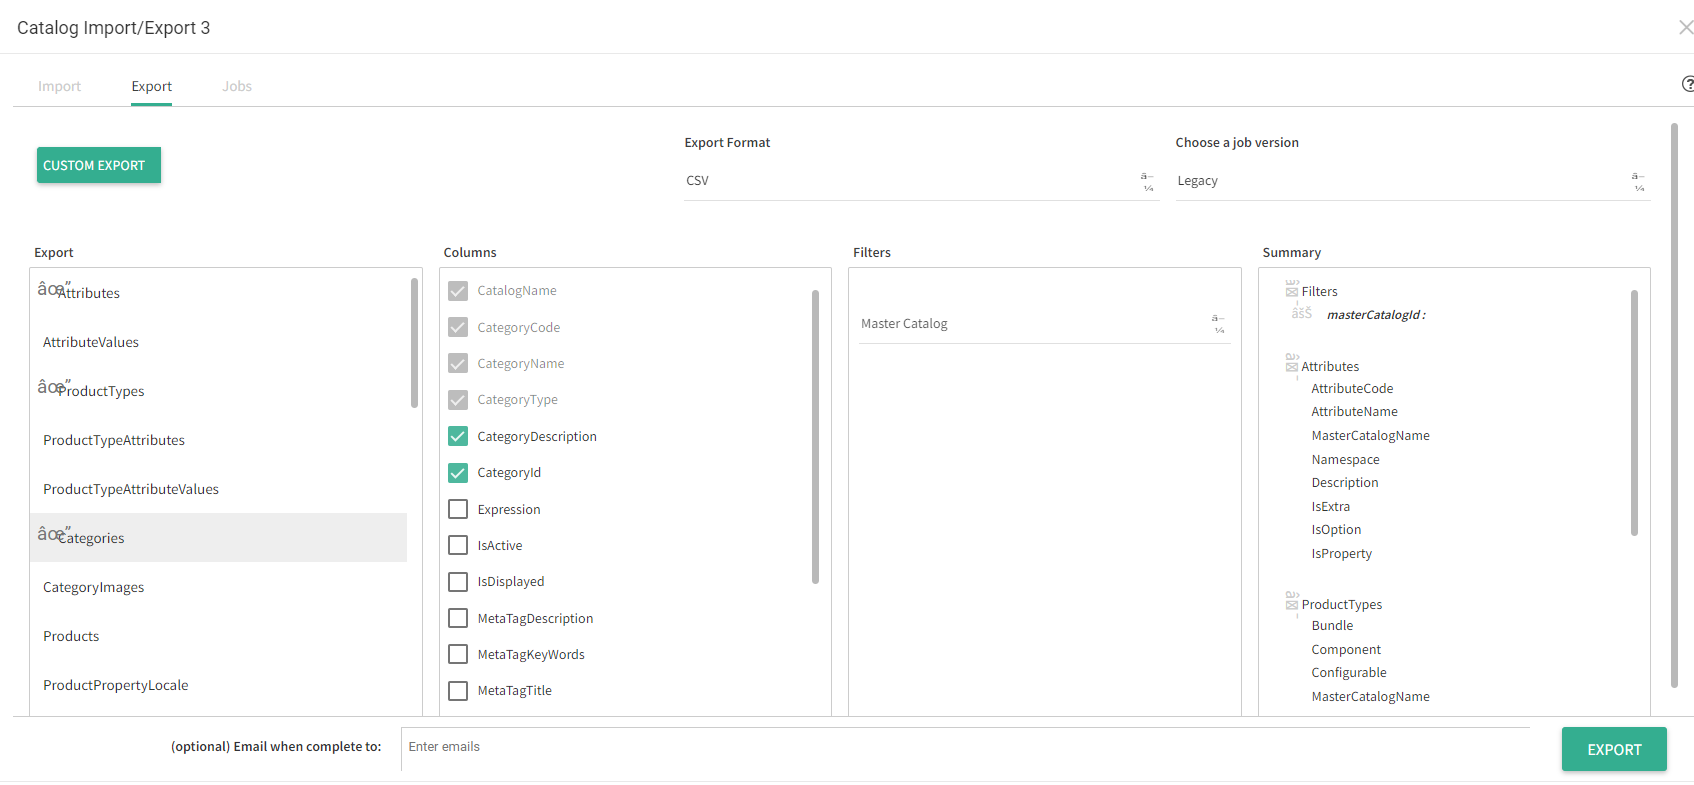
Configure an Export
Exporting is the recommended way to obtain the import/export template files you want to edit, even if you have not yet added real data to your tenant. Performing an export ensures that you are aware of all existing data, and that all your data attributes are reflected in the templates. You also can use exports as a form of data backup.- In the Main menu, click Import/Export under the appropriate category (such as Main > Catalogs > Import/Export).
- Click the Export tab.
- Select CSV as the Export Format. This exports a ZIP file in which each data domain is a separate CSV file. There is no limit to the size of CSV files.
- Choose a job version.
- Configure the export file by selecting which domains, columns, and filters you want to include. All of your selections will be displayed in the Summary pane.
- Each column maps to a property in your catalog data. The columns displayed are specific to the highlighted domain. Columns that are required for a successful import operation are selected by default and cannot be excluded.
- Filters apply globally to all data in all domains.
- (Optional) Enter one or more email addresses to receive a notification when the export job is complete.
- Click Export and the tool schedules your job. If it is the only job, the export will begin immediately.
Configure an Import
Be sure that every column in a template file contains valid data before you import the file. If you do not want to update the data in a column that is not required, remove that column before importing the file OR use the same data as that included in the export file. Importing blank columns will overwrite any data for the corresponding properties with NULL values.- In the Main menu, click Import/Export under the appropriate category (such as Main > Catalogs > Import/Export).
- Click the Import tab
- Select CSV as the file format. CSV files must be contained in a ZIP file. The ZIP file can have any name, but the individual CSV filenames must match the name of the data domain as exported by Kibo eCommerce. For example, to import catalogs, the CSV file must be named
Catalogs.csv. - Choose a job version.
- Click the Select File to import icon and navigate to the file to upload. The file can have any name, but Kibo recommends using some identifying information in the name. This is especially helpful if you are scheduling multiple jobs, such as if you are breaking up a large data import into multiple smaller imports.
- (Optional) Enter one or more email addresses to receive a notification when the job completes.
- Click Import and the tool schedules your job. If it is the only job, the export will begin immediately.

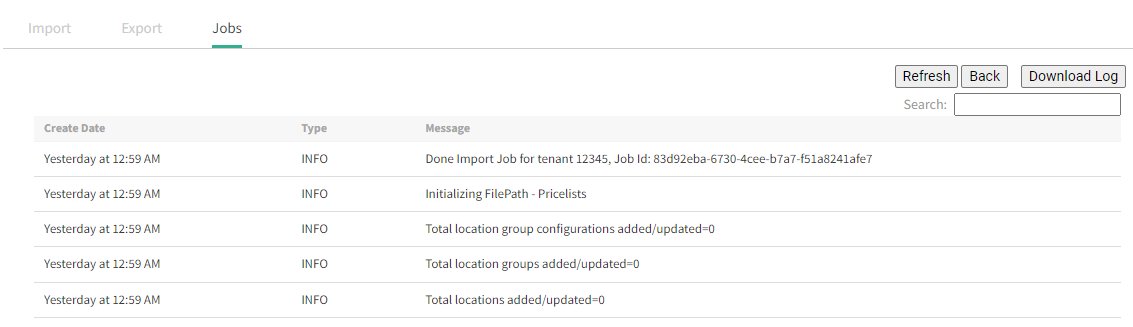
View Jobs and Logs
Import/Export creates log files for every import and export you run. When a job completes, you can view these logs on the Jobs tab. This will display the date and time each job was processed, its status and whether any errors were experienced, and other information.
Queue Multiple Operations
You can queue multiple import/export operations to execute in sequence. This is especially useful if you are importing or exporting very large data sets, because you can split a large job into smaller batches and more quickly see whether each small job succeeds.- Decide the order in which you want to process your jobs.
- (Optional) For multiple imports, consider giving each ZIP or Excel file a unique name to help identify which part of the job it corresponds to.
- Configure and start each import or export in the order you want them executed.
- After you configure all your imports and exports, go to the Jobs tab in the Import/Export console to see the progress of each individual job.