

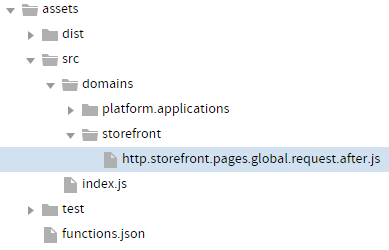
http.storefront.pages.global.request.after action file located in the storefront domain folder.
context and callback.
Context
Thecontext argument provides the function access to relevant objects and methods that interface with Kibo. The following table summarizes a few of the context objects and methods you can use to enhance the functions you develop. Refer to the reference content for full details about the context argument available for each action you are coding a custom function for, or log the context object to view its data.
| apiContext | Provides mostly read-only access to standard API variables, such as the tenant, site, master catalog, user claims, etc. |
| configuration | Provides read-only access to configuration data that you set in the Action Management JSON editor. |
| exec | Provides read and write access to functions that act on objects. The methods accessible by exec vary depending on the action you are coding the function for. |
| get | Provides read-only access to certain objects. The objects accessible by get vary depending on the action you are coding the function for. |
Examples:
context objects and methods related to the HTTP response and request, such as the following objects:
| request | Provides read access to the HTTP request made to the API endpoint the action accesses. |
| response | Provides read and write access to the HTTP response made to the API endpoint the action accesses. |
Variable Assignment
If you assign a variable to the value of a resource, and then use anexec method to update the resource, the variable in your JavaScript file does not automatically update with the new value of the resource. For example, if you set a variable to the value of an order:
exec method:
order variable still retains the original value of the order resource at the time of the GET operation. If you want the variable to update to the latest value of the order resource, you have to use the context.order.get method again.
callback
Thecallback argument enables non-blocking, asynchronous program flow by allowing you to propagate errors and other important information across function calls whenever needed. The callback argument follows the established JavaScript callback pattern: it takes an error as the first argument (or null if there is no error) and a result as the second argument (not required for API Extensions applications because you use context methods instead to perform state changes). To ensure that your function does not halt the runtime or break storefront functionality, arrange callbacks so that they are the last pieces of code to execute within your function.
Try Catch Error Handling
The try catch statement is useful for handling any errors that may occur in your API Extensions functions. It tells Kibo totry to execute a block of code, and catch errors if they occur in the try block. Note, however, that the catch block does not detect errors that occur within a Promise chain. To catch these errors, use a .catch statement at the end of the Promise chain.
To ensure that your function does not halt the runtime or break storefront functionality, place callbacks within the try catch statement. If you are familiar with try catch statements, you may know that you can also employ a finally block to execute a final block of code, regardless of whether an error occurred in the try block. Counterintuitively, however, the finally block executes before Promise chains, and because you will likely employ Promises in your functions, use of the finally block is generally not recommended.
The following code block demonstrates a high-level example of using the try catch statement within an action file:
Call a Third-Party Package
One of the benefits of the API Extensions framework is that it allows you to leverage the thousands of NPM packages developed by the Node.js community. The following code blocks provide an example of loading the Needle HTTP client for use with API Extensions. When integrating third-party packages, always load the smallest package possible. If the functionality you require is offered as a subset of the complete module, load the smaller module to minimize delays on your storefront.-
Install the package using npm by opening a command prompt in your project folder and entering
npm install _package name_. Alternatively, you can list the SDK as a dependency in yourpackage.jsonfile by adding the following code to the file, where you can specify a specific version of the package using a caret followed by the version number or match any version by using an asterisk: -
Require the package or a helper file that loads the package (shown) in one of your JavaScript files, and then use the package as needed. For instance, this package may be in assets/src/domains/someDomain/someActionFile.js:
And in assets/src/util/needleRequest.js:
Call the Node.js SDK
While thecontext argument provides each function access to pertinent methods and data, you may at times need access to the complete set of API microservices. To access this broader array of functionality, call the Node.js SDK from within API Extensions by completing the following steps:
-
Install the SDK using npm by opening a command prompt in your project folder and entering
npm install --save mozu-node-sdk. Alternatively, you can list the SDK as a dependency in yourpackage.jsonfile by adding the following code to the file, where you can specify a specific version of the SDK using a caret followed by the version number or match any version by using an asterisk: -
After installation, require and use the Node.js SDK in your JavaScript files. The following code block is an example of retrieving an entity list within an action file.
Notes for Using the Node.js SDK
- Require client factories using the “deep require” method shown in the preceding code block, which requires only the subset of the module that is needed. This saves you upload space compared to requiring the entire SDK using
require('mozu-node-sdk'). - The
contextobject includes user claims for the currently active user in a store. These user claims have a “shopper” level of permissions, but the example requires claims that can make calls to the API. If you want to make calls that require more privileges than the shopper has, set thecontextuser claims to null, as shown above in the preceding code block. - The Node.js SDK convention of looking for a
mozu.config.jsonfile for initialization does not work with API Extensions. Instead, pass thecontextobject to the client factory (or constructor) so that the SDK client initializes with the appropriate tenant, site, catalog, and authentication details. - When handling errors, communicate a success by calling
callback()with no arguments. Communicate an error by callingcallback()with the error provided. Note that you can passcallback()directly into a.catch()method on the Promise returned by the SDK. If you want to handle errors differently than described, you can write your own error handler.
Add or Remove User Claims
When an API Extensions action executes a custom function, it applies the user claims that belong to the user initiating the action. In some cases, user claims have sufficient permissions to execute your needed operations, such as manipulating items in a shopper’s cart. In other cases, however, you may need API-level instead of user-level claims to execute your needed operations, such as when you want to query the API regarding a resource. When you need more permissions, remove the user claims as follows:embedded.commerce.carts.addItem.after action, the user claims correspond to the permissions of a shopper who has just added an item to their cart. Given this information, the function requires:
- Retention of user claims on the cart resource, so that the extended properties are scoped to the shopper (in general, cart operations require user-level permissions to execute correctly).
- Removal of user claims from the order resource, so that you can query the API about order history, which is beyond the scope of the shopper’s user-level permissions.
Send Custom Data to Your Theme
You can set custom data within storefront HTTP after actions, and then expose that data in your theme for use on storefront pages. On the API Extensions side, you set the custom data in thecontext.response.viewData object. On the theme side, you access the data from the viewData variable, where it is stored as a top-level JSON object. However, you should note that ViewData is used for storefront functions that return HTML which must be processed through Kibo. This means that if your custom route manually returns some value that is only calculated in your function, it will have no effect. You must ensure that the data you are sending is compatible with the HTML designed for this process so that it can be processed and displayed on your site theme.
The context.response.viewData object contains an object called model, which represents the model for the current page. While you can access and modify the model object through API Extensions, you cannot add custom data that doesn’t already exist in the model object. You can only set custom data at the context.response.viewData level.
When you set custom data for your theme in an API Extensions action, you must:
- Use the after version of a storefront HTTP action.
- Access the data within a theme template that executes the same route as the API Extensions action in which you set the data. The following table demonstrates example relationships between actions and the theme templates that can access their custom data.
| Action File Where You Set Data | Theme Templates Where You Access the Data |
|---|---|
http.storefront.pages.cart.after.js | templates/pages/cart.hypr and any included templates |
http.storefront.pages.checkout.after.js | templates/pages/checkout.hypr and any included templates |
http.storefront.pages.productDetails.after.js | templates/pages/product.hypr and any included templates |
http.storefront.pages.myAccount.after.js | templates/pages/my-account.hypr and any included templates |
Example
The following is an example of setting custom data in an action file (remember, this must be an HTTP storefront after action):Securely Store and Access Sensitive Data
API Extensions allow you to access encrypted data on your tenant. You first post the sensitive data using the API, which encrypts the data and stores it at the tenant level as a credential store entry. Once the data is on your tenant, only an API Extensions application tied to your developer account can decrypt the entry—this is for security reasons; not even the API can decrypt the entry. The following sections provide more information about the process:Store Sensitive Data Using the API
To securely store data on your tenant, use the StoreCredentials operation to POST your data to theplatform/extensions/credentialStore API resource in the form of a credential store entry, which consists of the following fields:
| Field Name | Description |
|---|---|
fullName | A name for your entry, in the form of _name_@_namespace_, where the namespace must match the namespace of your developer account. If the name you choose already exists within the namespace, then the POST operation overwrites the previous value. |
value | A JSON object that represents whatever sensitive information you want to encrypt. |
Access Sensitive Data
To decrypt and access a credential store entry, use thegetCredential method available in the context object of an API Extensions function. The application that executes the function must be created within your developer account—other applications will not have the required permissions to run the getCredential method within your namespace.
getCredential method takes the value of the fullName field of the credential store entry you want to access. For the second argument, the method takes a callback. After you decrypt data using the getCredential method, you can assign the result to a variable and access the sensitive data from the entry’s value object. See the following example use case for additional details.
Example Use Case
Let’s say you want to encrypt an API key for a third-party service, and then access that key in an API Extensions function. Here’s how you would go about doing that:-
In the request body, POST the following credential store entry to the
platform/extensions/credentialStoreAPI resource. Remember that the namespace you choose should match the developer account that will contain the application for decrypting the sensitive data. - Create an API Extensions application within the same developer account namespace where you posted the credential entry.
-
Within an API Extensions custom function, access the encrypted data:
Calculating Currency
When you are calculating currency amounts in KCCP, you need to make sure that the decimals are correctly rounded. For example, all amounts are rounded to two decimal places (or three depending on your currency). JavaScript uses floating point values for numbers. That means.1 + .2 = 0.30000000000000004in some implementations including the API Extensions.
Thus, if you are setting a currency value anywhere in API Extensions, you need to apply the “Round” function and amount in a statement like this:
Number(amount.toFixed(2))
Which will convert an amount to .3 if the original value was 0.30000000000000004.