Supported Shipping Carriers
The Kibo Composable Commerce Platform supports several shipping carriers out-of-the-box: UPS, USPS, FedEx, Canada Post, and Purolator. All of these carriers can be enabled for returns and used for creating return labels. For information about creating custom carrier integrations, see the Shipping Extensibility guide.USPS, UPS, and FedEx
All three carriers support numerous shipping service types. If you use both UPS and UPS SurePost, then they must be configured as separate carrier accounts. They will use the same account number, but only one will be used for SurePost shipping methods. You must ensure that SurePost is enabled on your UPS account first before setting it up in Kibo. Likewise, FedEx and FedEx SmartPost must also be set up as separate carriers. You can also set which fields to send to the carrier as Customer Reference numbers in your theme settings: Shipment ID, Order ID, and/or External Order ID. Please check what each carrier supports when selecting which fields to send.Canada Post and Purolator
Canada Post and Purolator are carriers supported specifically for Canadian fulfillment locations. They are natively supported and only require your Canada Post or Purolator carrier credentials. Canada Post generally requires shipping manifests, which can be generated in the Kibo Composable Commerce Platform Fulfiller Interface alongside shipping labels for the individual packages. See the Fulfiller UI documentation for a detailed walkthrough of this process. Purolator supports the service types of Purolator Express, Purolator Ground, and Purolator Quick Ship. Canada Post supports the service types of Expedited Parcel and Express Post (with Express Post being the standard delivery option).Carrier-Specific Features
Some carriers support additional features of declared values and package signatures, both are which are enabled at the location group level.Declared Values
UPS supports “declared values” for insurance purposes. If the package value is less than a certain maximum insured value, then the package value will be submitted to the carrier as the declared value. If the package value is more than the maximum insured value, then the maximum insured value will be used as the declared value instead. This value is evaluated for each package and a declared value is sent for each package that the label request is made for. When a declared value is sent to UPS, they will return the service charges if applicable. This option can be enabled in the location group carrier settings, where you also specify the maximum insured value. However, you must first request Kibo Support to set the maximum insured value for declared values.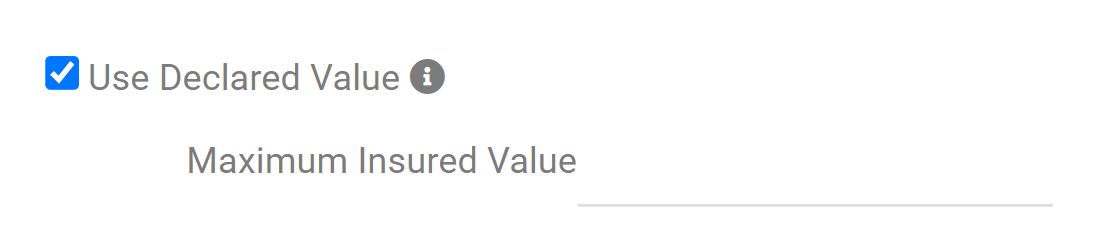
Package Signatures
UPS and FedEx (with the exception of FedEx SmartPost) support the ability to require a signature for packages with a value greater than a certain amount. This value is calculated as the sum of all line items in the package. When enabled, the signature requirement and type will be communicated to the carrier while generating the shipping label. These signatures are not supported for return labels. Multiple options for signature types may be available depending on which are available with the carrier. All options that Kibo supports are listed below, but please check the carrier’s documentation directly to confirm which signature types and descriptions they support.- No Signature: Carrier may leave the package without anyone present.
- Direct Signature: Any person at the recipient’s address may sign for delivery.
- Adult Signature: Any adult person at the recipient’s address may sign for delivery.
- Indirect Signature: Any person at the recipient’s address, or neighboring address, may sign for delivery. Currently only supported with UPS.
- Signature Restricted: Only the specified addressee, or authorized agent, may sign for delivery.
- Adult Signature Restricted: Only the specified addressee, or authorized agent, who is an adult may sign for delivery.
- Do Not Safe Drop: Instructs the carrier to not hide the package (“safe drop”).

FedEx One Rate
When enabled, the system uses FedEx’s One Rate pricing, which determines shipping cost based on the FedEx-branded box size. This requires Cartonization to be enabled, as well as the “Enable FedEx One Rate” setting on the carrier account. For supported services, package types, dimensions, and weight limits, refer to the FedEx One Rate official page.Create Carrier Accounts
The first step to start configuring shipping options is to set up the carrier accounts. While this guide details how to do so in the Admin UI, you can also do it via API instead.- Go to System > Settings > Shipping.
- Click Carrier Accounts to view a table listing all accounts that have already been set up.
- Click Create New Carrier Account to add an account. Multiple accounts can exist for the same type of carrier with different credentials as needed.

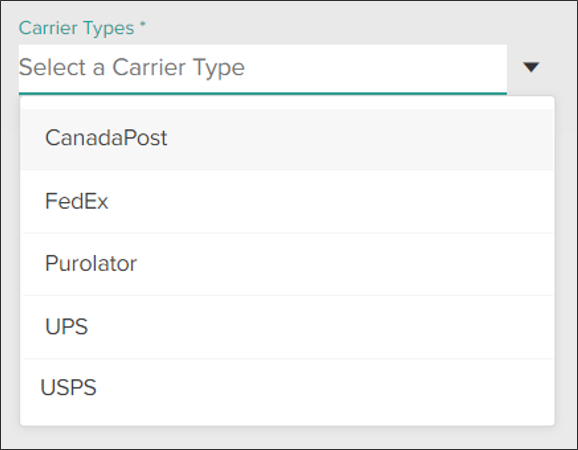
- Select the carrier from the Carrier Types drop-down menu. This will determine what other configuration fields are displayed on the page.
- Enter a Nickname and any other fields available for that carrier. The fields will vary depending on the carrier you selected, such as USPS also requiring your EasyPost API Key and FedEx requiring your company and address information.

- Click Save in the top right.
Note - FedEx carrier accounts can optionally be enabled for FedEx One Rate, which provides pricing based on FedEx-branded packaging. This option can be configured when creating or editing the FedEx carrier account using “Enable FedEx One Rate” checkbox. This setting defaults to Off.
UPS Authorization
If creating a UPS account, there is an additional step required for authorization:- After creating the UPS account and returning to the Carrier Accounts page, expand the drop-down actions menu for the UPS account and click Edit.
- Click Authorize and follow the instructions on the pop-up window.

- When complete, close that window and refresh the configuration page. A successful authorization status should now be displayed.
FedEx Authorization
FedEx requires Multi-Factor Authentication (MFA) for all carrier accounts. An authorization process must be completed for a FedEx or FedEx SmartPost account to be authorized.The current authorization state of a FedEx account is always visible at the bottom of the carrier account settings page. An account can be in one of two states:
- Pending — Authorization has not been completed for this account
- Authorized — The account is fully authorized

- SMS — A one-time code is sent to the phone number linked to your FedEx account
- Call — A one-time code is delivered via phone call to the number linked to your FedEx account
- Email — A one-time code is sent to the email address linked to your FedEx account
- Invoice — Enter details from a recent FedEx invoice associated with the account: Invoice Number, Invoice Date, Currency, and Invoice Amount
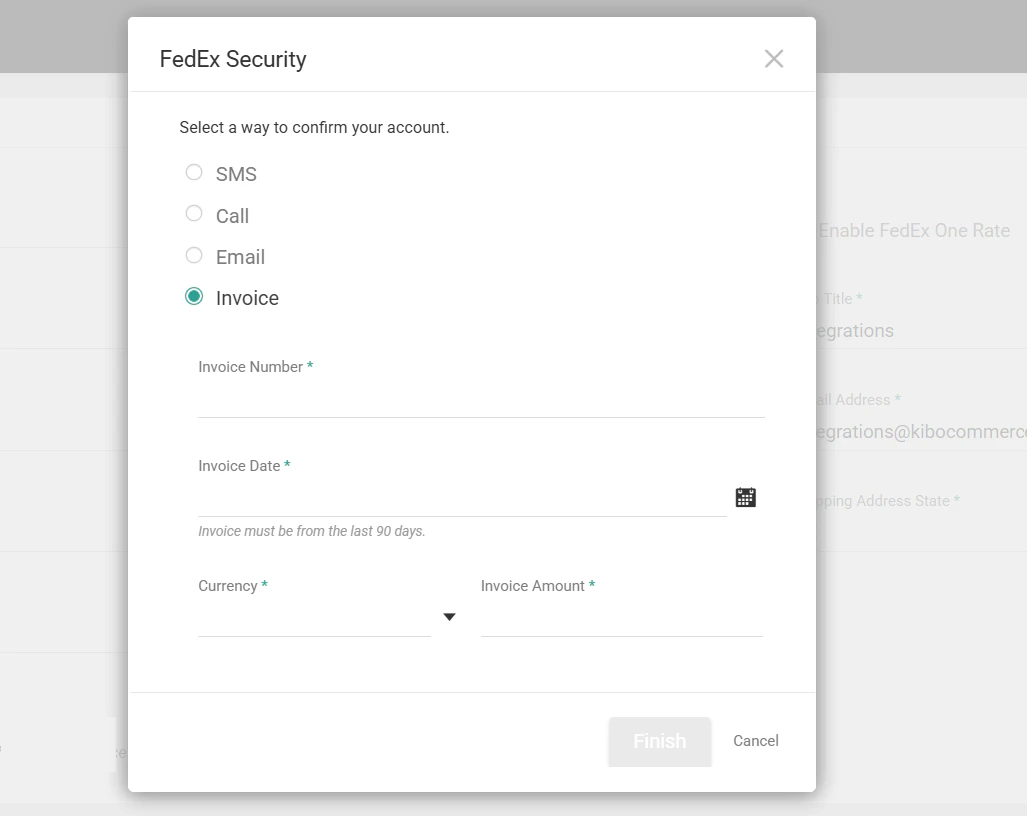
For clients setting up FedEx under the new FedEx two-factor authentication requirements: the SMS, Call, and Email verification codes are delivered to the phone number and email address on file for the primary account holder in FedEx. This is likely not the same person configuring the FedEx account in Kibo, so coordinate with the FedEx primary account holder to retrieve the one-time code.
Specify the Fulfillment Options for a Site
Under System > Shipping > Carriers, you can specify some default fulfillment options for each site as well as pair carriers with carrier accounts, enable them for checkout and returns, apply special shipping rates, and identifying eligible addresses.Default Fulfillment Options
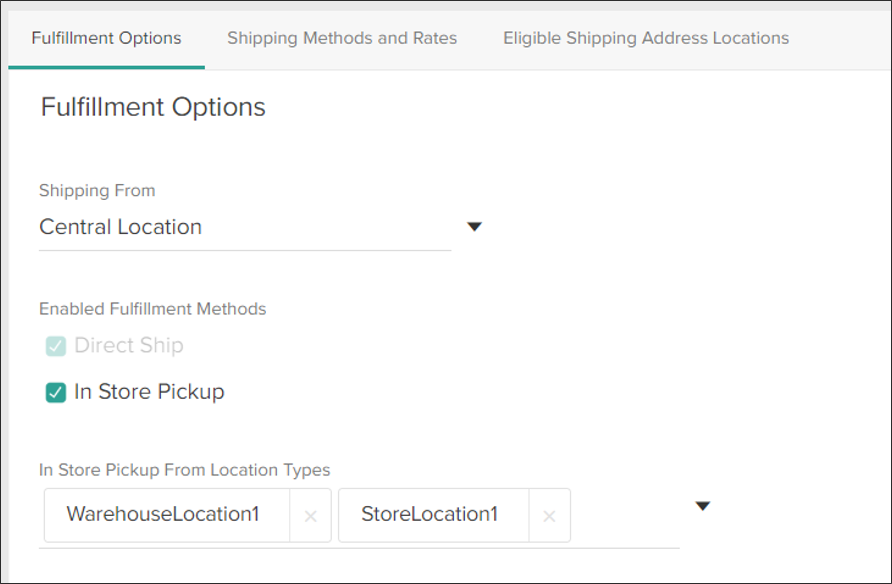
- Select the default Shipping From fulfillment location.
- Specify whether the location supports Direct Ship, In Store Pickup (BOPIS), or both.
- If applicable, specify any location types that should also support pickup.
Enable Carriers and Set Shipping Rates
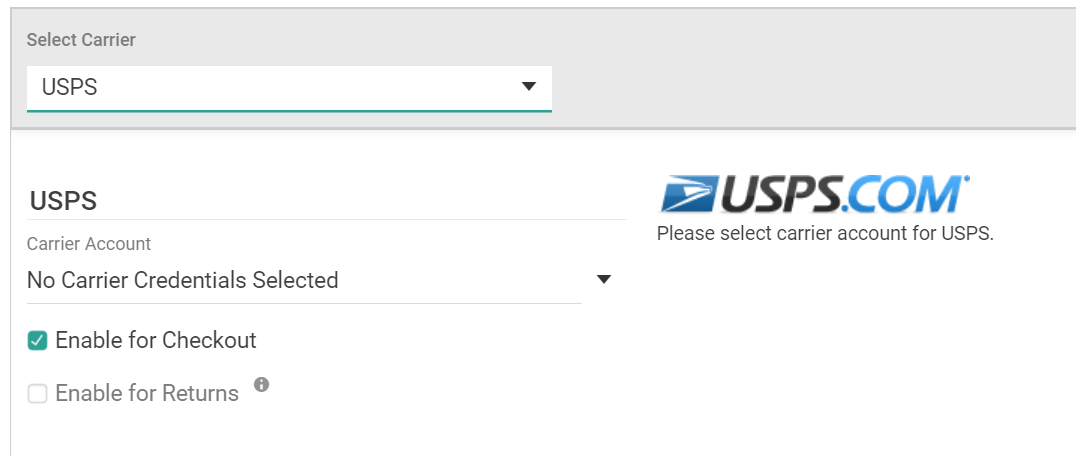
Once the default location has been selected, scroll down to Shipping Methods and Rates or click the heading in the navigation bar to jump to that section.- Select a carrier from the drop-down menu, such as USPS.
- Select the Carrier Account and any shipping method details that should be applied to that carrier for this location, if applicable. This will set the default carrier credentials, used when no credentials are specified at the location or location group level while generating shipping labels.
- If available for the carrier, check Enable for Checkout and/or Enable for Returns. There can only be one carrier shipping method enabled for returns; enabling returns on any carrier will disable the setting on any other shipping method. Enable for Checkout is essentially an on/off switch for the carrier that will make it an active option for your orders. If you are ready to display the carrier as a shipping option on your site, then enable the checkbox. If you want to deactivate the carrier on your site for a period of time, you can disable this checkbox without losing the shipping method configuration details.
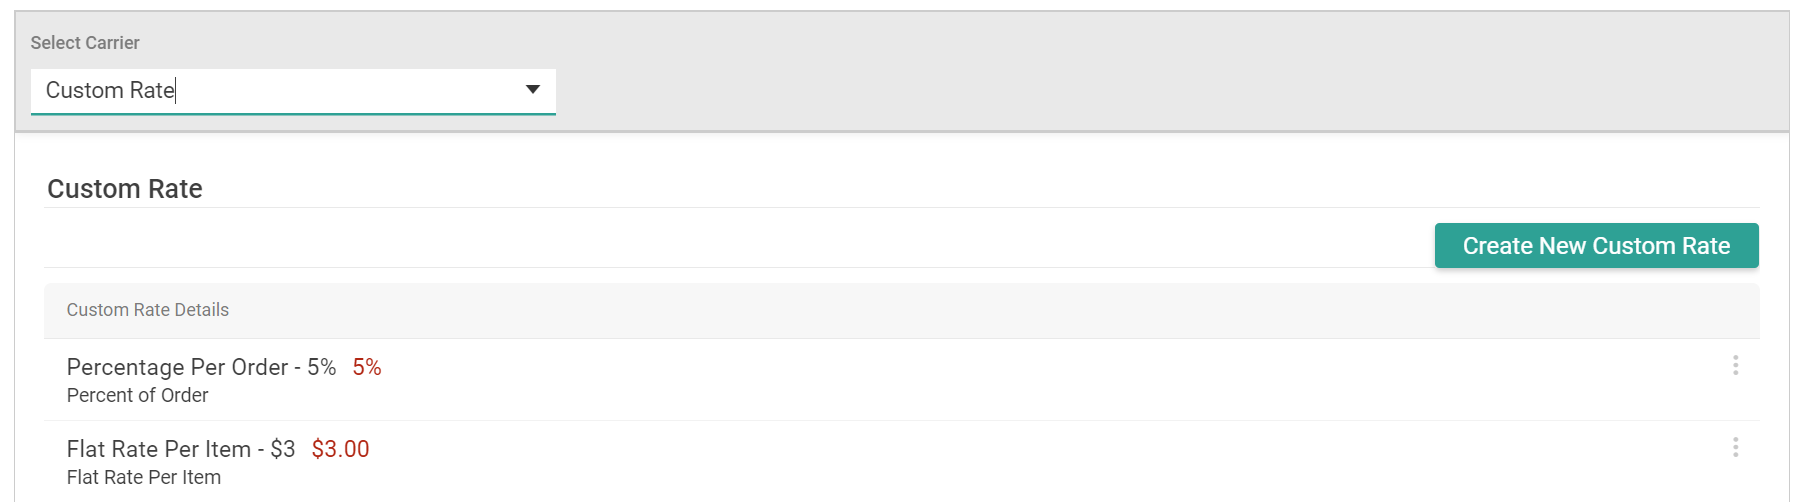
Create a Custom Rate
In the same section, custom rates can be configured. These may be used to define specific shipping rate calculations such as charging shipping as a percentage of the order total or setting a custom flat rate per item or order. If you enable the Retain Flat Rate Per Order fulfillment site setting and then create a custom flat rate per order here in the carrier settings, then the customer will always be charged the entire flat rate fee. Keep the following behavior in mind:- If one shipment is cancelled, then the fee will be redistributed to one of the remaining Active shipments. The system selects which shipment in order of priority by status (Ready, Future, Backorder, Customer Care, and then Fulfilled).
- If a reprice occurs on one shipment such as due to an item cancellation, the flat rate shipping will not be affected. For example, if a shipment consists of three items and a $15 flat rate shipping fee but then one item is cancelled, the shipping will remain $15.
- The customer will only be credited the shipping fee if the entire order and all of its shipments are cancelled.
- Go to System > Settings > Shipping > Carriers > Shipping Methods and Rates.
- Select the site you want to specify options for from the top bar.
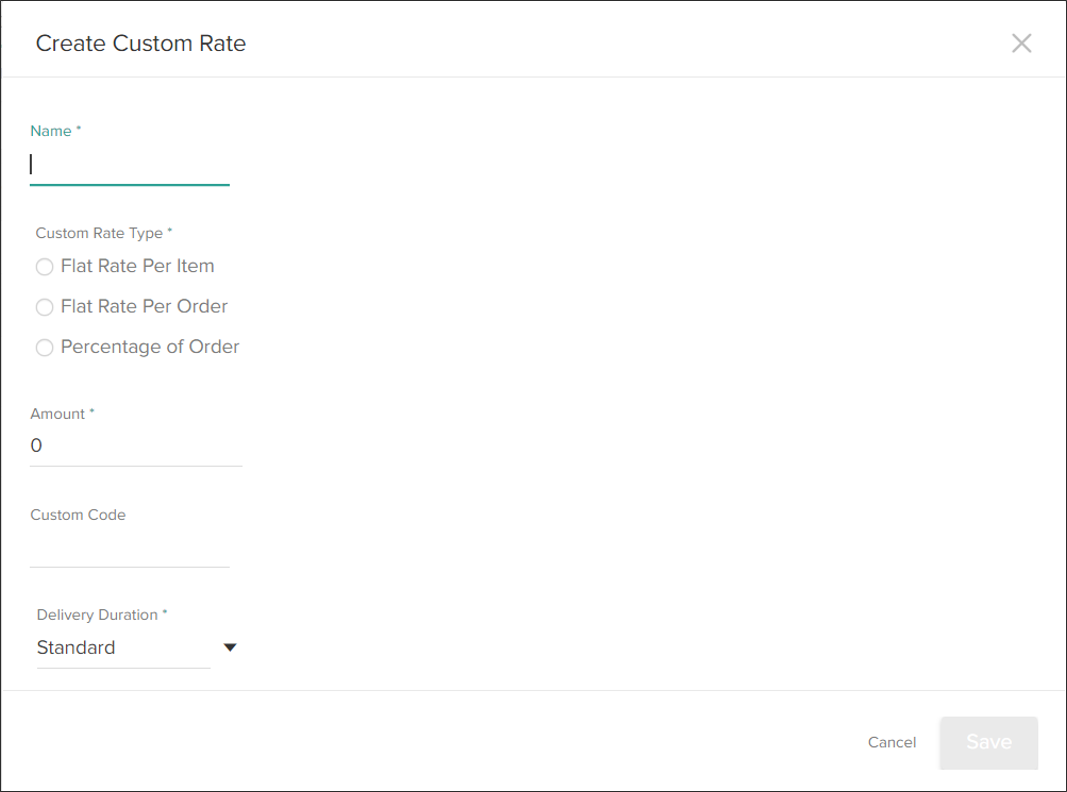
- Click Create New Custom Rate.
- Enter a Name.
- (If applicable) Select a Custom Rate Type.
- Enter an Amount.
- (If applicable) Enter a Custom Code.
- Click Save.
Set the Default Carrier for Returns
You can specify a default carrier for returns at the site level if you want all return labels to be handled by the same chosen carrier.- Go to System > Settings > Shipping > Carriers > Shipping Methods and Rates.
- Select the site you want to specify options for from the top bar.
- Click on a carrier, such as FedEx.
- Enable Enable for Returns.
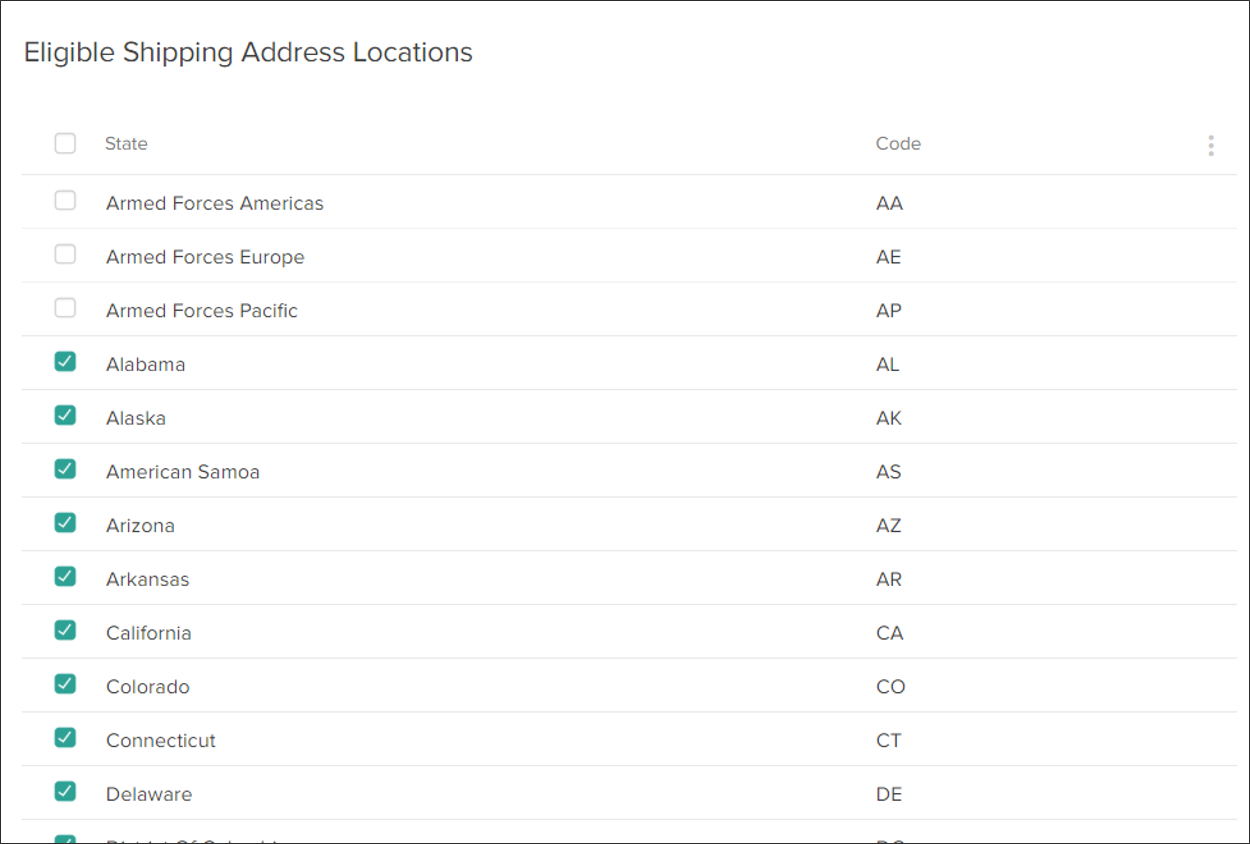
Specify the List of Eligible Shipping Addresses
Go to System > Settings > Shipping > Carriers > Eligible Shipping Address Locations to select which U.S. states should display on your storefront as eligible shipping addresses. These settings are only used for instances of KCCP that include eCommerce and have no effect on order management-only implementations. Note that this list filters only U.S. states by default. If you want to enable international shipping addresses on your storefront, ask your theme developer to make the necessary changes to your theme.