

Watch: Postman Setup
See how to set up Postman for testing Kibo APIs
Setup
- Download the Postman collection and sample environment files.
- Open the Postman desktop application. Note: You must use the desktop version as the web version does not support pre-request scripts.
- Click Import, then drag and drop both files to import them.
- Click the Environments tab on the left sidebar.
- Select the imported environment and fill in the following variables:
| Variable | Description |
|---|---|
appKey | Your application key from Dev Center |
appSecret | Your shared secret from Dev Center |
baseUrl | Your tenant URL (e.g., https://t10000.sb.usc1.gcp.kibocommerce.com/) |
Finding Your Credentials
Application Key and Shared Secret: Open your application in Dev Center to find these values.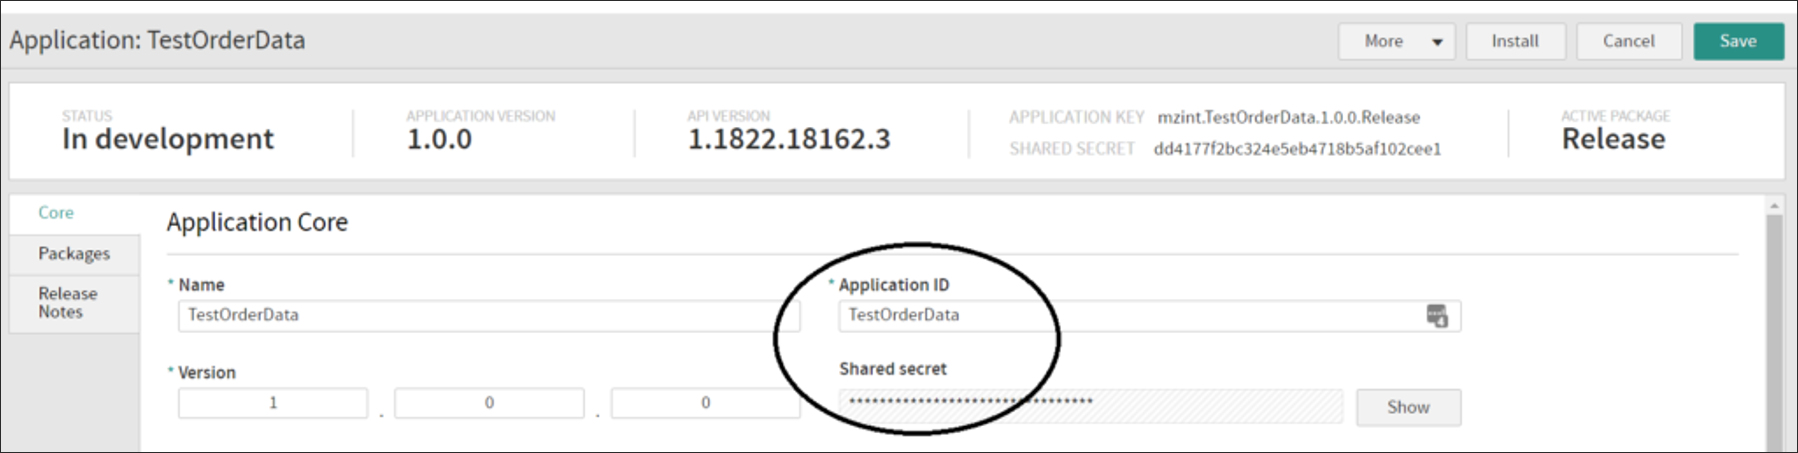
Making API Calls
- Select the imported Kibo collection in the left sidebar.
- Browse or search for the API you want to use.
- Click Send.
Troubleshooting
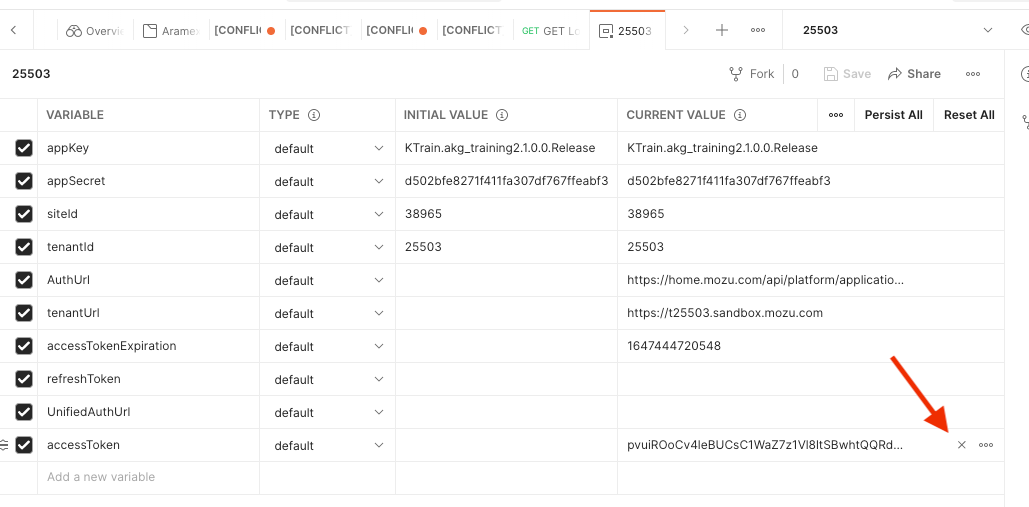
Remove New Lines in Variables
The light gray symbol shown below means you copied a new line into your environment variable, which will cause authentication to fail. Remove this new line to fix the error.
Refresh Token After Adding Behaviors
If you added a new behavior to your application, clear theaccessToken value in your environment variables to generate a new one. The token caches behaviors when it is generated.
Wait After Installing Application
It takes a few minutes after installing an application before it will be fully accepted by Reverse Proxy, so wait a short time before attempting authentication.Clear Cookies if Requests Fail
If you type in the wrong URL and receive a response from the storefront, cookies may interfere with subsequent requests. Click Cookies in the top right of Postman to clear them.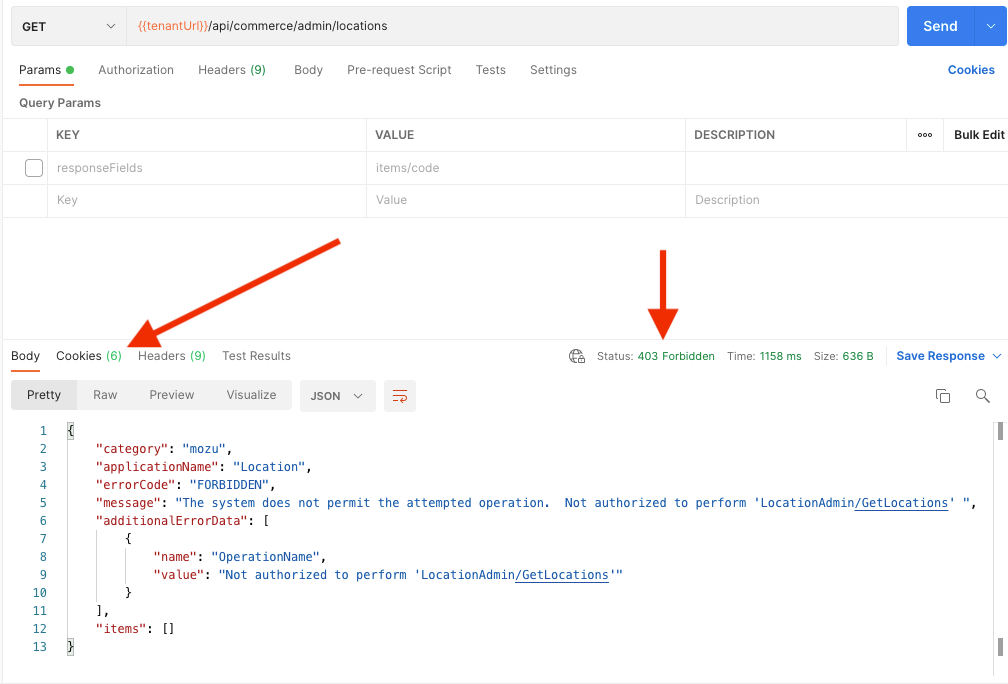
Specify Site for Some APIs
Some APIs require site context. If you experience a 400 Bad Request error or a message about missing context level, add thex-vol-site header with your site ID.
Provide cURL Request When Requesting Help
To debug issues or request help, copy your API request as a cURL request:- Click the Code button on the right side of Postman.
- Select cURL for the code snippet type.
- Copy and paste this when requesting support.