You can calculate tax using Avalara and add your own tax engines using either API Extensions or tax calculator capability. If a user needs a service other than Avalara then the following approaches help to integrate your own tax calculator.
Approach 1: Using estimateTaxes API Extension
This approach is used after creating a new API extension application.
The following steps set a tax response using the estimateTaxes API Extension:
- Create a new API Extension Application. Refer to the API Extension document.
- Use the API Extension function.
- The Estimate Taxes (Before) file is shown in the following code block:
module.exports = function(context, callback) {
  var responseBody = {
    "itemTaxContexts" : [],
    "shippingTax" : 0.00,
    "handlingFeeTax" : 0.00,
    "orderTax" : 0.00,
    "taxData": { "taxPercent": 0.00 }
  };

  needle.get('https://example.com/taxService', (res) => {
    var taxResponse = JSON.parse(data);
    responseBody.orderTax = taxResponse.data.taxAmount
    responseBody.taxData = { "taxPercent": taxResponse.data.taxPercentage };
    var lineItem = taxOrderInfo.lineItems[0]; // assume there is at least 1 item in the order
    responseBody.itemTaxContexts.push({
      "id" : lineItem.id,
      "productCode" : lineItem.productCode,
      "quantity" : lineItem.quantity,
      "tax" : taxResponse.data.taxAmount,
      "shippingTax" : 0.0,
      "feeTotal": taxOrderInfo.handlingFee
    });
    context.response.body = responseBody;

    context.response.end();
    callback();
  });
};
The sum of the item.itemTaxContexts elements must equal to orderTax in all the examples given below. This is a requirement for any tax integration in KCCP to be able to correctly calculate the prorated taxes when items are split across shipments.
Approach 2: Using Tax Calculator Capability
This approach helps you to add tax calculator capability through the Kibo commerce application.
The following steps add a tax calculator capability:
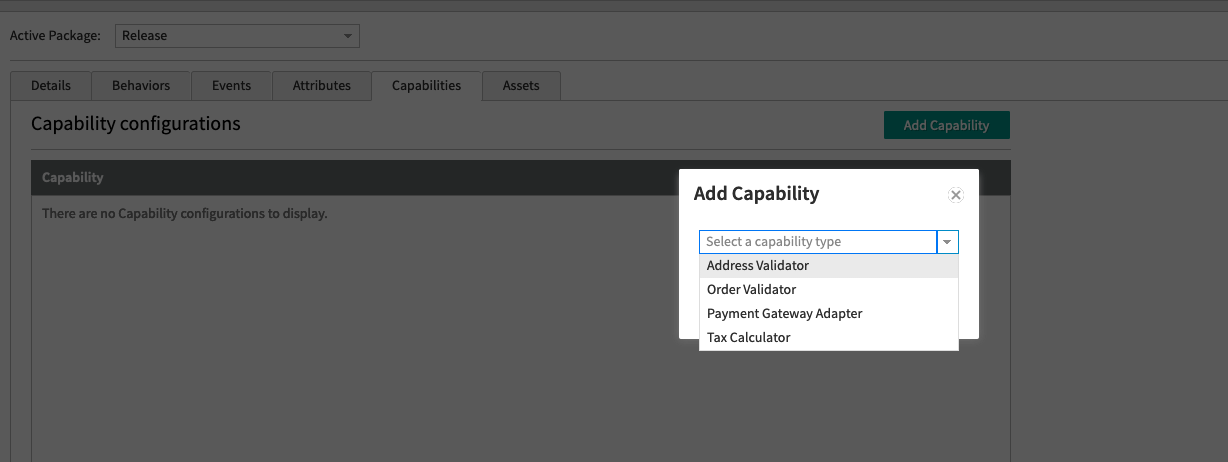
- In Dev Center, navigate to Develop > Applications > Packages > Capabilities.
- Click Add Capability.
- Search for Tax Calculator in the Add Capability modal and click Ok.

- Enter the external URL that receives the tax request and responds with the tax response. It will post to the URL directly and does not add any path.
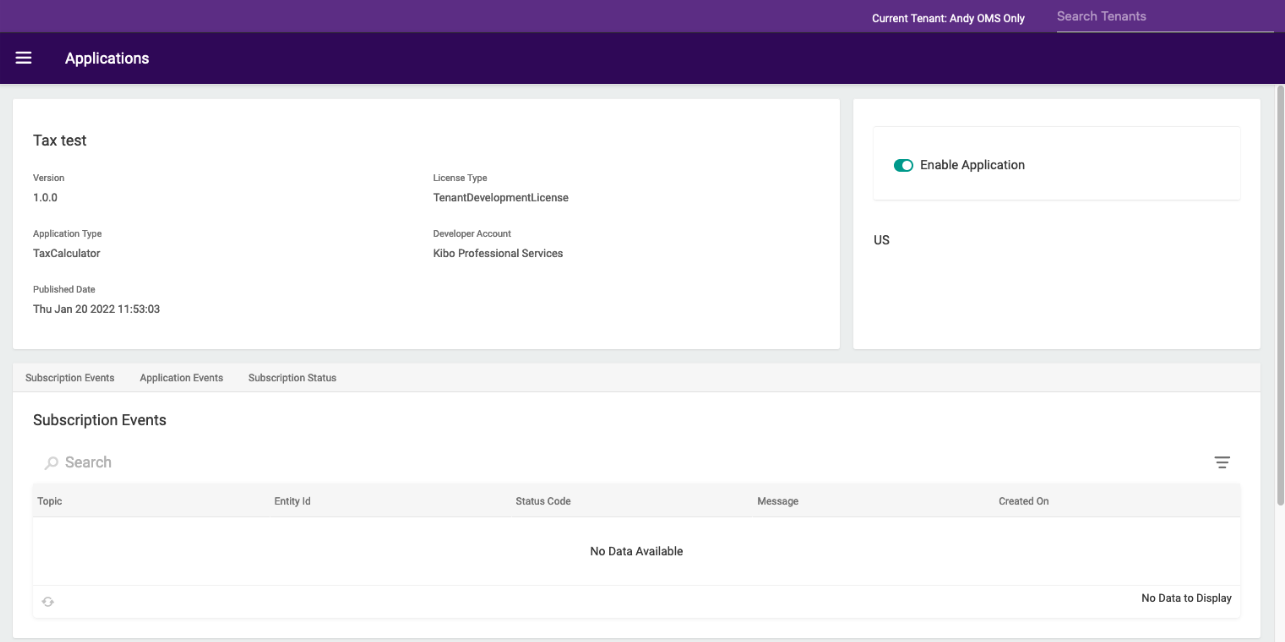
- Select the country you want to enable it for. Press the “Enabled” toggle to enable the calculator. It might take a minute to start working.

Rest API Responses
This is what your endpoint will receive:
{
  "OrderDate": "0001-01-01T00:00:00Z",
  "TaxContext": {
    "TaxContextId": "13",
    "CustomerId": "",
    "TaxExemptId": null,
    "TaxShipping": true,
    "OriginAddress": {
      "Address1": "1835 Kramer Lane",
      "Address2": "#100",
      "Address3": null,
      "Address4": null,
      "CityOrTown": "Austin",
      "StateOrProvince": "TX",
      "PostalOrZipCode": "78758",
      "CountryCode": "US",
      "AddressType": null,
      "IsValidated": false
    },
    "DestinationAddress": {
      "Address1": "1234 Fake St",
      "Address2": "",
      "Address3": null,
      "Address4": null,
      "CityOrTown": "Houston",
      "StateOrProvince": "TX",
      "PostalOrZipCode": "12345",
      "CountryCode": "US",
      "AddressType": "Residential",
      "IsValidated": null
    }
  },
  "LineItems": [
    {
      "Id": "dbc98455f06d47359d47ae230119e28f",
      "ProductCode": "blz-1001",
      "VariantProductCode": null,
      "ProductName": "Wool Blazer",
      "ProductProperties": [
        {
          "AttributeFQN": "tenant~availability",
          "Values": [
            {
              "Value": "24-48hrs",
              "StringValue": "Usually Ships in 24 to 48 Hours"
            }
          ],
          "AttributeDetail": {
            "InputType": null,
            "ValueType": null,
            "DataType": null,
            "Name": "Availability",
            "Description": null
          },
          "IsHidden": null,
          "IsMultiValue": false
        }
      ],
      "Quantity": 1,
      "LineItemPrice": 199.0,
      "DiscountTotal": 0.0,
      "DiscountedTotal": 199.0,
      "ShippingAmount": 0.0,
      "HandlingAmount": null,
      "FeeTotal": 0.0,
      "IsTaxable": true,
      "Reason": null,
      "Data": null,
      "ProductDiscount": null,
      "ShippingDiscount": null,
      "ProductDiscounts": [],
      "ShippingDiscounts": [],
      "OriginAddress": null,
      "DestinationAddress": null
    }
  ],
  "ShippingAmount": 0.0,
  "CurrencyCode": "USD",
  "HandlingFee": 0.0,
  "OriginalDocumentCode": "13",
  "OrderId": "12e9f48b2405bf00012c953200007729",
  "OrderNumber": 13,
  "OriginalOrderDate": "2022-01-20T17:06:35.0750575Z",
  "TaxRequestType": "Order",
  "Attributes": [],
  "ShippingDiscounts": null,
  "ShippingDiscount": null,
  "OrderDiscounts": null,
  "OrderDiscount": null,
  "HandlingDiscounts": null,
  "HandlingDiscount": null,
  "ShippingMethodCode": null,
  "ShippingMethodName": null
}
Example: OrderTaxContext Response
This is what your endpoint should respond with:
{
  "ItemTaxContexts": [
    {
      "Id": "dbc98455f06d47359d47ae230119e28f",
      "ProductCode": "blz-1001",
      "Quantity": 1,
      "Tax": 1.0,
      "ShippingTax": 1.0,
      "TaxData": {
      }
    }
  ],
  "ShippingTax": 1.0,
  "HandlingFeeTax": 3.0,
  "OrderTax": 1.0
}
Example: Application
This just sends back dummy data for the specific order above, but it does work.
from flask import Flask, request, jsonify
app = Flask(__name__)


@app.route('/', methods=['GET', 'POST'])
def hello_world():
    print(request.get_data(as_text=True))
    return jsonify({
  "ItemTaxContexts": [
    {
      "Id": "dbc98455f06d47359d47ae230119e28f",
      "ProductCode": "blz-1001",
      "Quantity": 1,
      "Tax": 1.0,
      "ShippingTax": 1.0,
      "TaxData": {
      }
    }
  ],
  "ShippingTax": 1.0,
  "HandlingFeeTax": 3.0,
  "OrderTax": 1.0
})


app.run(host='0.0.0.0', port=8000)
And then in your terminal:
# In one terminal tab
python3 app.py

# In another terminal tab
ngrok http 8000
Use the URL that ngrok gives you as your application URL.

