Watch: Fulfiller Overview
Get an introduction to the Fulfiller application
Navigation Menu
The Fulfiller UI navigation menu consists of the following pages.- Home: Return to the Admin UI.
- Locations: Access the updated dashboard’s map view.
- Shipments: Access the updated dashboard’s list view.
- Returns: Manage returns using the embedded Admin UI.
- Pick & Pack: Prepare shipments for fulfillment by picking and packing the items. This will only be displayed if pick waves are enabled for the currently-selected location’s group.
- Receive Transfers: If transfers are enabled, accept shipments from another fulfiller. This will not be displayed if your current location is not allowed to use transfer shipments.
- Manage Blocked Locations: Update the list of locations that have been temporarily blocked from Order Routing assignment.
- Links to Help, Settings, and Log Out.
Dashboard Overview
The Fulfiller dashboard can be viewed as either a location map or shipment list. Switch between the two views using the selector in the top right of the page. You can access this dashboard again at any point by clicking Locations in the navigation menu.
Map View
The collapsible map displays all active fulfillment locations that you have access to by default, and clicking on one displays a pop-up of the address and count of Ready shipments. You can further filter by specific location(s), look back period, shipment type, and Fulfillment SLA if those are enabled for your implementation. If SLAs are enabled, the pop-up will visualize the percentage of shipments in green, yellow, and red thresholds as shown below. Otherwise, those details will not be displayed. Click the shipment count in this pop-up to view the shipment list filtered to the selected shipment type and SLA at that location. If you click a threshold instead, you will be taken to the shipment list filtered to that threshold as well.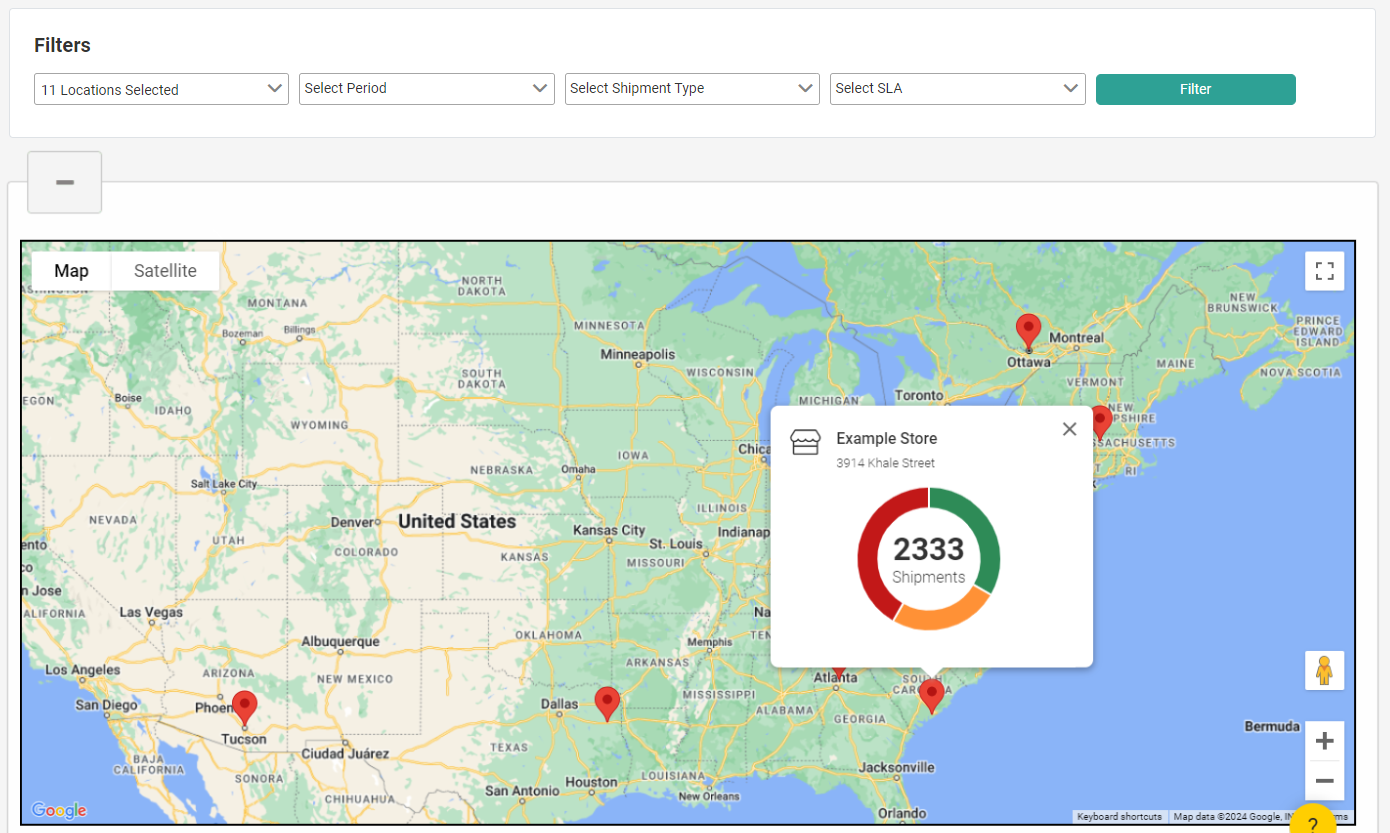
isMapViewCollapsedByDefault theme setting to “1.”
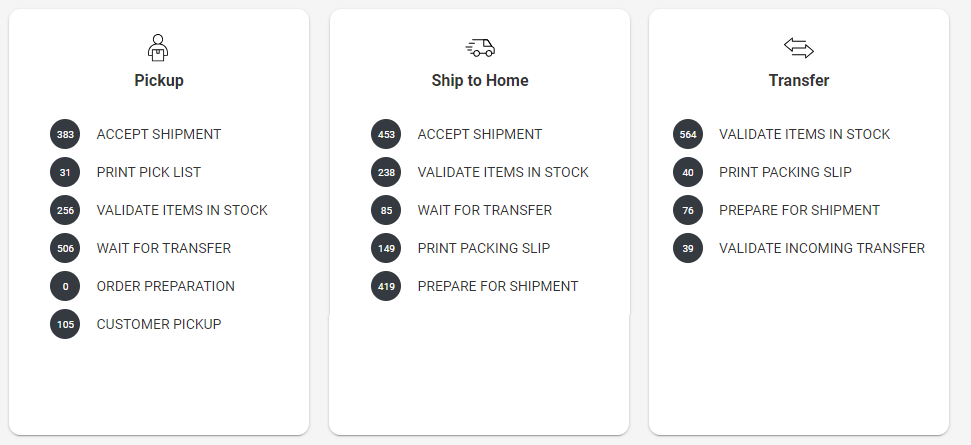
Below the map are cards that represent the shipment types supported across the locations selected in the locations filter. Each card lists the shipment steps and count of shipments currently in each step. Click a step to view the shipments list filtered to that shipment type and step at the selected location.
List View
By default, the list view displays Ready shipments at all locations you have access to. This grid includes sortable columns that detail the location, shipment type and step, shipment and order numbers, date and elapsed times, and order notes for each shipment. You can further filter by specific location(s), shipment type, and shipment workflow step. Additional toggles for Late Shipment or Express Shipment may appear depending on the shipment type you select, which allow you to include or exclude those shipments from the results. Click a shipment number to view its details page, or click the order number to view it in the Admin UI.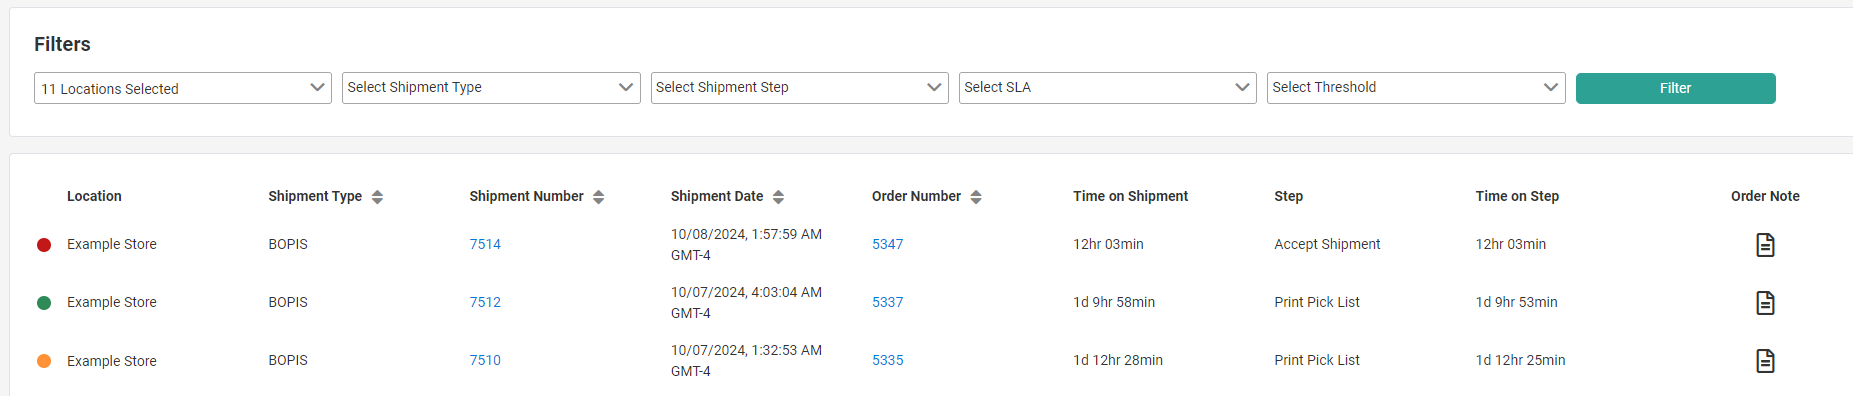
Customize the Dashboard
You can customize the text labels on the dashboard, such as the visible columns and their labels on the list view, via the tenant settings in your theme language files as shown below. Refer to Fulfiller Theme Customization for more instructions about accessing language files and editing them. Do not change theisModernFFUI setting, as this should remain set to “1” in order to enable the map and list views detailed here.
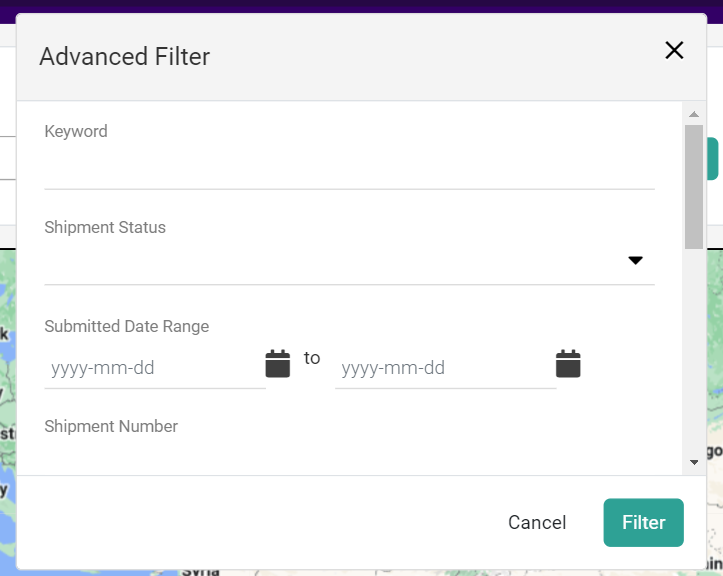
Search for Shipments
Shipments can also be found via the search bar at the top of the interface. You can search for and view any shipment within the entire tenant, even if you aren’t associated with the location that a shipment is assigned to. Filter shipments on the following fields by typing them into the quick search bar:- Order Number (exact match)
- Shipment Number (exact match)
- Destination Contact Short Full Name (contains match)
- Destination Contact Address Line 1 (contains match)
- Email (exact match)
- Item Name (contains match)
- External Order ID (contains match)
- Order Reference Number (exact match; this refers to the
parentCheckoutNumberused in the Commerce APIs which is passed from orders to shipments)