Watch: Fulfiller Overview
Get an introduction to the Fulfiller application
STH vs. BOPIS Picking
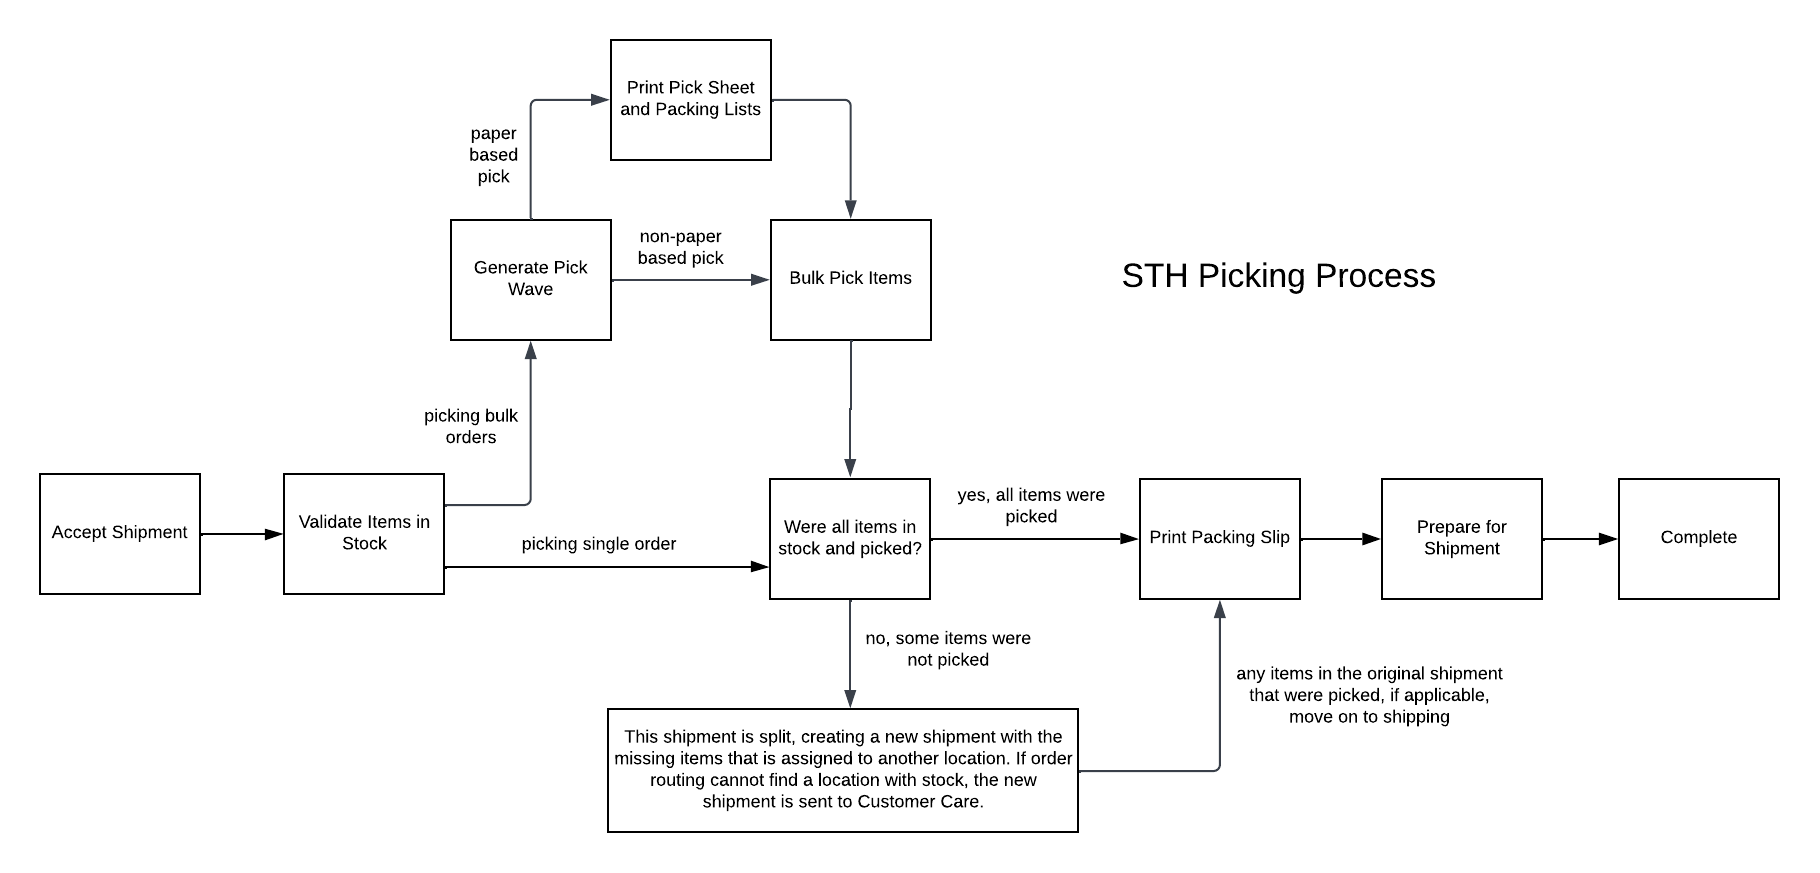
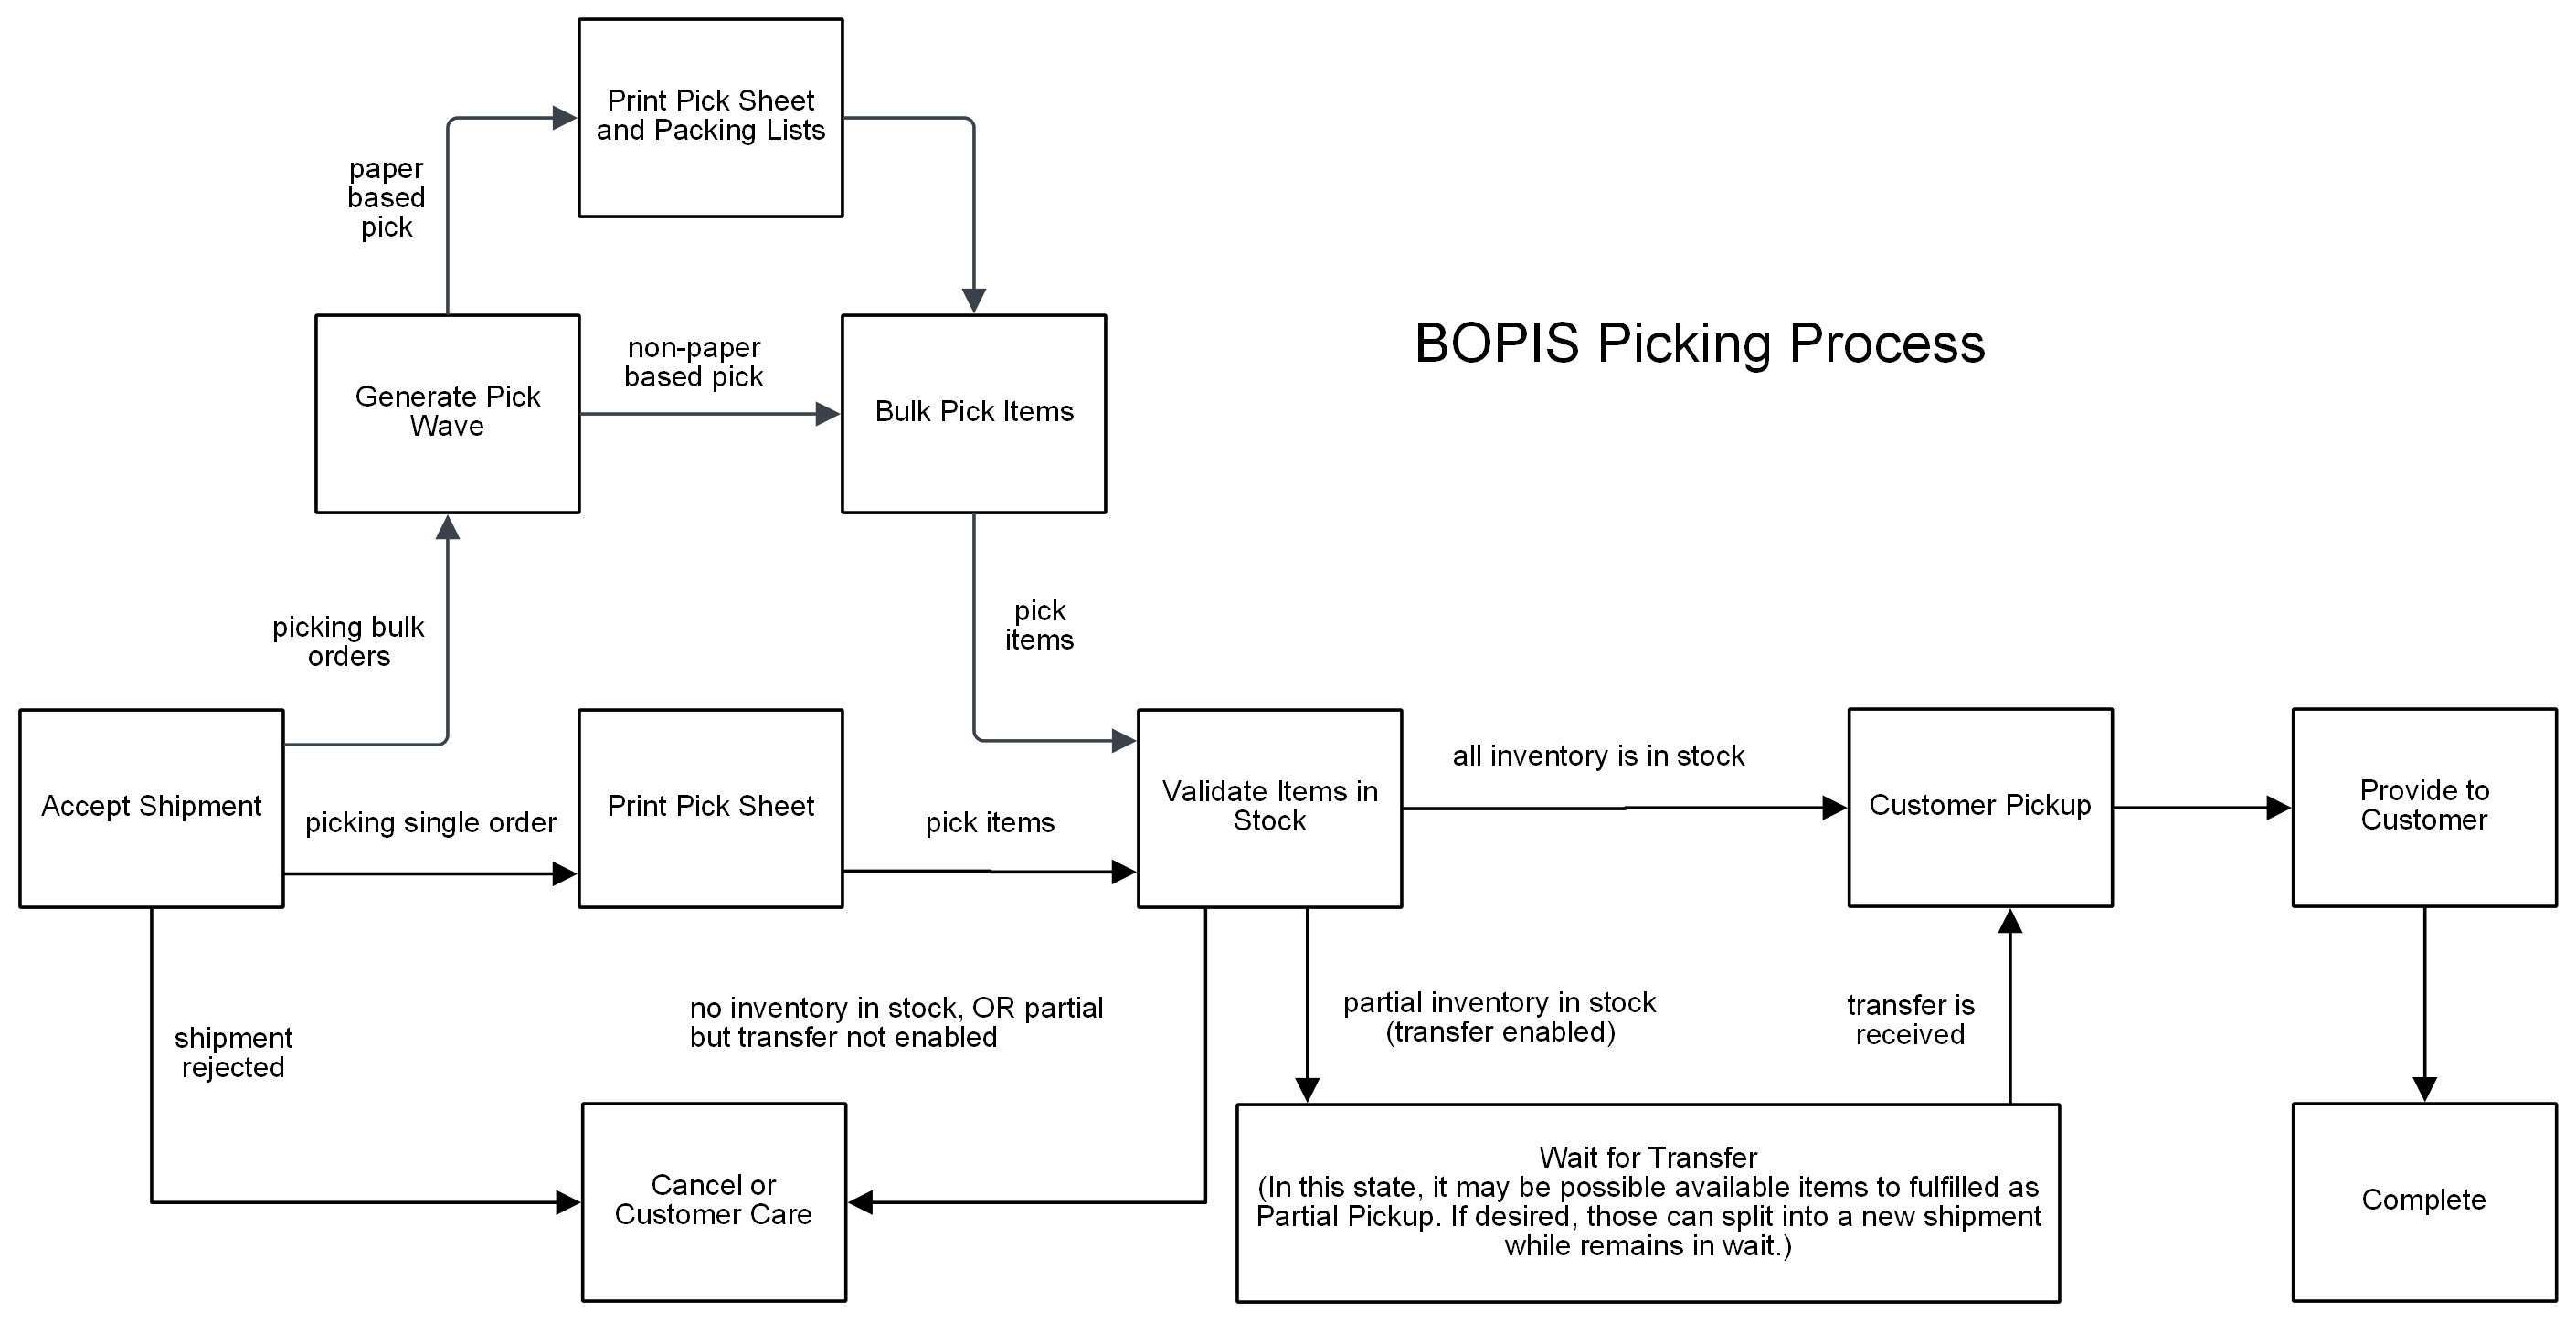
In STH fulfillment, the fulfiller can pick items in bulk as part of a wave or as a single shipment. There is no specific step in the standard business process manager flow that is dedicated to picking; this occurs as part of the Validate Stock step. Once the fulfiller confirms stock and has the items in hand, the packing slip can be printed and added to the package. Pick waves are most common at larger fulfillers with a higher concentration of shipment. A pick sheet can be printed or viewed digitally, then merchandise is picked for all shipments and the items are sorted into their packages. On the other hand, a BOPIS shipment has a “Print Pick List” step that requires the pick list to be viewed before stock can be validated by the fulfiller. This shipment can be added to a wave or have its own pick sheet printed to be collected by itself. See the process flows below for a visual depiction of these differences.

STH Shipment Behavior
Note that for STH, the packing slip can be printed during the pick process by checking “Print packing slip” during pick wave creation. When a pick wave is closed, its shipments will be immediately moved into the Prepare for Shipment step by default. If you want to change the BPM step that shipments are moved to, Kibo can configure your implementation to adjust that behavior. Please contact Kibo Support. Note that if you set your preferred BPM step to Print Packing Slip, then fulfillers do not need to check the “Print packing slip” option when creating the pick wave.Enable Pick and Pack
Before using picking and packing in the Fulfiller UI, those features must be enabled for a location group.- This configuration is located in the Admin UI at Orders > Location Groups.
- Select the appropriate location group to open its details and then click Config Settings.
- Scroll down to Other Settings and Enable Pick and Pack using the checkbox.
- Click Save in the top right.


