

Watch: Location Groups
Learn how to configure location groups
View Location Groups
Use the Location Groups page at Main > Orders > Location Groups to view and manage location groups. Here you can create, edit, and delete location groups. Deletion will remove all grouped configurations from the individual locations that were associated with the group.
Create a Location Group
To create a new location group:- Go to Main > Orders > Location Groups.
- Click Create New Location Group.
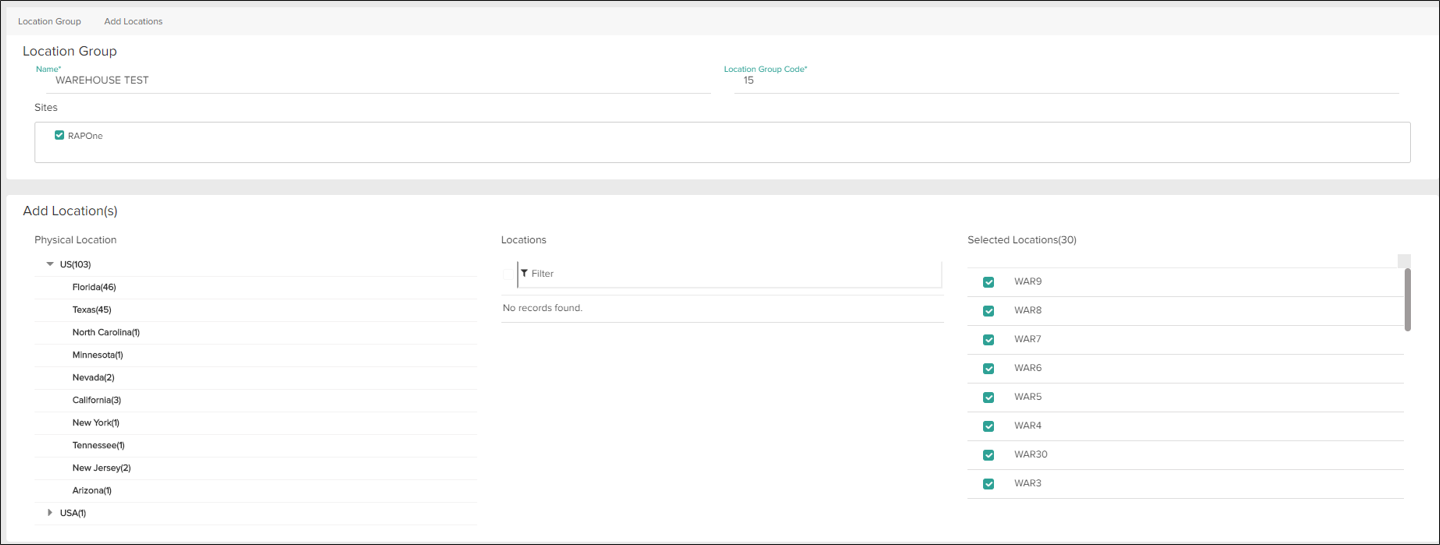
- Enter a group name and identifying code.
- Select the associated site catalog(s).
- In the Add Location(s) section, you can filter by region (e.g. Canada and the United States as shown to the right) and select individual location to be added to the group.
- Click Save when all desired locations have been added.
Configure a Location Group
To configure a location group:- Go to Main > Orders > Location Groups.
- Click a group in the main Location Groups table to open a similar location selection screen.
-
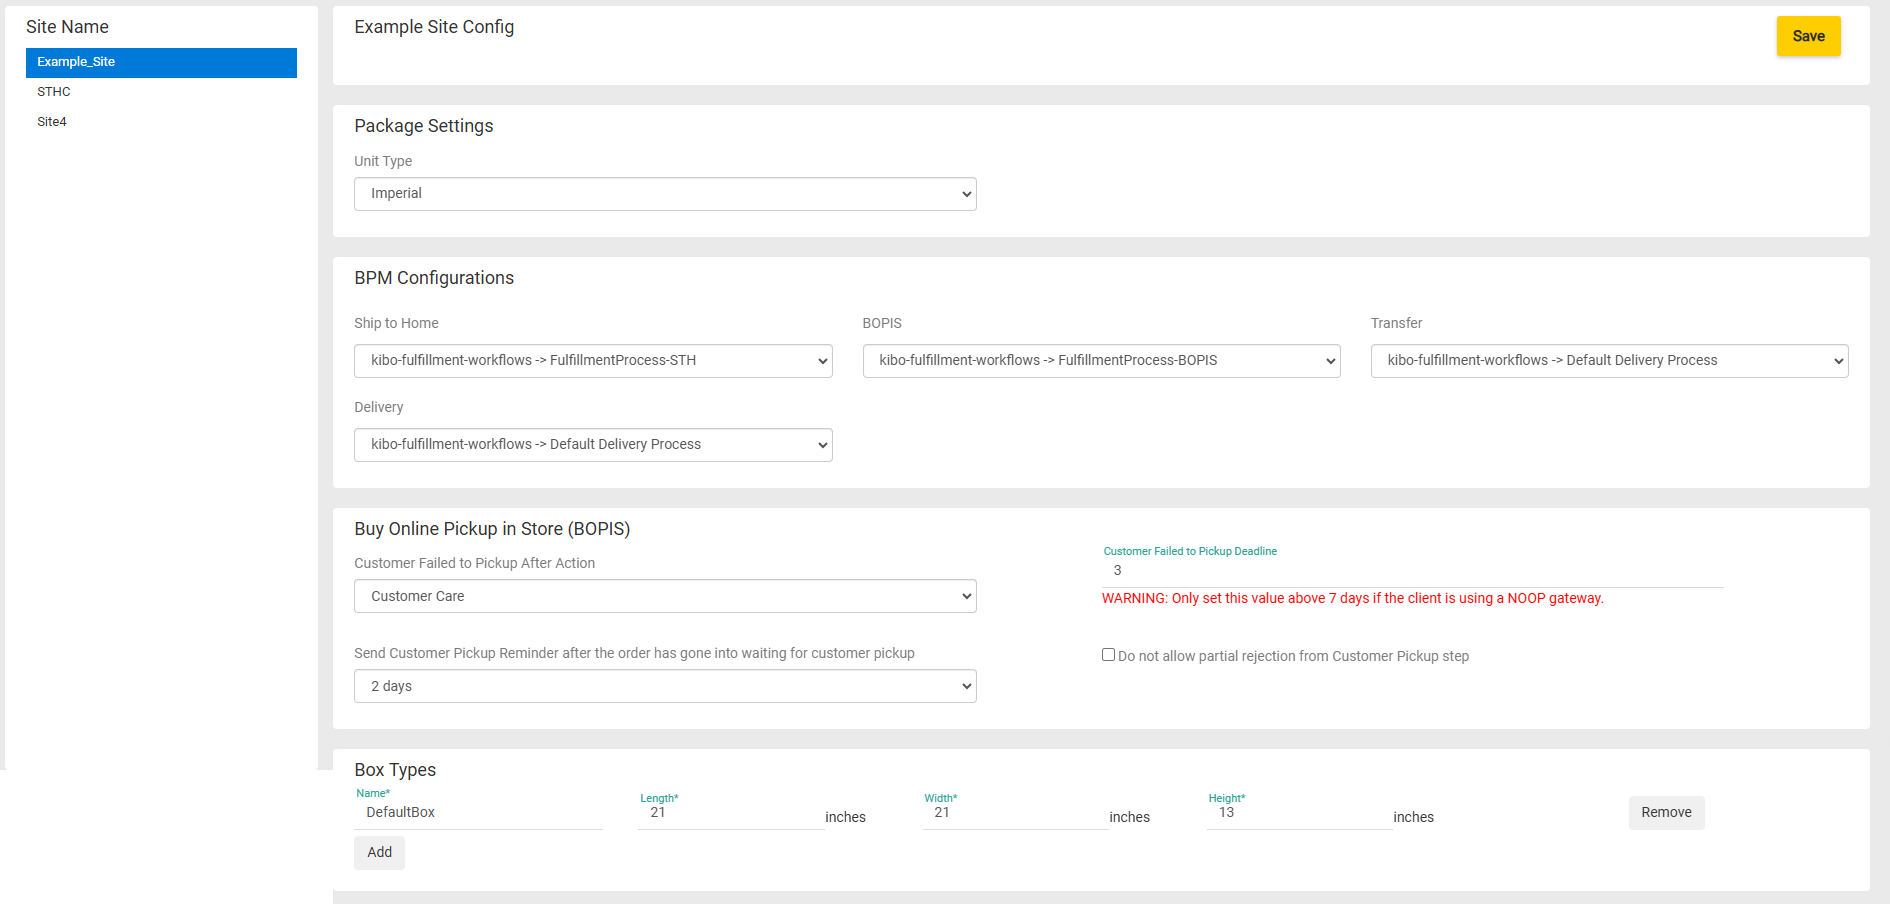
Click Config Settings in the header to switch to another configuration screen, which displays other options that are applied to all locations in the group. If there are multiple sites on your tenant, you can switch between them in the left-hand navigation bar.
- These settings allow you to select the measurement unit type for packages, BPMs for each fulfillment method (which are preset to the default versions), customer pickup behavior, and supported shipping box types.
- These settings allow you to select the measurement unit type for packages, BPMs for each fulfillment method (which are preset to the default versions), customer pickup behavior, and supported shipping box types.
-
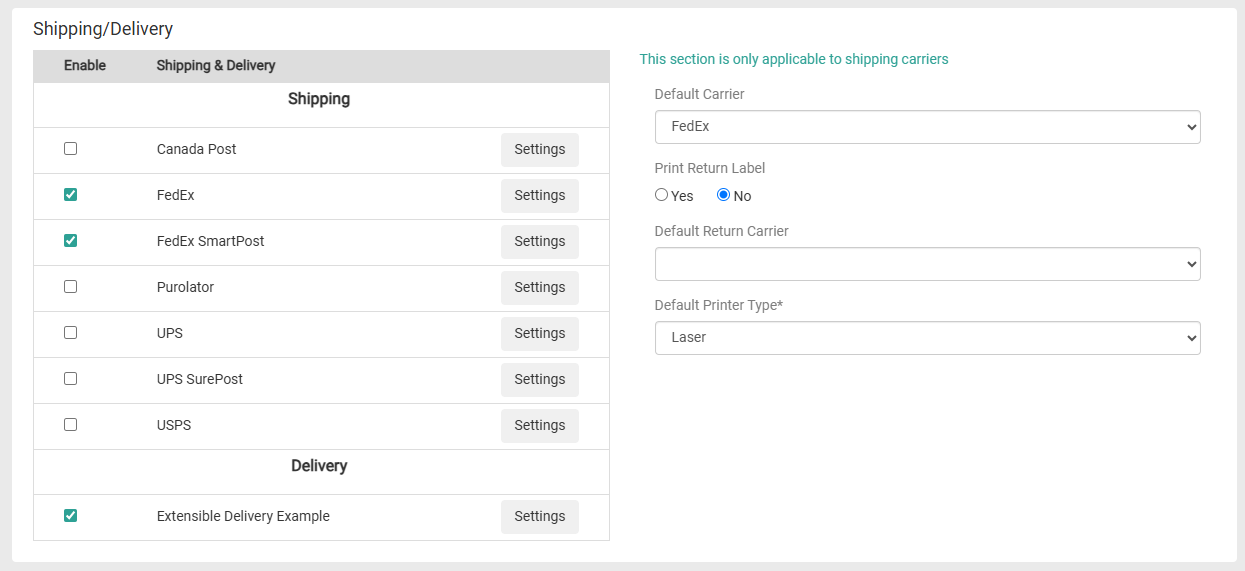
Carrier settings are located further down this page in the Shipping/Delivery section. This section contains a table in which carriers are grouped by whether they support Shipping or Delivery, allowing you to more easily differentiate between them while configuring.
- Use the checkboxes to enable carriers for the location group and select their default shipping and return carriers. Printing preferences should be defined to determine whether return labels are printed along with shipping labels and what kind of printer is the default.
-
Click Settings next to a carrier to open more detailed options. Select the associated account for this location group, enable or disable its supported shipping or delivery types, select the return label shipping type (for carriers that support shipping), and indicate the preferred defaults for different shipping speeds. Multi Piece Shipments can also be enabled here for custom carriers.
- When shipping labels are being generated, carrier account credentials are automatically inherited from a higher level if not specified in the priority of location, then location group, and then site. The “No Carrier Credentials Selected” option in the account drop-down means that this location group will fall back to the default site credentials.
- UPS configurations include a setting called Use Declared Value that will activate support for declared values. If enabled, you must provide Kibo with the maximum value you want to insure. This value is currently set to $7500 and can only be changed by contacting the Kibo team. If a shipment value is less than the maximum insured value, then the shipment value will be used as the declared value. If a shipment value is greater than or equal to the maximum insured value, the maximum insured value will be used as the declared value.
- UPS and FedEx configurations also include the option to require signatures for packages greater than a certain amount.
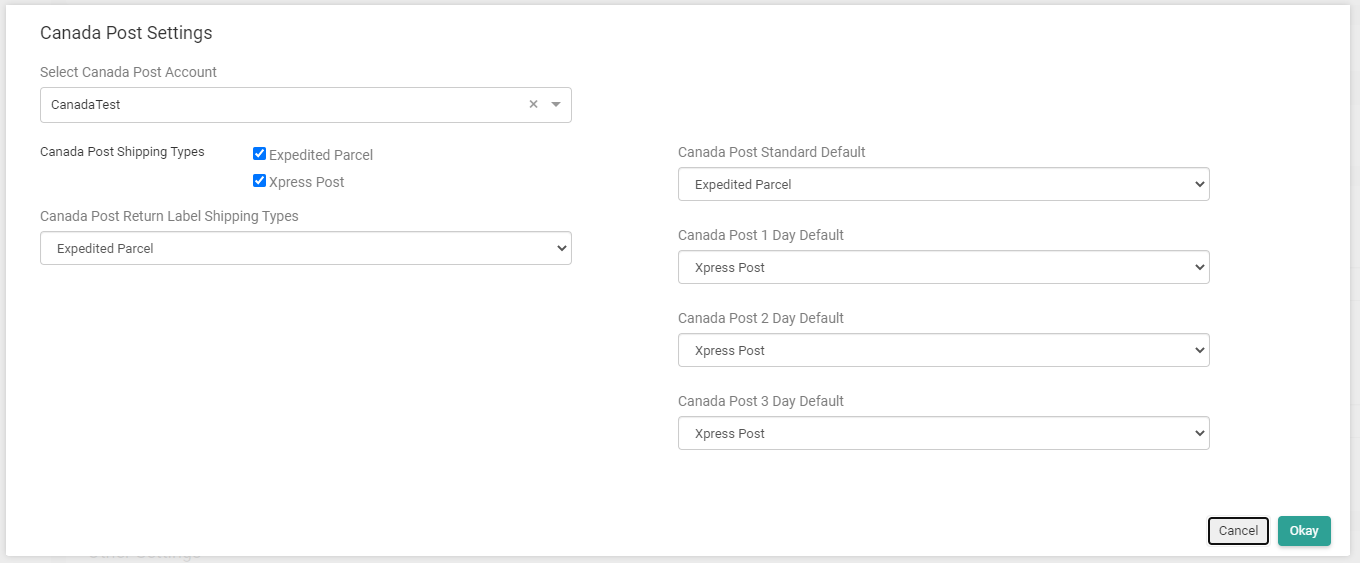
- Click Okay to save those configurations.
-
In the Other Settings section, configure related fulfillment options such as whether to generate packing lists, whether to allow partial quantity when validating stock (in order to split shipments), and whether pick waves are enabled.

-
When a carrier is enabled in location group settings, you are required to configure at least one shipping method or type as well as its default options.
- If you attempt to enable a carrier without making these selections, an error will now be displayed that prompts you to set those options.
- If you cannot provide that information at the time, you are still able to save incomplete carrier settings without enabling the career.
-
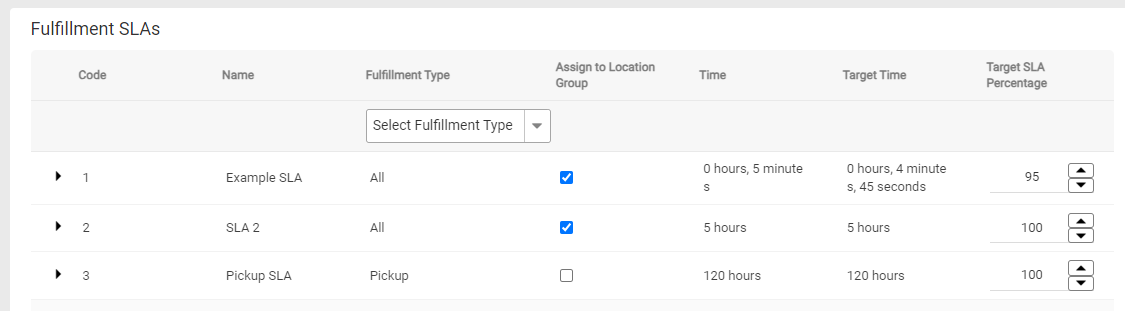
If Fulfillment SLAs are enabled for your implementation, then the Fulfillment SLAs section will be displayed at the bottom of the page. Use the checkboxes to assign one or more SLAs to this location group, and use the up and down arrows to adjust the target percentage for each assigned SLA.
- Click Save in the top right.