

Cart & Checkout Concepts
Learn about shopping cart and checkout workflows
Developer Reference
See the Cart API documentation for programmatic access
How to Use Cart Takeover
In order to view a shopper’s cart, a new order must be made first. CSRs can do this for both anonymous and registered shoppers. However, keep in mind that viewing an anonymous user’s cart pulls up an empty cart. For a logged-in user, viewing the cart pulls up the shopper’s online cart. The following example uses an eCommerce storefront. See the Cart Takeover for Kibo Headless Storefronts section for details on how the process differs for headless implementations.- Go to Main > Orders > Orders.
-
Click Create New Order in the top right. This opens the below page.

- Select the customer from the Customer Search drop-down menu on the right.
-
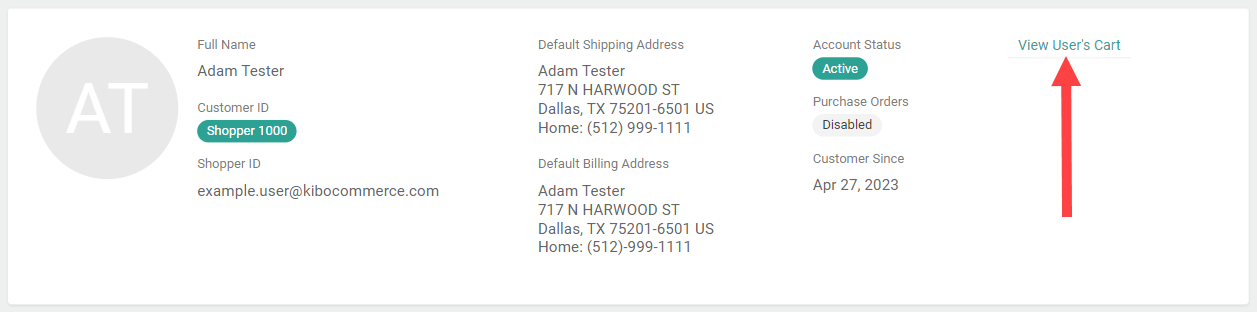
Now that the order is created, click View User’s Cart in the header.

-
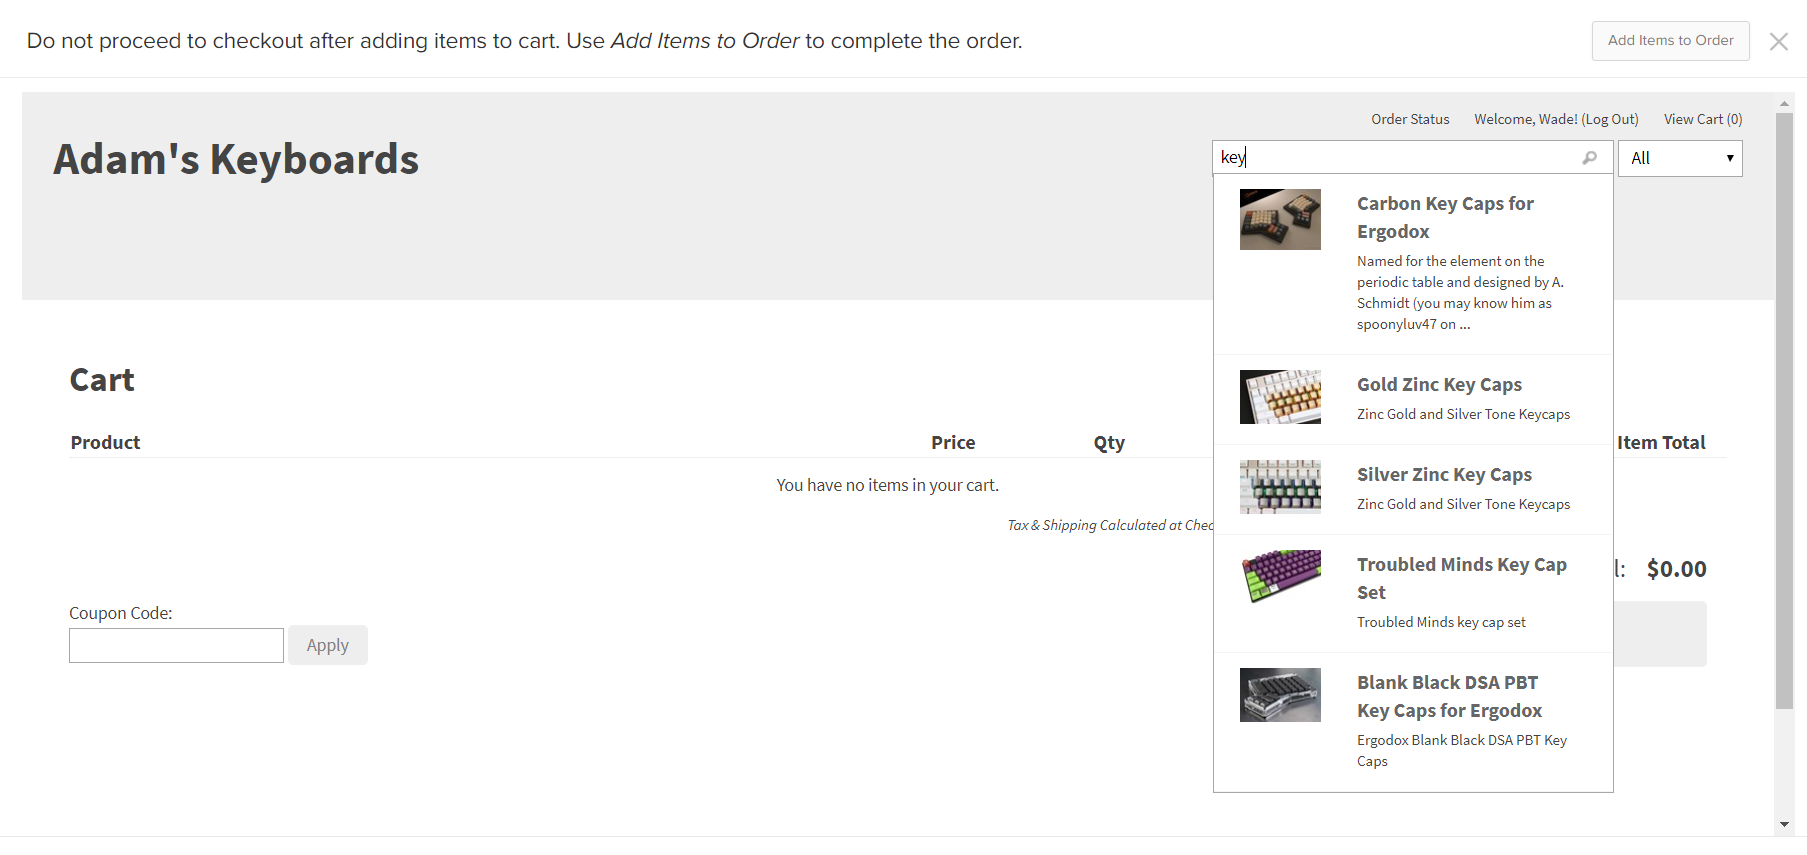
This will open the cart page, where no items will be displayed initially. To add an item, first search for a keyword or use the drop-down list of products.
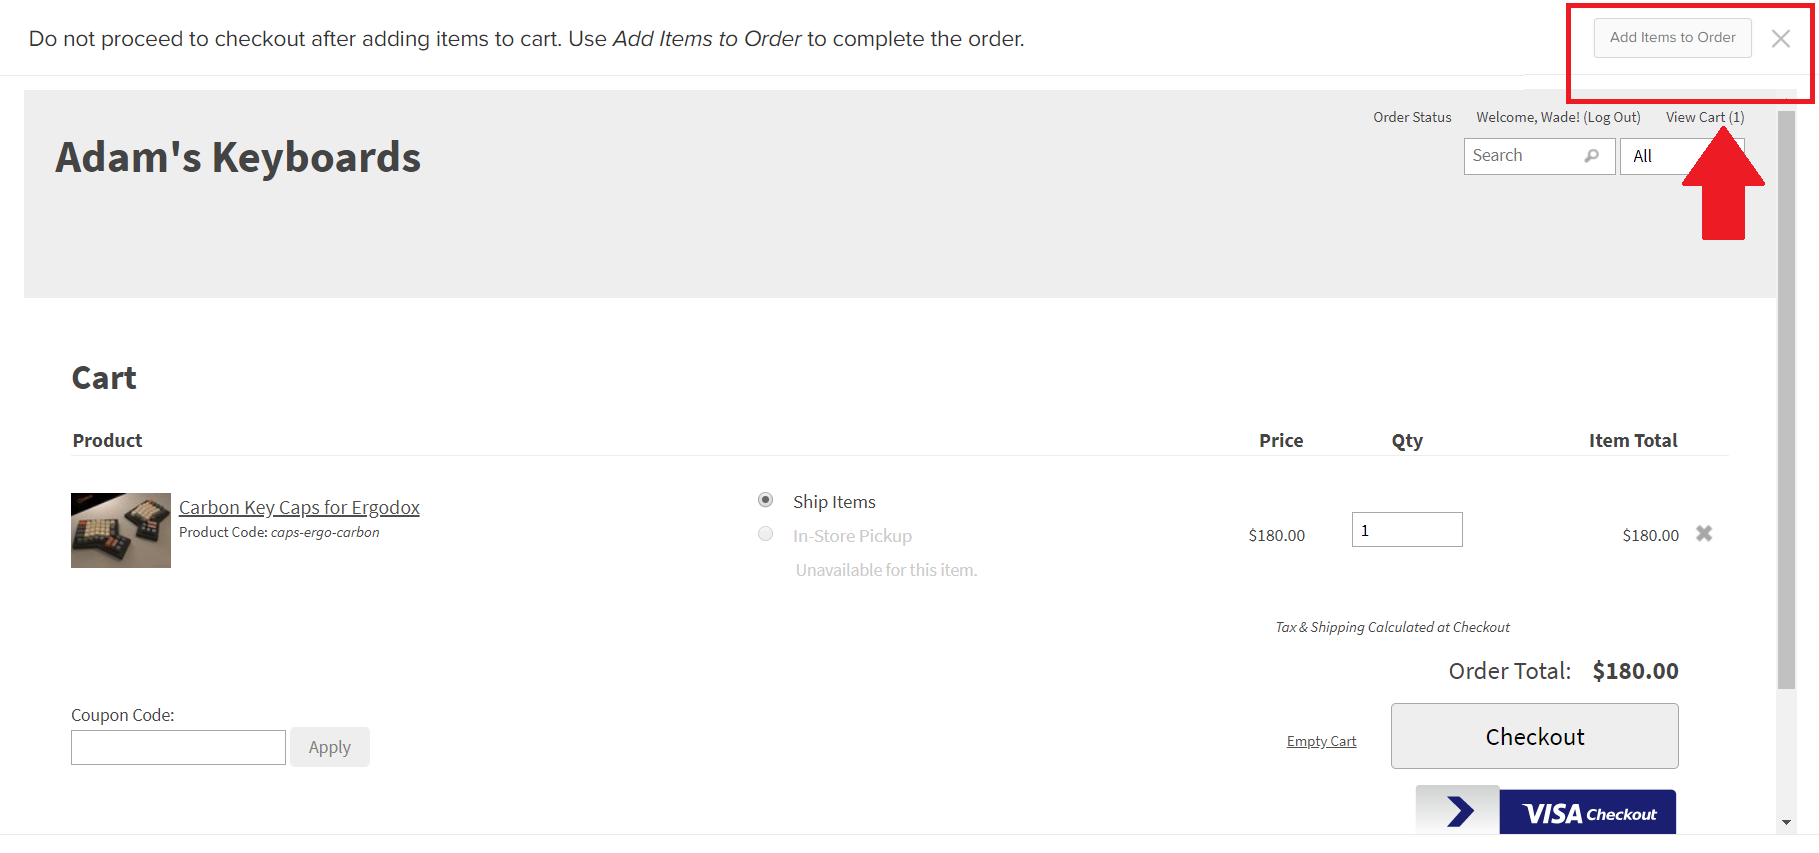
The cart will always display the CSR logged in as the shopper even though that is not the case. The CSR should not be confused or try to click Log Out.
-
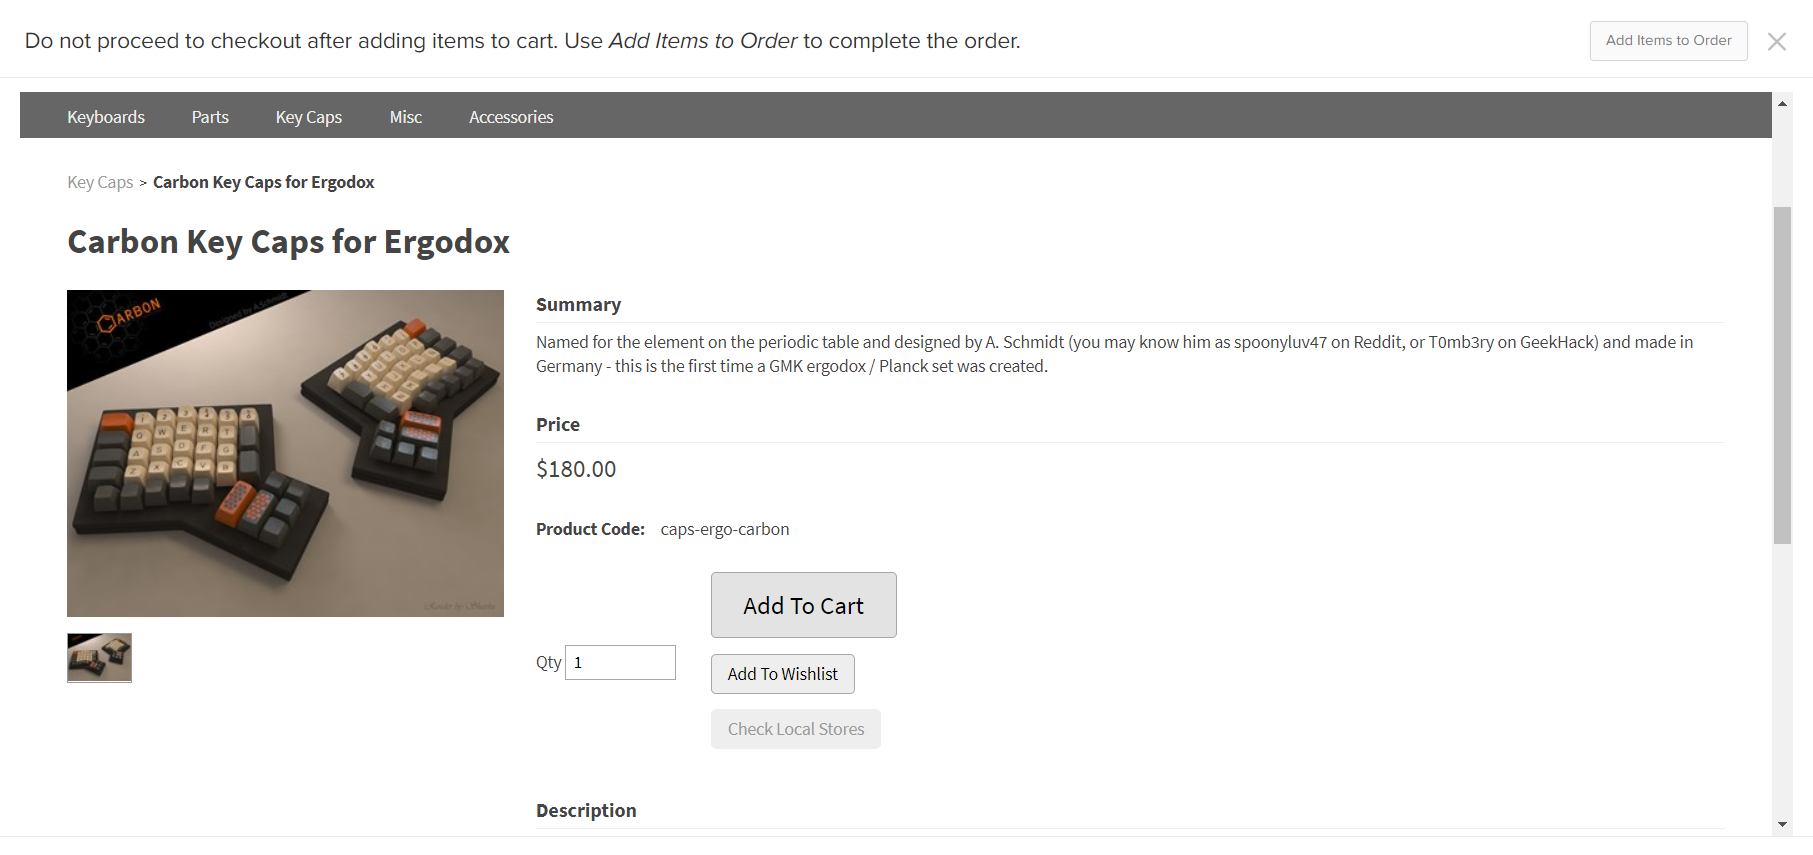
Clicking on an item opens its details page. Select any options (if applicable) and click Add to Cart.
-
When all items have been added, click Add Items to Order in the top right to exit the takeover and allow the shopper to complete checkout on their own.
Do not click Checkout while doing a cart takeover, unless you intend to enter the customer’s payment information yourself as an offline order.
Cart Takeover for Kibo Headless Storefronts
Headless integrations can use cart takeover with external storefronts. Admin users can either follow a link on the Customers page to access the storefront directly, or submit an offline order populated with items from the shopper’s cart. External cart takeover is not supported for anonymous shoppers. Contact Kibo Support to enable this feature.View the Kibo Headless Storefront
In addition to the offline order page as shown above for non-headless cases, headless integrations will also display View User’s Cart buttons on the Main > Customers > Customers table and the customer details page. Clicking either of these buttons will prompt you to select a site before continuing to the external storefront to edit the cart there.
Create Order in Admin UI
If creating a new order in the Admin UI, any changes will not be reflected on the external storefront. This means that you will have to submit it as an offline order, instead of releasing it for the shopper to checkout on their own.- After creating a new order and selecting the customer, click Populate Items from Cart in the actions menu. This will add all items from the shopper’s external cart to the order.

- Click Edit Details to add/remove items, select a shipping method, or perform adjustments.
- Click Save on the Edit Details modal when complete.
- Enter the customer’s payment information in the Payments tab.
- Click Submit Order in the top right of the page.