You must create Admin accounts in order for admins, customer service representatives, sales representatives, and other users to access the Kibo Composable Commerce Platform. This guide explains how to create and invite users, as well as organize them into user groups and block IPs. For more information about roles and the behavior permissions that control each user’s access level, see the User Roles guide.Documentation Index
Fetch the complete documentation index at: https://docs.kibocommerce.com/llms.txt
Use this file to discover all available pages before exploring further.
View and Invite Users
Once you define your organization’s roles, you can invite specific users to your account. Go to System > Permissions > Users to view the list of current users. If searching for an existing user, use the search bar or expand the drop-down menu to filter the results by first name, last name, or email address.
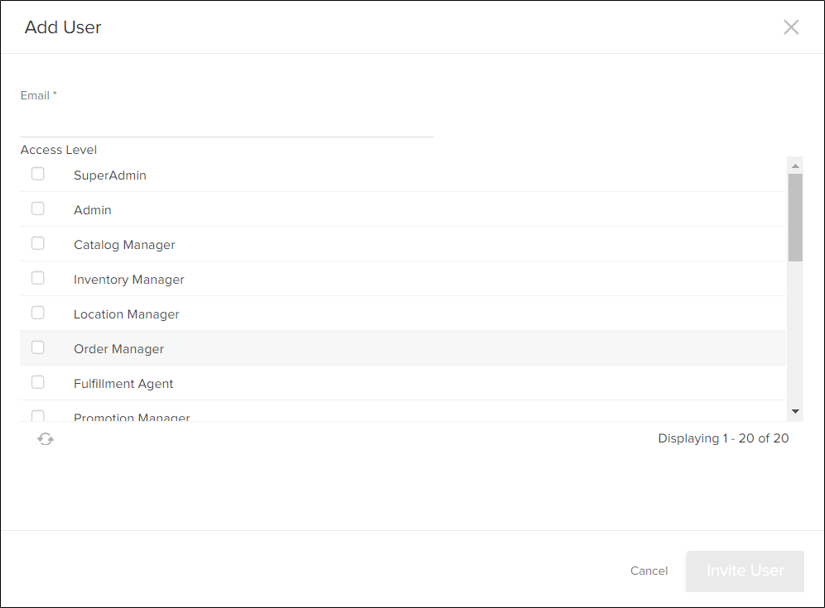
- Click Add User.
- Enter an email address.
- In Access Level, select one or more roles.
- Click Invite User.
- When the user accepts the invitation, they will register their account and can begin working in Admin.
Edit Users
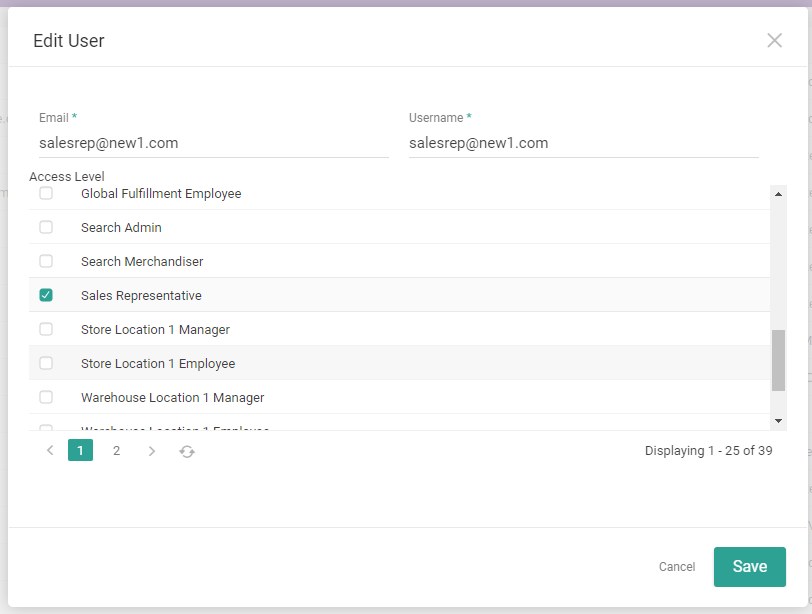
You can edit an existing user’s email, username, and access level.- Go to System > Permissions > Users.
- Click a user in the table whose account you want to edit, or expand the drop-down action menu on the right of the table row and click Edit.
- Edit their Email and/or Username as needed.
- Select and/or deselect roles as needed under the user’s Access Level.
- Click Save.
User Groups
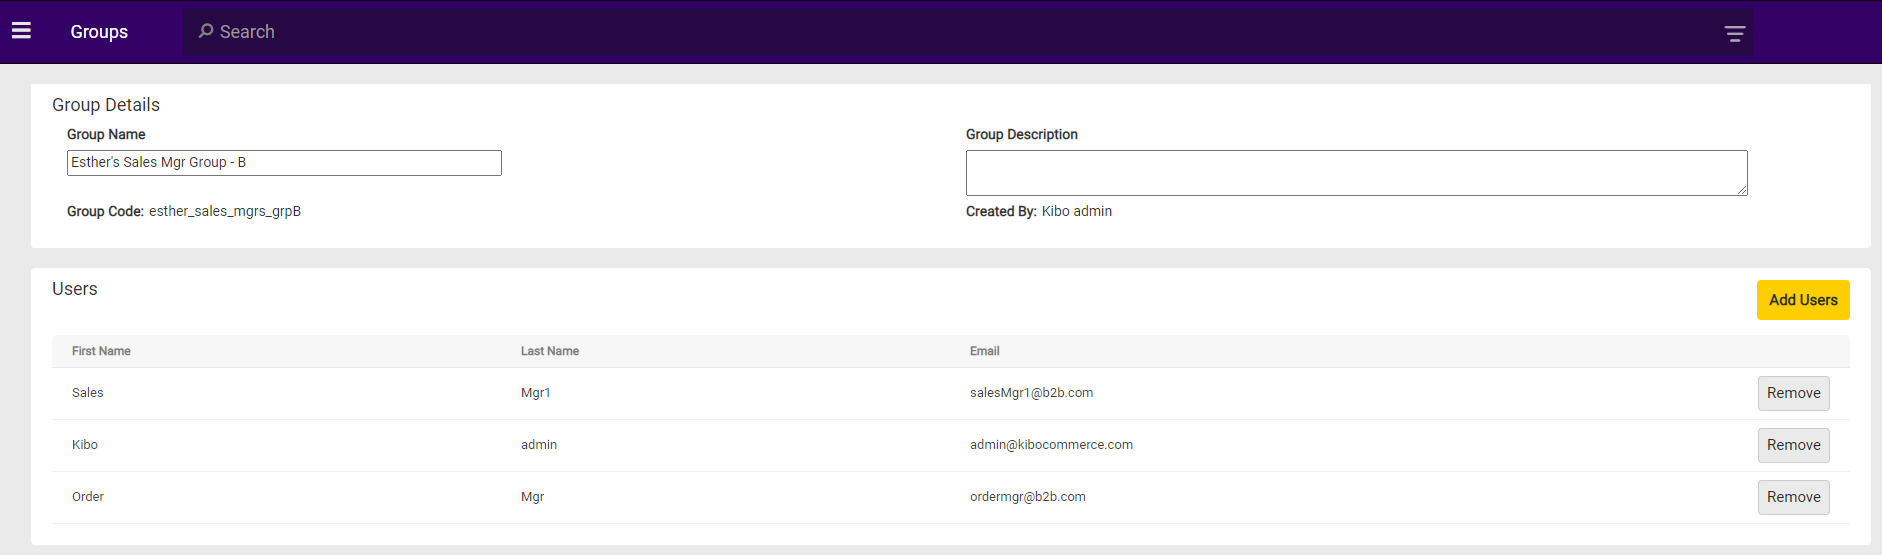
Users can be organized into groups at Settings > Permissions > Groups. Create groups and assign existing users to them in order to create sets of similar users such as regional administrators, sales managers, etc. depending on your needs.
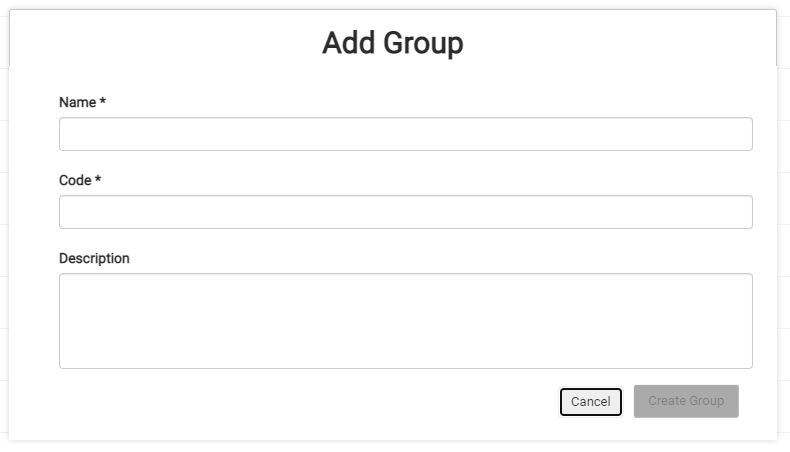
- Click Add Group.
- Enter a required name and a shorthand code for the group.
- Enter an description if desired.
-
Click Create Group to confirm.
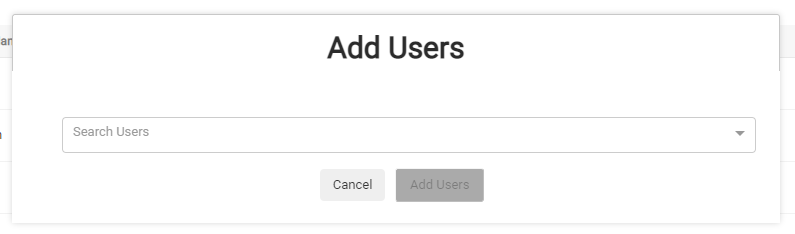
- Begin adding users by selecting them from the drop-down. You may begin typing the user’s name and they will appear as the suggested result.
-
Click Add Users when complete.