Watch: Vendor Inventory Management
See how vendors upload inventory via CSV so it is available to the order routing engine
Overview
The Inventory Upload feature lets vendors submit a CSV file that sets or updates stock quantities for any number of SKU and location combinations in a single operation. Uploads run as background jobs, so vendors can navigate away from the page once a file is submitted without canceling the operation. Each upload is governed by the Inventory Upload Mode configured by the operator on the vendor’s profile — either Partial update (default) or Full replacement. This mode determines how submitted quantities are reconciled against existing inventory and is shown to vendors as a confirmation note before they submit. Who does what:Operator Portal: Configuring Inventory Upload Mode
What is Inventory Upload Mode?
Inventory Upload Mode is a per-vendor setting that controls how the backend reconciles quantities when a vendor submits an inventory CSV.Note: The default for all new vendors is Partial update — a safe starting point that prevents accidental stock zero-outs during onboarding or routine restocks.
Where to Find It
Path: Operator Portal → Vendor Management → [Vendor Name] → Overview → Vendor Settings card The Inventory Upload Mode dropdown appears in the Vendor Settings card on the vendor’s Overview tab, positioned after Vendor Type and Vendor Status.
Changing the Mode
- Open the vendor record and navigate to the Overview tab.
- In the Vendor Settings card, locate the Inventory Upload Mode dropdown.
- Select Partial update or Full replacement.
- Inline confirm (✓) and cancel (✗) controls appear to the right of the field — the new value is not yet saved.
- Click ✓ to save. Click ✗ to revert to the previously saved value without making an API call.

Note: Vendor activation is never blocked by this field — Inventory Upload Mode always has a default value.
Vendor Portal: Uploading Inventory
CSV Format
The accepted file format is .csv with exactly three columns:
A downloadable template containing only the header row is available directly on the upload screen. Click Download template in the top-right corner of the drop zone to save it.
How to Upload Inventory
Step 1 — Drop or select your file
On the Inventory Upload screen, drag your CSV onto the drop zone or click anywhere in the zone to open the file picker. Only .csv files are accepted — any other file type is rejected inline without proceeding.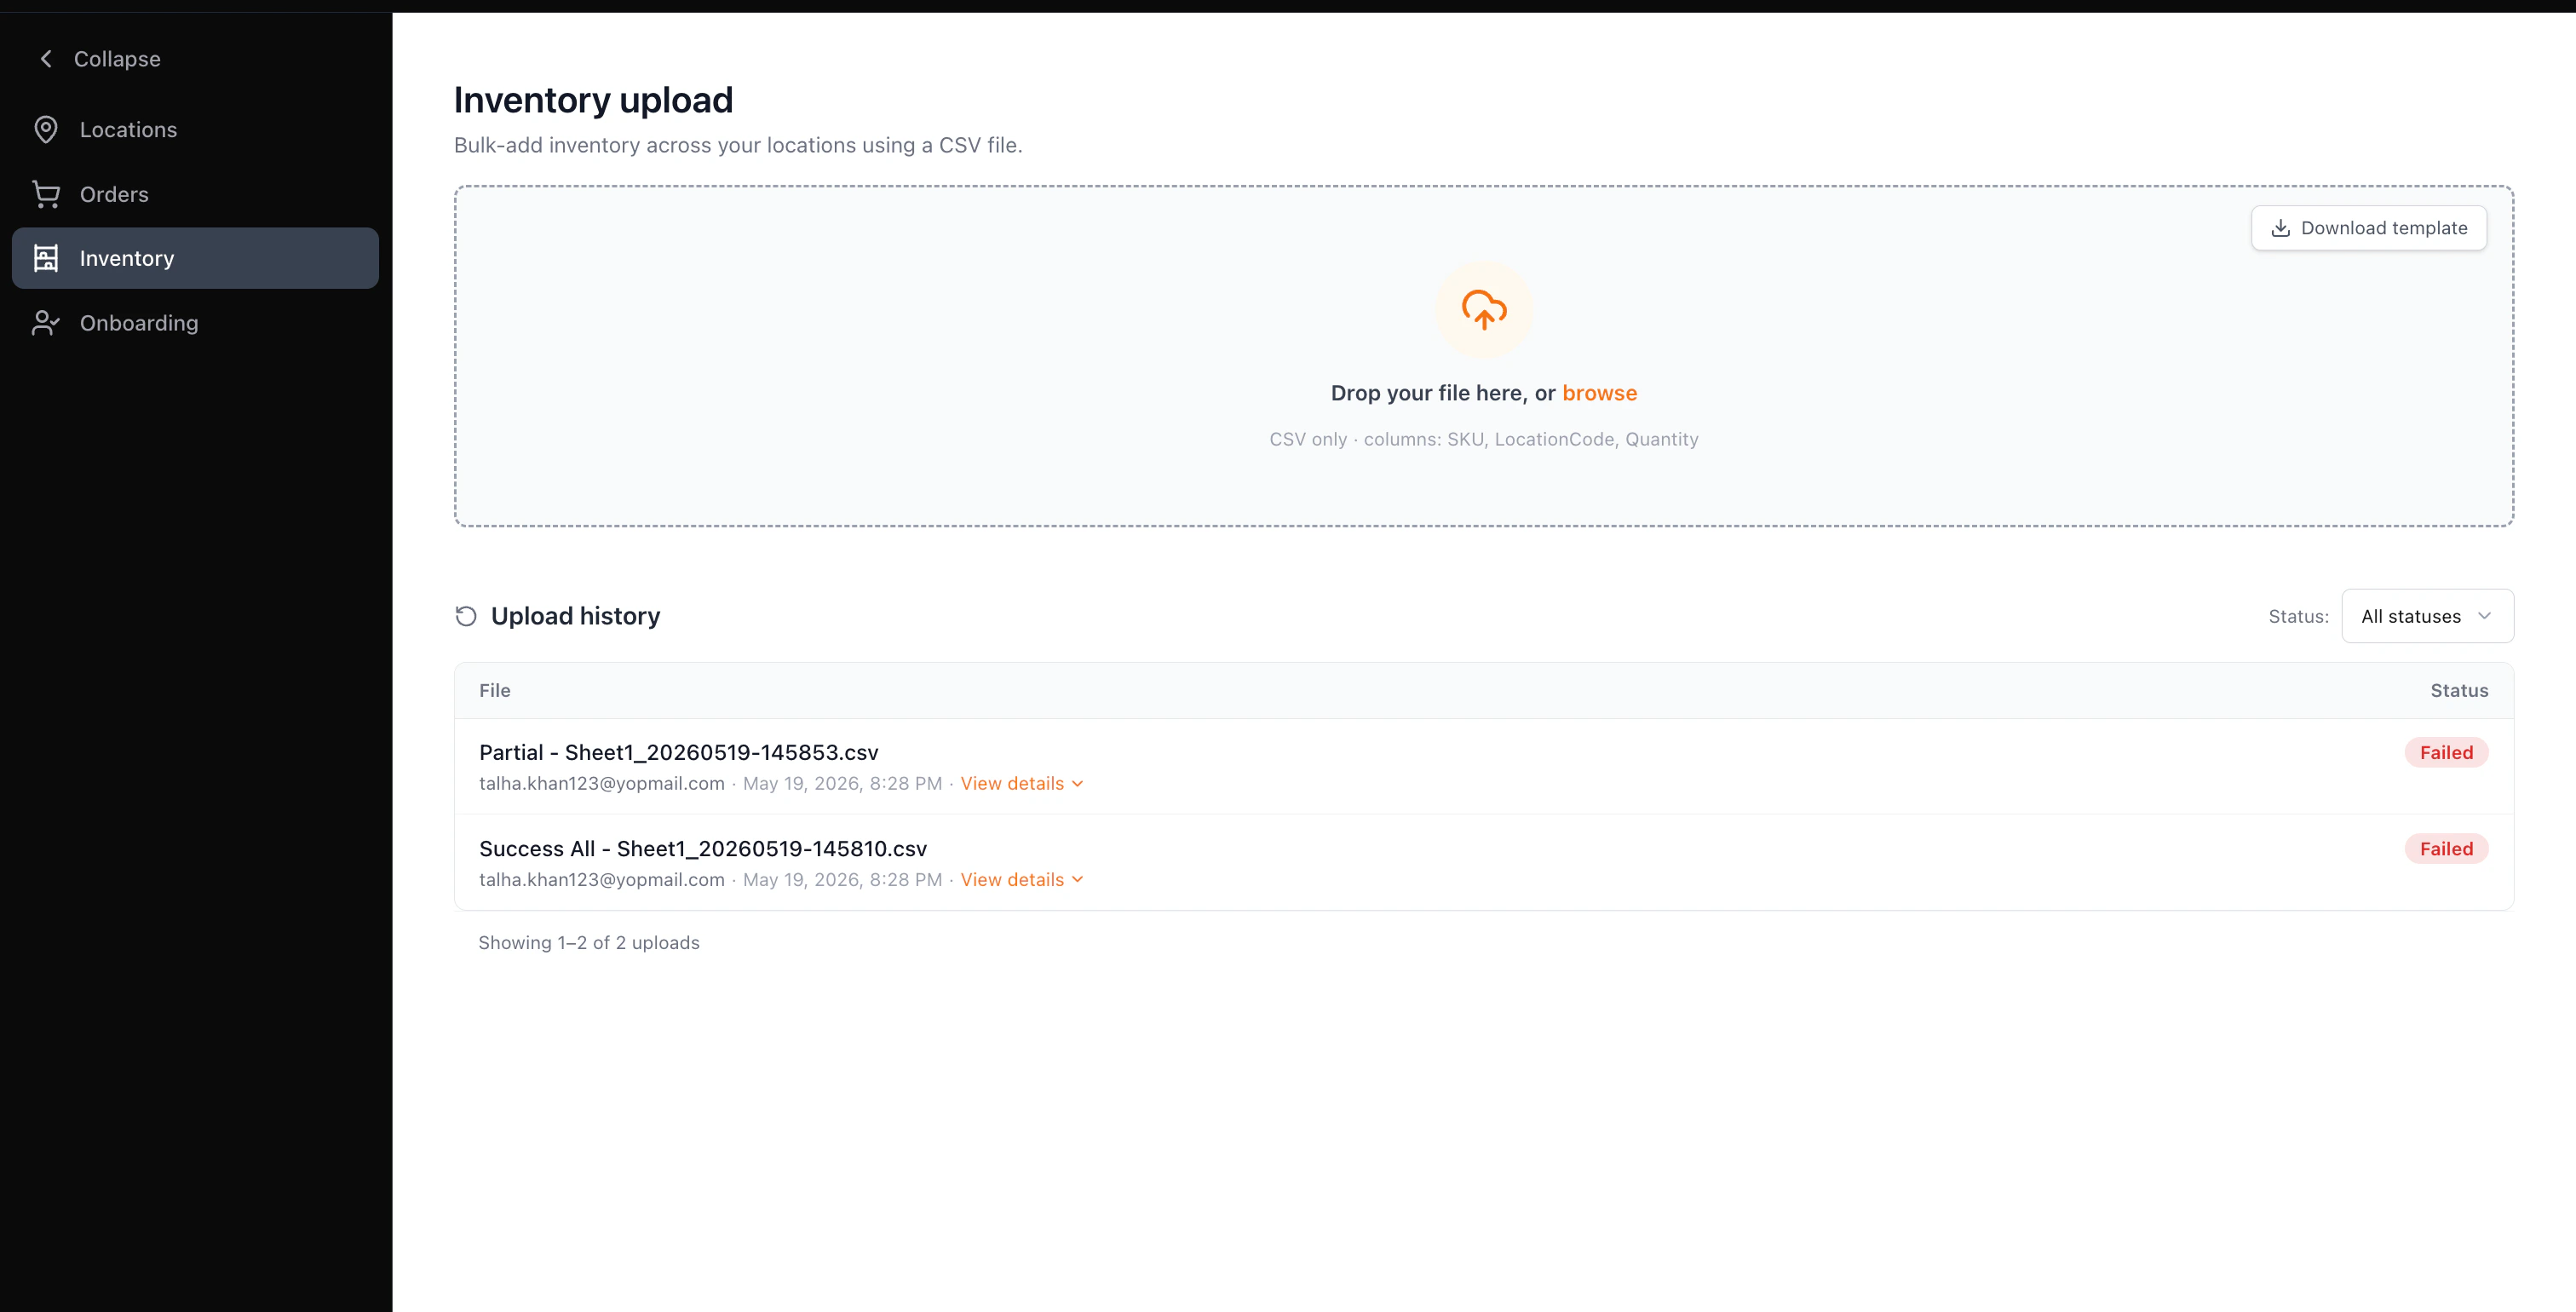
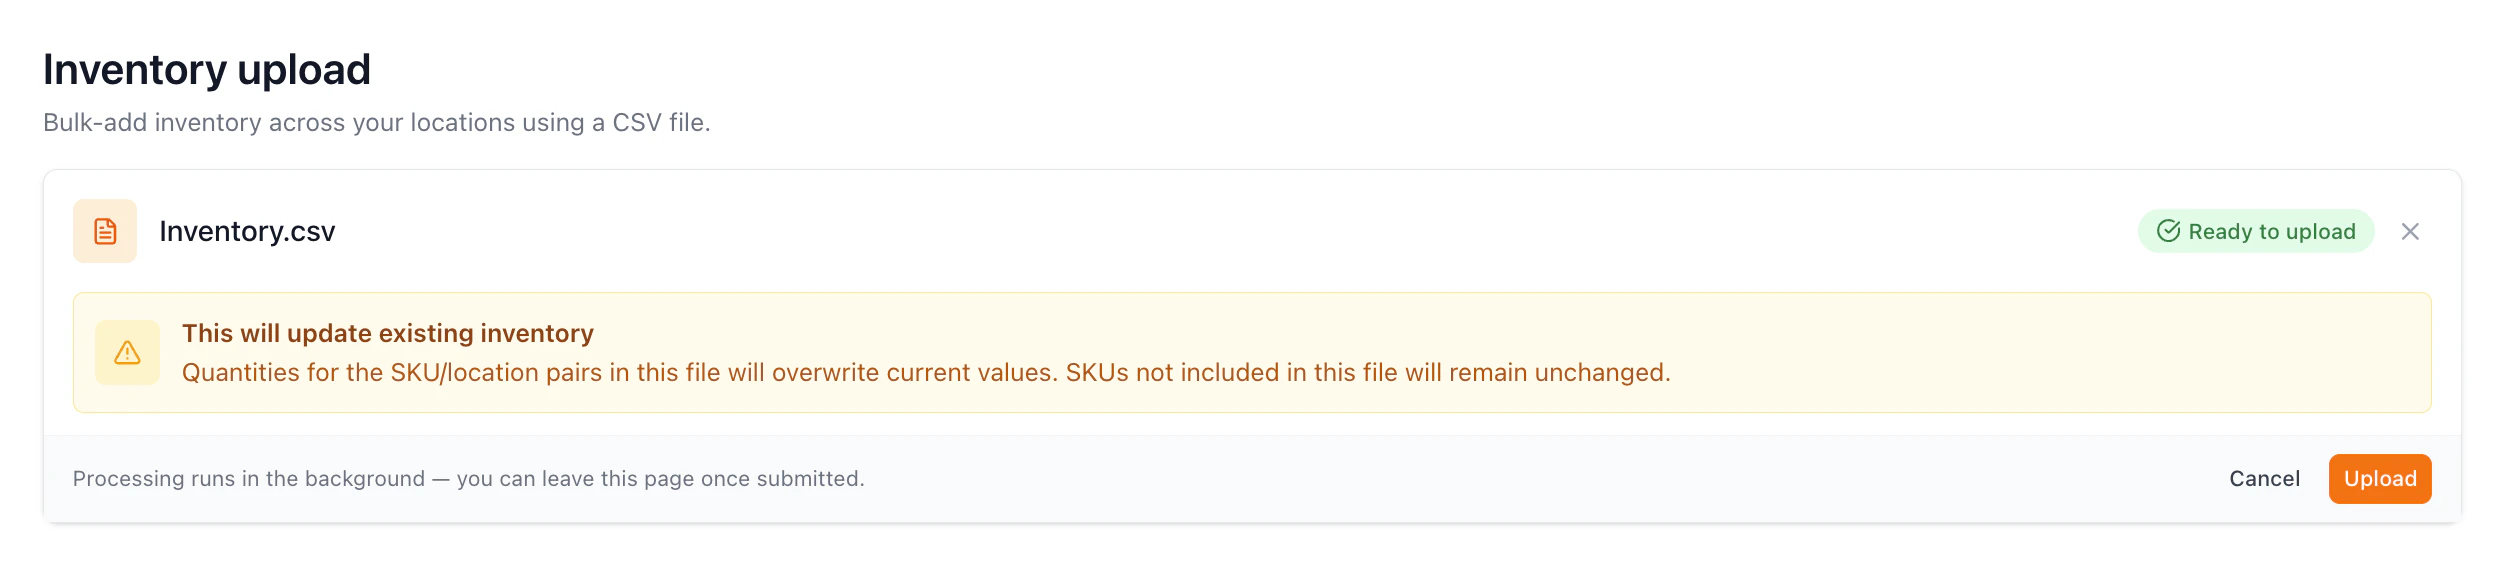
Step 2 — Review the confirmation panel
After selecting a file, a confirmation panel appears showing the file name and a note describing what the upload will do, based on your operator-configured Inventory Upload Mode:
Review the confirmation note carefully — a Full replacement upload will zero out any SKU not present in the file.
Click Upload to submit, or Cancel to discard the file and return to the drop zone.
Step 3 — Validation
After clicking Upload, the panel transitions to a Validating state. All validation is handled by the backend — you cannot cancel an upload once validation has started.
Step 4 — Review the result
When validation completes, the panel displays a per-location result for every location in the file. All locations passed — a green success panel confirms inventory was updated for every location. Click Done to return to the drop zone. A new Processing row is added to Upload history and transitions to Success once the background job finishes.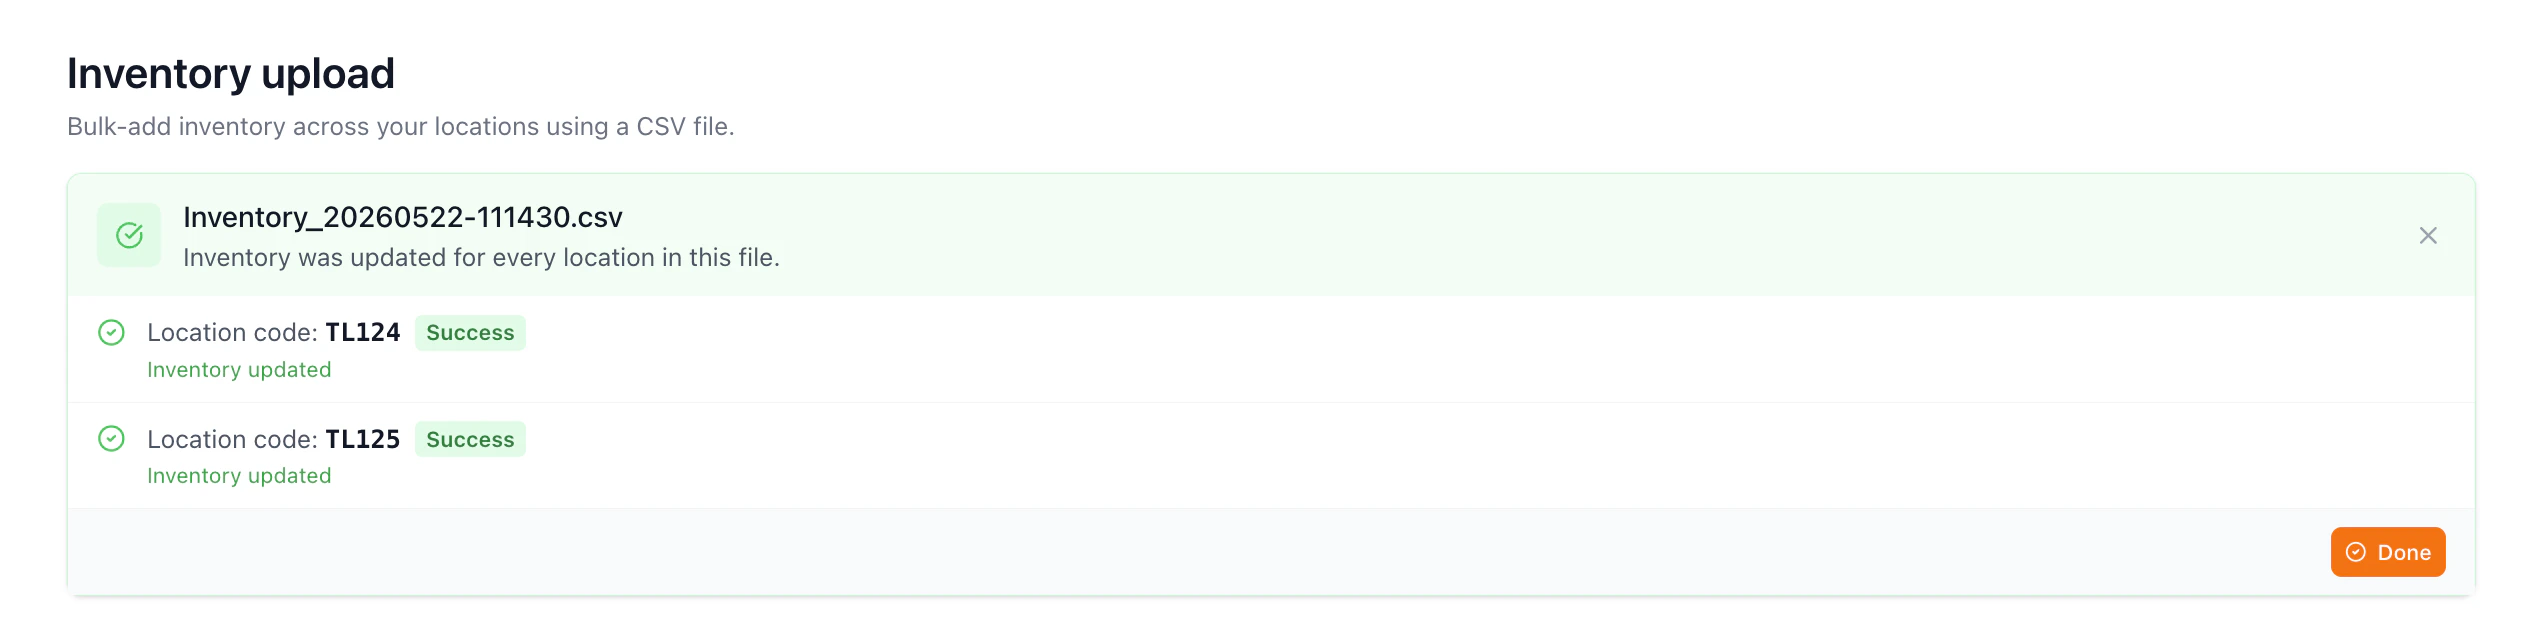
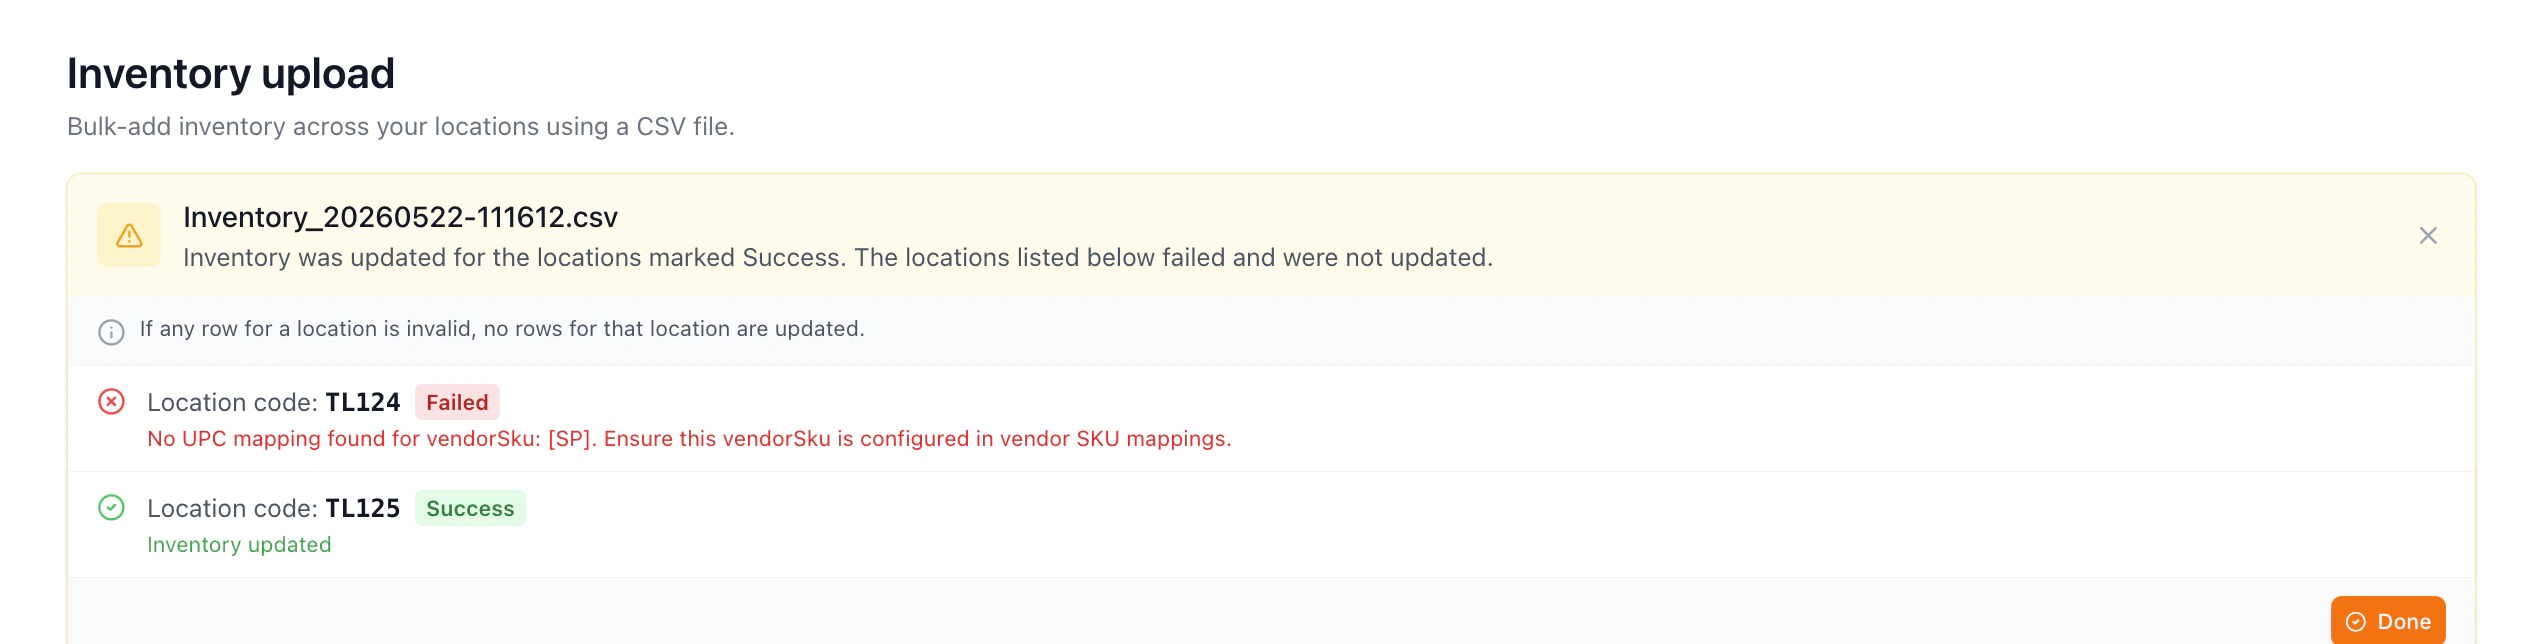
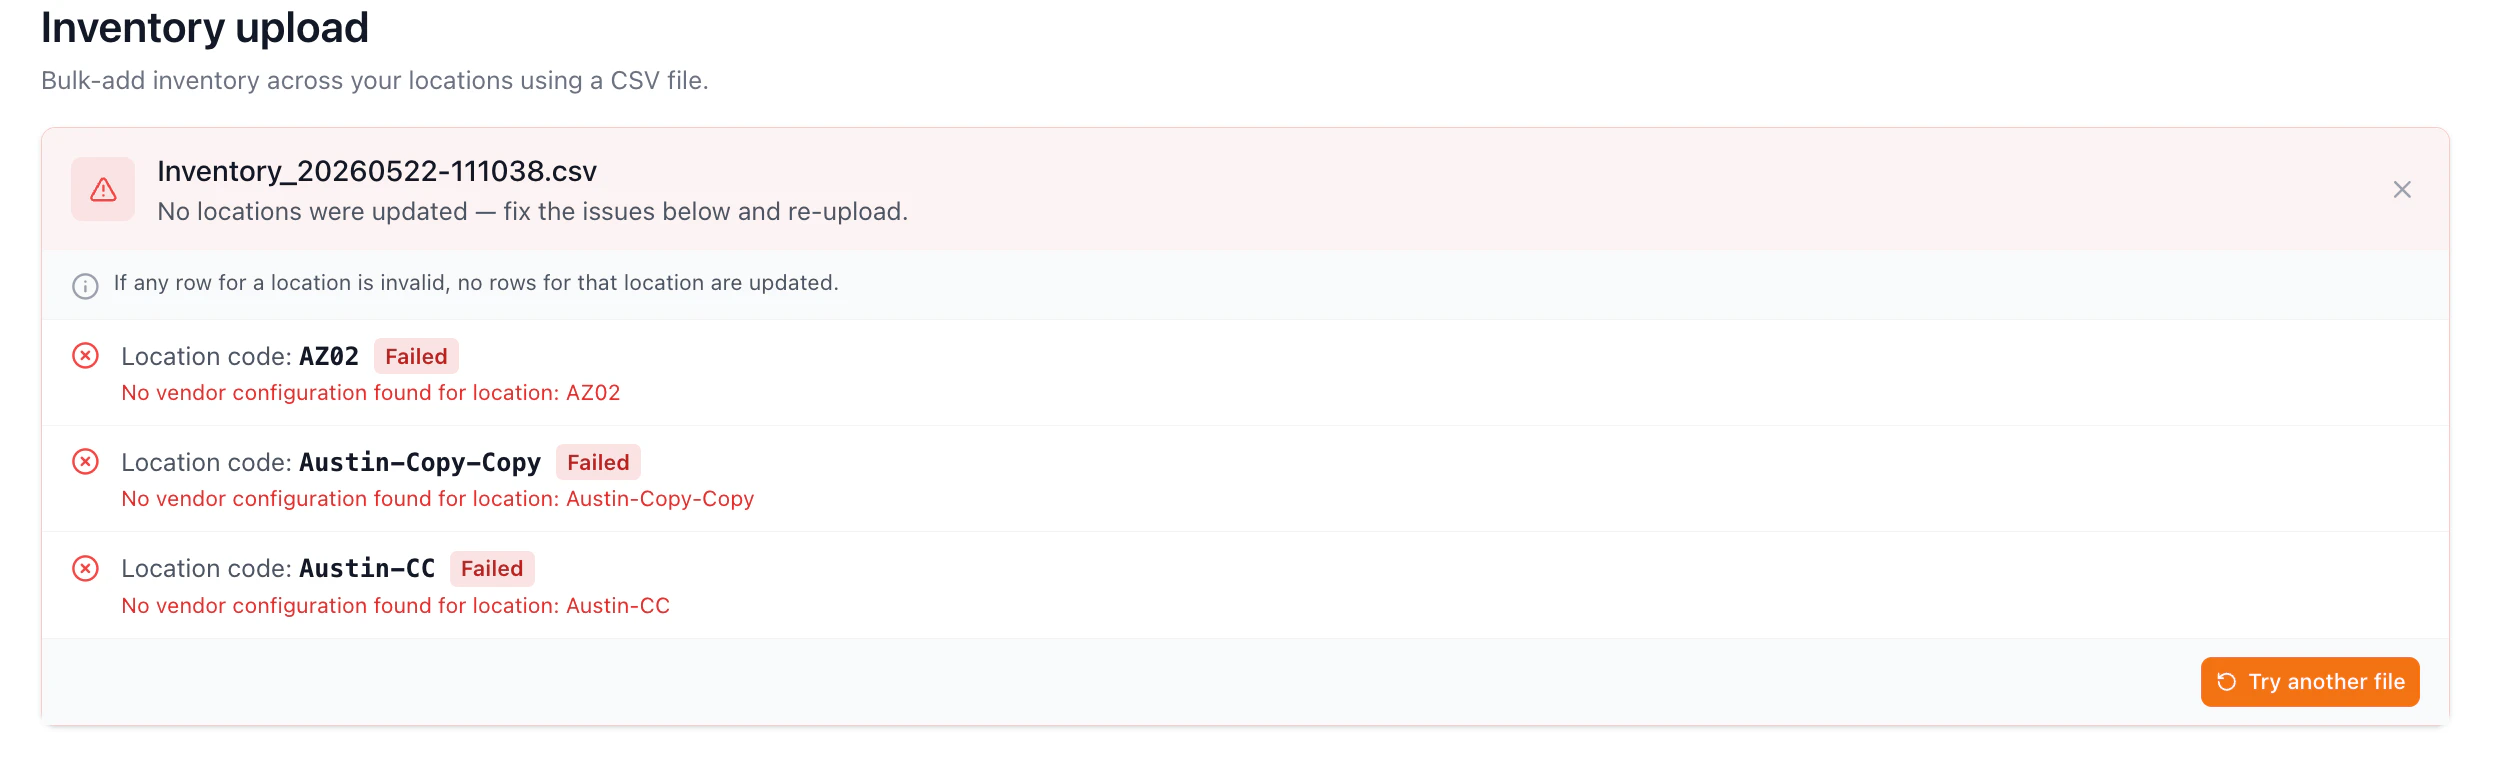
- A pass (✓) or fail (✗) icon
- The location code
- A Success or Failed status badge
- For passed: “Inventory updated”
- For failed: the specific reason returned by the backend
Note: Validation is atomic per location — if any row for a location is invalid, no rows for that location are updated.
Upload History
The Upload history table records every submitted upload with: file name, uploading user’s email, submission timestamp, and a status chip.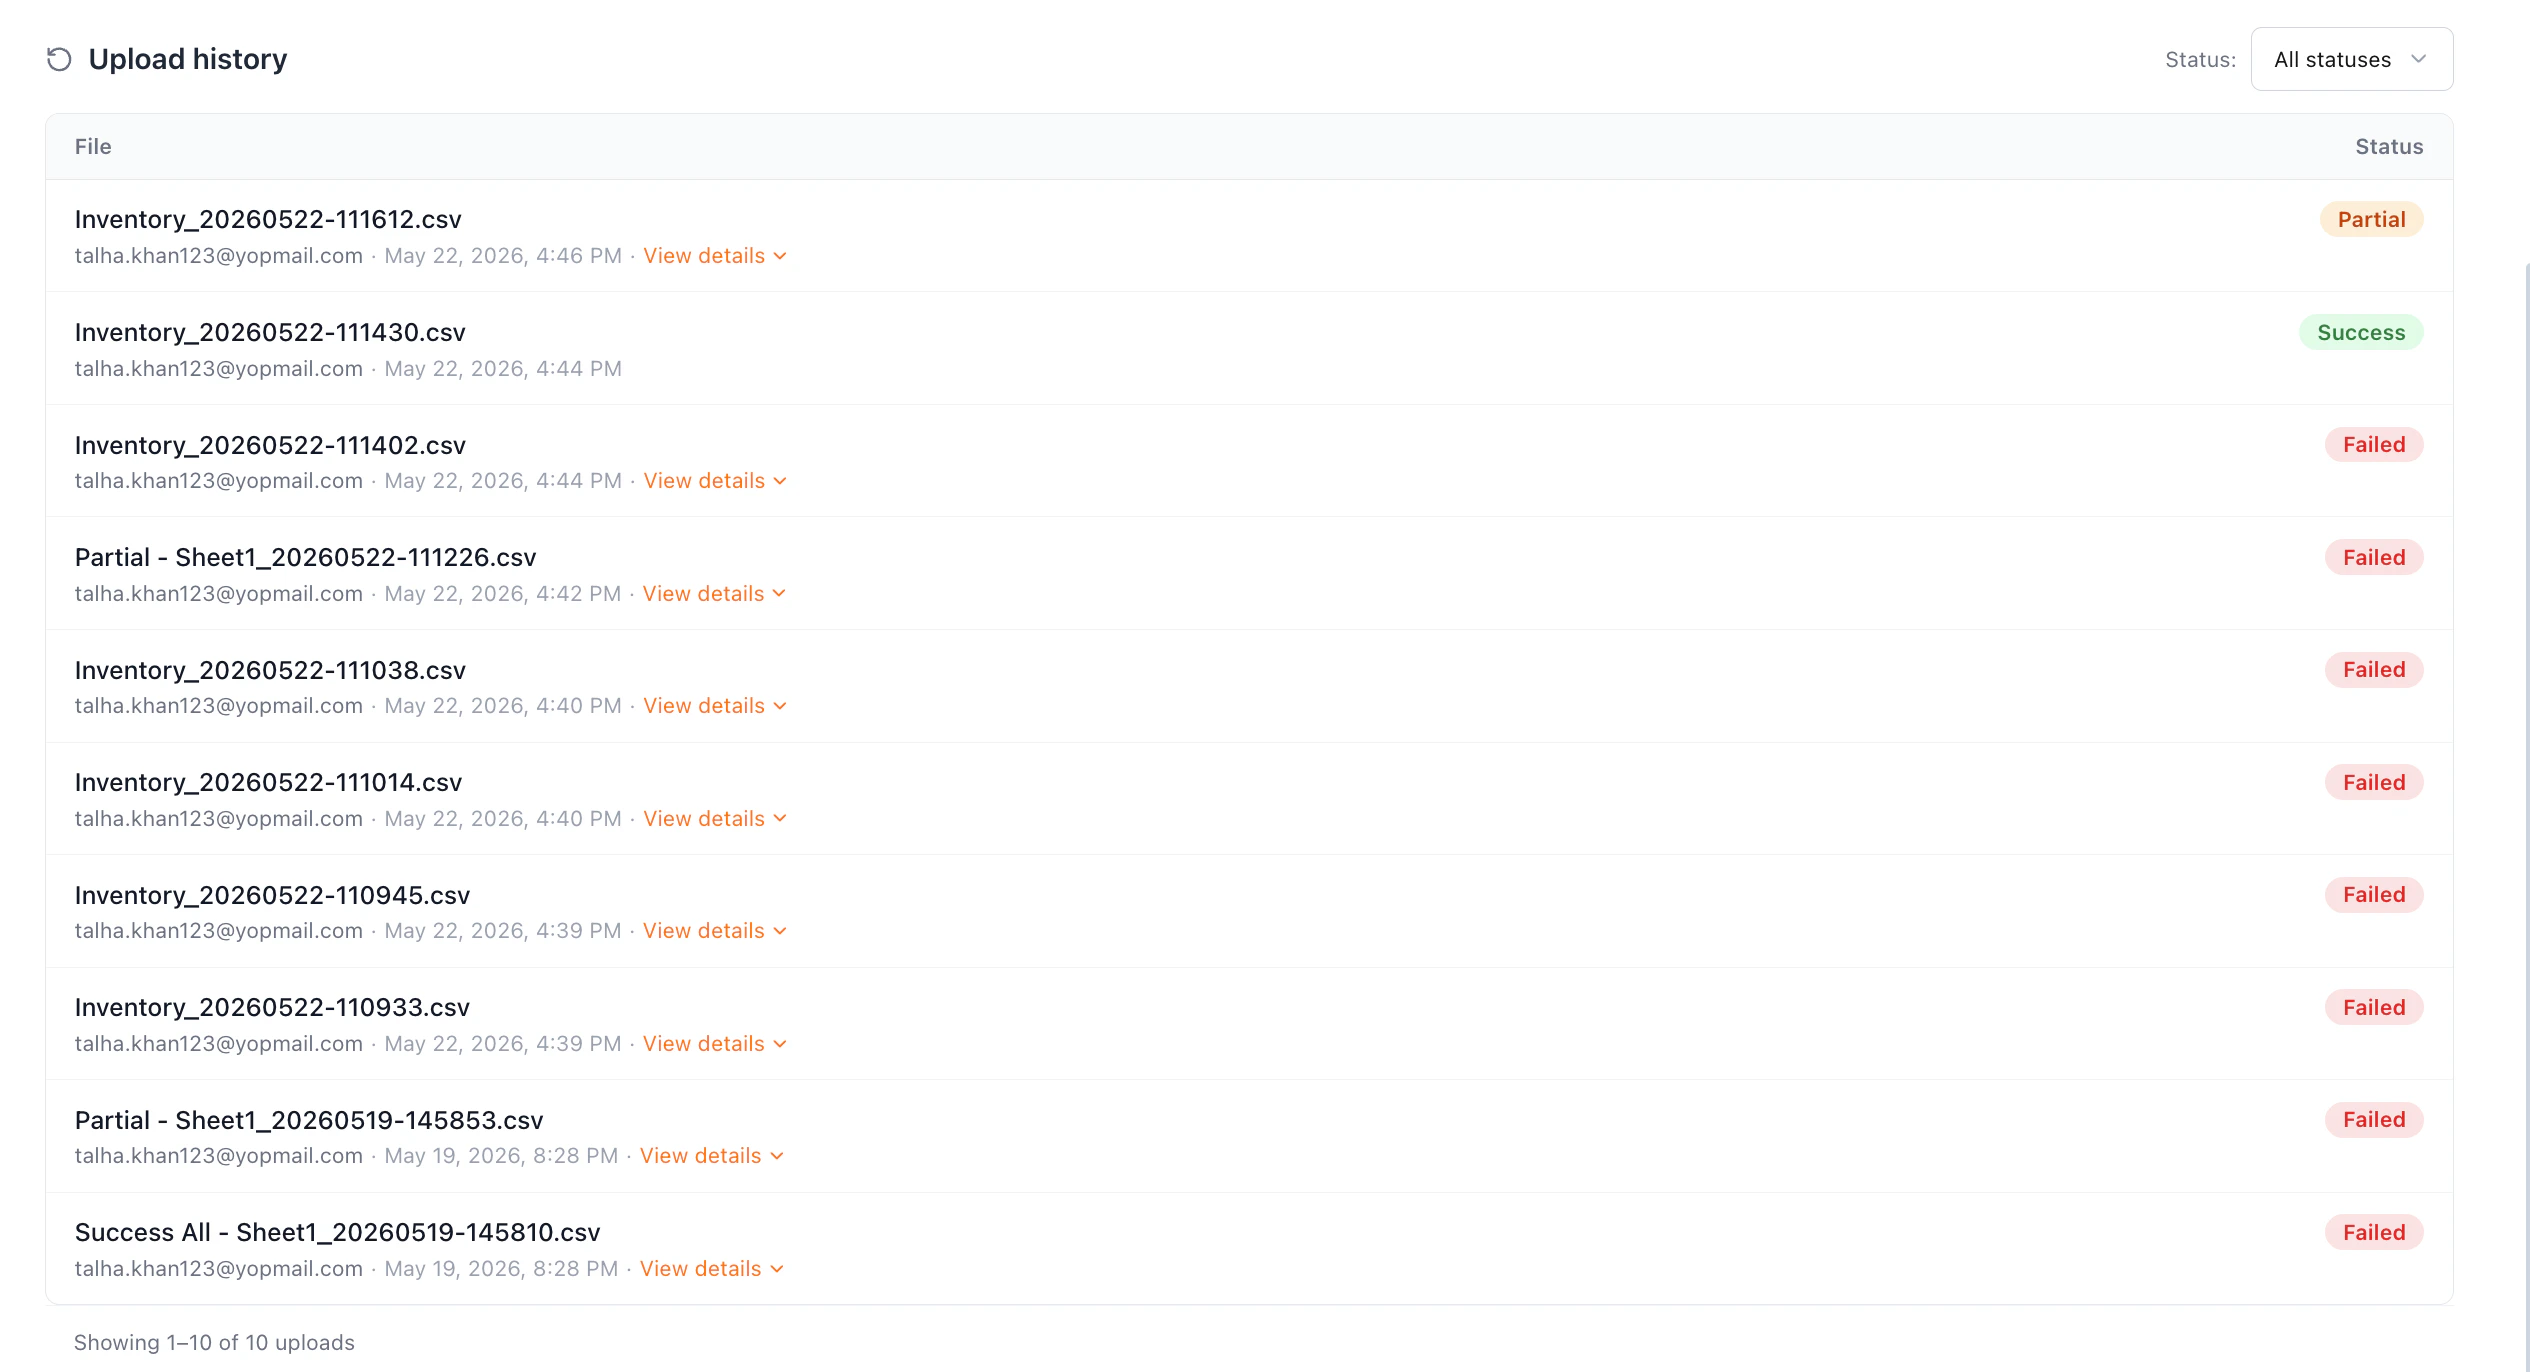
Filtering
Use the Status dropdown to the right of the heading to filter rows. Options: All statuses, Success, Partial, Failed. The footer shows a count of visible rows.
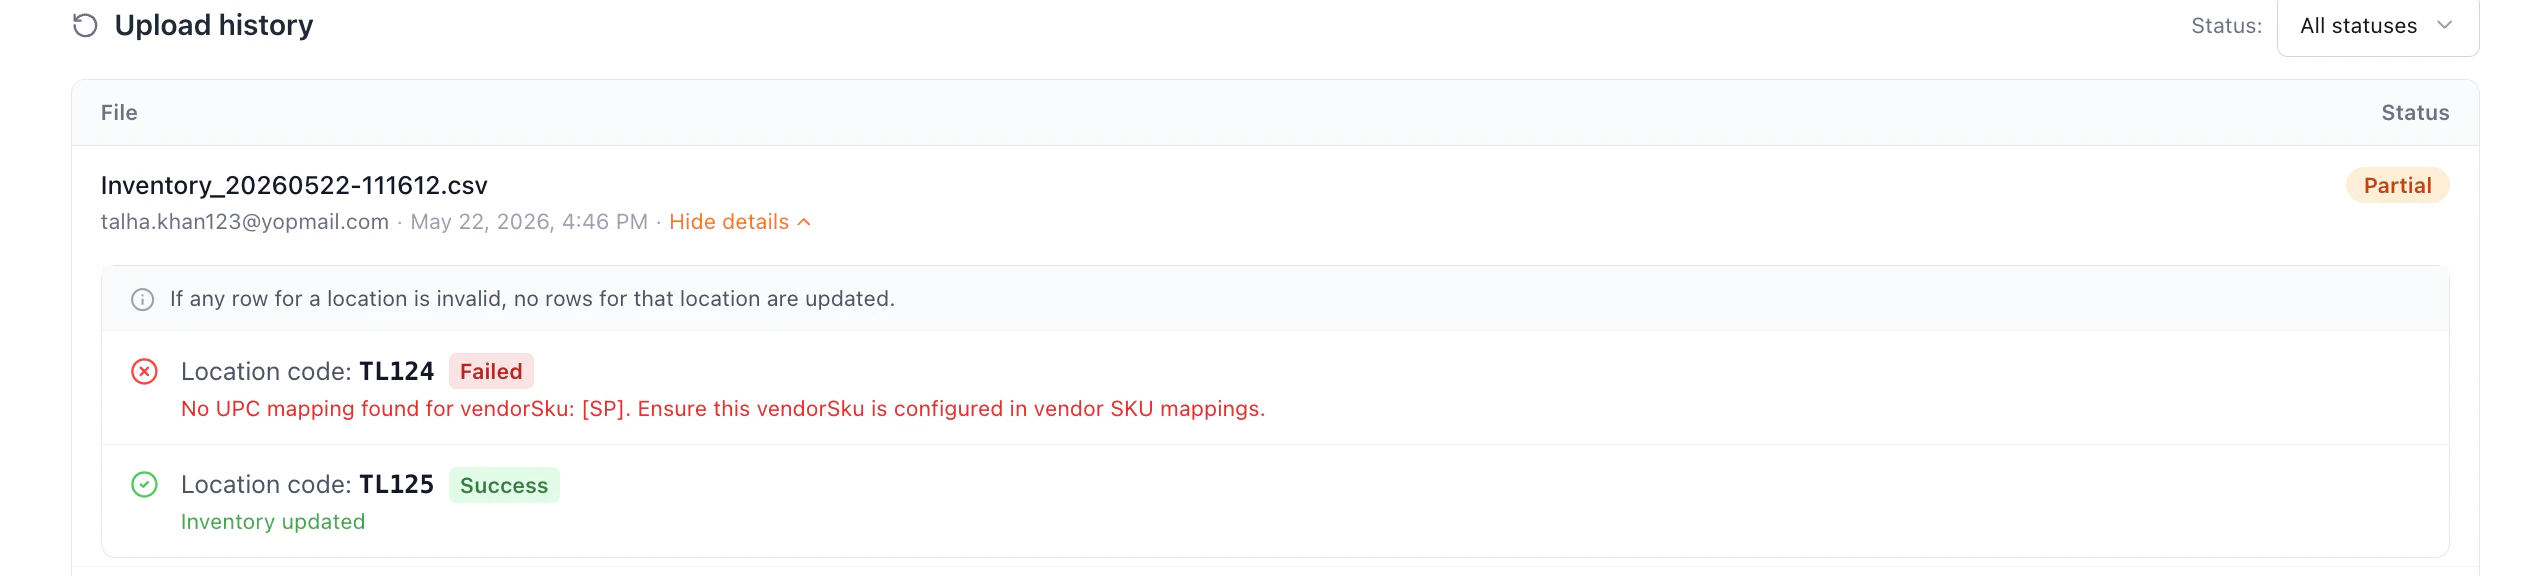
Viewing details for Partial or Failed uploads
Rows with a Partial or Failed status include a View details link. Clicking the row or the link expands a per-location breakdown directly beneath it — using the same location result format as the in-page result panel. Click Hide details to collapse.