

The Return Process
Create a Return
An update in which the the Fulfiller application has now adopted Admin UI’s create return flow. This ensures a consistent workflow across both applications and delivers additional features and functionality to better support return processes.Process a Return
An update in which the Admin UI’s return dashboard is embedded within the Fulfiller UI is now available, giving fulfillers access to more robust return management. The existing functions to create and process returns within the Fulfiller UI will be removed in 2026. Kibo will be upgrading all Fulfiller implementations to the new process. Please contact Kibo Support if you have any questions. An overview of each version is detailed below.Classic Fulfiller Returns
The following processes represent the existing Fulfiller behavior that is being deprecated in 2025 and replaced with the embedded Admin UI.Initiate a Return
To begin creating a return:- Go to Main > Fulfiller.
- Search for a shipment using the search function. This could be located by looking up the customer’s name, the shipment/order ID, or searching for shipments in the Fulfilled status.
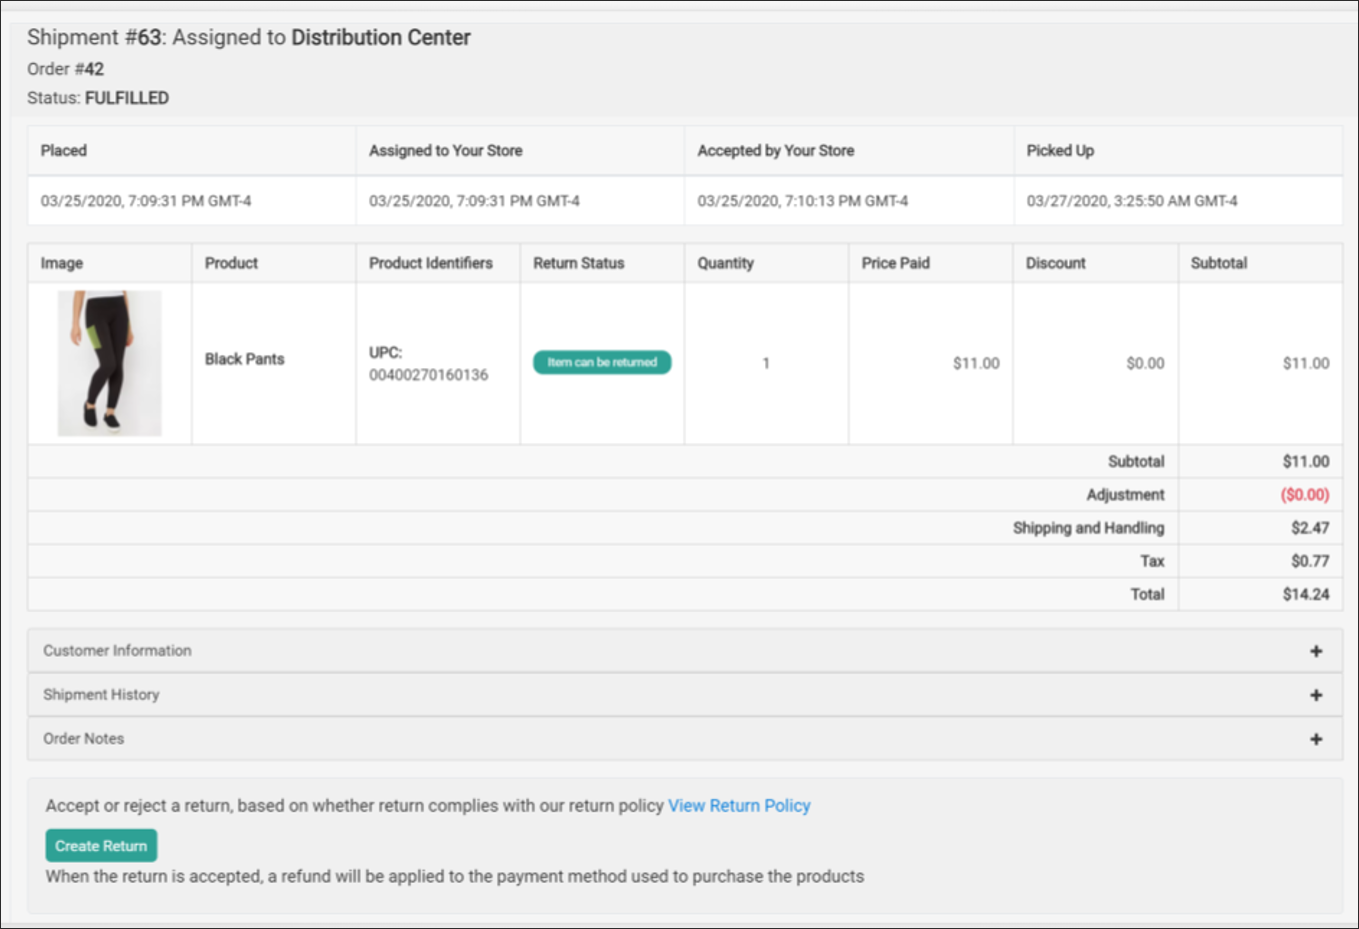
- The Return Status column in the item details will say “Item can be returned” if the item is eligible.
- If the desired item is eligible, click Create Return at the bottom of the shipment view. The Create Return modal will be displayed.
- Select which items from the shipment to return and the quantity of each item.
- Select the reason for the return from the drop-down list.
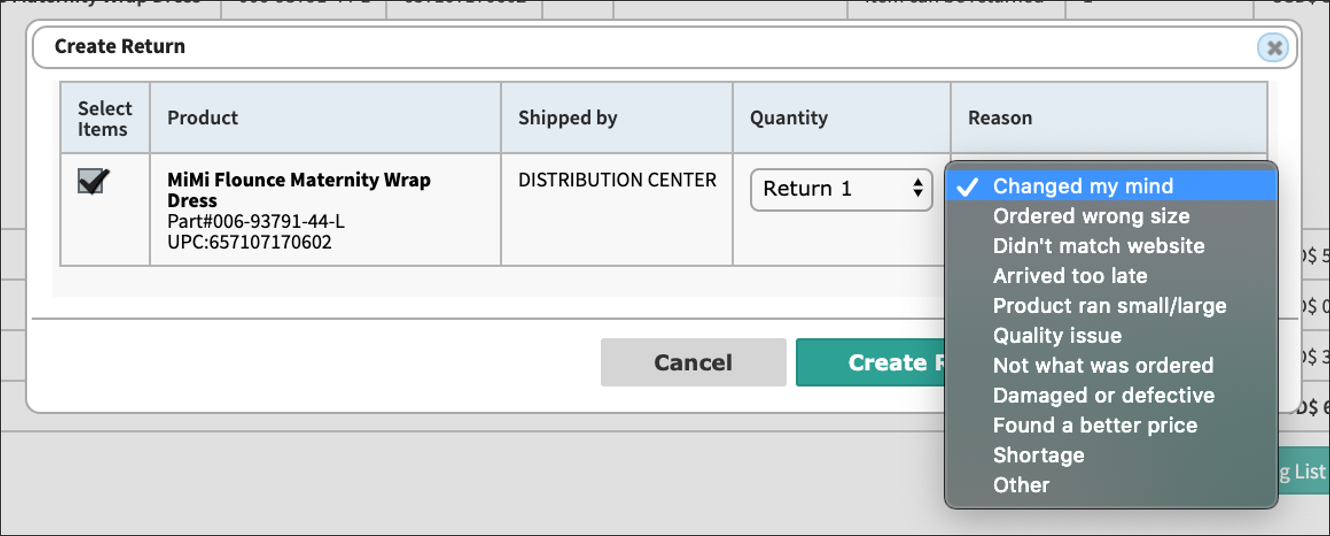
- Click Create Return for These Items to confirm the selections and open the return.
Process a Return
To process the return in the Fulfiller UI when the items are received:- Use the search bar to search for the shipment with the active return. The displayed shipment information will include a Return Status column with the associated status, Return ID, and External ID (if one was provided in the return data—this field is not included in the UI creation process described above).\
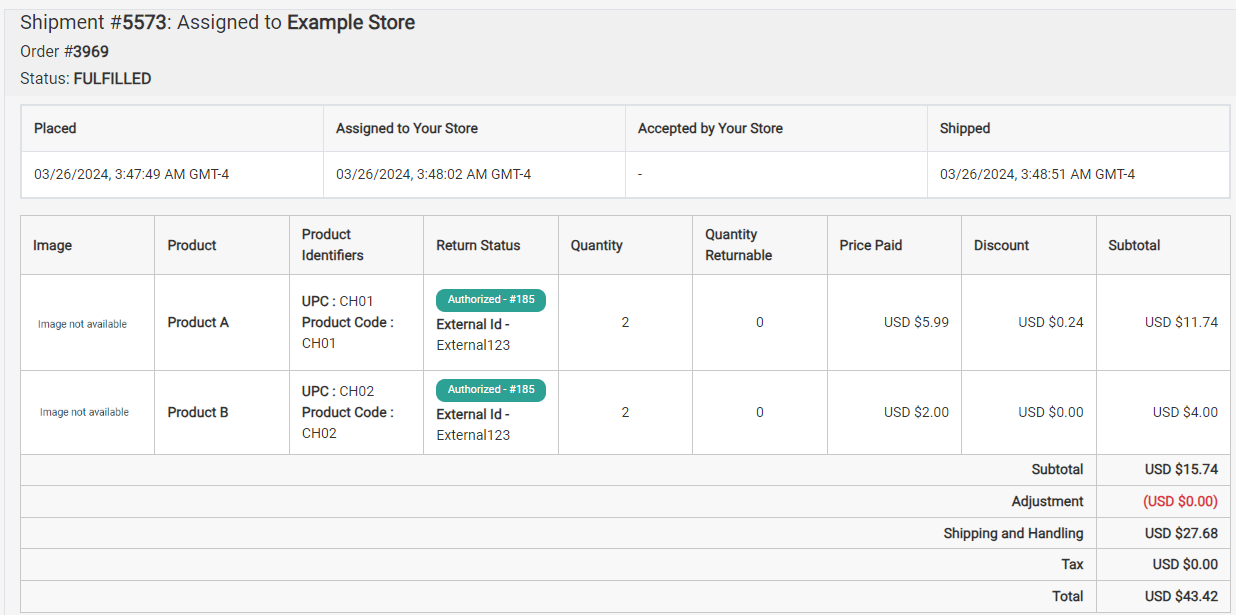
- Click Process Return at the bottom of the shipment view (in the same location where the user initially clicked Create Return). This will display a pop-up for you to confirm the return information and close the return.
- If you have not selected a location in the UI and/or are viewing shipments under All Stores, then you will be prompted to select the location where you are processing the return. This allows the inventory record to be restocked at the proper location.

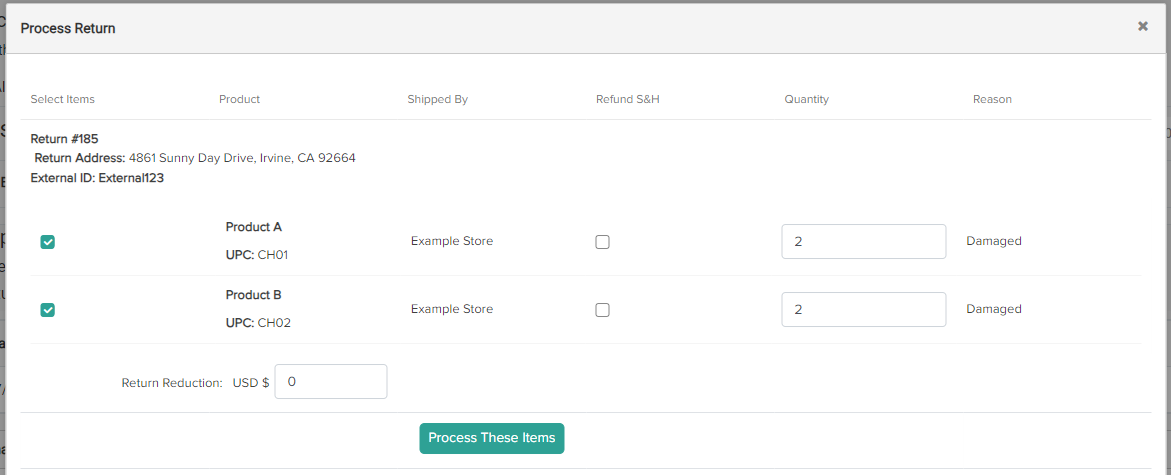
- In the Process Return pop-up, confirm the item quantity being accepted and reduce the amount that will refunded to the consumer’s original payment method if necessary (such as if there is a restocking fee). This is called the Refund Reduction. For instance, if an item’s cost was $10.99 and the refund reduction is $5.99, then the total refund for the customer will be $5.00.
- Click Process Items to close the return, and KCCP will both refund the customer and update the location inventory levels as needed.
Print Return Receipt
After the return is closed, you will be returned to the shipment details view. From here, there will be an option to print a return receipt. The return receipt lists the returned items and quantities, as well as provides an explanation of the refund that the customer can expect to receive.Updated Return UI
Once your implementation is upgraded, the navigation menu will display links for create and process returns.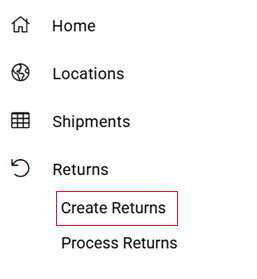
Create a Return
To create a return using the streamlined flow:- Navigate to Returns: Go to Main > Fulfiller > Returns > Create Return.
-
Search and Select Order: Search for the order you want to process a return for using the improved search functionality.

-
Select Returnable Items: Use the checkboxes on the right of the Returnable Items table to select the product(s) to return. You can create multiple returns for a single order as needed

- Select Return Reason: For each selected product, select the reason for the return using the Reported Issue drop-down menu. The default reasons that are available out-of-the-box are listed below, but you can customize your list of return reasons with an API Extension action.
- Damaged
- Defective
- Missing Parts
- Different Expectations
- Late
- No Longer Wanted
- Other
Type | Description |
Replace | Select this option if the shopper desires a replacement product. You can still provide a refund to the shopper under this option. |
Refund | Select this option if the shopper only desires a refund. You can still send a replacement if conditions change later in the process. |
- For each selected product, enter the Quantity to Return.
-
**Click Initiate Return
** -
Select a return location from the drop-down menu that appears
- The selected location will be where all returned items should be delivered by the customer
-
Choose Return Location: Create return location drop down in Fulfiller will only display locations that the Fulfiller has access to

- Create the Return: Click Create Return to finalize the return creation
Process a Return
The Process Return button will load the Admin UI returns dashboard in the Fulfiller UI as shown below. For more information about managing returns using this UI, refer to the Returns user guides.