Order Attributes
Order attributes apply a single value to the entire order. For example, you might want to track the season associated with an order, or capture a special instruction that applies to the whole order.Subscription Attributes
Similar to order attributes, subscription attributes can also be created by selecting Subscription under Apply Attribute To.Shipment Attributes
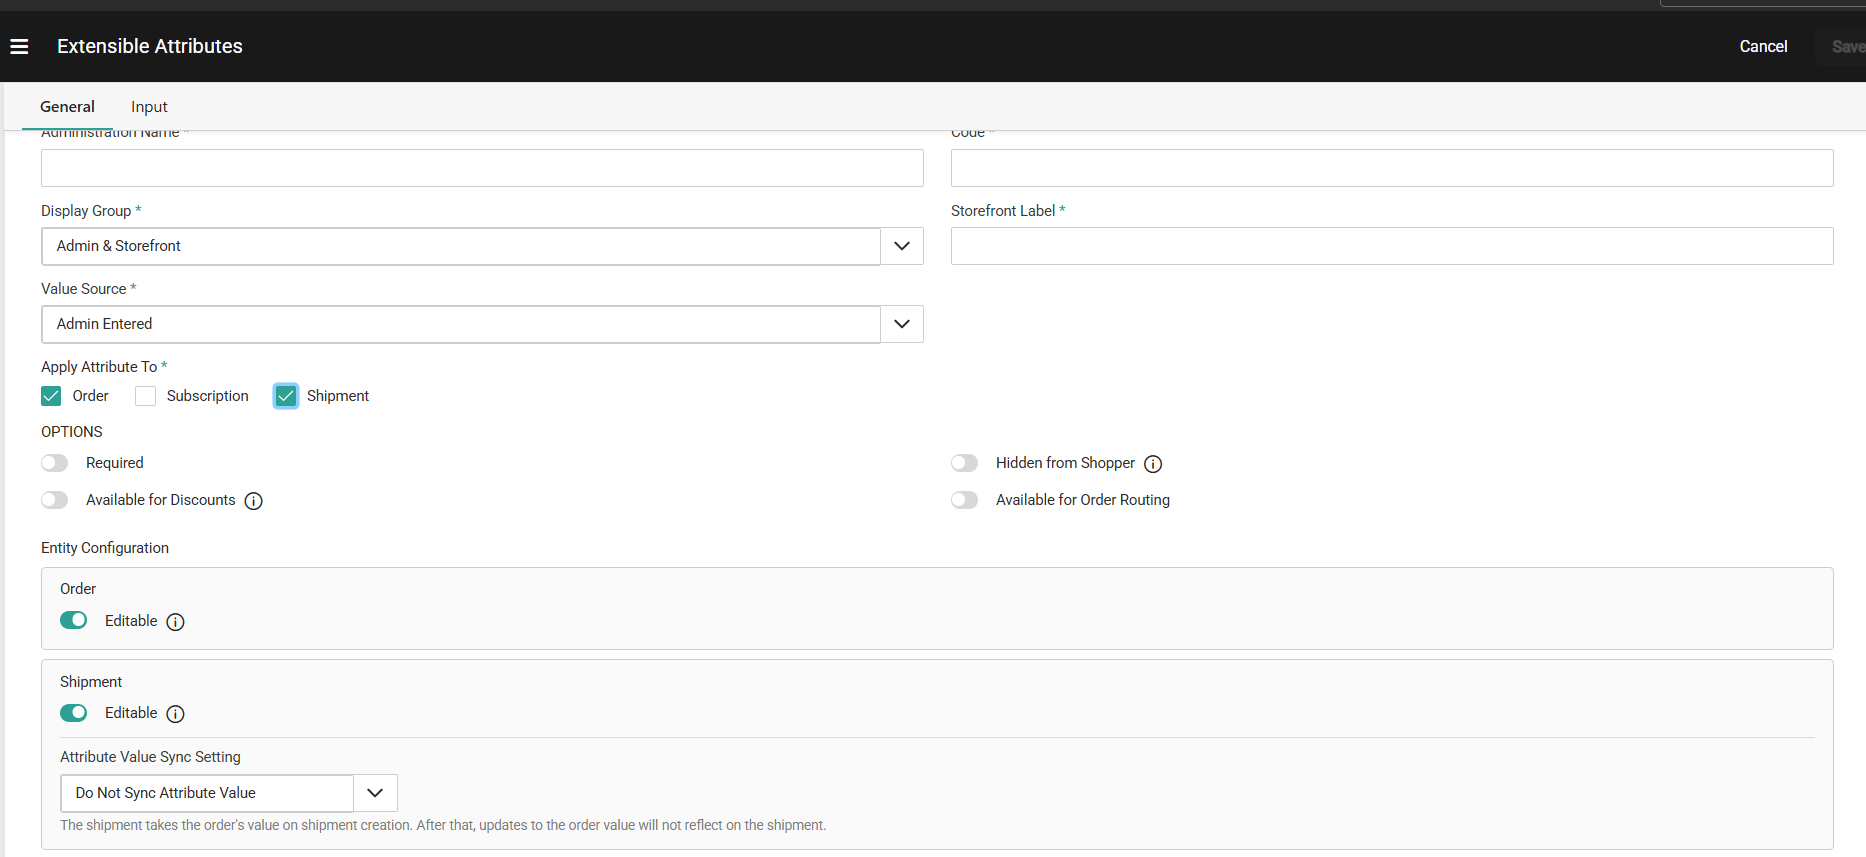
Fulfillment users view and populate shipment attribute values during the fulfillment workflow. Shipment attributes apply a single value to the entire shipment. For example, Handle with Care, Special Carrier Instructions, or Delivery Notes. When both Order and Shipment are selected under Apply Attribute To, the attribute is created for both the order and the shipment. The Attribute Value Sync Setting determines how the value flows between the order and the shipment. See the Attribute Value Sync Setting section below for details.Attributes Grid
All entity-level attributes are managed at System > Schema > Extensible Attributes. You can filter the data grid by entity type — Order, Subscription, or Shipment — and toggle columns on or off using the dropdown on the far right of the data grid headers. To edit an existing attribute or disable one that is currently enabled, click the attribute in the data grid to open its settings.Create an Attribute
- Go to System > Schema > Extensible Attribute
- Click Create New Extensible Attribute
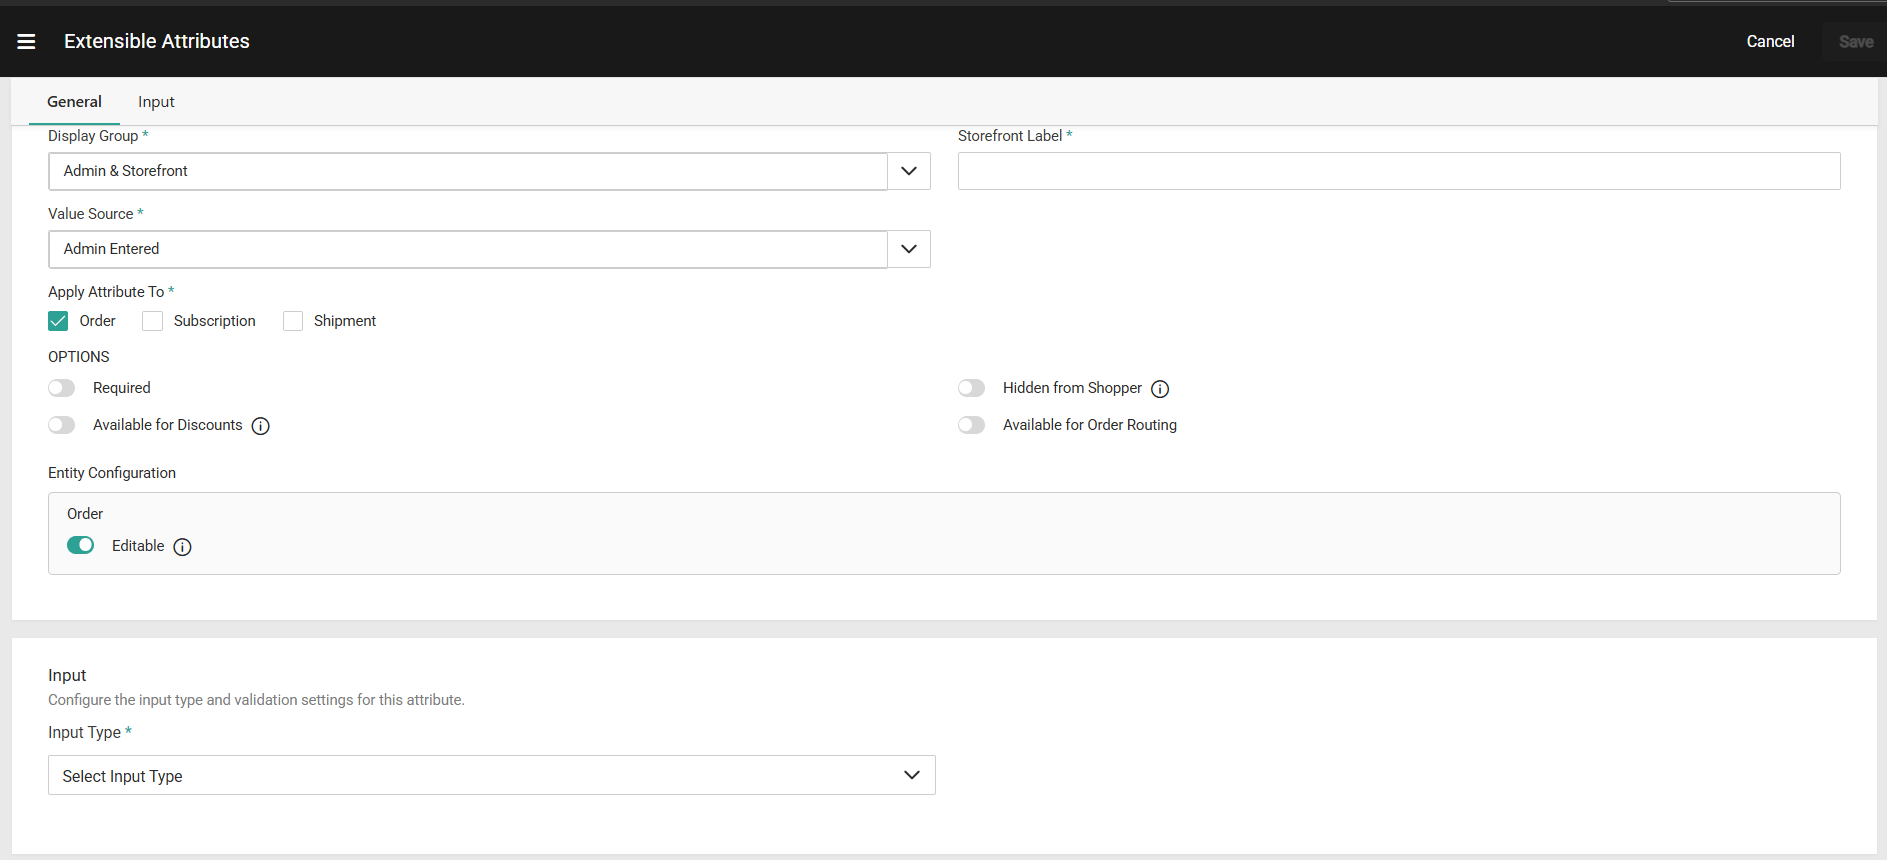
- In the General section, complete the following:
- Enter an Administration Name.
- Enter a Code.
- Use the Display Group drop-down menu to specify one of the following options.
- Admin Only: The attribute only displays in Admin.
If you select this option, you can only select Admin Entered for the Value Source. - Admin & Storefront: The attribute displays both in Admin and on the storefront.
- Admin Only: The attribute only displays in Admin.
- (If applicable) If you selected Admin & Storefront for the Display Group, provide a Storefront Label.
This is the label that shoppers will see for the attribute on the storefront. - Use the Value Source drop-down menu to specify one of the following options.
- Shopper Entered: The shopper can provide a value for the attribute.
- Admin or Shopper Entered: Either the Admin user or shopper can provide a value for the attribute.
- Admin Entered: The Admin user is the only one who can provide a value for the attribute.
- In the Apply Attribute To setting, select one or more entities this attribute applies to — Order, Subscription, or Shipment. You can create an attribute for a single entity or select multiple entities. This selection cannot be changed after the attribute is saved.
- Select a value under Options.
- Required: If enabled, the attribute requires a value on all orders before they can be submitted. For shipments, the attribute requires a value before the shipment can be fulfilled.
- Hidden from shopper: If enabled, the attribute is hidden on the storefront. The attribute can still have a value populated, but it is not displayed to shoppers.
For example, you might want to collect geo location, cookie information, special processing needs, and/or negotiated pricing, but you don’t want this information displayed to shoppers. - Available for Discounts: If enabled, the attribute will be available for use in discount conditions.
- Available as Order Routing Filter: If enabled, the attribute can be used as a filter condition within Order Routing.
- In the Input section, use the Input Type drop-down menu to specify the input type for the attribute. You can choose a list, text box, text area, yes/no, or date for the type. Depending on the input type and data type you select, other fields may display that require additional information
- Review the Entity Configuration section, which appears based on your Apply Attribute To selection. See the Entity Configuration section below for details.
- Click Save.
Entity Configuration
After selecting one or more entities under Apply Attribute To, a configuration block appears for each selected entity. The Editable setting is available across all entity types and controls whether an attribute value can be modified after it has been initially set. For order attributes, the Editable setting allows admin to edit the attribute value post order submit. Similarly, for shipment attributes, the Editable setting allows fulfiller user to edit the shipment attribute after the shipment has been created. When both Order and Shipment are selected under Apply Attribute To, an additional setting — Attribute Value Sync Setting — appears within the Shipment section. The Attribute Value Sync Setting determines how the value flows from the order to the shipment. See the Attribute Value Sync Setting section below for details.