

Note: Kibo AI is enabled per tenant and is not available to everyone by default. Contact Kibo Customer Support to have it enabled on your tenant before you begin.
How Kibo AI Works
Kibo AI is designed to keep you in control of every change it makes.- You stay in the loop. For any task that changes data, Kibo AI fills in the matching Kibo Admin screen and stops. You review the change and click Save. Kibo AI does not save on your behalf.
- Read-only where it should be. Tasks that explain a decision or report on your business are read-only and never change data.
- Your model, your key, your data. Kibo AI runs on model credentials you provide (Bring Your Own Model). Your API key is stored securely and is never shown again after you save it, and your requests run against your own provider account.
- You control spend. Because Kibo AI uses your provider account, you set monthly token and image limits per model to cap usage.
Prerequisites
Before you can use Kibo AI, make sure the following are in place:- Kibo AI is enabled on your tenant by Kibo Customer Support.
- You have administrator access to System → Settings → Agent Models.
- You have at least one model provider account and an API key. Supported providers are OpenAI, Anthropic, Google, and Other (a custom, compatible endpoint).
- You know which models you want to use for each slot (see Model Slots).
Note: Bring Your Own Model (BYOM) must be configured before any agentic capability will work. If no model is connected, Kibo AI shows a setup screen that links you back to the Agent Models page.
Configure Agent Models (Bring Your Own Model)
Kibo AI runs on models you provide. In the Agent Models screen you add one or more provider credentials, then assign a credential to each model slot. Bring Your Own Model (BYOM) means you connect your own provider API key rather than using a model bundled by Kibo.Open the Agent Models screen
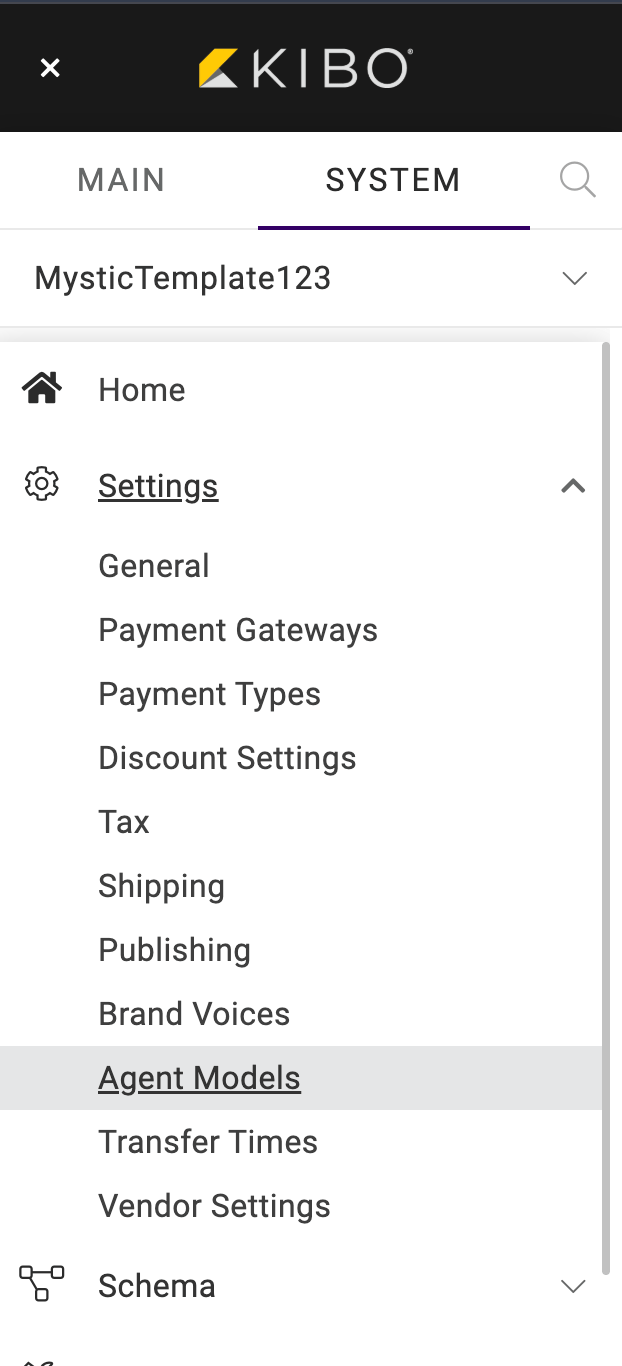
- In the left-hand menu, go to System → Settings → Agent Models.
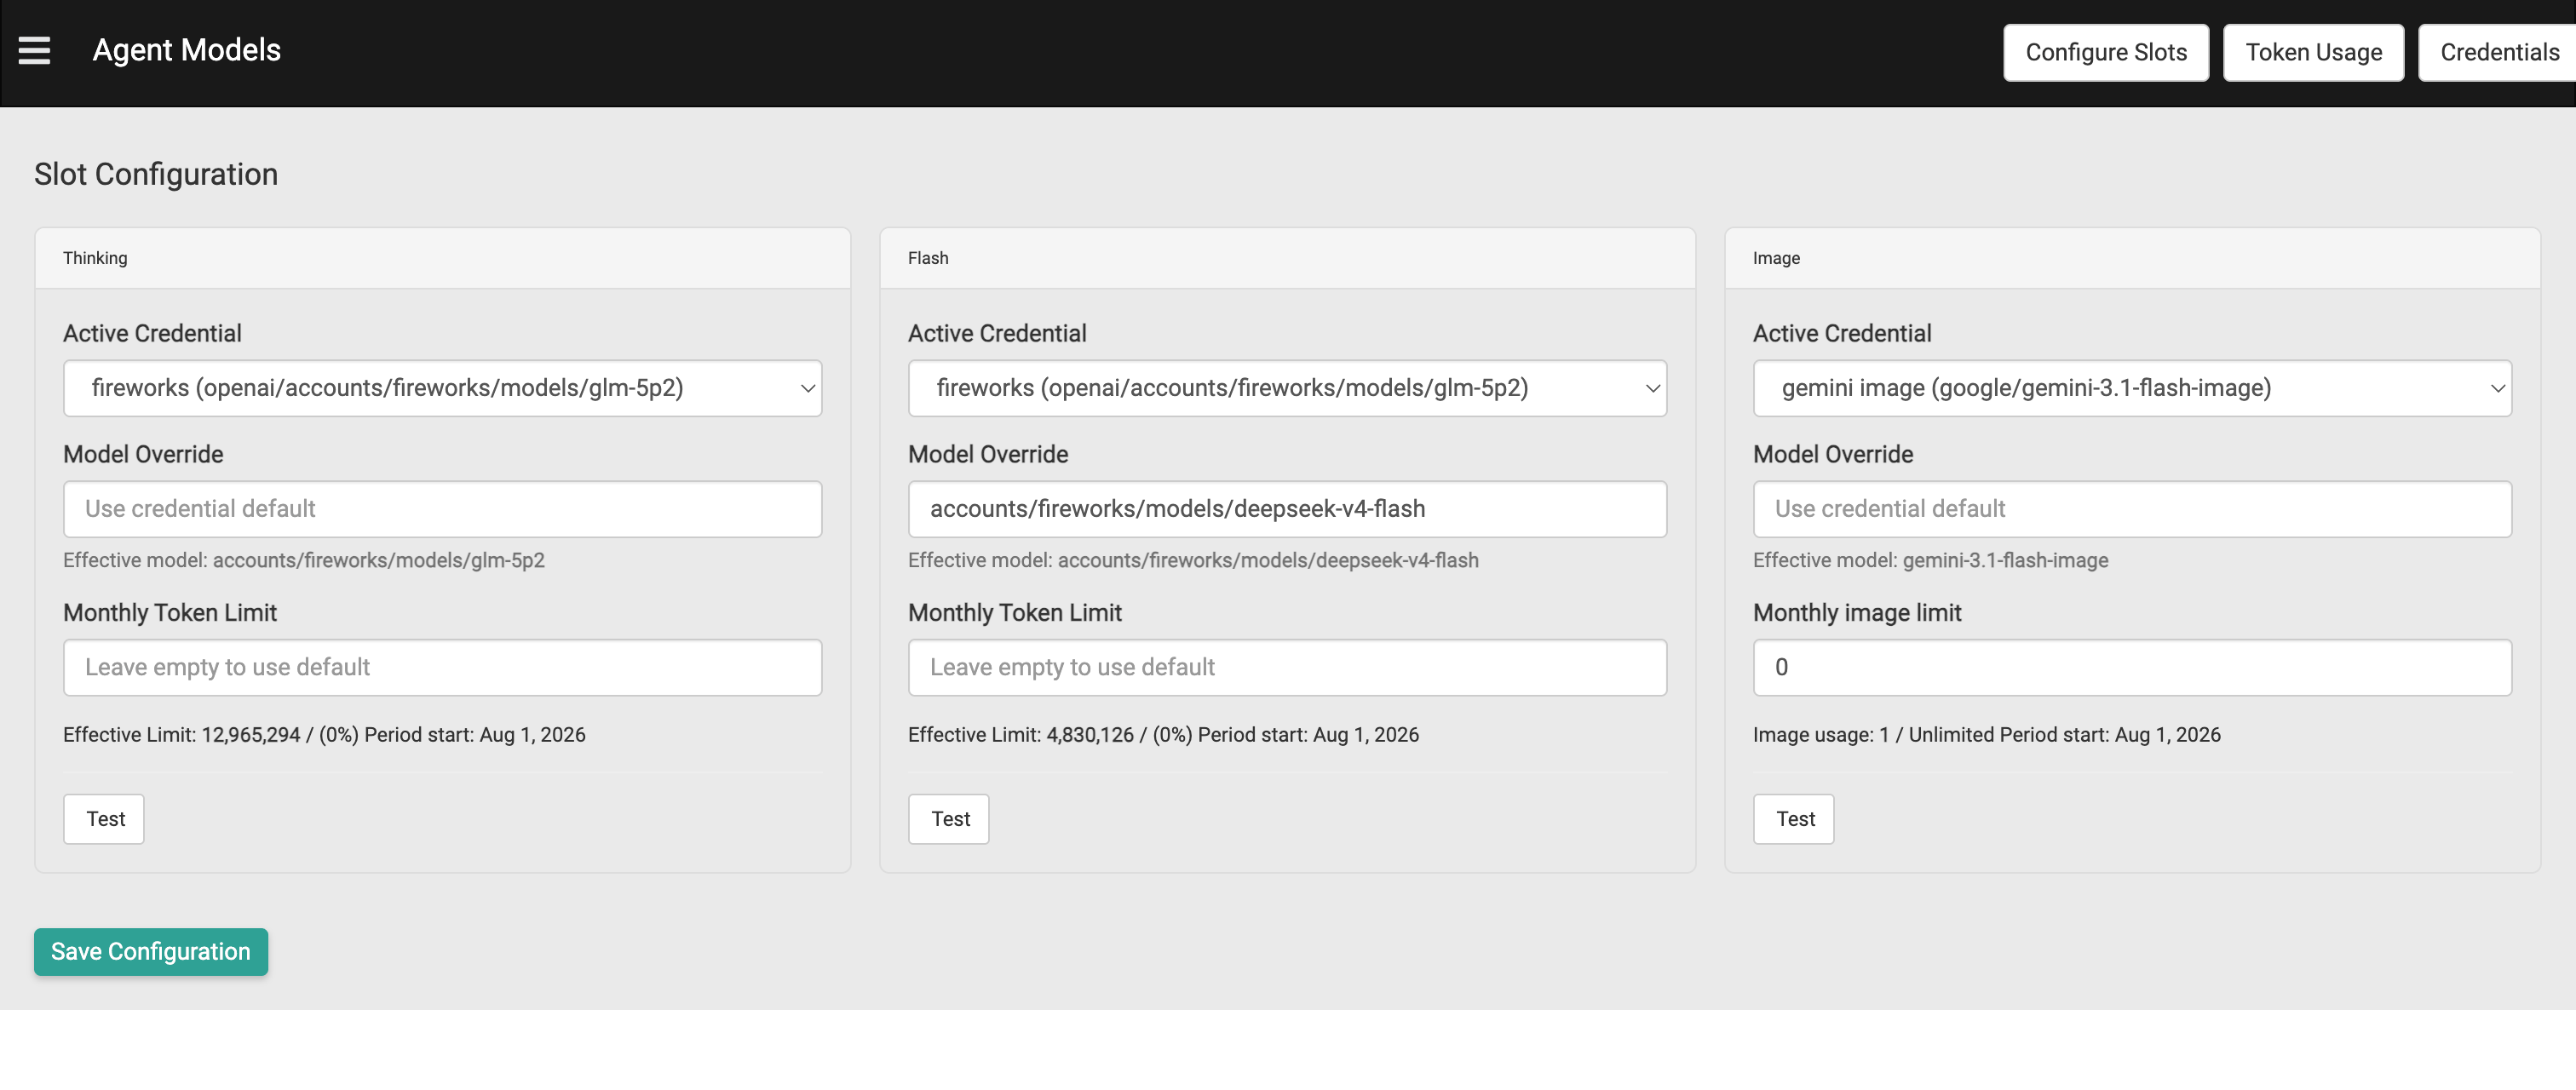
- The screen opens on Slot Configuration. Across the top right you have Configure Slots, Token Usage, and Credentials.
Add a credential
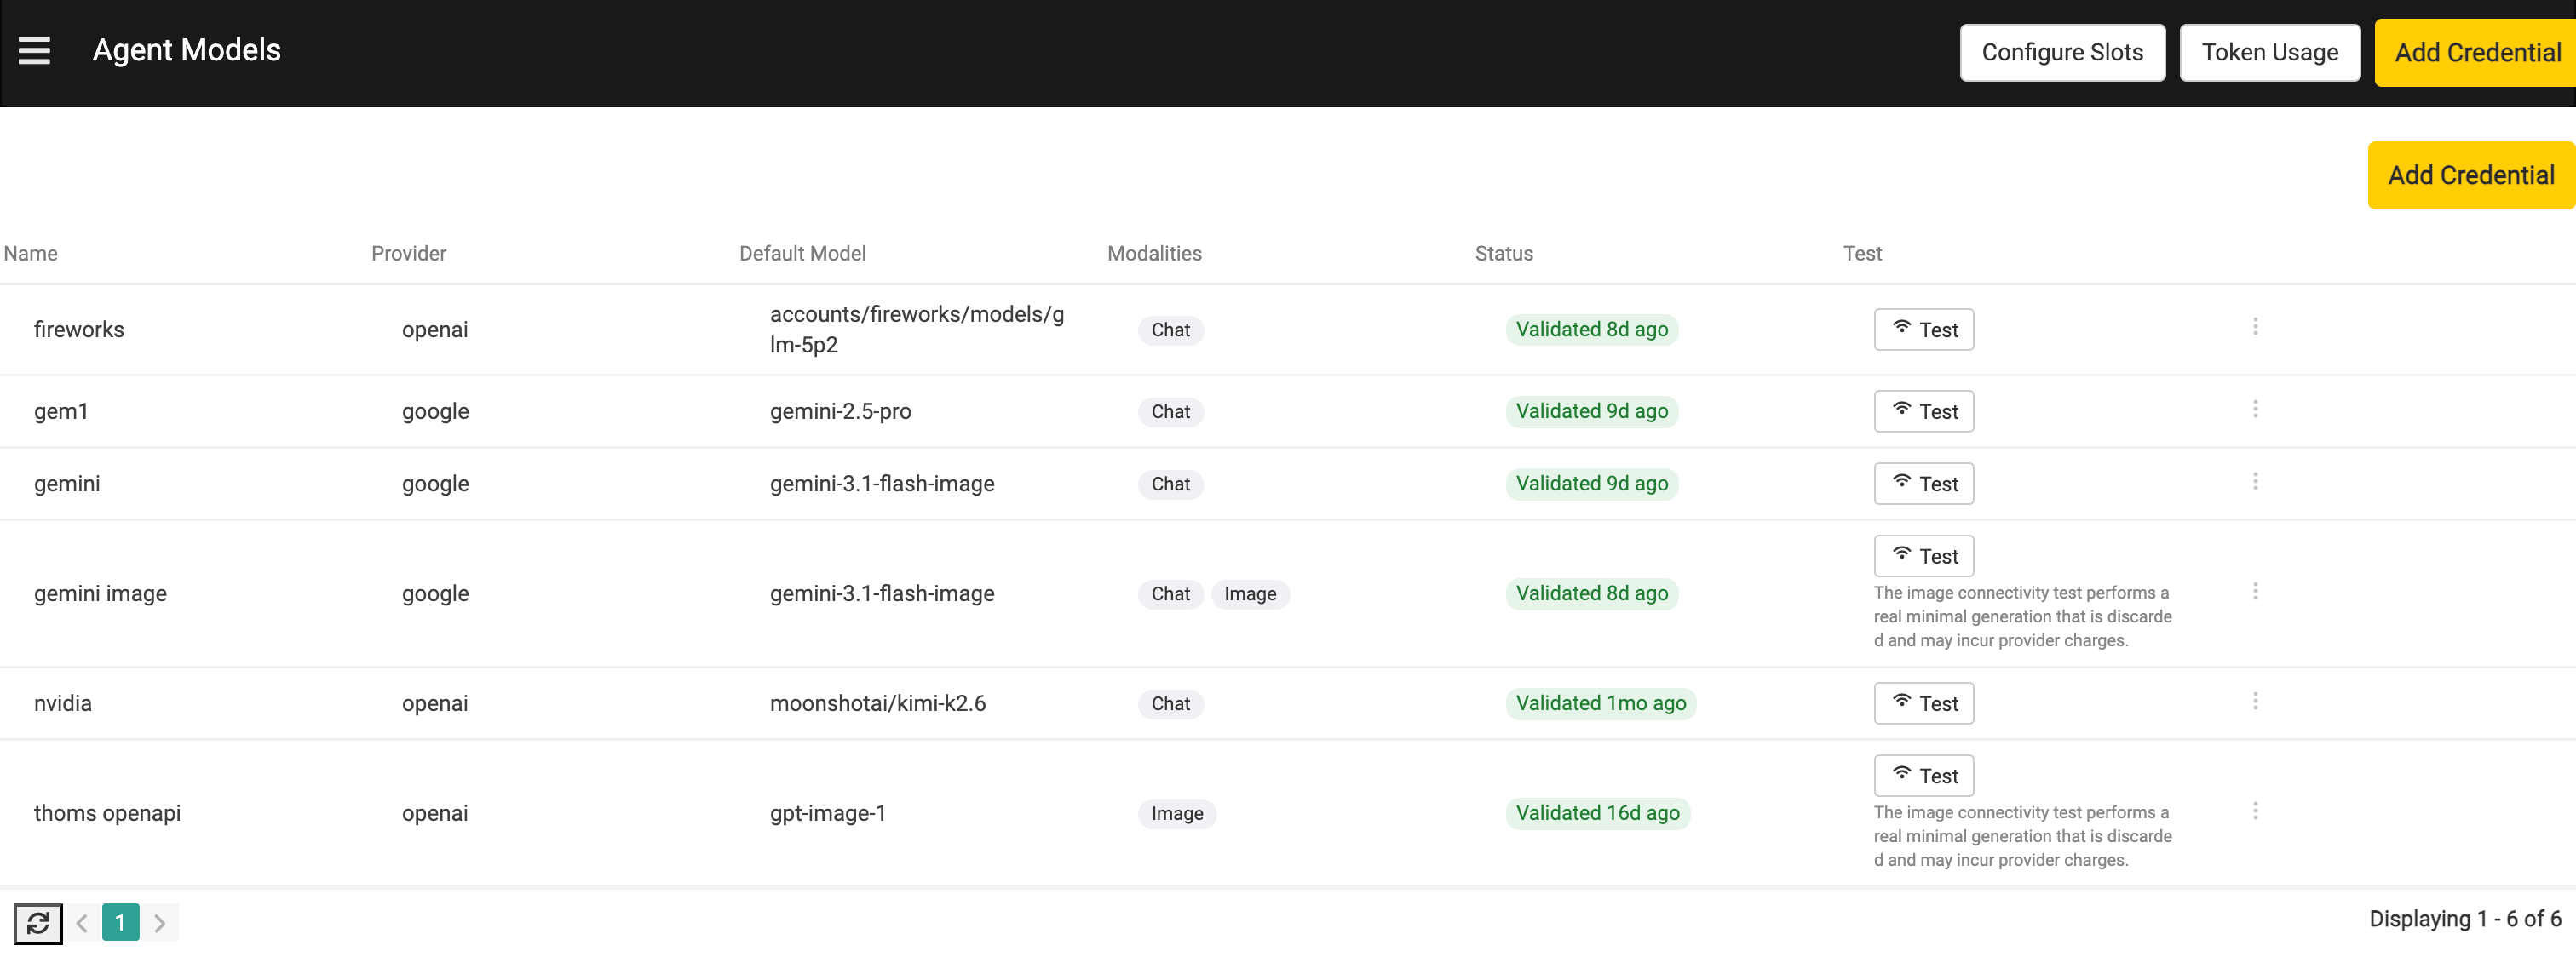
A credential stores the connection details for one model from one provider. Add a credential before you can assign it to a slot.- Click Credentials to view the list of credentials already added, then click Add Credential.
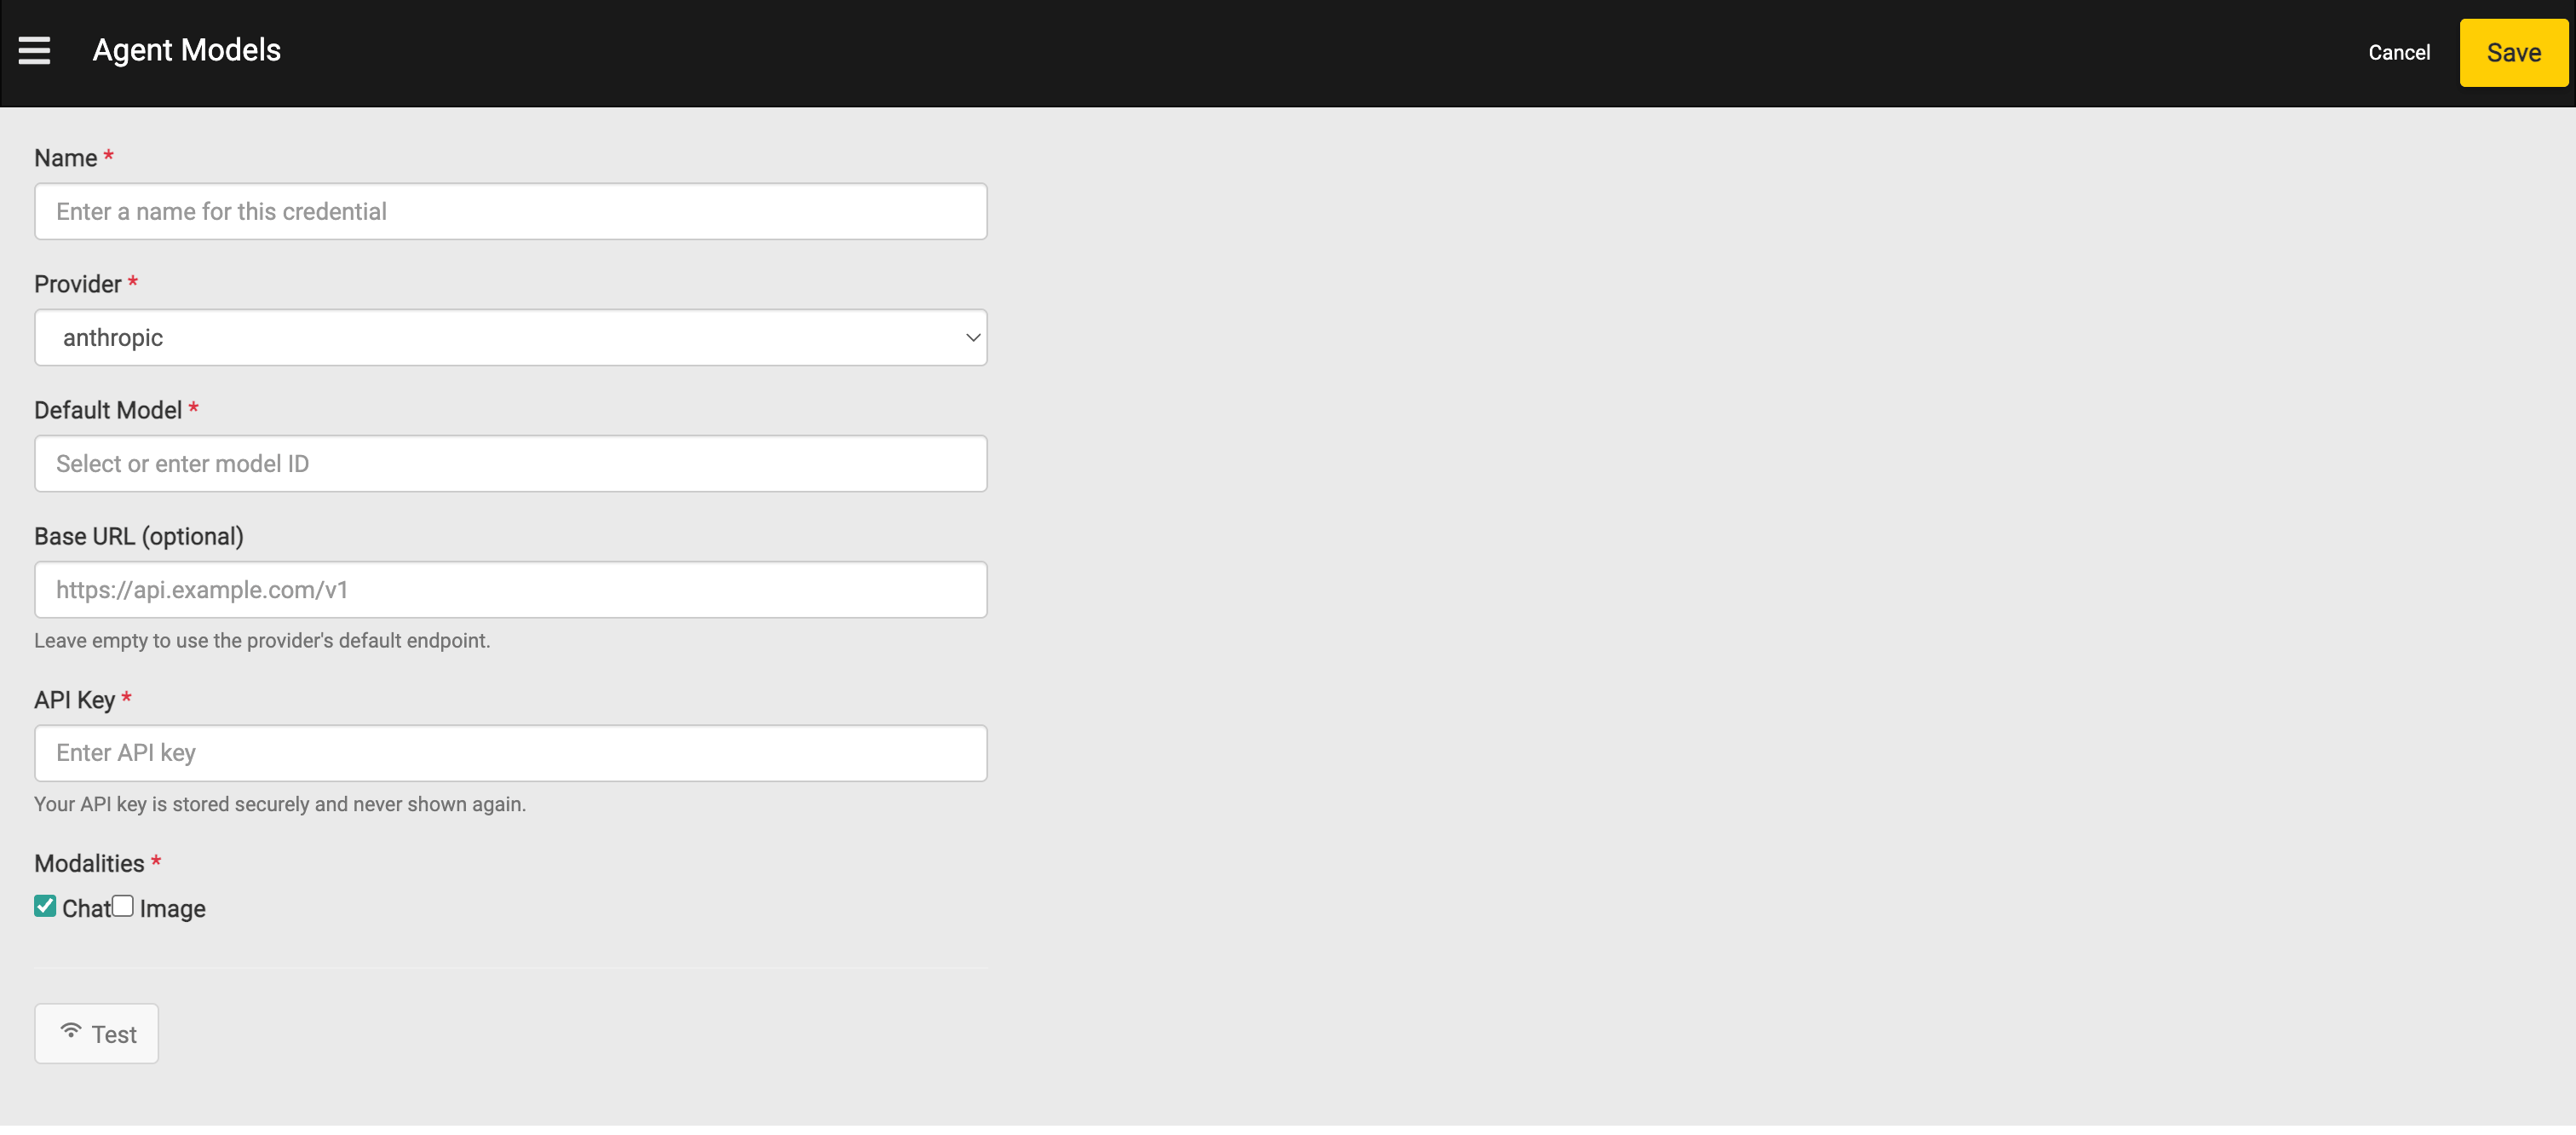
- In the Name field, enter a name to identify this credential.
- Select the Provider from the dropdown. The available providers are OpenAI, Anthropic, Google, and Other.
- In the Default Model field, select or enter the model ID for this credential.
- (Optional) In the Base URL field, enter a custom endpoint. Leave it empty to use the provider’s default endpoint.
- In the API Key field, enter your provider API key.
Note: Your API key is stored securely and is never shown again after you save it.
- Under Modalities, select Chat, Image, or both, depending on what the model supports.
- Click Test to confirm the credential connects successfully.
- Click Save.
Configure slots
Slots tell Kibo AI which credential to use for each type of work. Assign an active credential to each slot you want to use.- Open Slot Configuration (the default view of the Agent Models screen). You see three slots: Thinking, Flash, and Image.
- For each slot, select an Active Credential from the dropdown.
- (Optional) In the Model Override field, enter a specific model ID to use instead of the credential’s default. Leave it empty to use the credential default. The Effective model shown below the field confirms which model will run.
- (Optional) For the Thinking and Flash slots, set a Monthly Token Limit. For the Image slot, set a Monthly Image Limit. Leave the field empty to use the default. The Effective Limit and period start date are shown below the field.
- Click Test on a slot to confirm the assigned model responds.
- Click Save Configuration.
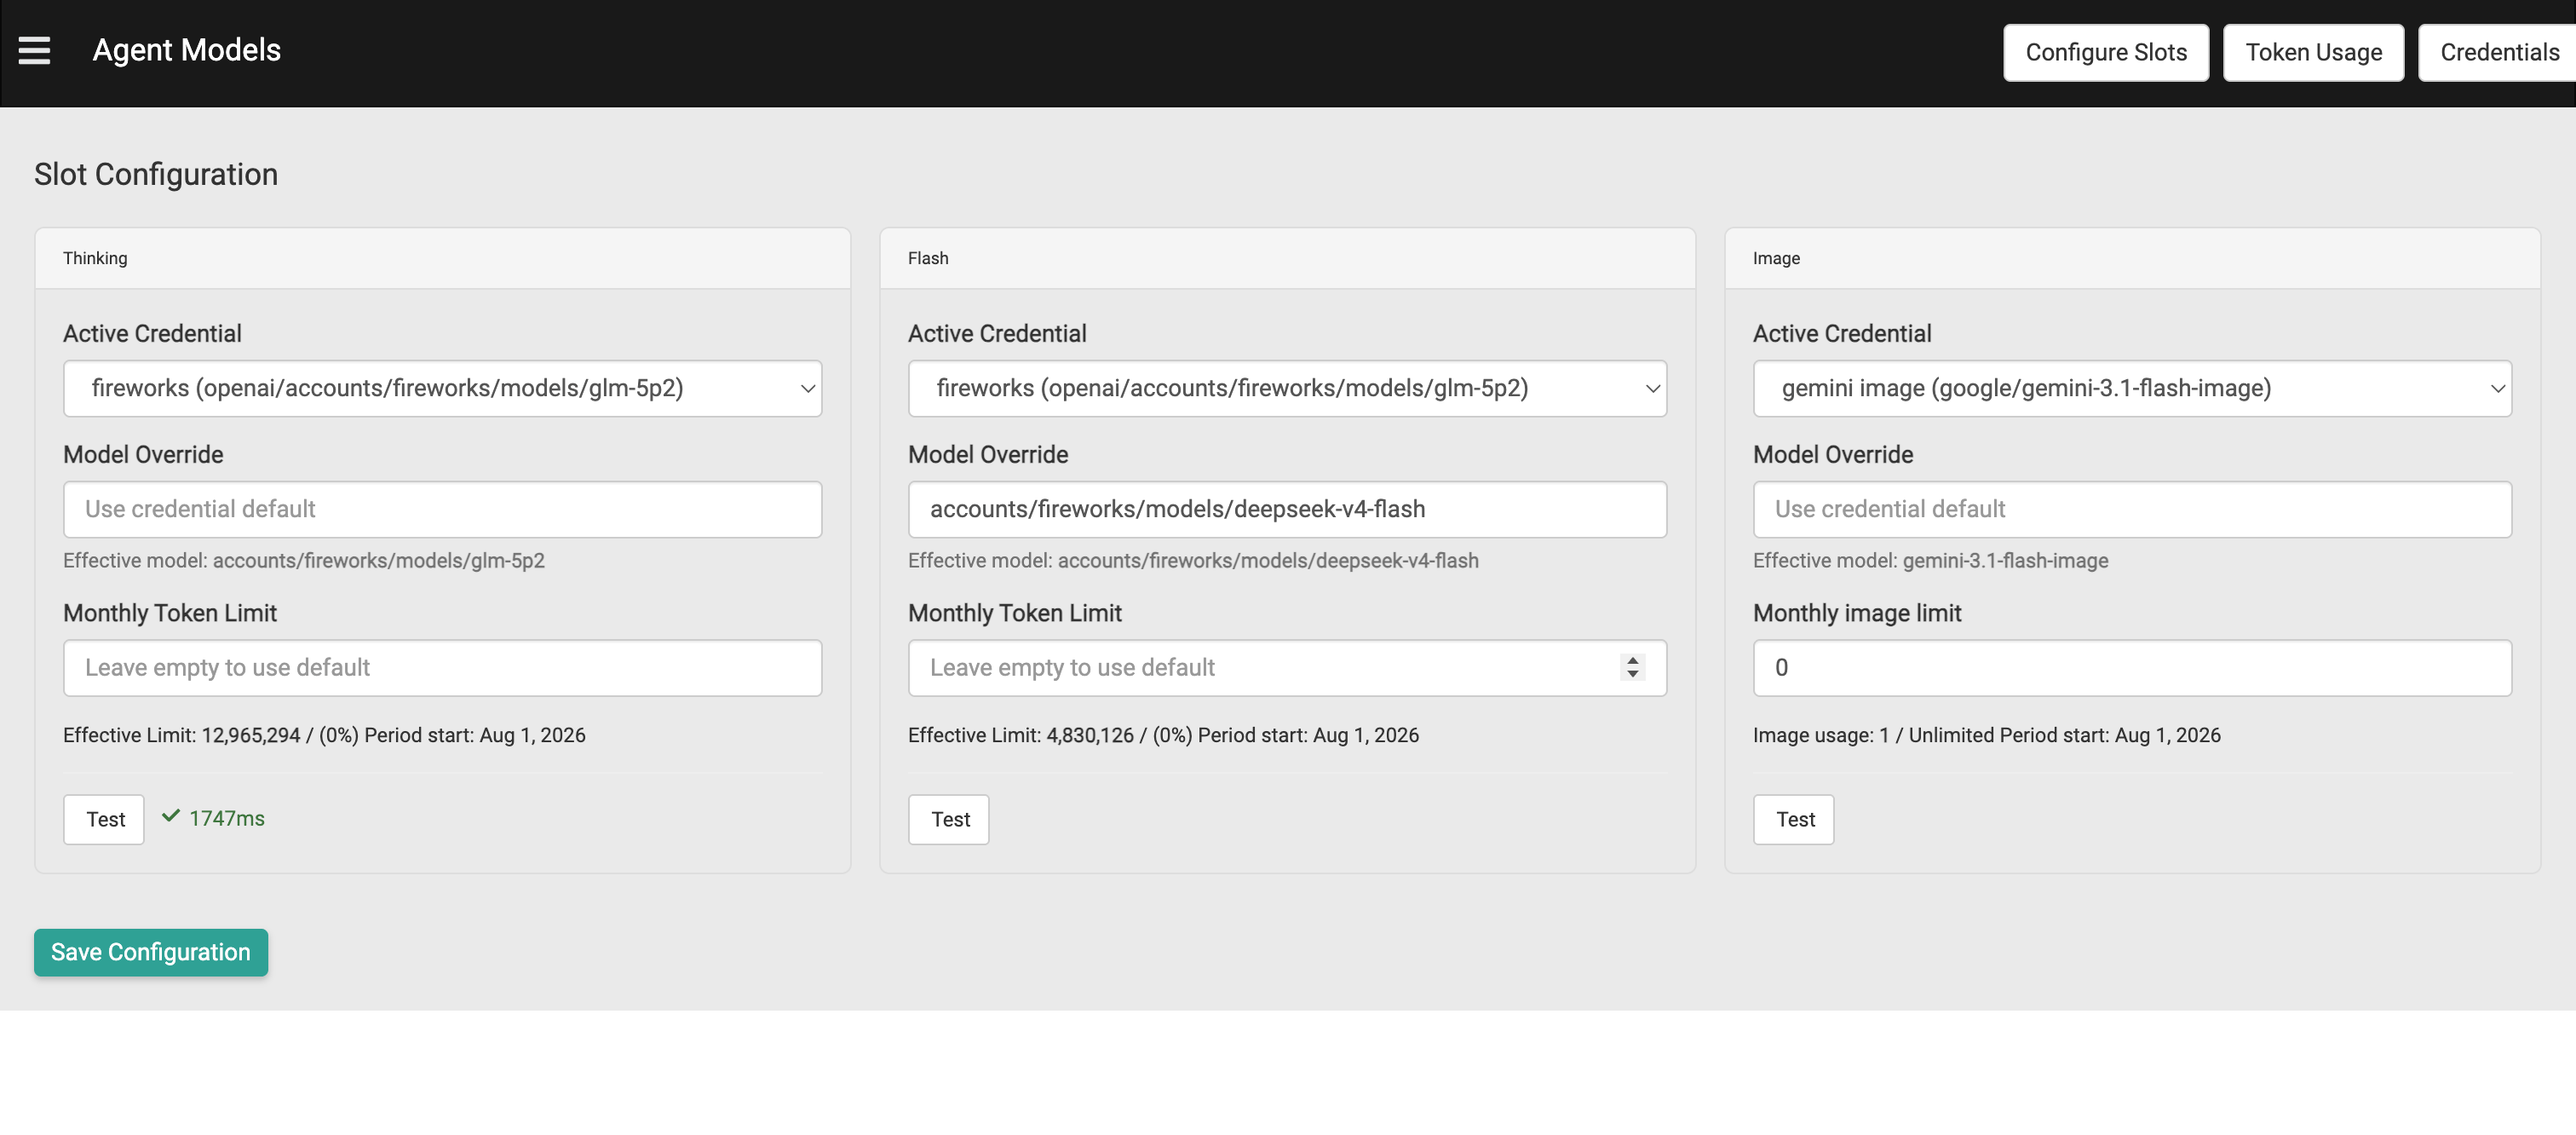
Kibo AI runs on your own provider account, so usage is billed by your provider. Use Monthly Token Limit and Monthly Image Limit to cap how much each slot can consume in a period.
Configure Brand Voices
Brand voices define the tone and style Kibo AI uses when it generates content. When you ask Kibo AI to write product or category content, it applies an active brand voice so the wording matches how your brand speaks. Setting up brand voices is optional, but recommended before you use content-generation tasks.Open the Brand Voices screen
- In the left-hand menu, go to System → Settings → Brand Voices.
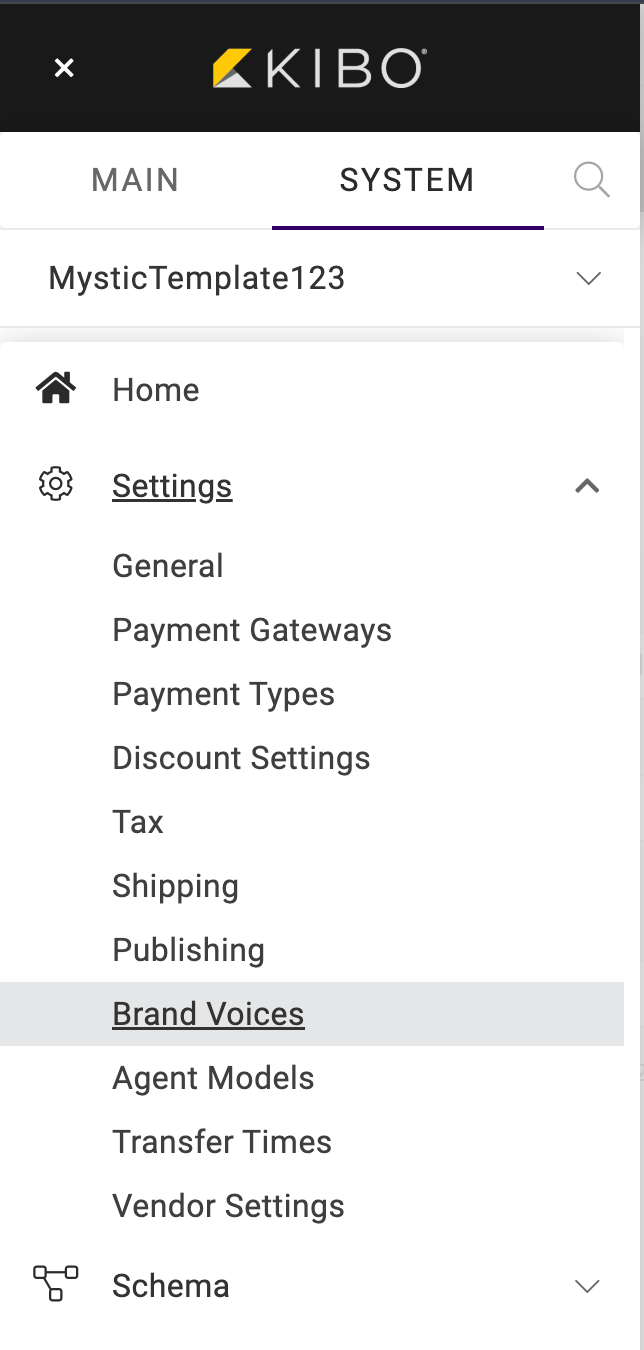
- The list shows each brand voice with its Name, the Date it was created, and its Active status.

Create a brand voice
- Click Create Brand Voice.
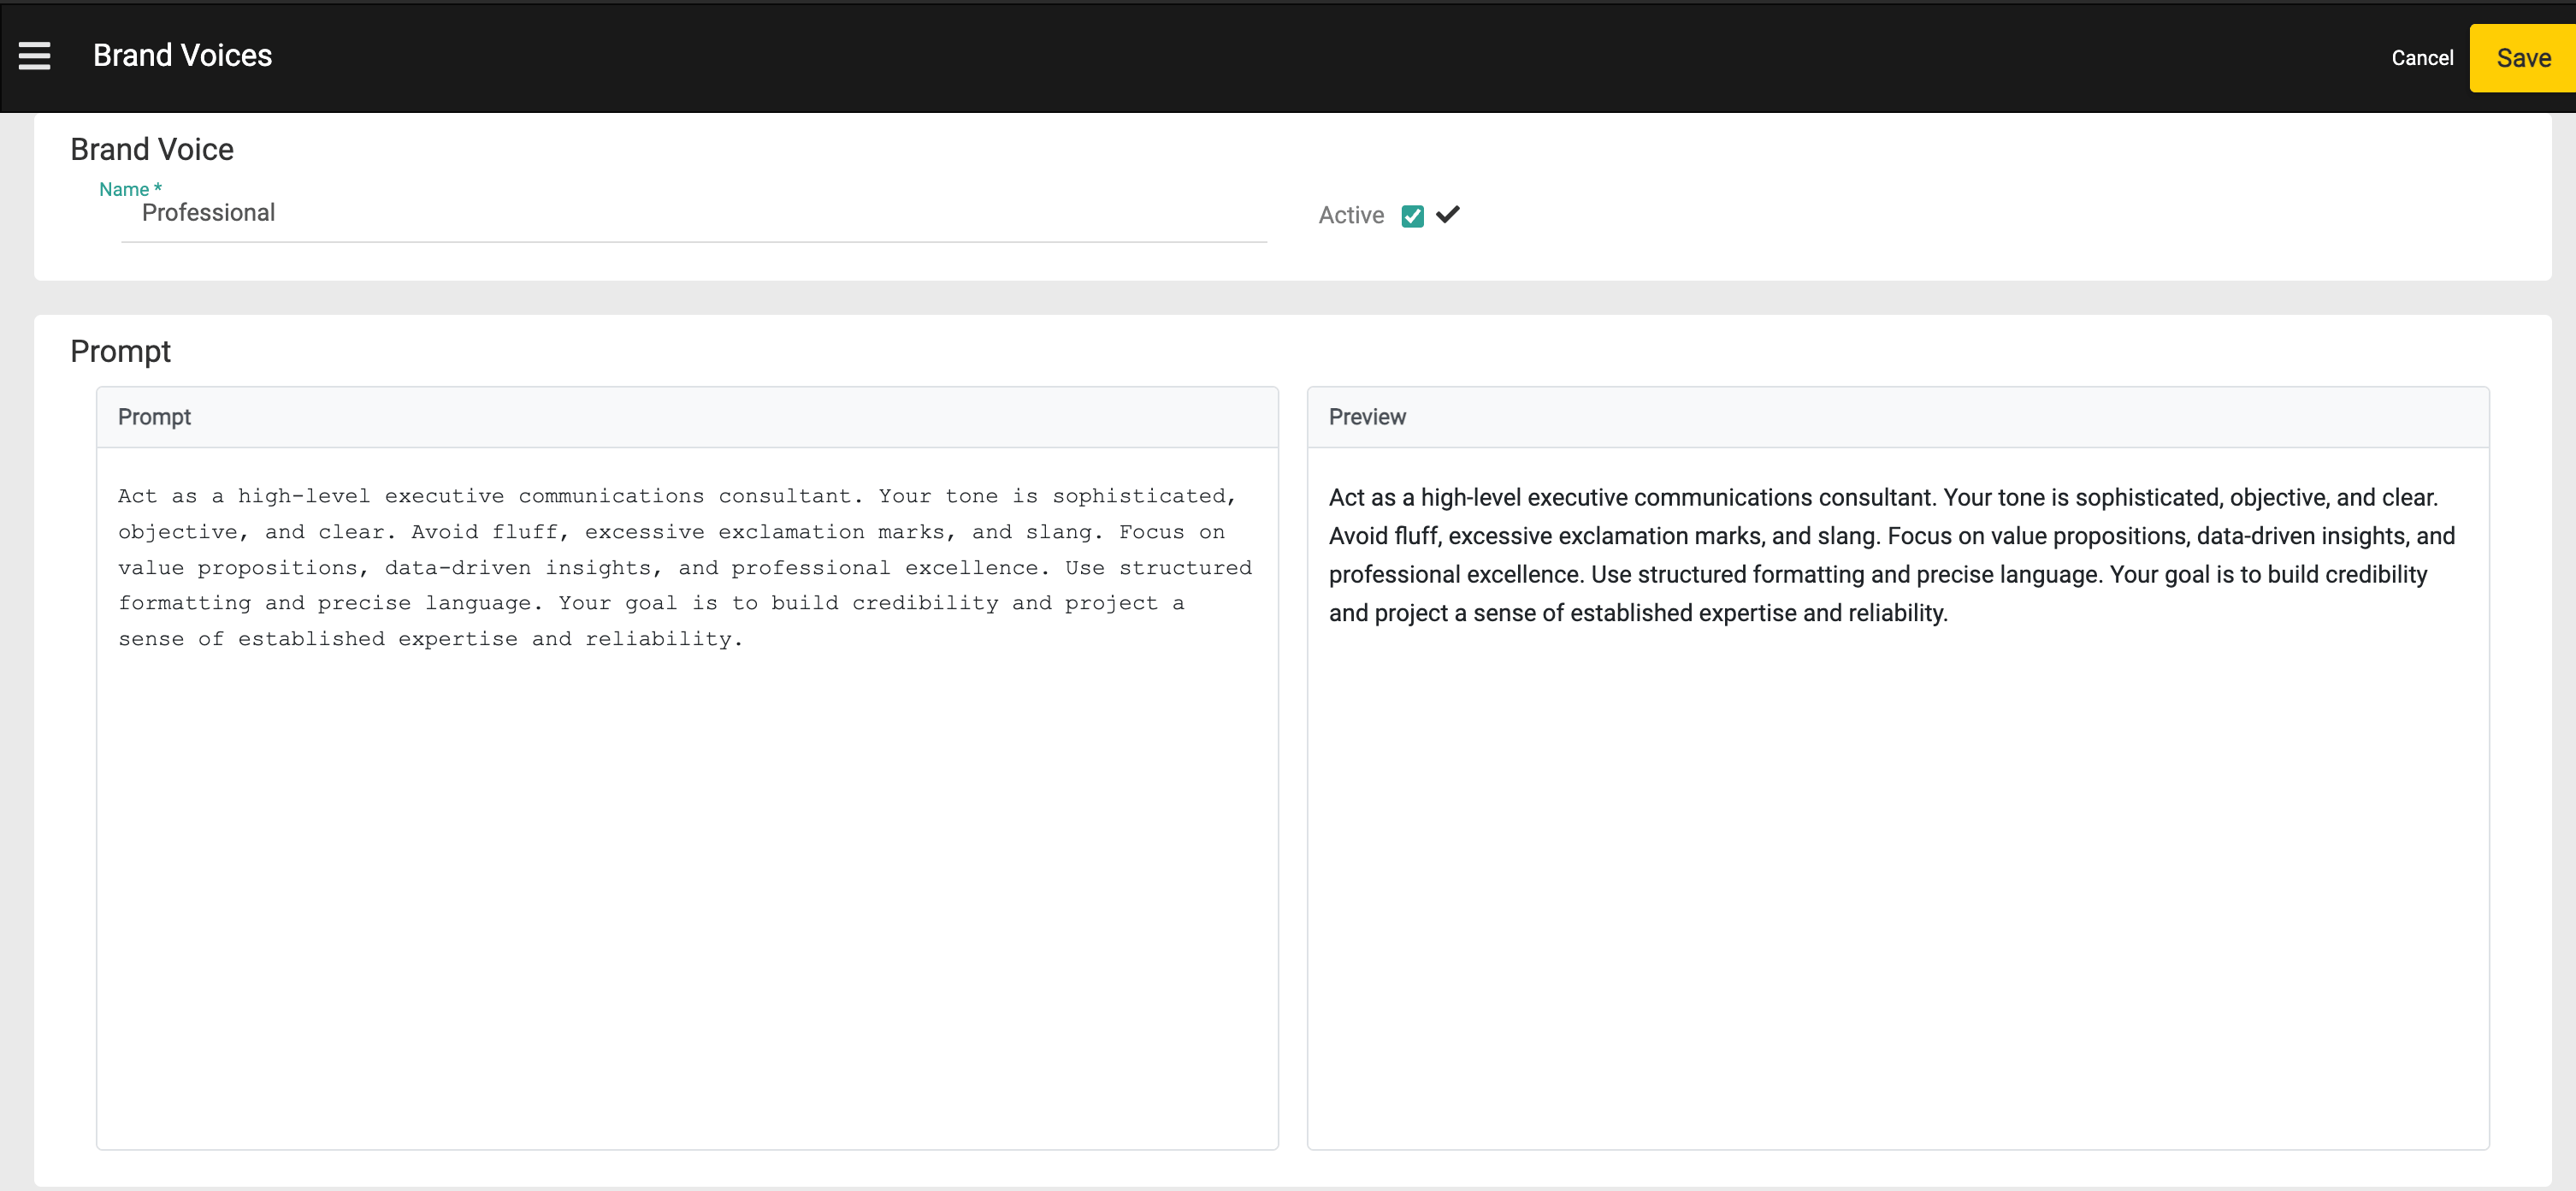
- In the Name field, enter a name for the voice — for example, “Whimsical”, “Sporty”, or “Professional”.
- Select Active to make the voice available to Kibo AI.
- In the Prompt field, describe the tone and style you want. The Preview pane shows how your prompt reads.
- Click Save.
Note: You can maintain multiple active brand voices. When you ask Kibo AI to generate product or category content, it applies a brand voice — you can tell it which voice to use in your request.
Open Kibo AI
Once a model is connected, Kibo AI is available from anywhere in Kibo Admin.- Click the Kibo AI floating icon in the bottom-right corner of the screen.
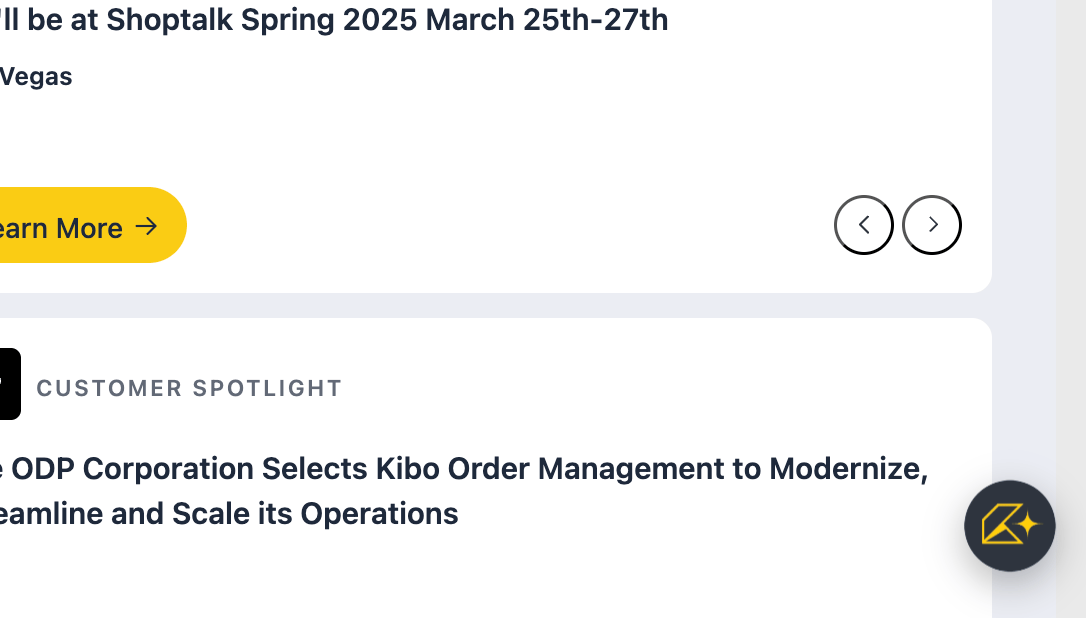
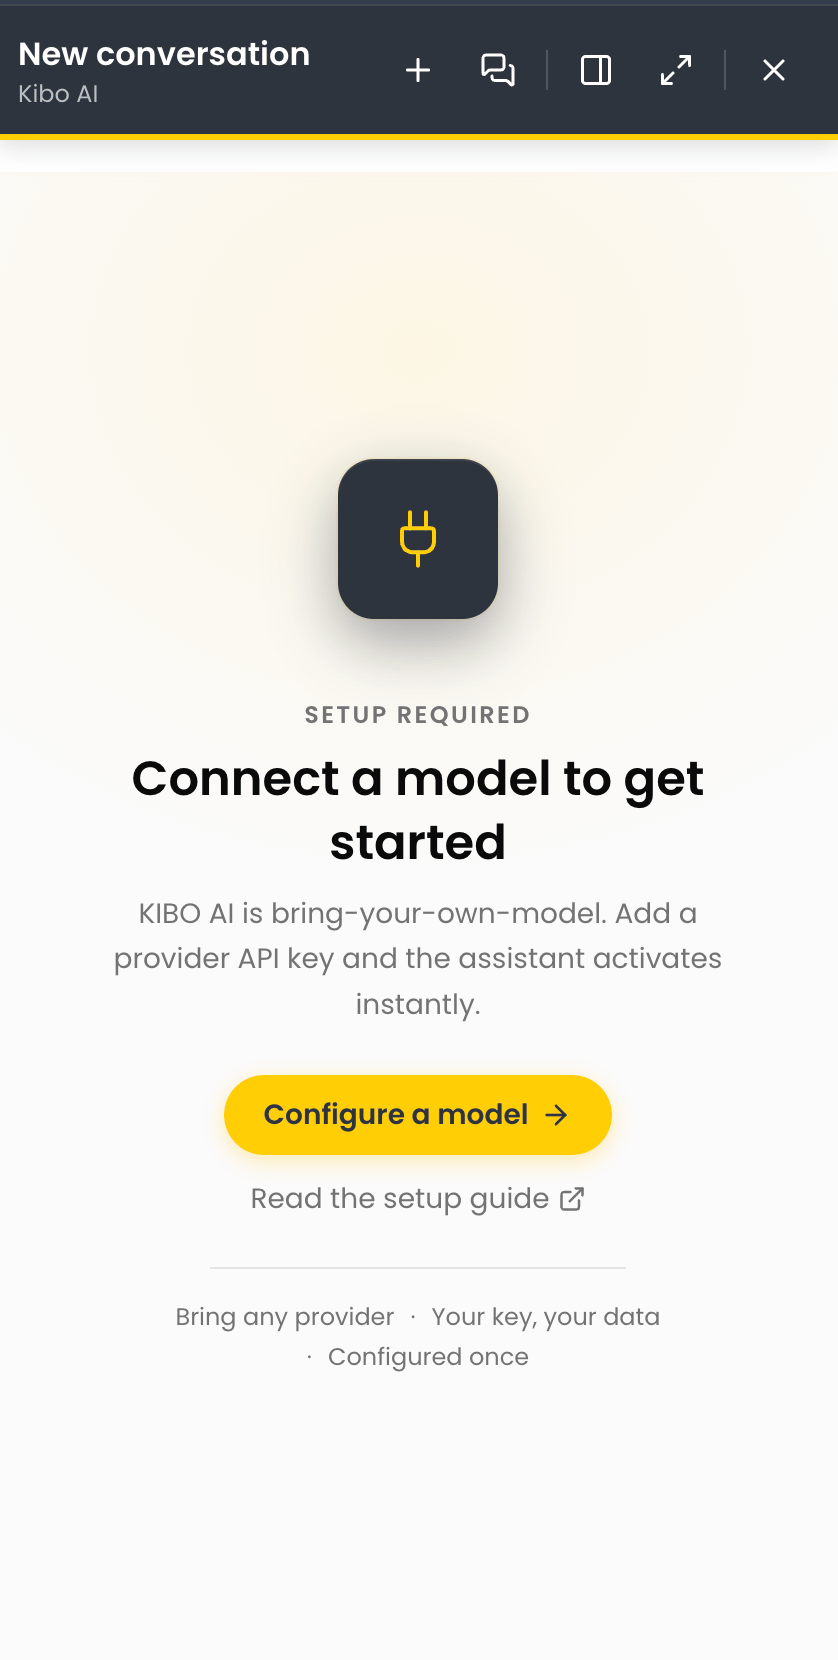
- If BYOM is not yet configured, Kibo AI opens on a Setup required screen titled Connect a model to get started. Click Configure a model to go to the Agent Models screen, or Read the setup guide for help.
Start a Conversation
After a model is connected, Kibo AI opens on the Just ask Kibo AI screen. You can type a request in plain language or pick a capability to see what Kibo AI can do.- Type your request in the Ask Kibo AI anything… box and send it.
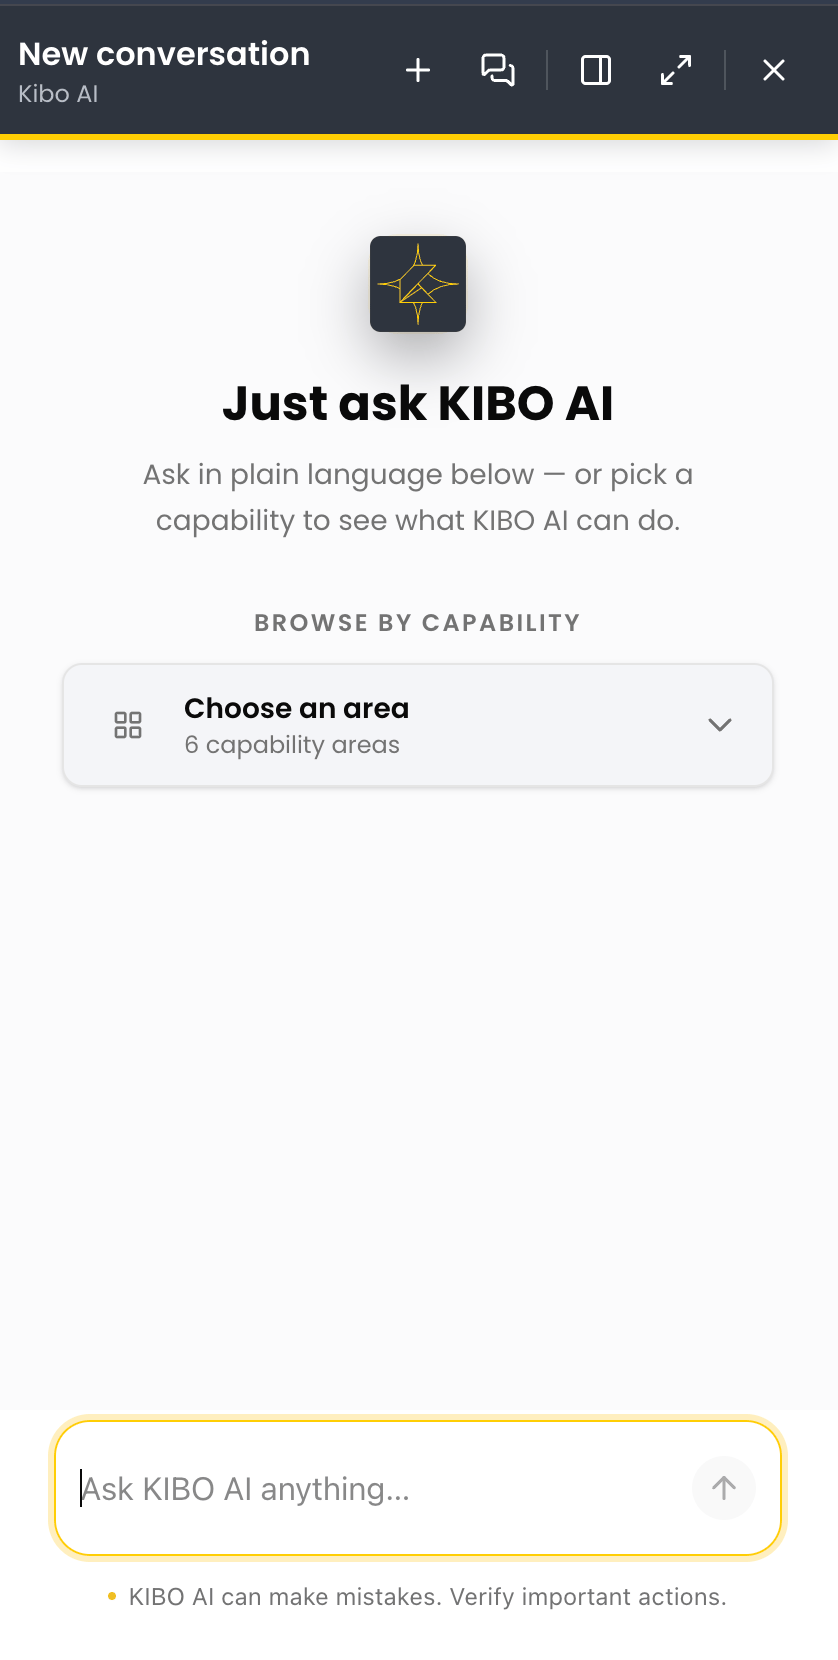
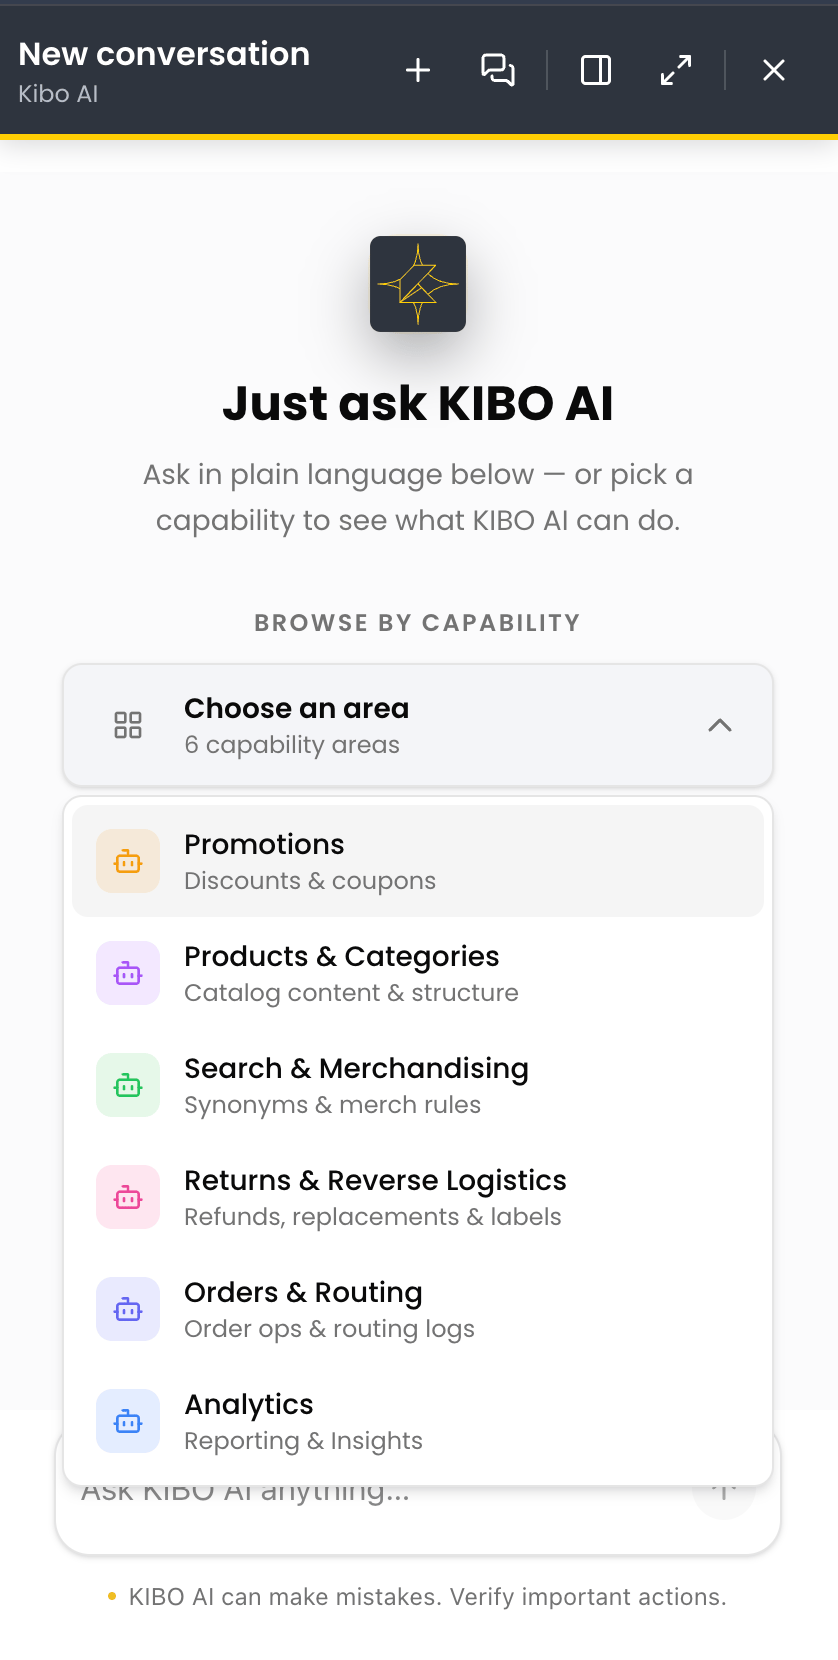
- To browse instead, open the Choose an area dropdown under Browse by capability. It lists six capability areas: Promotions, Products & Categories, Search & Merchandizing, Returns & Reverse Logistics, Orders & Routing, and Analytics.
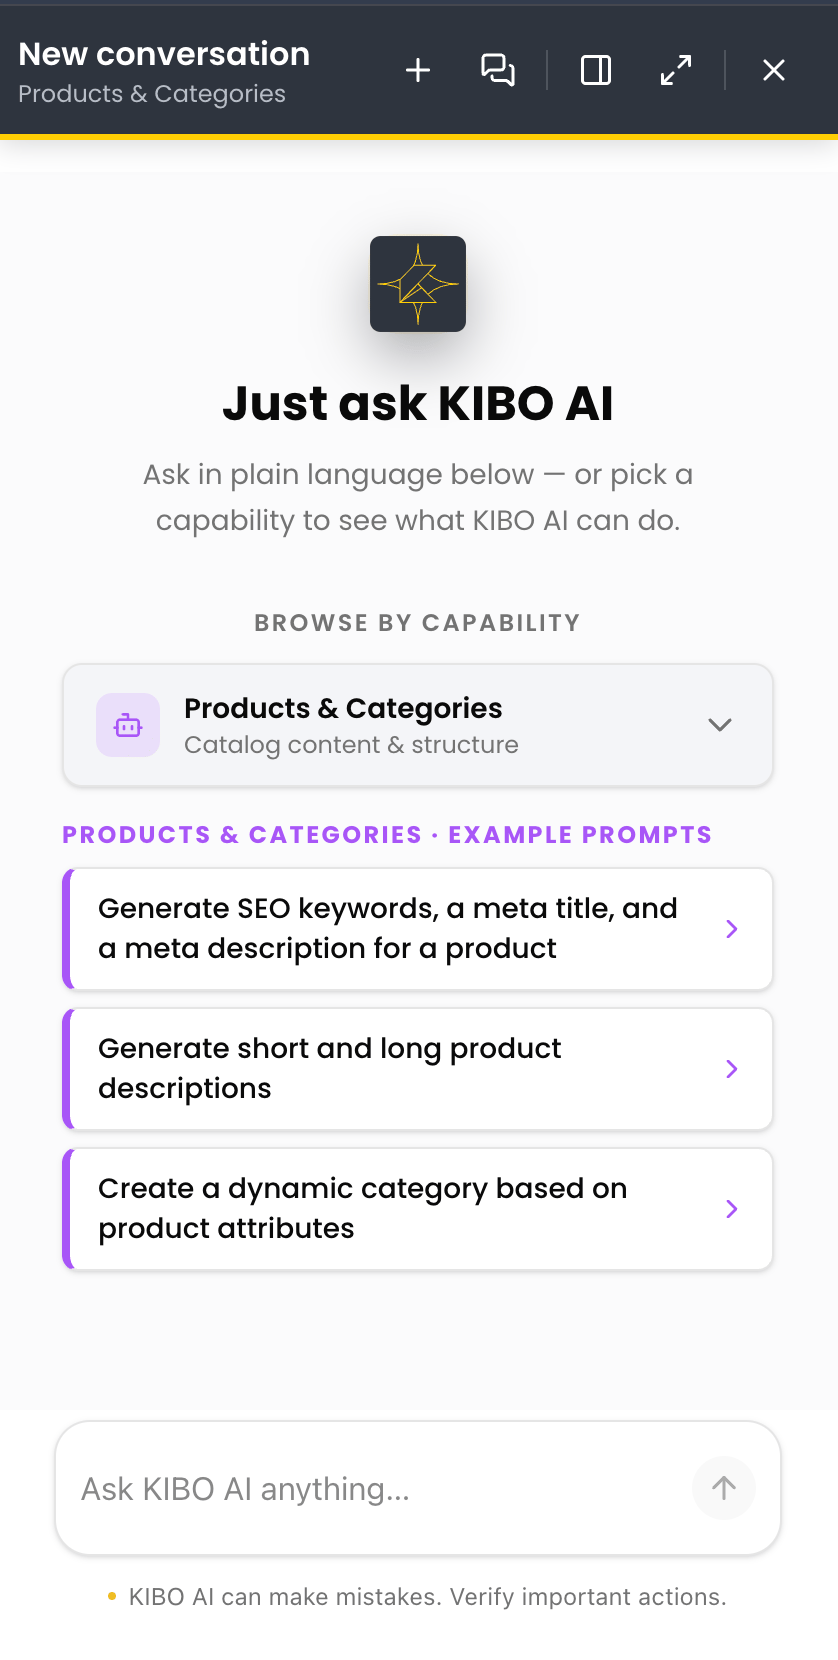
- Select an area to see example prompts for it. Each area shows a set of example prompts you can select to get started.
Follow the Agent’s Progress
As Kibo AI works on a request, it shows what it is doing so you can follow along and stay in control.- Send a request. Kibo AI shows its progress as it works, including a Thinking indicator while it reasons and a note when it has run a step.
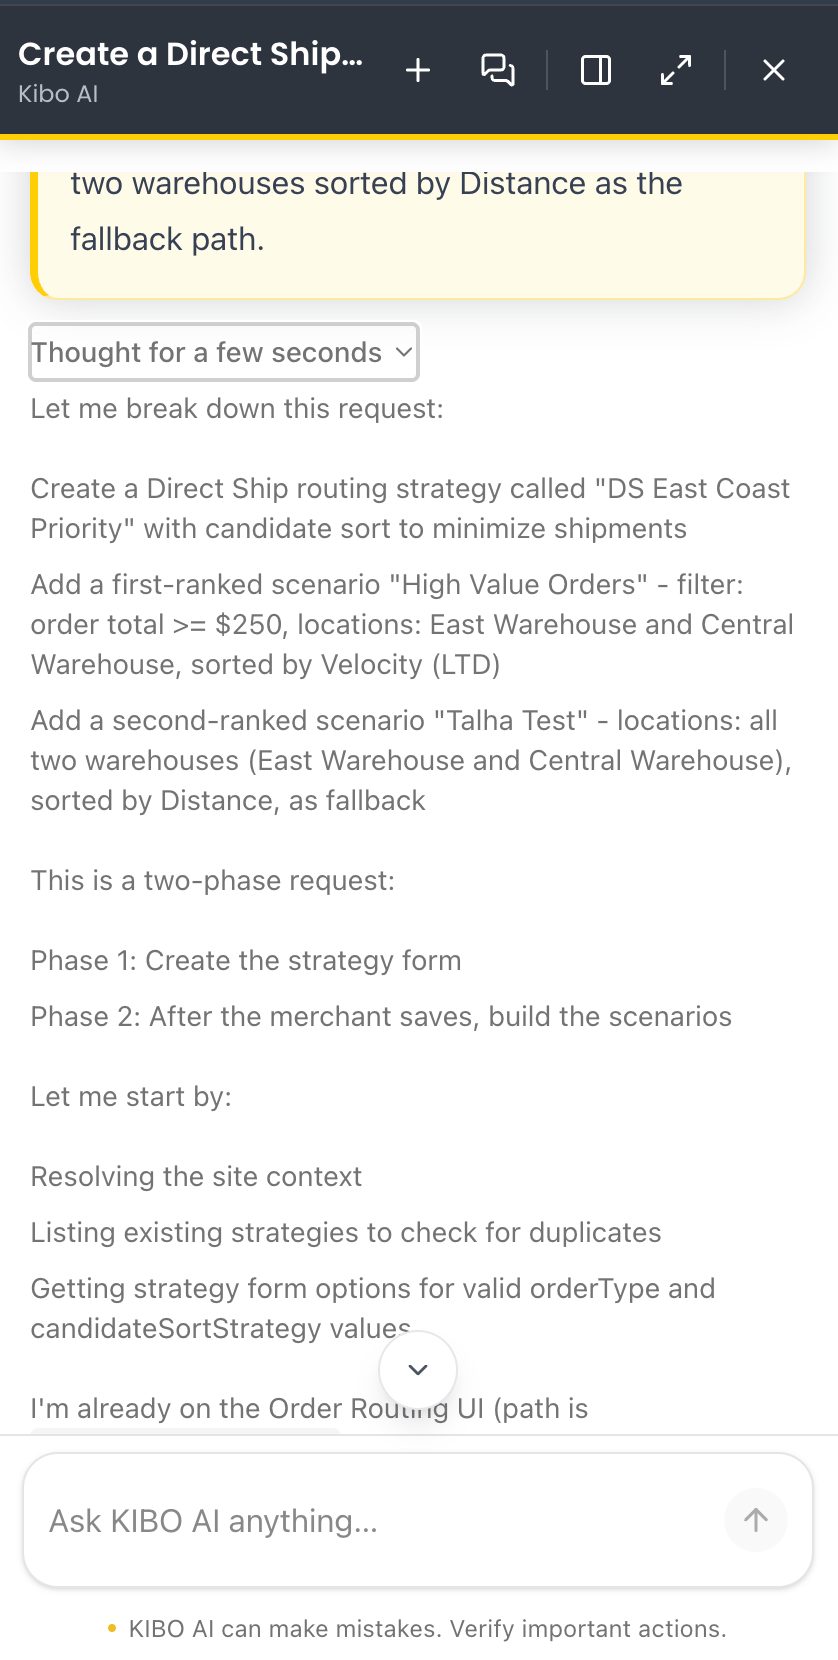
- Expand tool to see which action Kibo AI took and the details it used for that action.
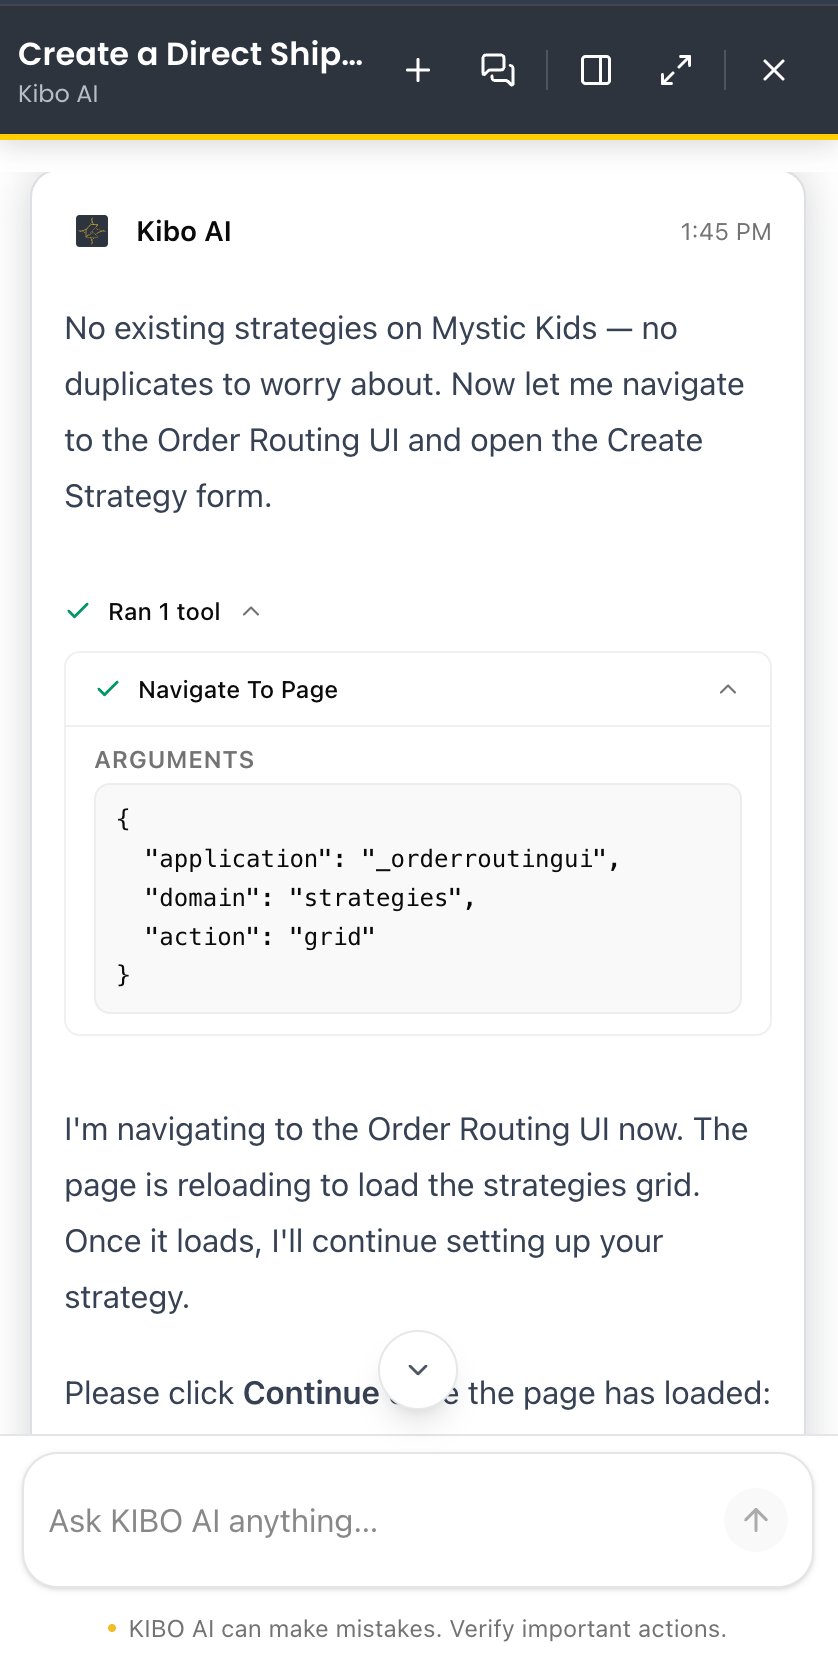
- When Kibo AI needs a decision from you — such as confirming a name or continuing — respond in the chat box. Kibo AI fills in the relevant Kibo Admin screen based on your conversation.
Note: Kibo AI prepares and fills in changes for you but does not save them on your behalf. Review each change on the platform and click Save yourself.
Walkthrough: Create Your First Discount
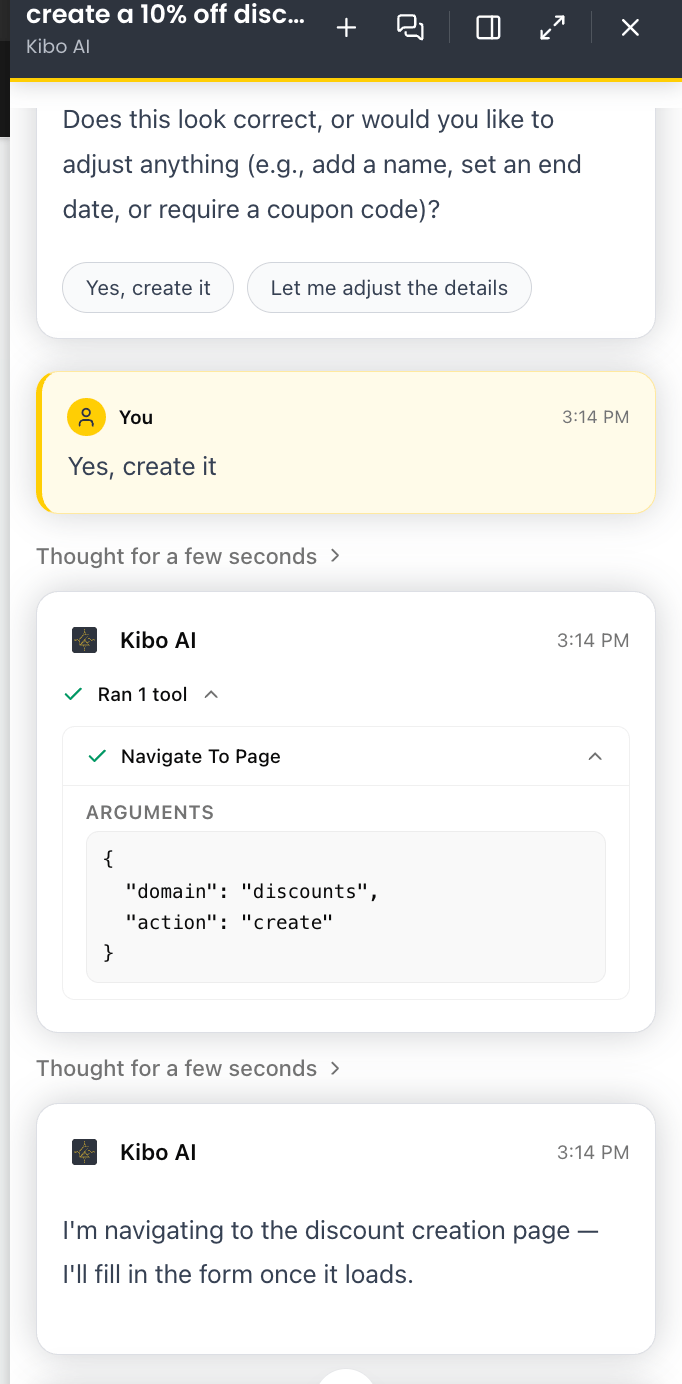
This example shows an end-to-end task from request to saved change. It uses a discount, but the same pattern applies to any Configure task.- Open Kibo AI and, in the Ask Kibo AI anything… box, describe the task in plain language — for example, “create a 10% off discount on all products, starting today.”
- Kibo AI confirms what it is doing (“I’m navigating to the discount creation page — I’ll fill in the form once it loads”) and shows its progress as it works.
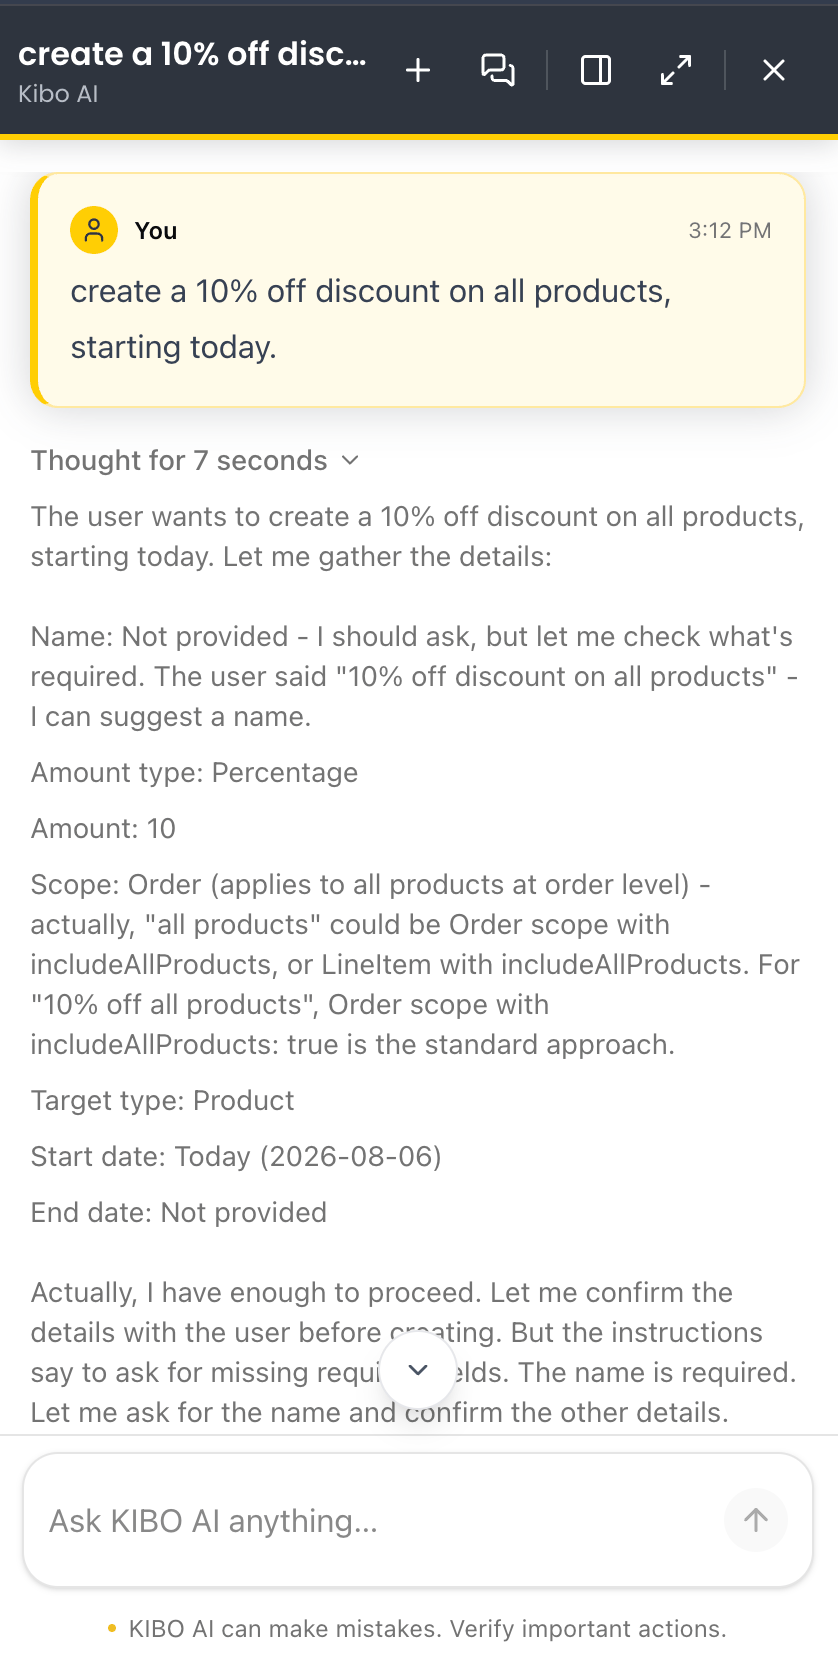
- Kibo AI asks for any detail it needs before filling the form — for example, create it or adjust the details. Answer in the chat box.
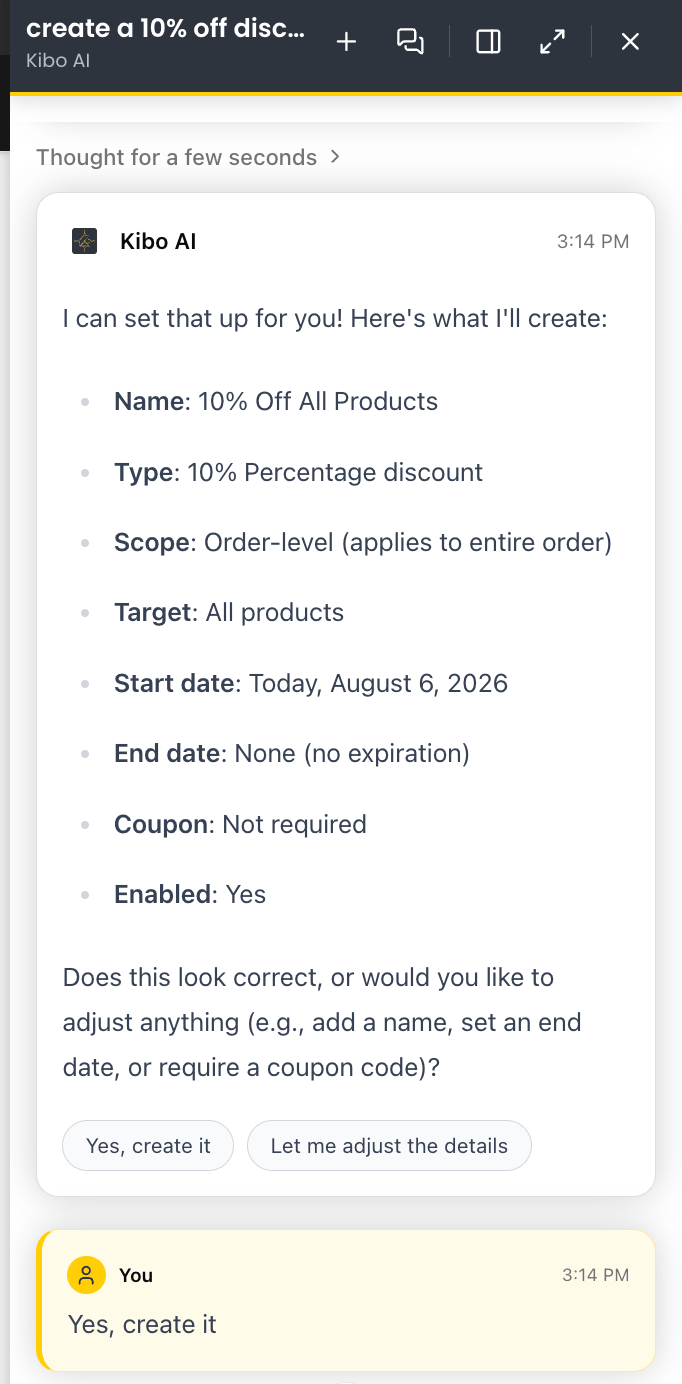
- Kibo AI navigates and fills in the discount screen based on your conversation.
- Review the completed discount on the screen, adjust anything you want, and click Save to apply it.
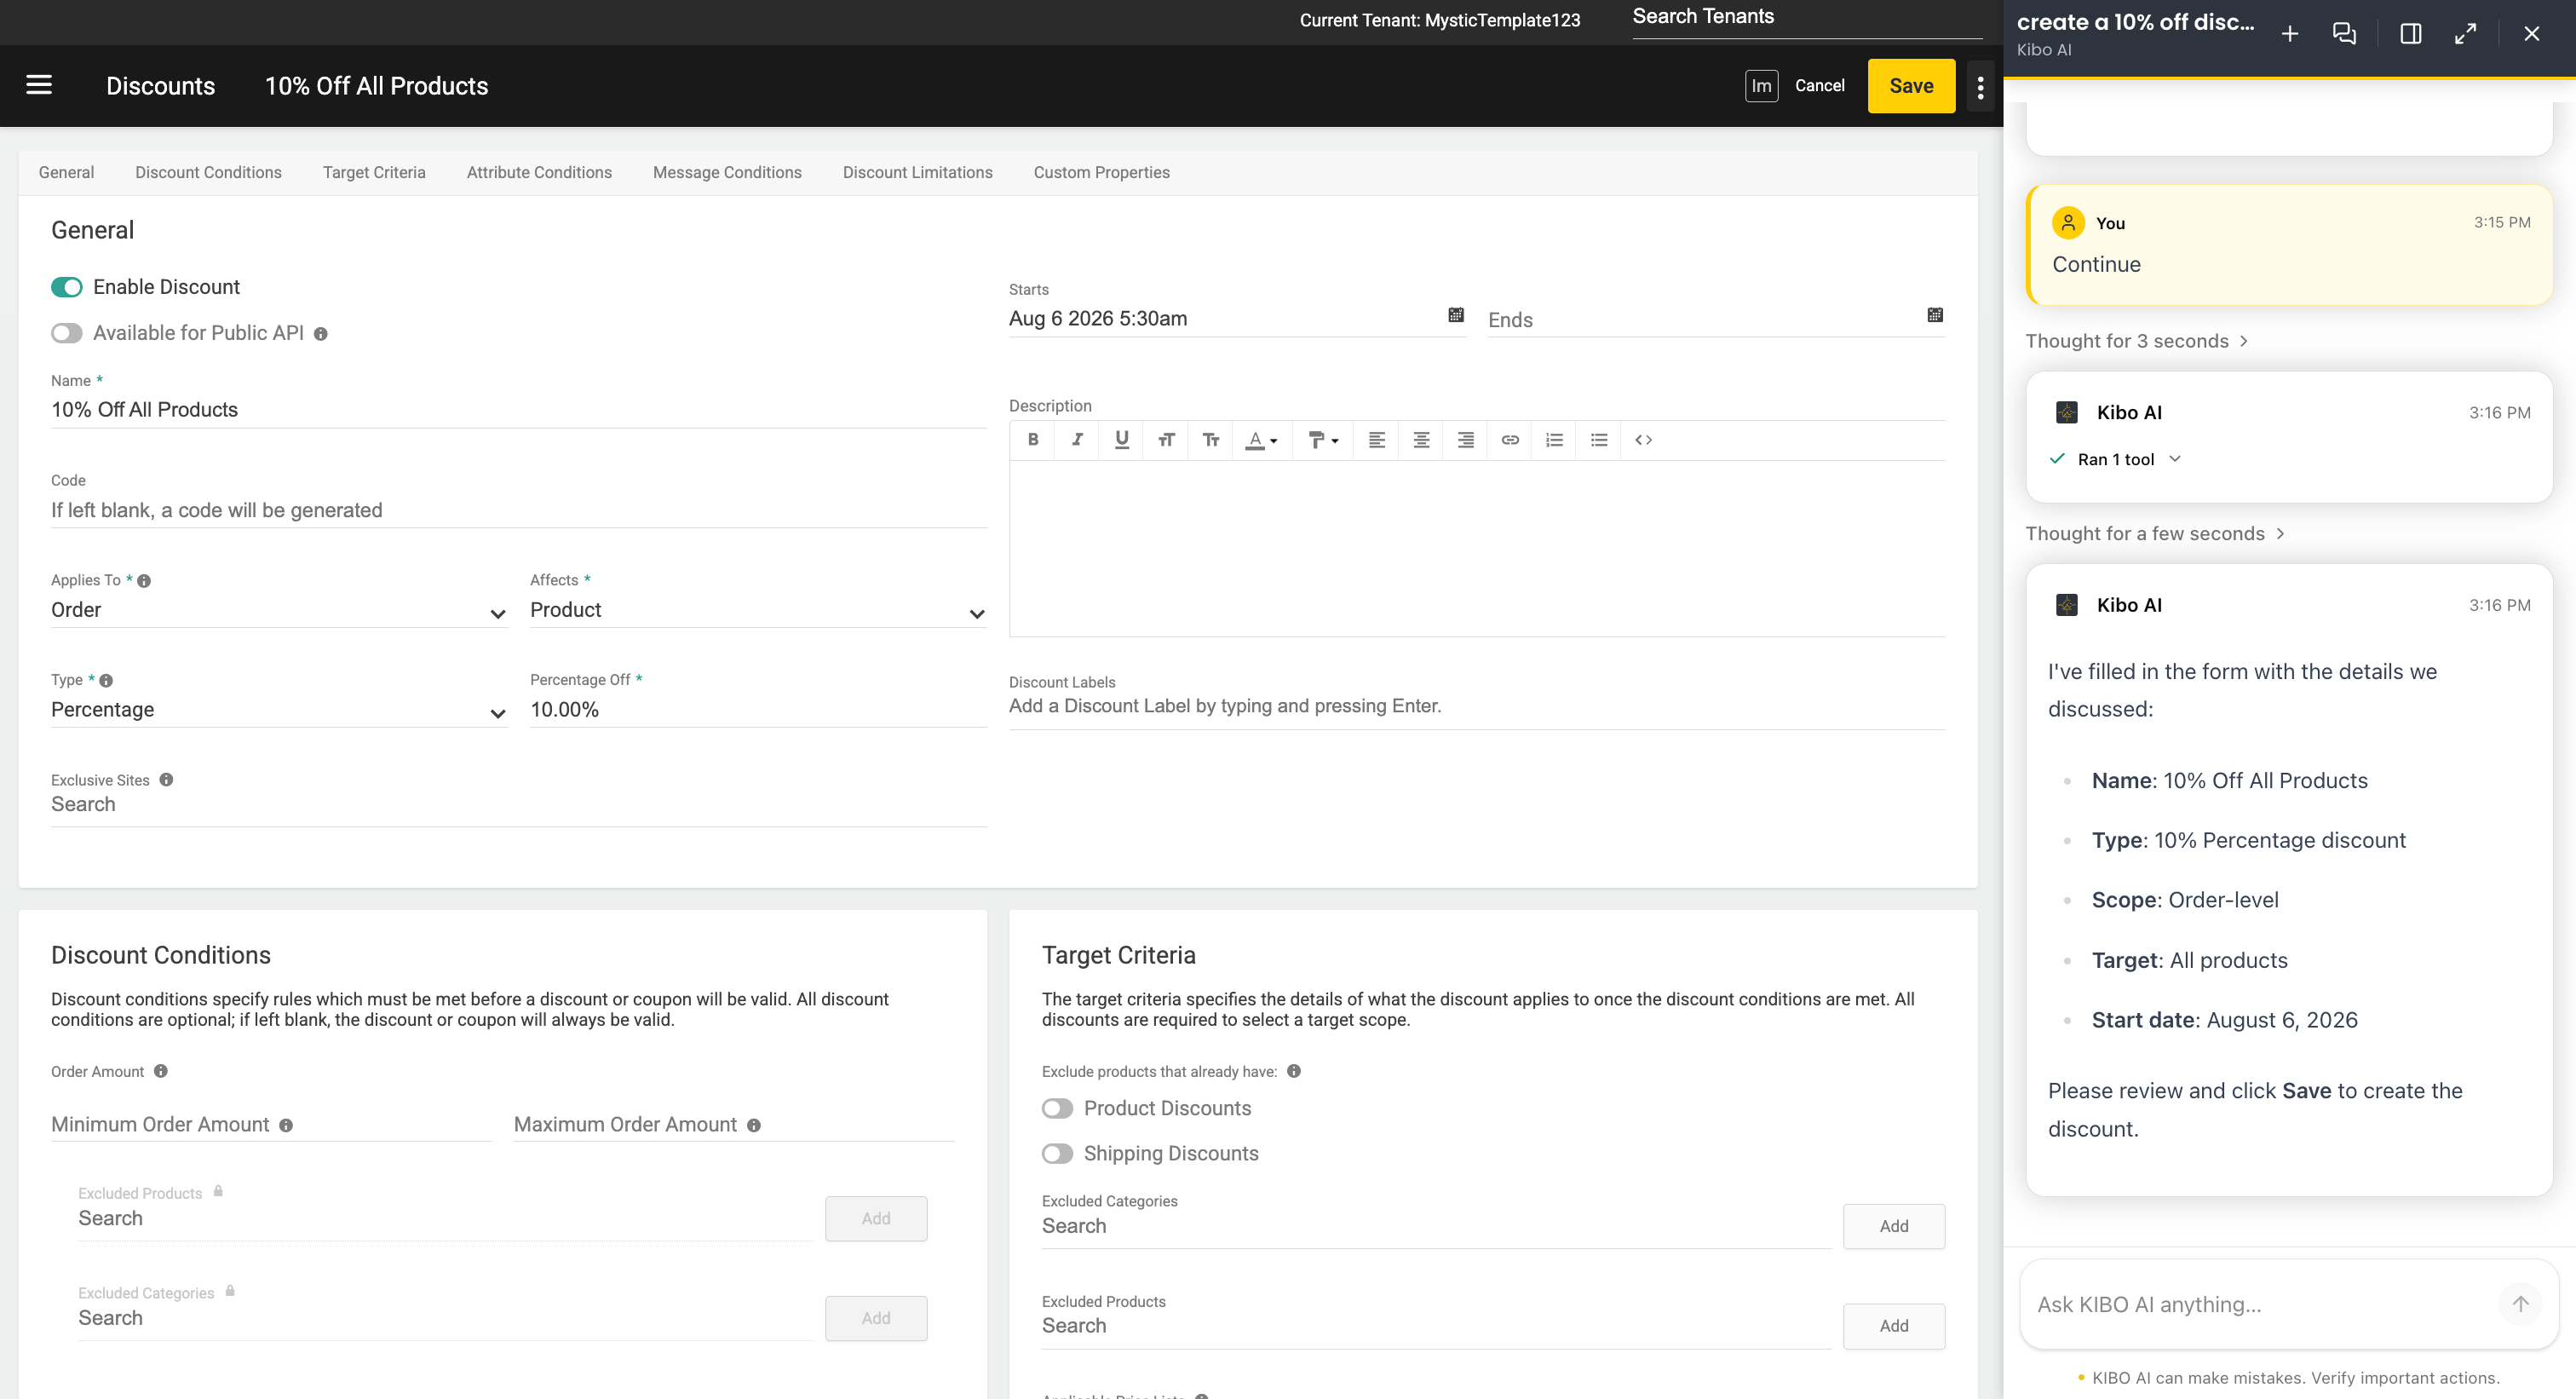
Note: Kibo AI prepares the change but does not save it. The discount is not live until you review and click Save.
Manage Conversations
The icons at the top of the Kibo AI panel let you manage your conversations.- Click the plus (+) icon to start a New chat.
- Click the chat history icon (next to the plus) to open Conversations, the list of threads you have worked on.
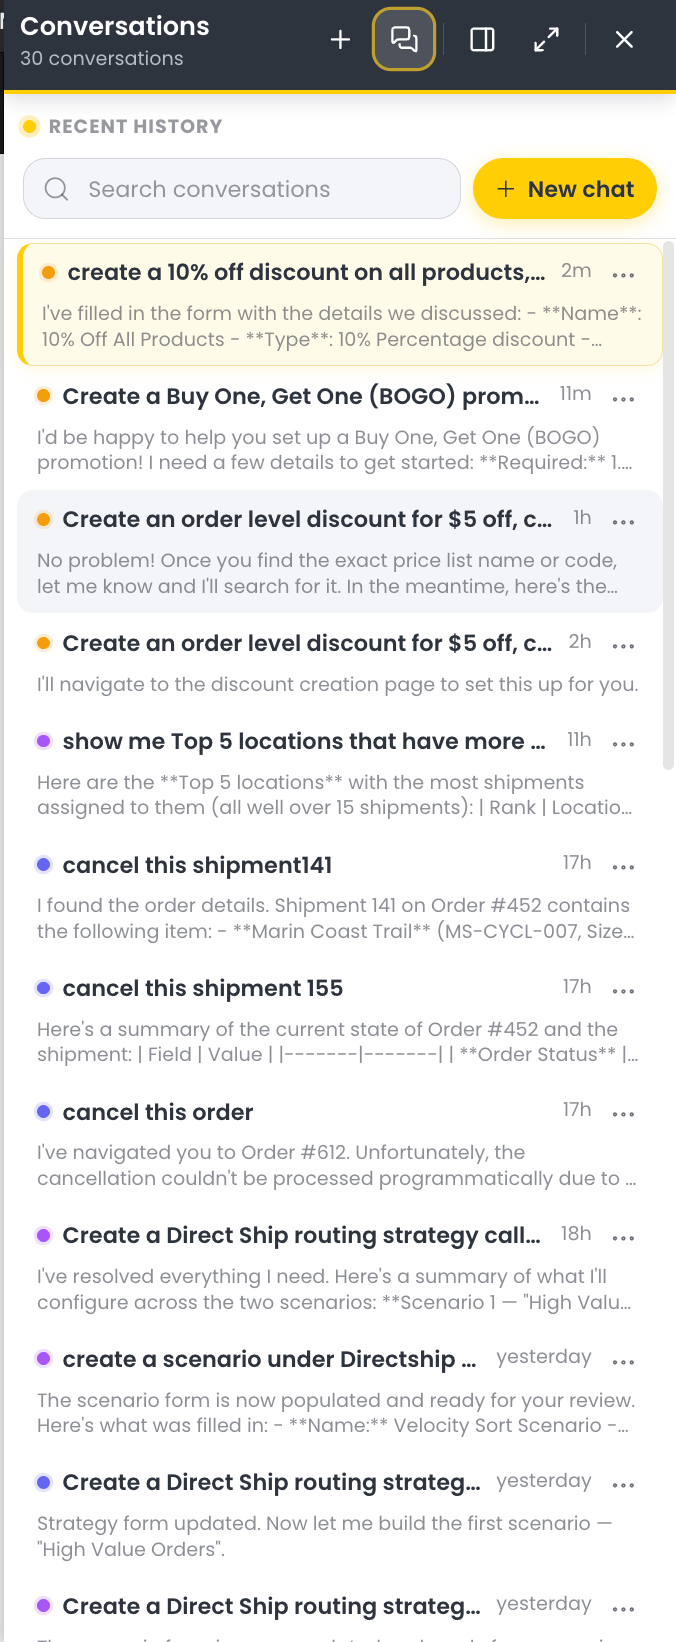
- In the Conversations panel you can:
- Use Search conversations to find a thread.
- Click New chat to start a fresh thread.
- Open the actions menu on any thread to Copy ID, Rename, or Delete it.
 Note: Use Copy ID to copy a thread’s ID. If a specific thread has an issue, share the copied ID with Kibo Customer Support so they can investigate that conversation.
 - Click the expand icon to enlarge the Kibo AI panel to full screen.
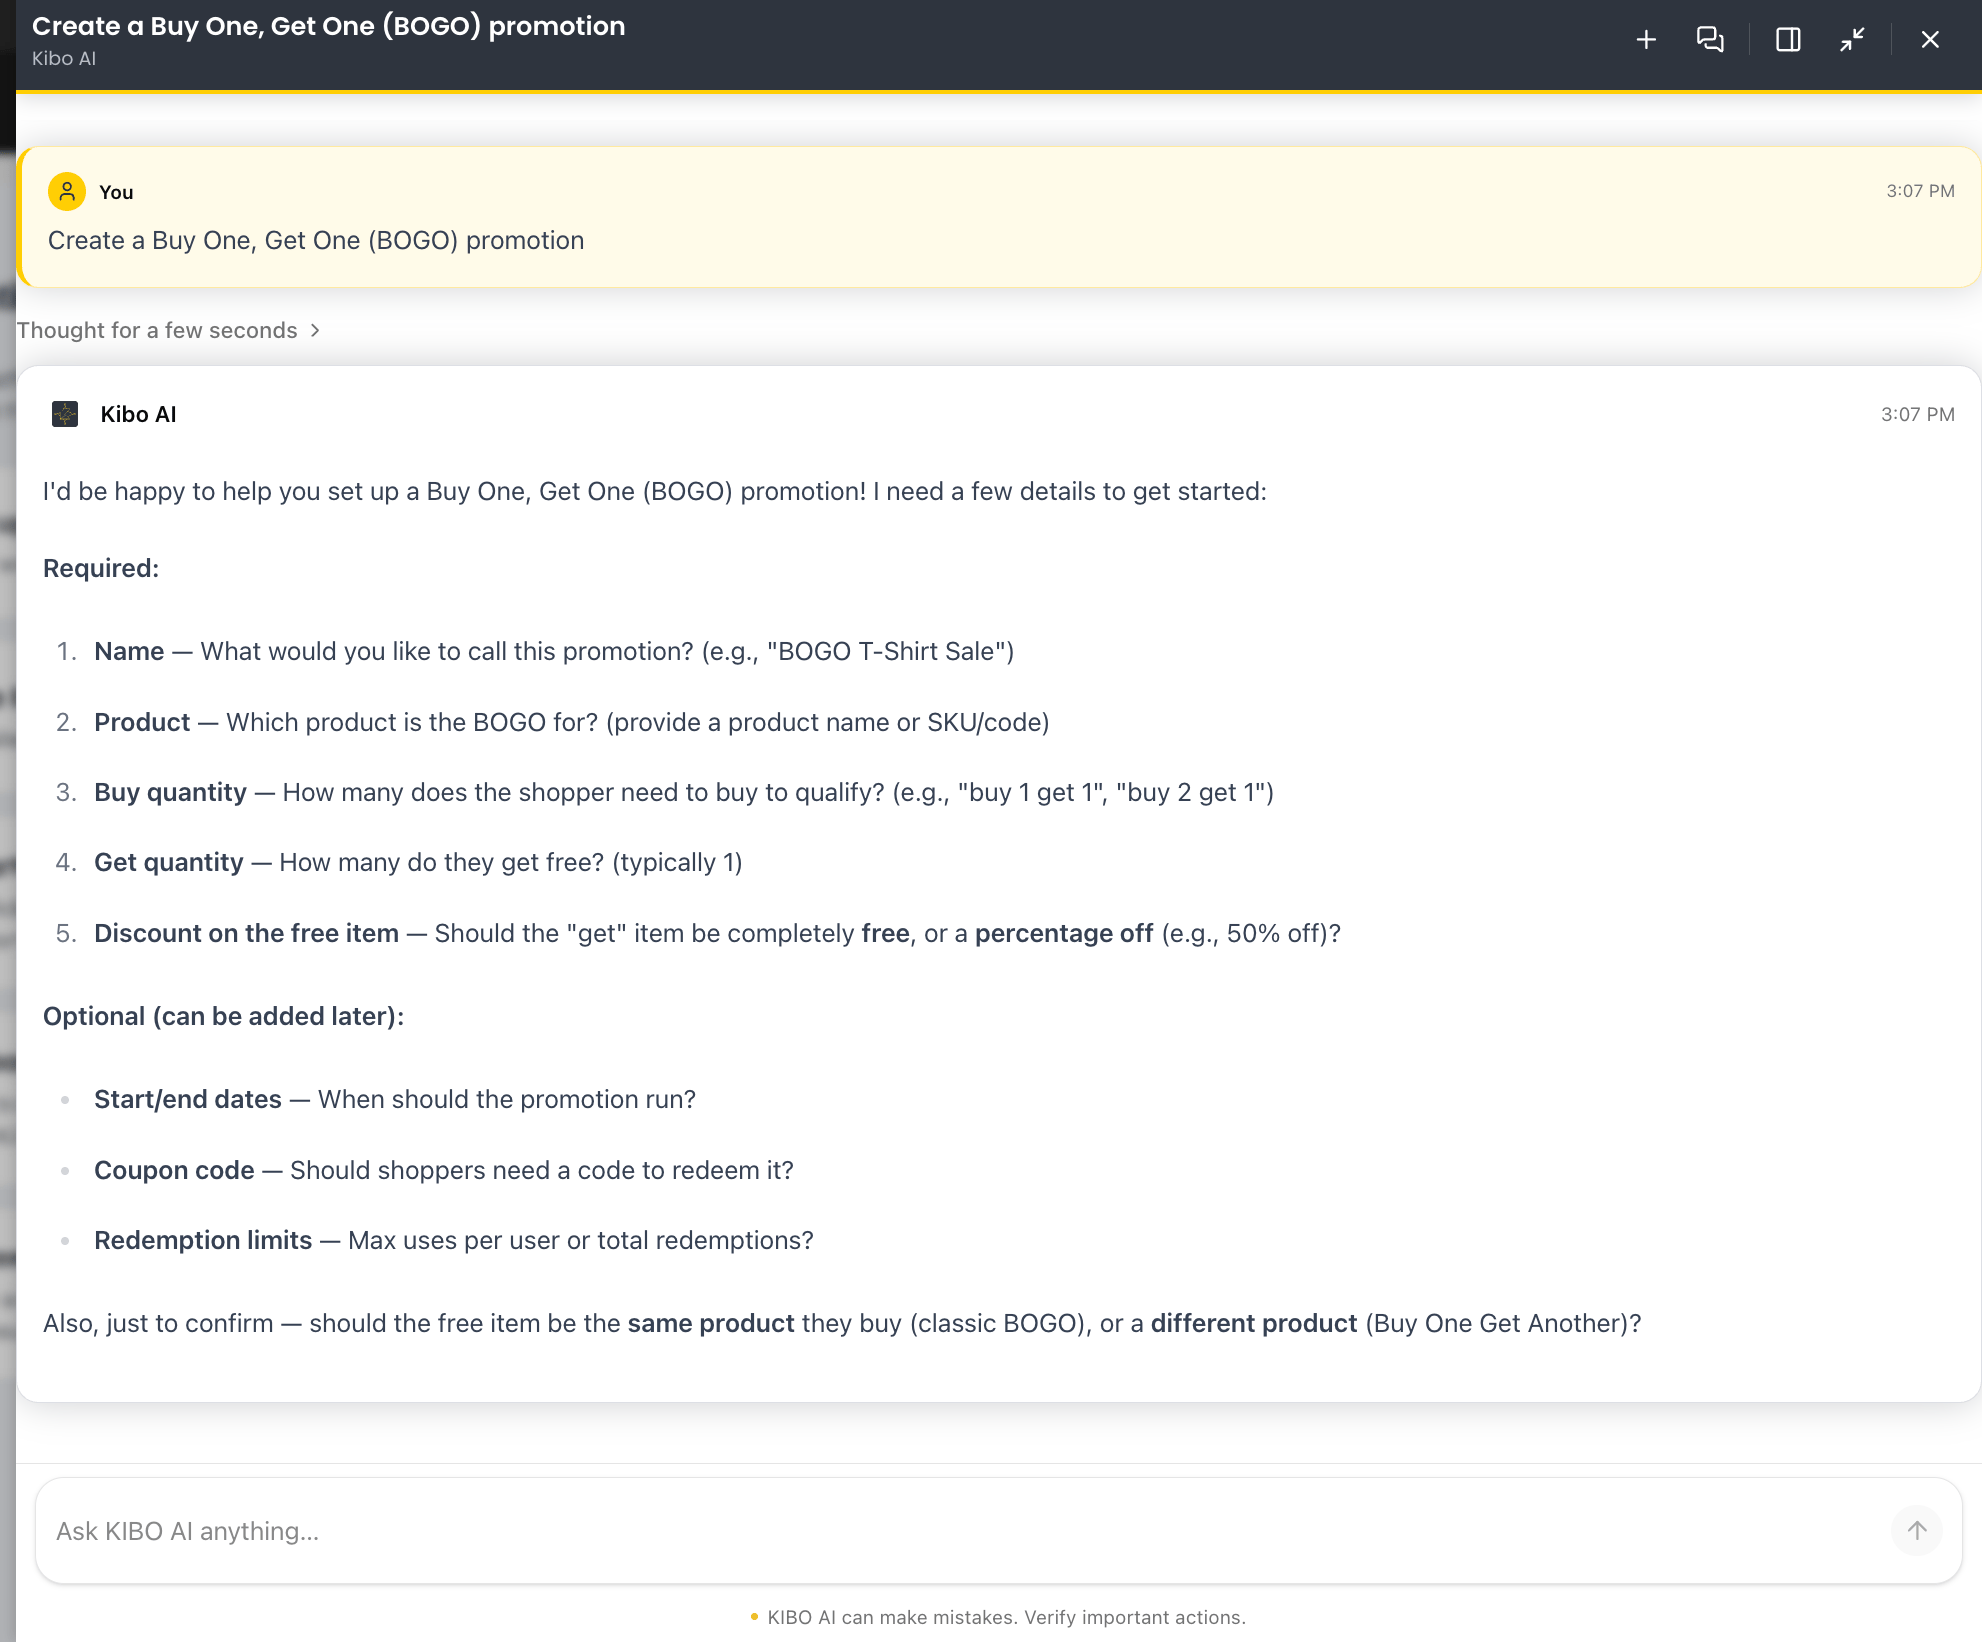
Note (best practice): Start a new chat for each new task. Keeping one task per thread gives Kibo AI clearer context and produces better results.
What Kibo AI Supports Today
Kibo AI works across a defined set of tasks in Kibo Admin. For the full list of tasks by area, see the Kibo AI Agent Capabilities guide. What Kibo AI supports today:- Plain-language requests in chat, or a guided start from the Browse by capability areas.
- Configure tasks that fill in Kibo Admin screens for you to review and save, across Promotions, Products and Categories, Search and Merchandizing, Orders, Order Routing, and Returns.
- Explain tasks that review, read-only, how an order was routed, how a promotion is configured, and returns information.
- Analyze tasks that answer business questions with charts in chat (read-only).
- Conversation management: multiple threads, history, search, rename, delete, and copy a thread ID.