

Note: User Management is available to Vendor Admins. A Vendor User does not see this page or its actions.
Open User Management
In the Vendor Portal left navigation, click User Management (below Onboarding). The Users page lists everyone with access to your vendor account.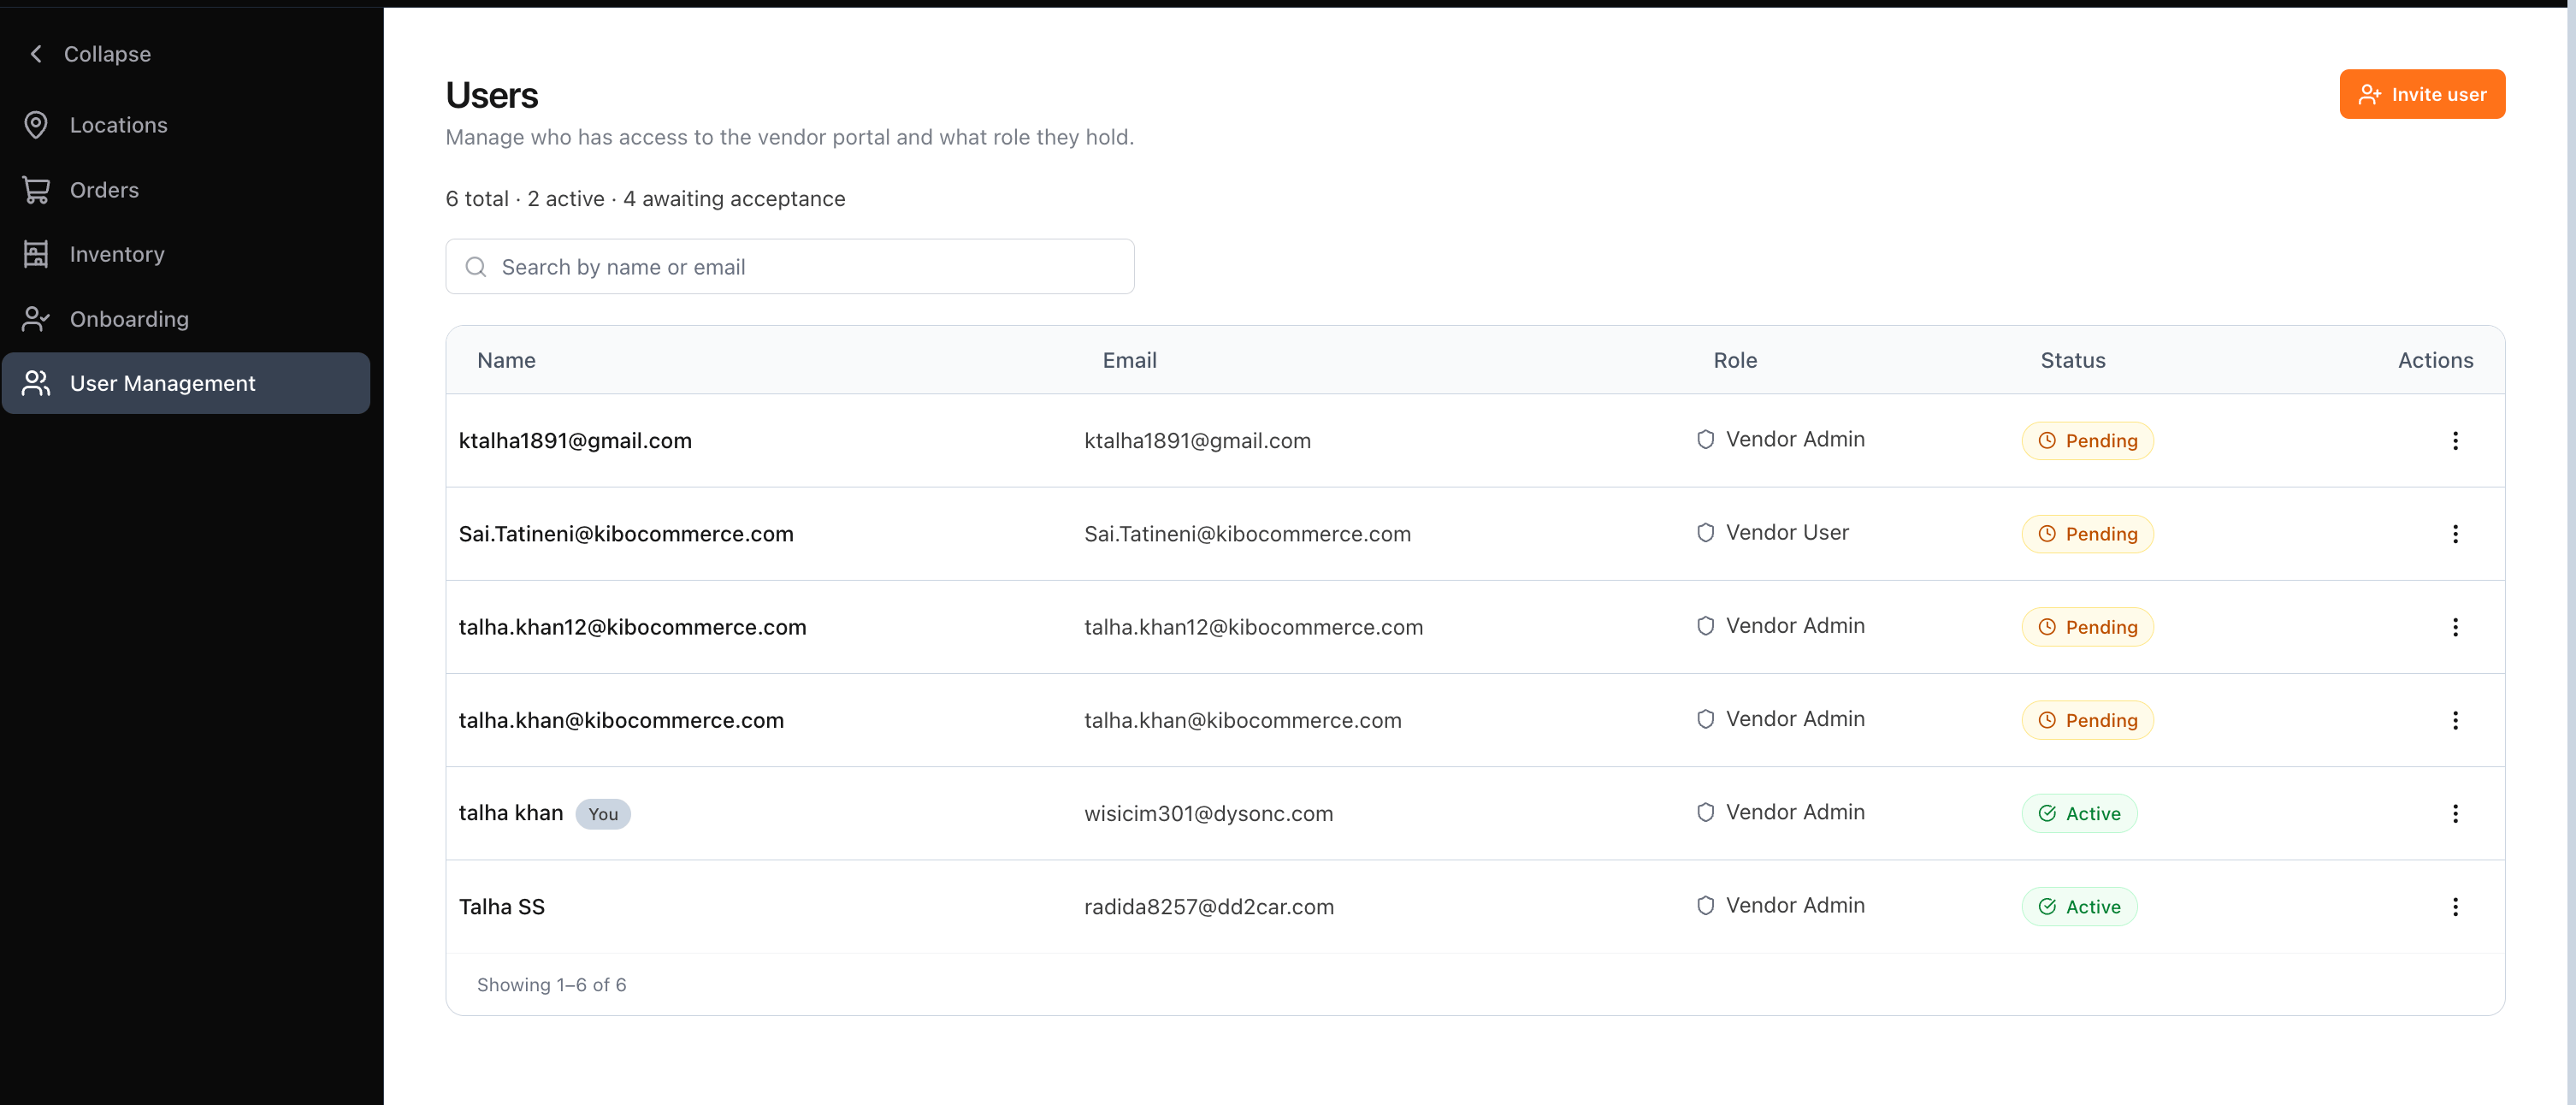
The Users List
The list shows one row per user with:- Name — the user’s display name. Your own row is tagged You.
- Email — the user’s login email.
- Role — Vendor Admin or Vendor User.
- Status — a badge showing Active, Pending, Expired, or Declined.
- Actions — a row menu whose options depend on the user’s status (see below).
Invite a User
Click Invite user in the top-right to add a teammate. The invite flow — select a role, then enter the user’s details — is the same one used during onboarding; see Vendor Onboarding → Add Users for the step-by-step. The invited user appears at the top of the list with a Pending status.Resend an Invitation
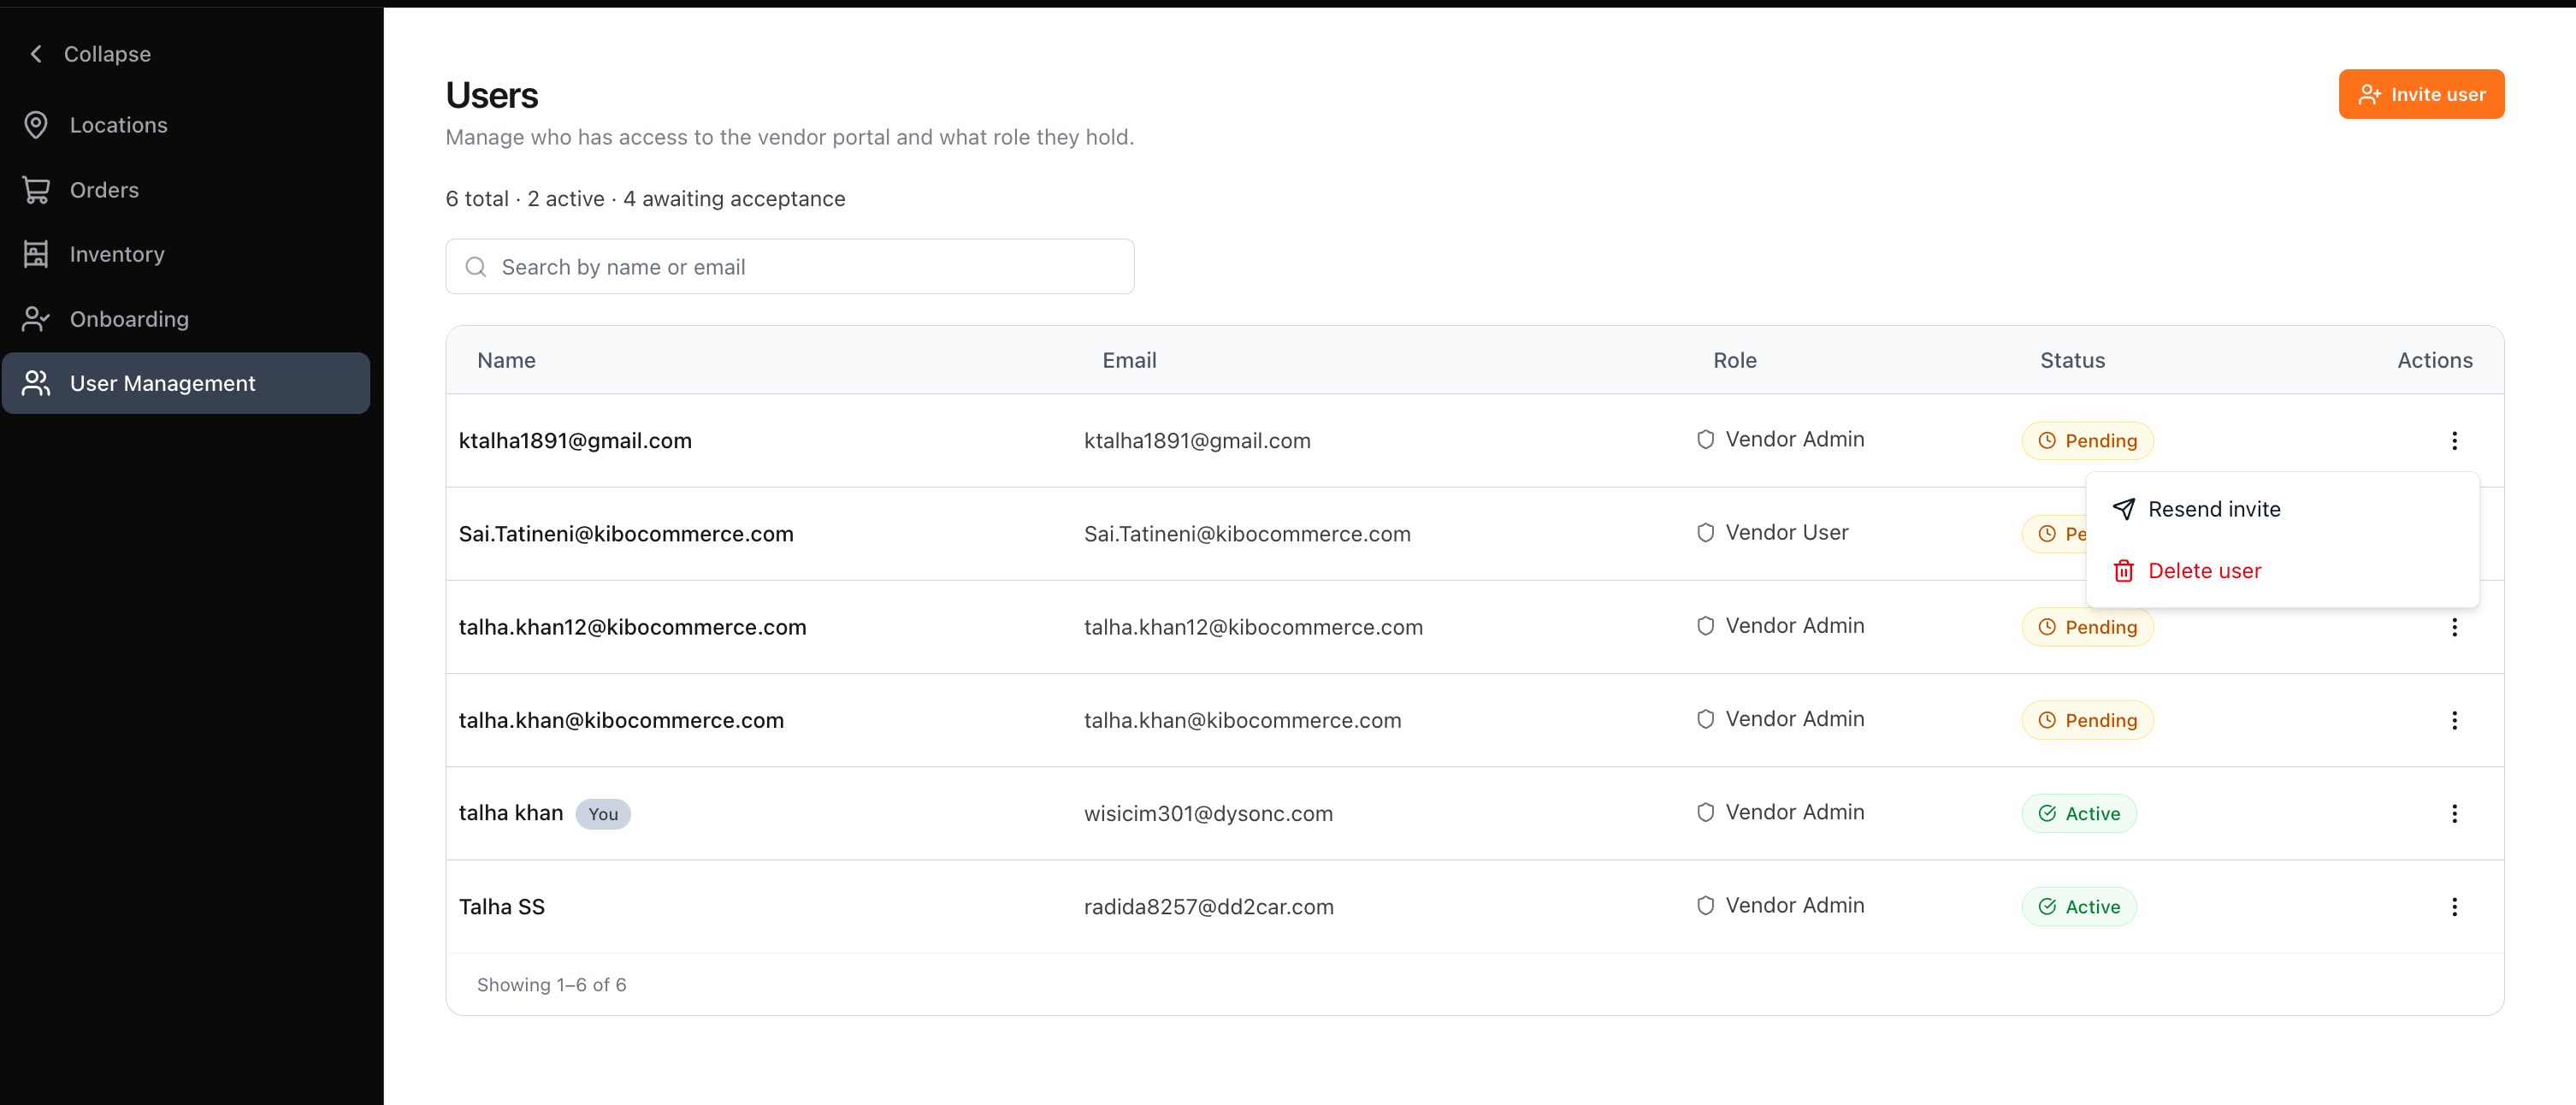
Use this when a user’s invitation is still Pending and they haven’t signed in yet.- On the user’s row, open the Actions menu (⋮) and click Resend invite.
- A Success dialog confirms “The invite has been resent to [email].” Click OK to close it.
Edit a User’s Role
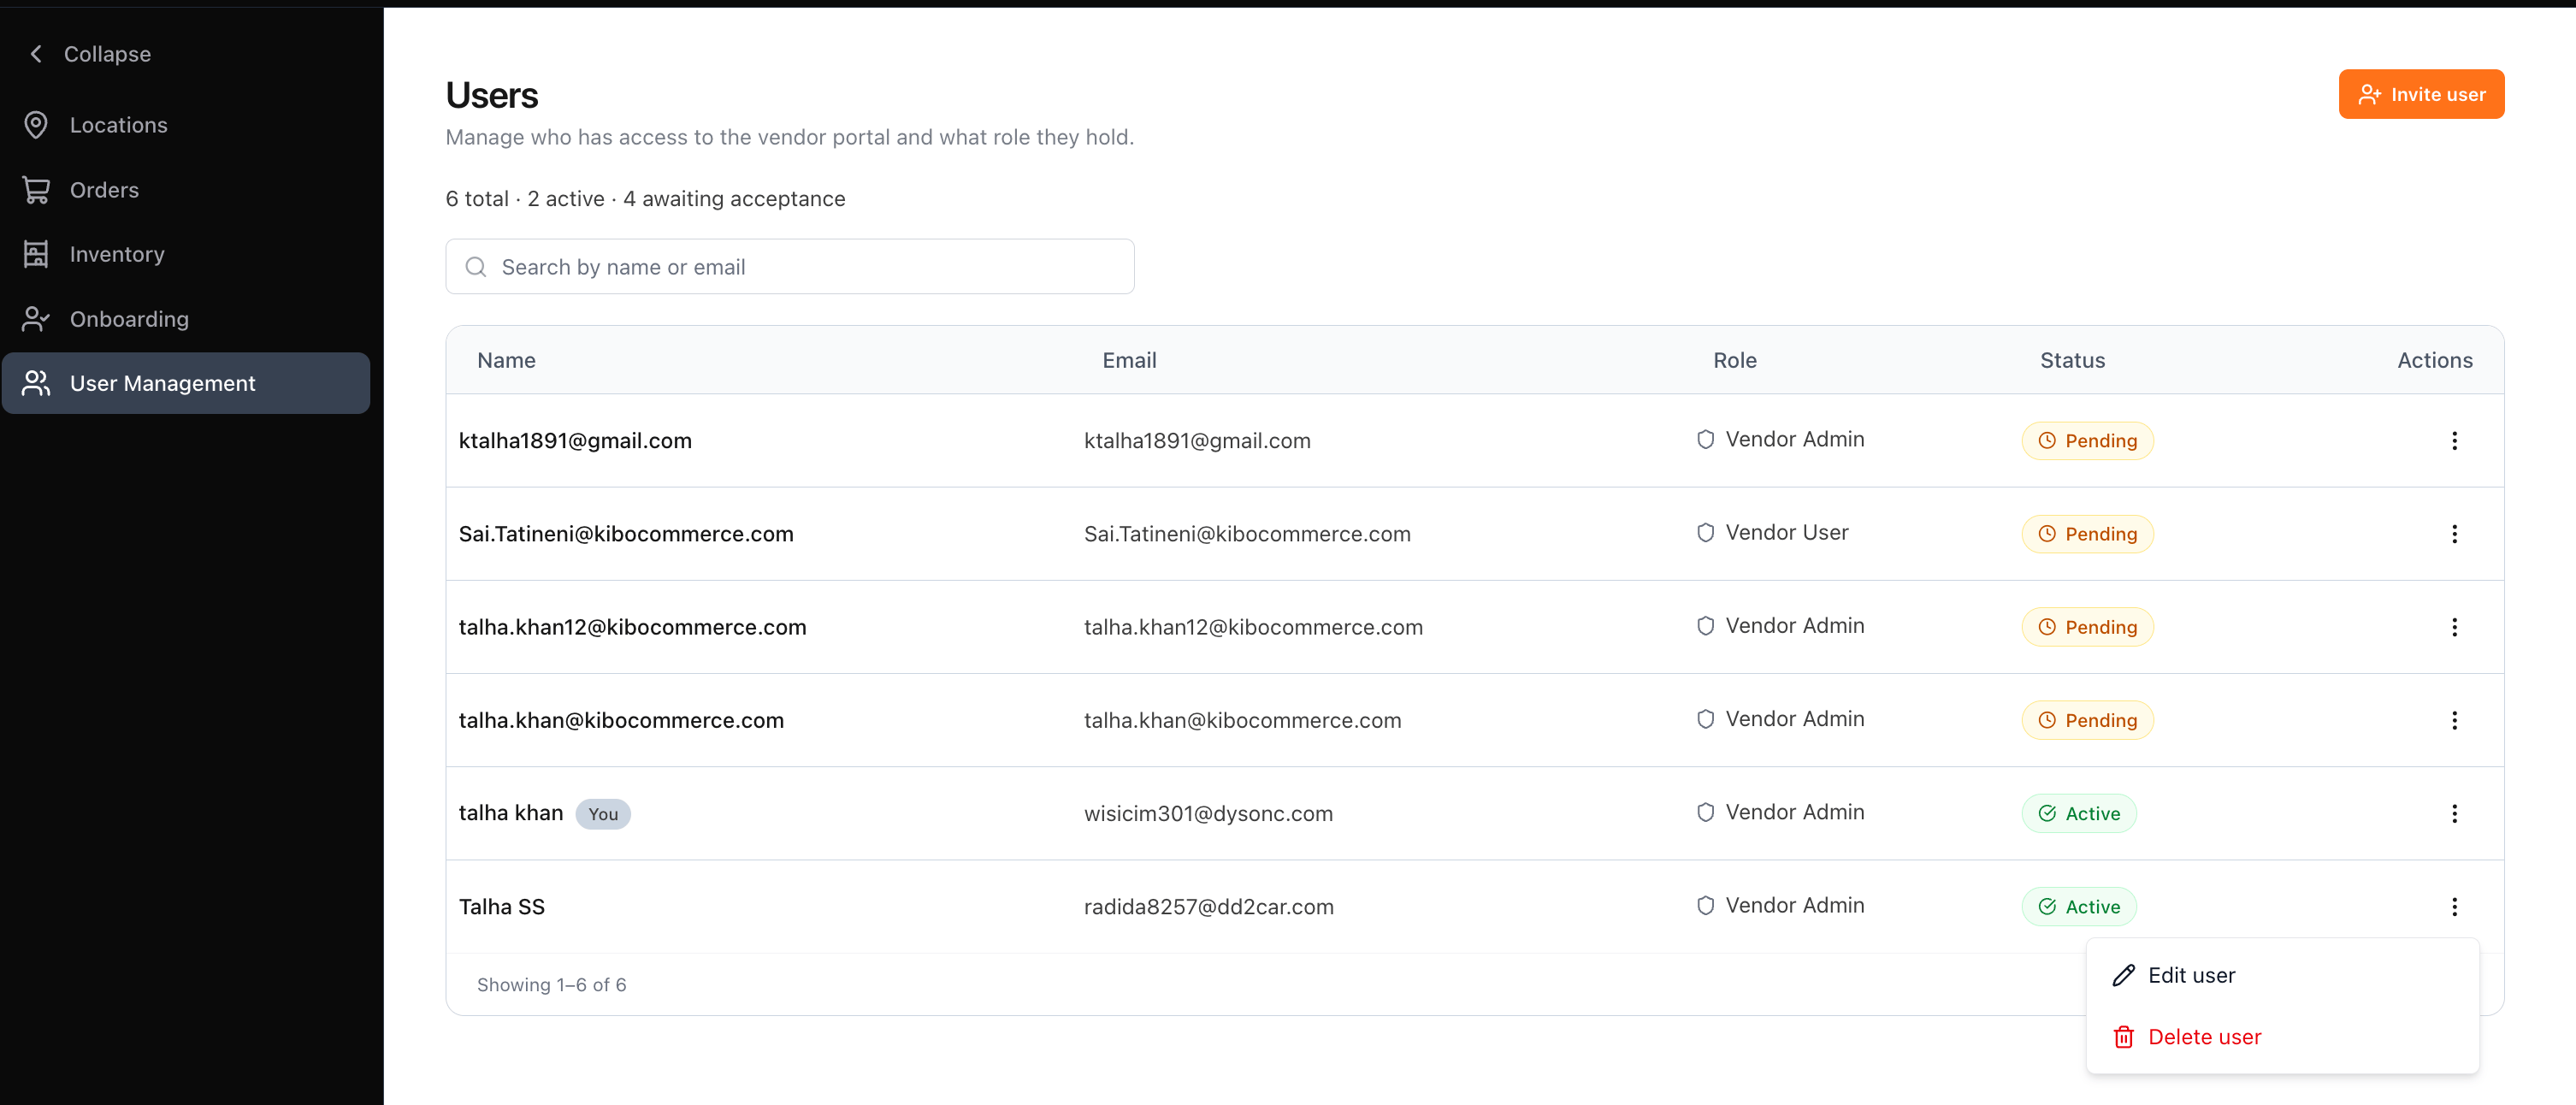
You can change the role of an Active user.- On the user’s row, open the Actions menu (⋮) and click Edit user.
- In the dialog, the user’s Name, Username, and Email are read-only. Select a new Role — Vendor Admin or Vendor User. The selected role’s access summary is shown as a hint.
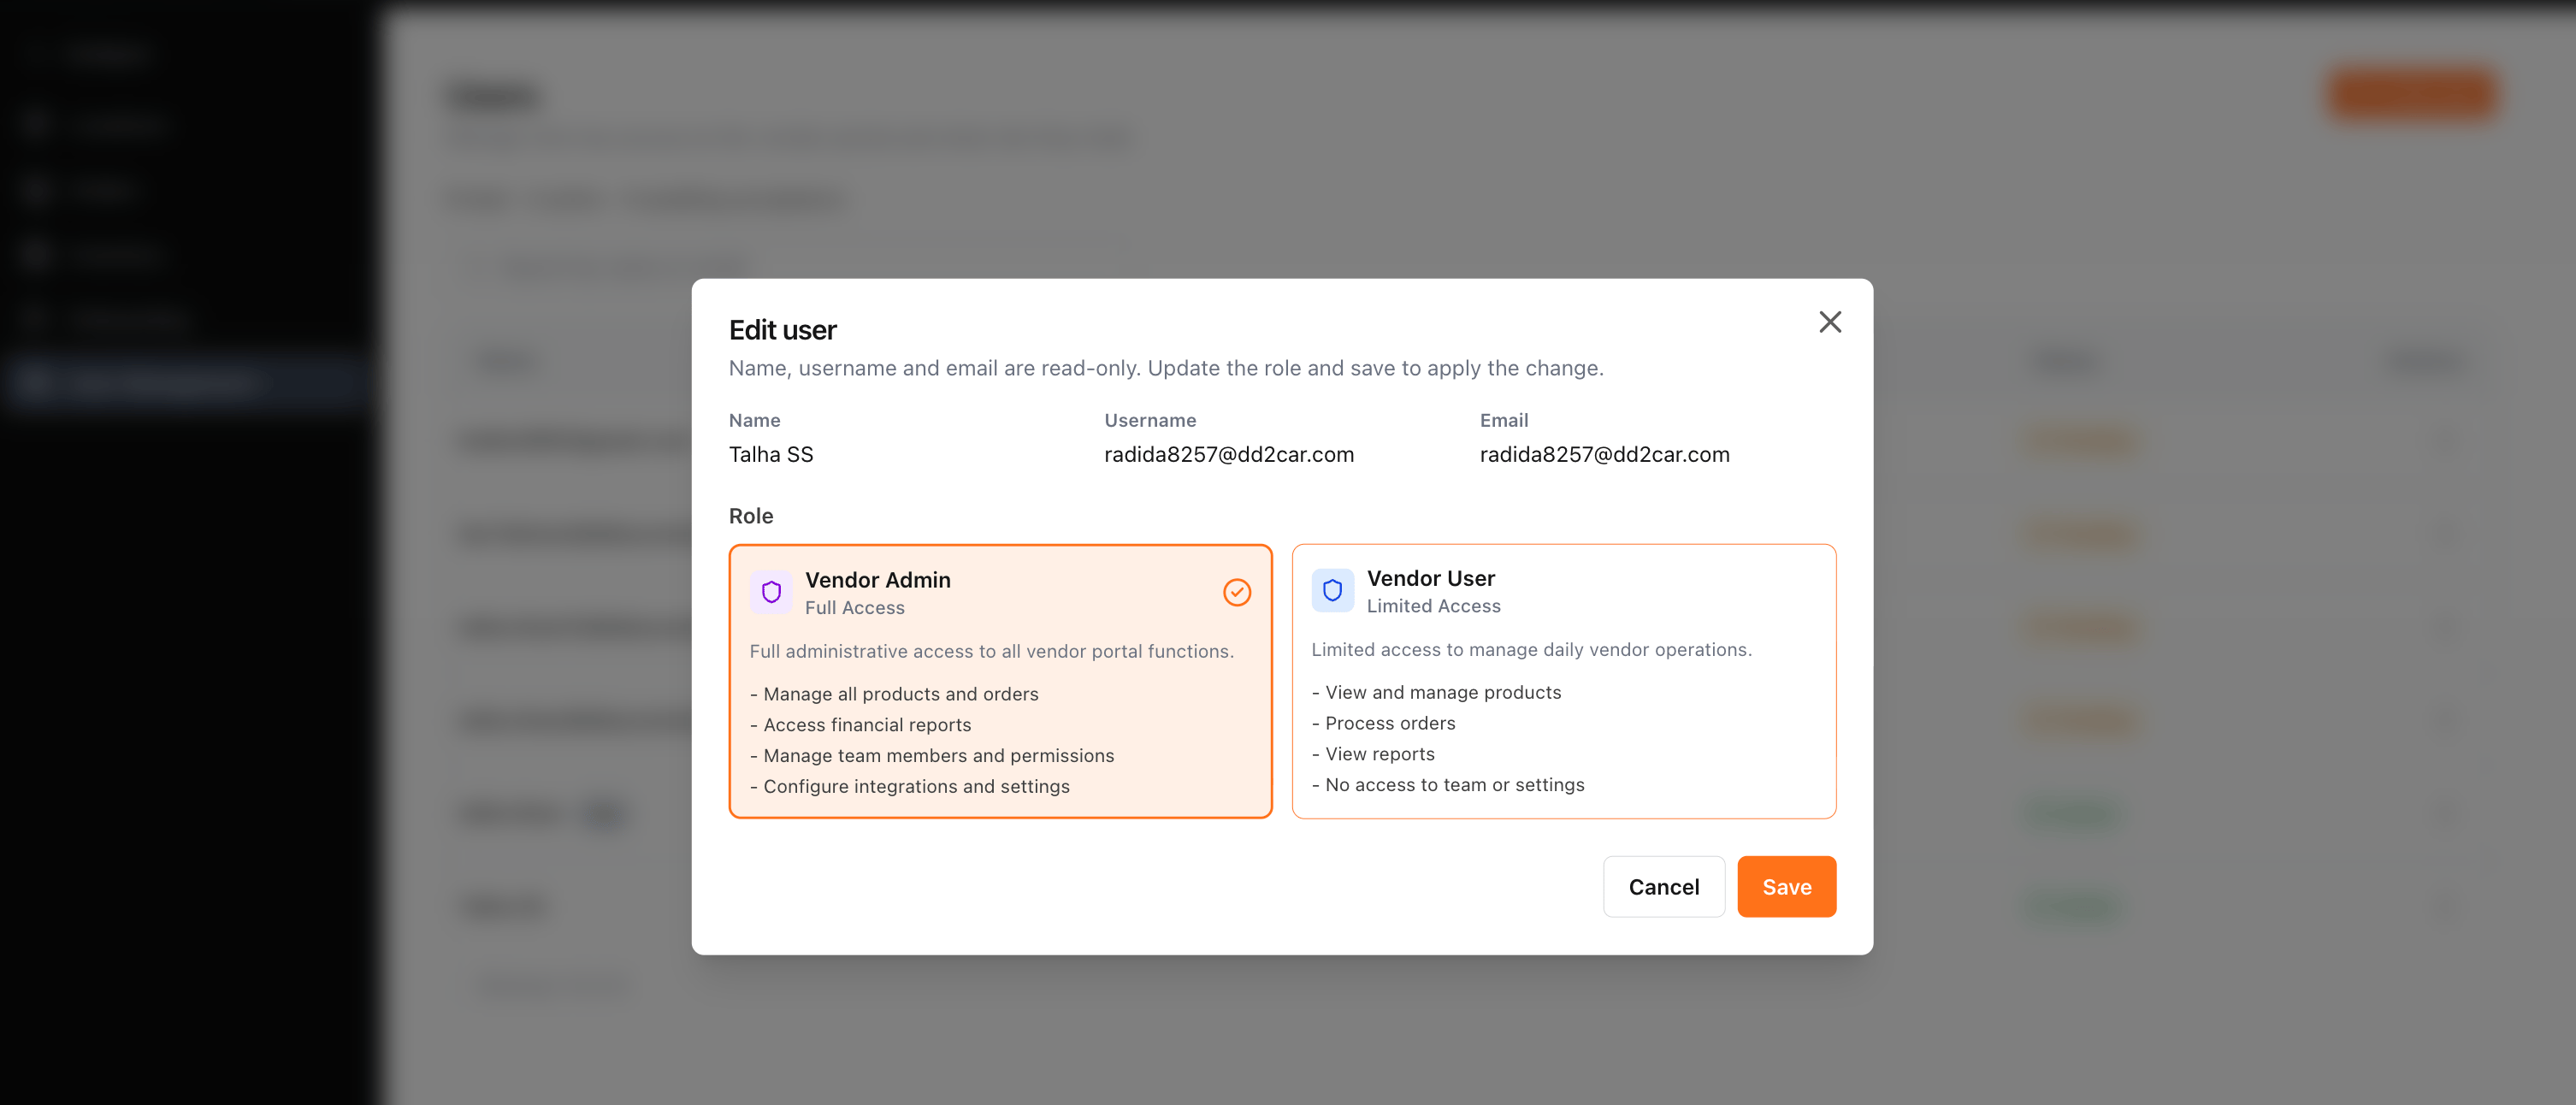
- Click Save. A Success dialog confirms the new role and the row updates. Saving without changing the role simply closes the dialog.
Delete a User
You can remove a user whose status is Pending or Active.- On the user’s row, open the Actions menu (⋮) and click Delete user
- A confirmation dialog names the user — “Are you sure you want to delete [name] ([email])? This action cannot be undone.” For a user who hasn’t accepted yet, the dialog also notes that their pending invitation will be canceled and the link will stop working.
- Click Delete user to confirm, or Cancel to keep the user. On confirmation, the row is removed and a Success dialog is shown.
Account Safeguards
Two protections apply to every user action:- You can’t act on your own account. On your own row (tagged You), Edit user and Delete user are disabled — “You can’t change your own role.” and “You cannot delete your own account.”
- The last admin can’t be removed. At least one active Vendor Admin must always remain. Deleting the last remaining admin is blocked: the confirmation warns that you would need to contact Kibo Support to restore access, and you must tick an acknowledgement checkbox before the action is allowed.