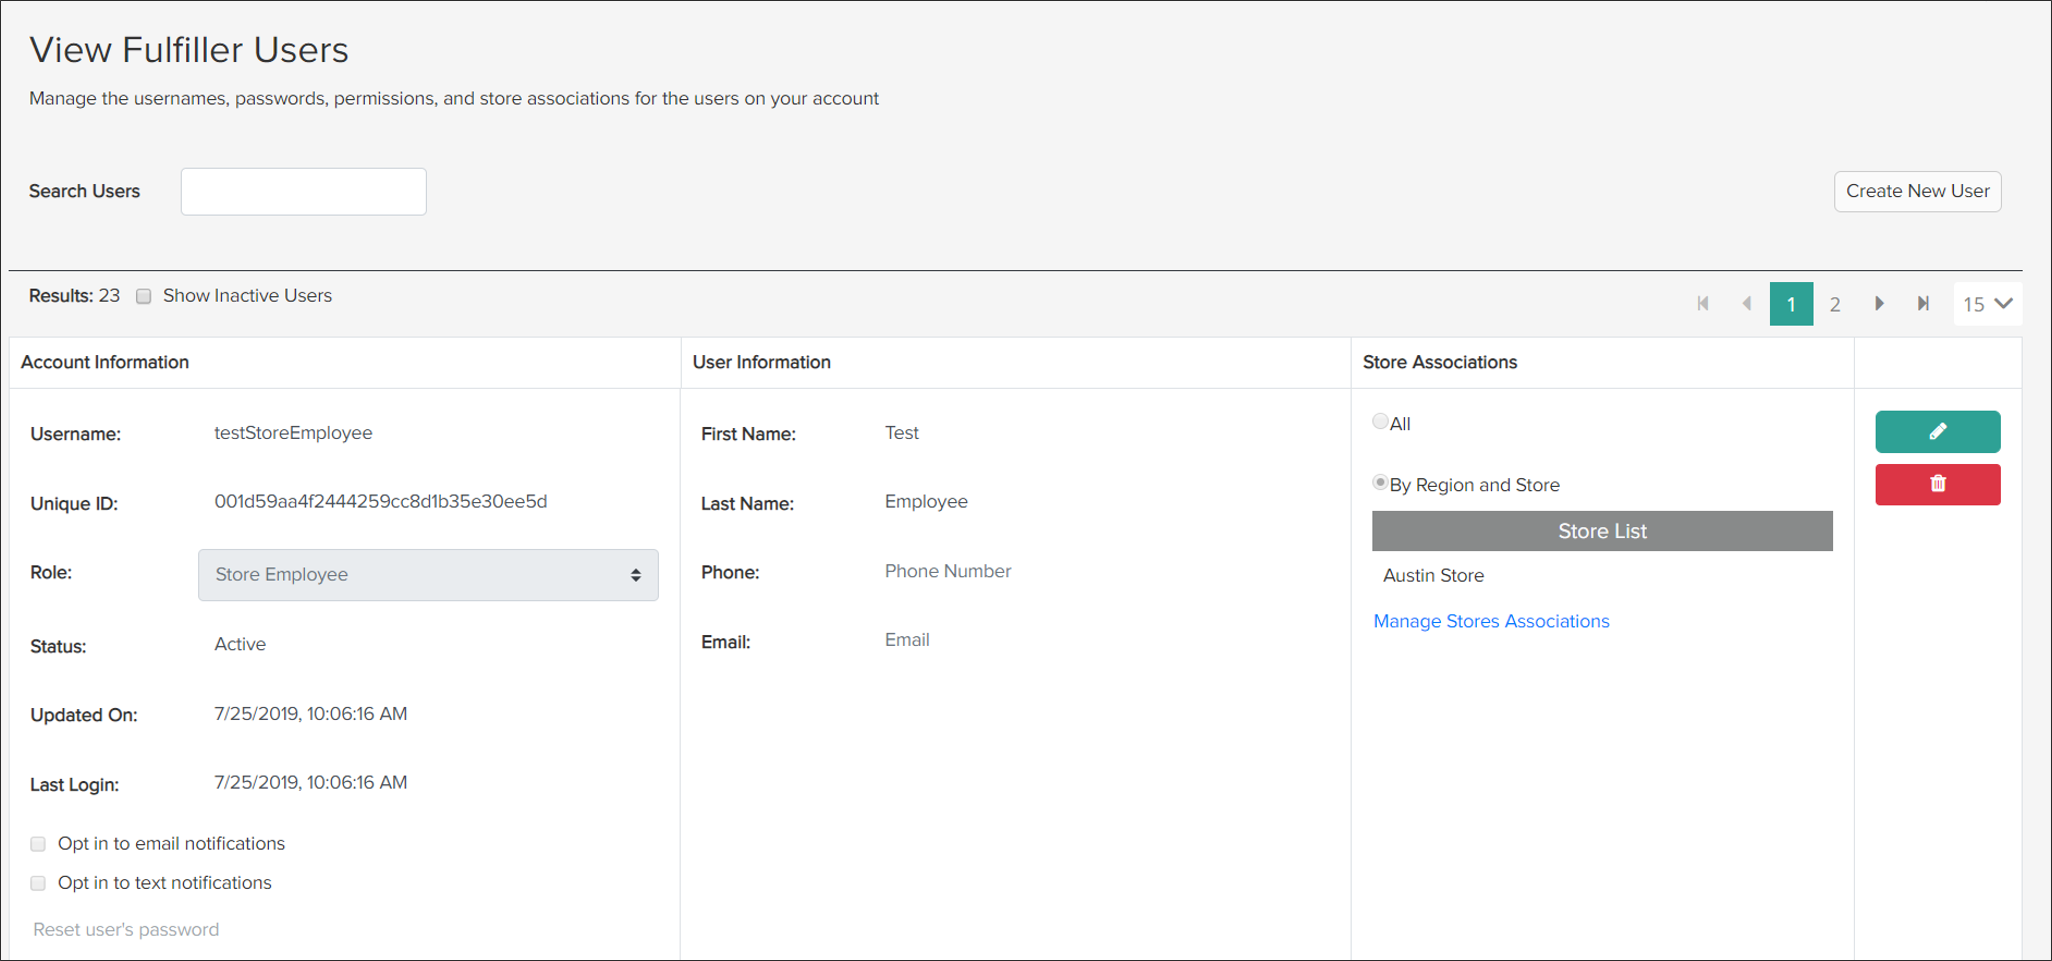
The Settings tab of the Fulfiller UI contains all the user management functions that are available to fulfiller administrators. This page lists all fulfiller account information, user contact details, and the store associations for the user – the locations that they belong to and whose orders they can access when using the interface.Documentation Index
Fetch the complete documentation index at: https://docs.kibocommerce.com/llms.txt
Use this file to discover all available pages before exploring further.
Add a User
To create a new fulfiller user:- Go to Main > Fulfiller > Settings.
- Click Create New User in the top right above the user listings.
- Configure the required Username, Password, First Name, and Last Name.
- Configure the optional Phone and Email.
- Click Save when all details have been provided to finish creating the user account and manage their store associations.
Edit Existing Users
To update an existing fulfiller user:- Go to Main > Fulfiller > Settings to view a list of fulfiller users across all stores.
- Click the green pencil icon to the right of an existing user listing.
- This will enable editing on Username, Role, First Name, Last Name, Phone, and Email.
- Changing the option under Role will display what locations the user can access under either a manager or employee role, so a user can be assigned as a manager at some locations and an employee at others.
- Clicking All instead of By Region and Store above the store list will set the user to a Global Fulfillment Manager/Employee instead of location-specific. See the User Settings guide for more information about fulfiller roles.
- Click the green checkmark to save or use the red trash can to delete the user account from the fulfiller interface.
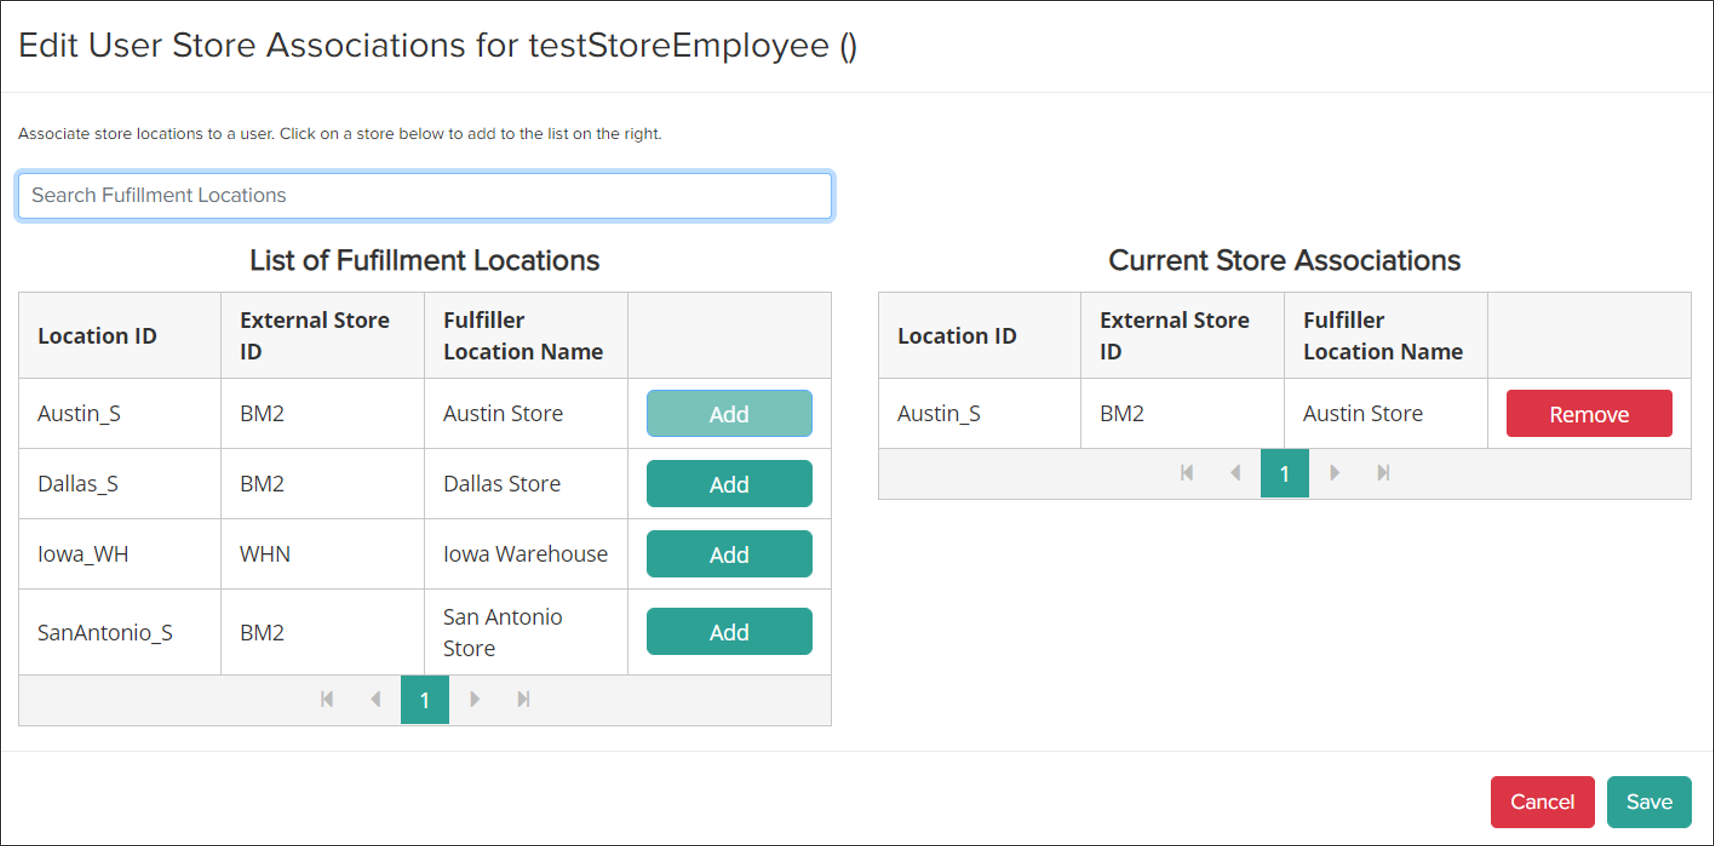
Update Store Associations
Store associations can also be removed or added by clicking Manage Store Associations while editing a user.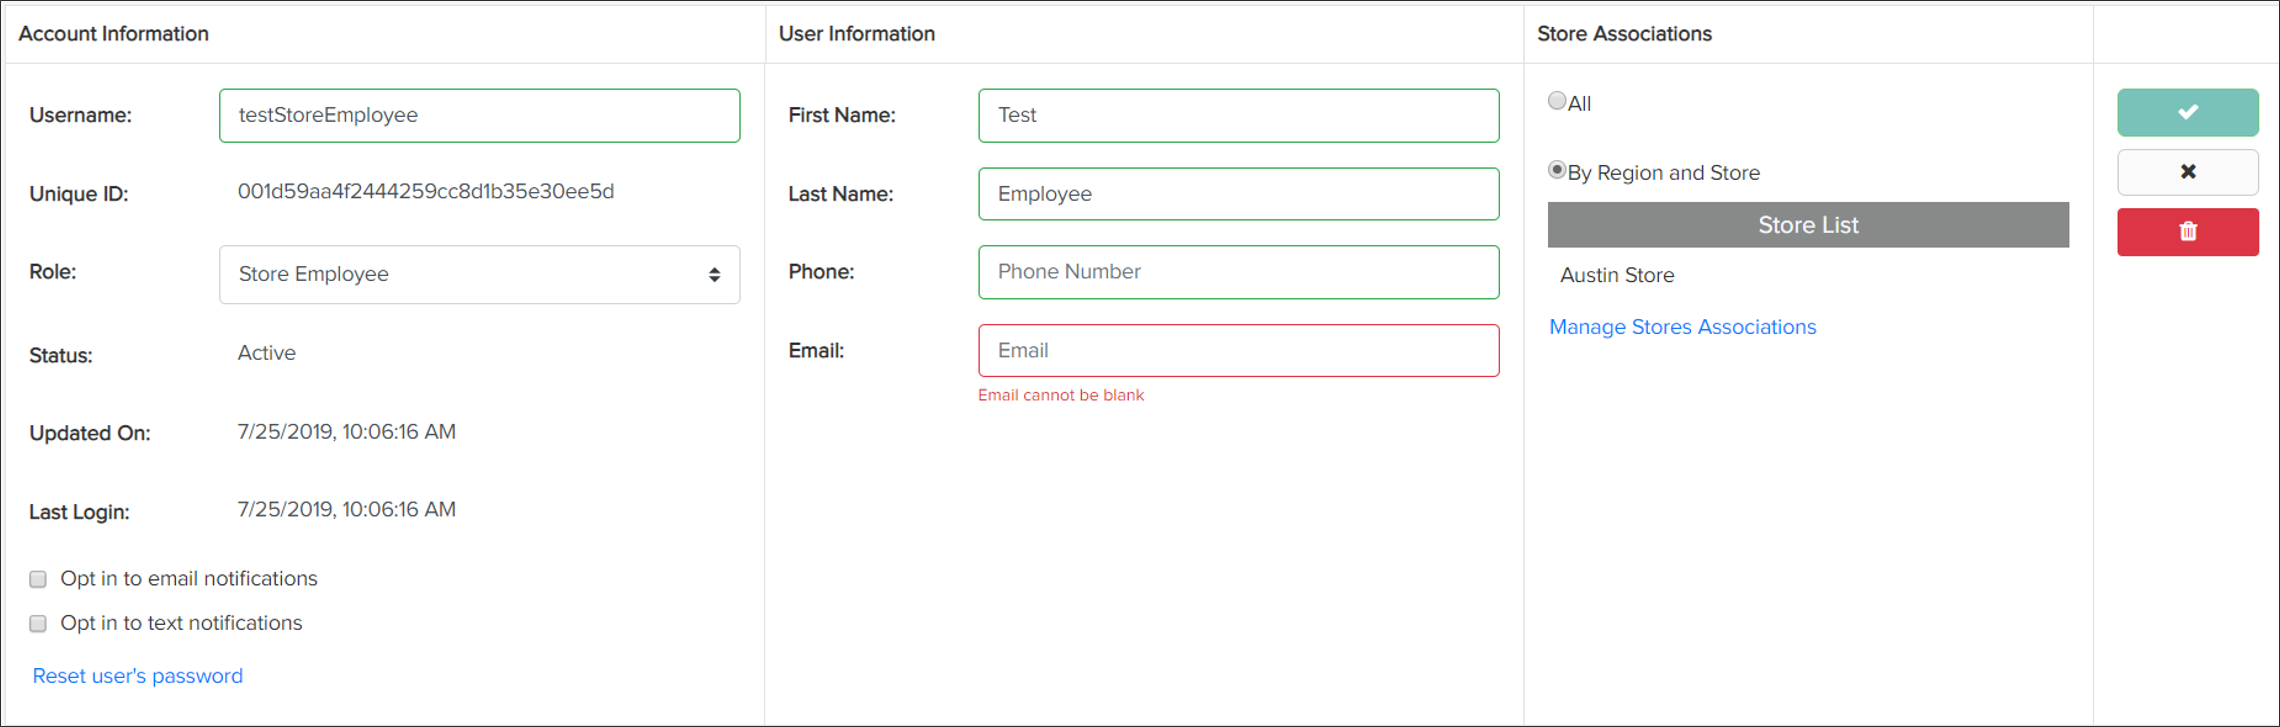
- Click Add next to a location to associate it to the user.
- Clicking Remove will take a location off this list.
- Click Save when all changes have been made.