Shipping Extensibility allows you to create your own shipping carrier integration by creating an application in the Kibo Dev Center, configuring that application with shipping integration details, and then installing that application in your tenant. This application can then be run by an API Extension or your own hosted API endpoint.
API Extensions vs. REST APIs
Shipping Extensibility runs on either API Extensions or a hosted REST API. Extensions can be fully developed from the Dev Center. If you prefer to use a REST API, Kibo can provide you with the exact specifications and hosting details.
It is recommended to contact your Kibo enablement team to discuss your needs before starting to create a new carrier, as well as to get more details about developing these options such as sample code.
Integrate an API Extension
If you are using an API Extension, you will configure it similarly to the following JSON using an application ID as the carrier ID. This will enable using the custom carrier when calling the shipping service. See Getting Started with API Extensions for more information about configuring extensions.
{
  "actions": [
    {
      "actionId": "embedded.commerce.catalog.storefront.shipping.shippingExtensibility.main",
      "contexts": [
        {
          "customFunctions": [
            {
              "applicationKey": "carrierId",
              "functionId": "embedded.commerce.catalog.storefront.shipping.shippingExtensibility.main",
              "enabled": true,
              "timeoutMilliseconds": 25000
            }
          ]
        }
      ]
    }
  ],
  "configurations": [

  ],
  "defaultLogLevel": "Info"
}
Set Up a Shipping Adapter
Shipping Adapter applications have some unique behaviors and Kibo recommends reviewing this relevant behavior and best practices under the Installing, Versioning, and Best Practices section.
Create an Application
To begin creating a custom shipping integration, you will need to create an application. For more details and context, see the application documentation.
- In the Kibo Dev Center, under the Developer Accounts list, select your developer account.
- Select Develop > Applications.
- Enter your application's name in the search bar.
- Under the Actions column for your app, select the settings icon.
- Select Edit.
- On the left hand side, select Packages > Capabilities.
- Select Add Capability.

- Select Shipping Adapter from the drop down menu.
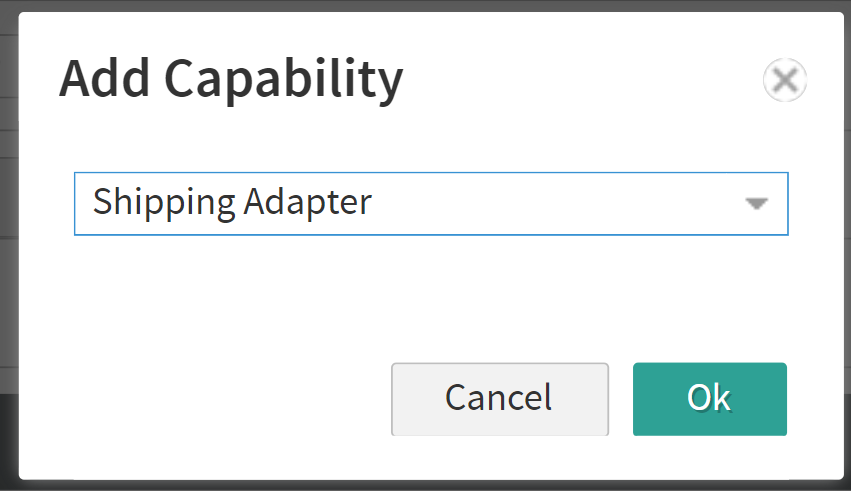
- Select Ok. This displays the Shipping Adapter screen.
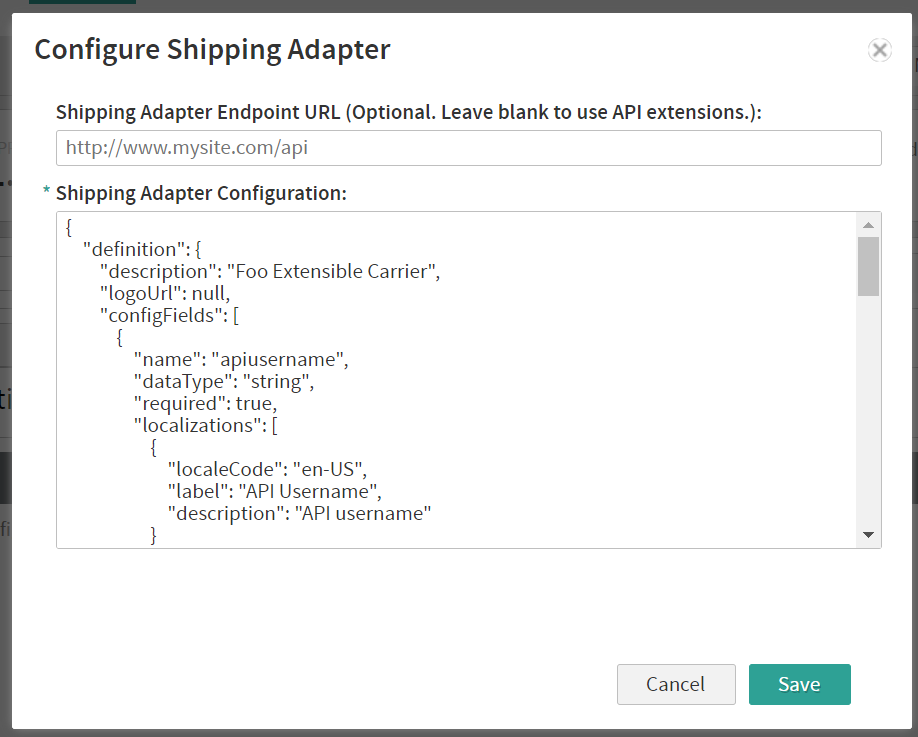
- If you are using a third-party REST API, enter the endpoint in the Shipping Adapter Endpoint URL. Leave blank if you intend to use an API Extension instead.
- In the Shipping Adapter Configuration, define the carrier with its description, logo (if applicable), configuration fields, and shipping service types such as in the example below. These configuration fields should include carrier credential sets, username/password and API key. The serviceTypes field should define the supported shipping methods for this carrier with a shipping code suffix and duration. Refer to the example below for a template of this definition.
{
    "definition":     {
        "description": "Foo Extensible Carrier",
        "logoUrl": "https://host/image/path.png",
        "configFields":  [
          {
              "name": "apiusername",
              "dataType": "String",
              "required": "true",
              "localizations":  [
                {
                    "localeCode": "en-US",
                    "label": "API Username",
                    "description": "Foo API username"
                }
              ]
          },
          {
              "name": "apipassword",
              "dataType": "Password",
              "required": "true",
              "localizations":  [
                {
                    "localeCode": "en-US",
                    "label": "API Password",
                    "description": "Foo API password"
                }
              ]
          }
        ]
    },
    "serviceTypes": [
        {
            "serviceTypeCodeSuffix": "Standard",
            "deliveryDuration": "Standard",
            "localizations": [
                {
                    "localeCode": "en-US",
                    "name": "Foo Standard"
                }
            ]
        },
        {
            "serviceTypeCodeSuffix": "3_Day",
            "deliveryDuration": "ThreeDay",
            "localizations": [
                {
                    "localeCode": "en-US",
                    "name": "Foo 3 Day"
                }
            ]
        },
        {
            "serviceTypeCodeSuffix": "2_Day",
            "deliveryDuration": "TwoDay",
            "localizations": [
                {
                    "localeCode": "en-US",
                    "name": "Foo 2 Day"
                }
            ]
        },
        {
            "serviceTypeCodeSuffix": "1_Day",
            "deliveryDuration": "OneDay",
            "localizations": [
                {
                    "localeCode": "en-US",
                    "name": "Foo 1 Day"
                }
            ]
        }
    ]
}


Submit Your App for Certification
If you are deploying this app to a production tenant, it must be certified to ensure that it is secure. Once you have tested the adapter, provide Kibo with the Application ID and Development account of the application. Kibo Engineering will review the adapter and perform an audit. This process usually takes about four weeks.
Although the Dev Center includes a submission button at More > Submit for Certification, you do NOT have to perform this action if you have worked with Kibo enablement to set up and test the adapter.
Install Your Shipping Adapter App
When certified, the application can be installed on a production tenant. For some reminders about relevant behavior and best practices, see the Installing, Versioning, and Best Practices section.
To install a shipping adapter from Dev Center:
- In the Dev Center Console, select Develop > Applications.
- Search for your application.
- Under the Actions column, select the settings icon.
- Select Edit.
- Select Install.
- Select your sandbox from the list.
- Select OK.
Enable in Your Tenant
Then, to install the application in your tenant:
- Go to System > Customization > Applications page of the Admin UI.
- Select the application.
- Click Enable Application to toggle it on.
Be aware that if your application is certified and then you create a new version, the application key will update with the new version and technically create a new carrier. Upon install of the new version, you will need to configure the new carrier before use.
Configure the Carrier in Admin
To begin using the new carrier:
- Go to System > Settings > Shipping Settings > Carrier Accounts.
- Create a new carrier account and select the custom integration from the dropdown.
- Once created, set up fulfillment options for the site to enable shipping methods and set rates.
- Go to Main > Orders > Locations to enable carriers and shipping methods at the location and location group levels.
Once configured, the new shipping options will be displayed when placing an order and on the Fulfiller UI.
Installing, Versioning, and Best Practices
When versioning a Shipping Extensibility application, there are some important behaviors and best practices to keep in mind.
Application Installation Behavior
Extensible carriers exist globally and are shared by all tenants in an environment (e.g. Sandbox, Pre-Prod, and Production). When the application containing a carrier is installed to a tenant, it will create a global carrier definition in that environment and enable it for use on the tenant. Installing the same application to another tenant will reuse the global carrier definition and enable it for the new tenant.
Upon first install, the carrier will have to be configured on each tenant. This includes configuring the application version in API Extensions (if applicable) and settings for Shipping, Locations, and Location Groups in the Admin UI. But upon re-install, any changes made to the carrier (including the name, description, service types, etc.) will be applied to all tenants in your environment that use the same application version. It is not necessary to re-install the application to each tenant.
Application Versioning Behavior
Extensible carriers are unique to the application version. This allows for development of new versions and safe installation to Production tenants with the ability to rollback if necessary. For example, all of the below application versions are treated as different carriers and will be installed and updated distinct from other versions:
- namespace.ApplicationName.1.0.0.Release
- namespace.ApplicationName.1.1.0.Release (version increment)
- namespace.ApplicationName.1.1.0.Testing (different package)
Each application version will have to be configured separately on each tenant. This includes configuring the application version in API Extensions (if applicable) and settings for Shipping, Locations, and Location Groups in the Admin UI.
Best Practices
Follow these best practices to simplify your extensible carriers.
Use a Single Application and Single Package
It is recommended to use only a single application and a single package. This will reduce the amount of configuration required and simplify development, certification, and promotion to production. However, you may still use multiple applications or multiple packages if desired.
Use Example Kibo Code to Get Started
It is highly recommended to use example code from Kibo to get started. The example code is written in a version-independent way and provides many implementation details to make development and implementation easier.
Perform Thorough Testing in Each Environment
To avoid any configuration issues and rollbacks, it is recommended to do thorough testing in each environment. First, develop and test the application in Sandbox. Then, submit the application for certification and install it for testing in Pre-Prod. Finally, install and configure it in Production.
Remove Older Versions After Successful Promotion
After a successful promotion to Production, it is recommended to remove all configurations for older versions to minimize confusion. This includes removing the application version in API Extensions (if applicable) and removing those settings under Shipping, Locations, and Location Groups in the Admin UI.
If desired, you may also submit a request to Kibo Support to disable the older carrier in an environment to prevent its use and simplify the UI options.