Quick edits allow you to make the same update to an attribute value or category assignment across multiple products at once, rather than making the update one at a time for each product or using the import/export tool to perform a bulk edit. With quick edits, you can:
- Update general pricing related fields such as sales price and cost.
- Update base properties available across all products.
- Update properties that are specific to a product type.
- Update product properties/attributes with a single value, such as updating the price or availability for all selected products.
- Update product properties/attributes with multiple values, such as adding more brand names to the Brand property.
- Assign products to one or more static categories by either replacing all existing category assignments or adding to them.
- Remove all existing category assignments on products.
- Remove only specific category assignments from products.
- Update primary categories.
However, the following properties are not supported for quick editing:
- Unique fields like Product Code to which a mass update cannot be applied.
- Fields that are typically not the same across products, including long descriptions and images.
- Fields that are dependent on other fields to be updated, such as Start Date for Minimum Advertised Price.
Quick Edits in Catalogs
When updating product attributes (i.e. pricing fields and properties), quick edits are performed at the master catalog level. It is not yet supported to apply overrides to attributes on the child catalog level. However, updating category assignments will always be done at the child catalog level.
In either case, you can only make edits within one master or child catalog at a time. When assigning catalogs, you can only assign a product to another catalog within the same master catalog.
Perform Quick Edits
Walkthroughs for each of the possible actions are described below.
Kibo recommends a maximum amount of 200 products per quick edit, and you will have to remain on the page while the update is applied. If you want to make updates across thousands of products, then Kibo recommends using the import/export tool instead of the Quick Edits interface.
Update Attributes
The Update Attributes screen displays a form with four steps:
- Select Catalog
- Choose Product Type
- Select Products
- Update Attributes
You must perform each of these steps in order. If you go back and change a previously completed step, then any selections you have made in the later steps will be cleared.
- Go to Main > Catalog > Products.
- Expand the Quick Edit menu in the top right.

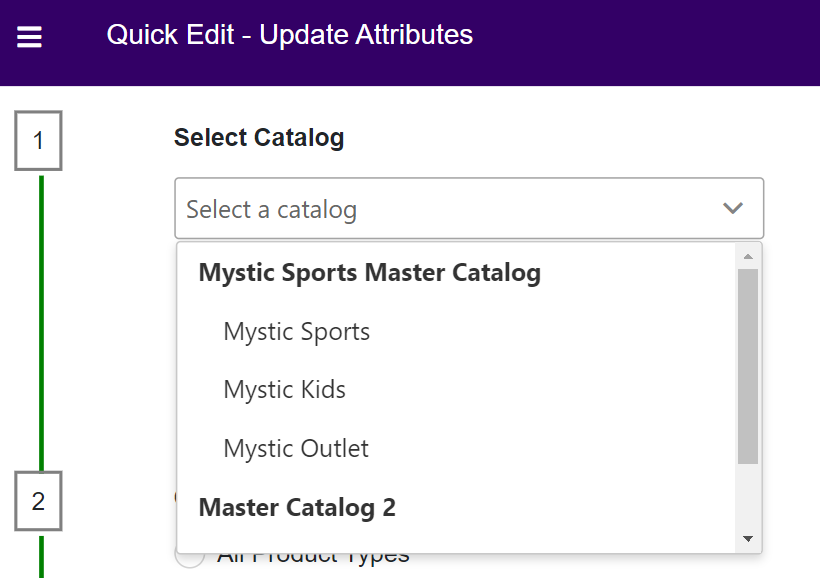
- Click Update Attributes. The page now displays the four steps for updating attributes.
- In Select Catalog, pick a catalog to filter the product list by. If you select a child catalog, this will only filter the list of products available to edit - the updates will still be performed at the master catalog level.
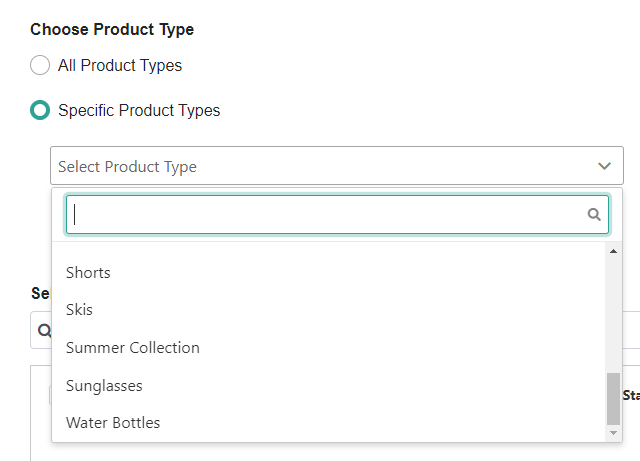
- In Choose Product Type, select a type to determine the available product list. You can either filter for all product types in the catalog or filter for a selected product type.
- If you select All Product Types, then only properties and attributes common across all product types will be available to update. This includes the usage types of Standard, Configurable, Bundles, Bundle Components, and Collections. For example, base properties like "Availability" belong to all product types.
- If you select the Specific Product Type option, then you need to select the product type you want to filter for from the dropdown. The properties available to update will include the base properties as well as properties that are specific to that product type. For example, a Bicycle product may have unique properties like "Speed" whereas a Jacket product may have properties like "Fabric." See the Product Types and Product Attributes guides for more information about how these are configured in the catalog.
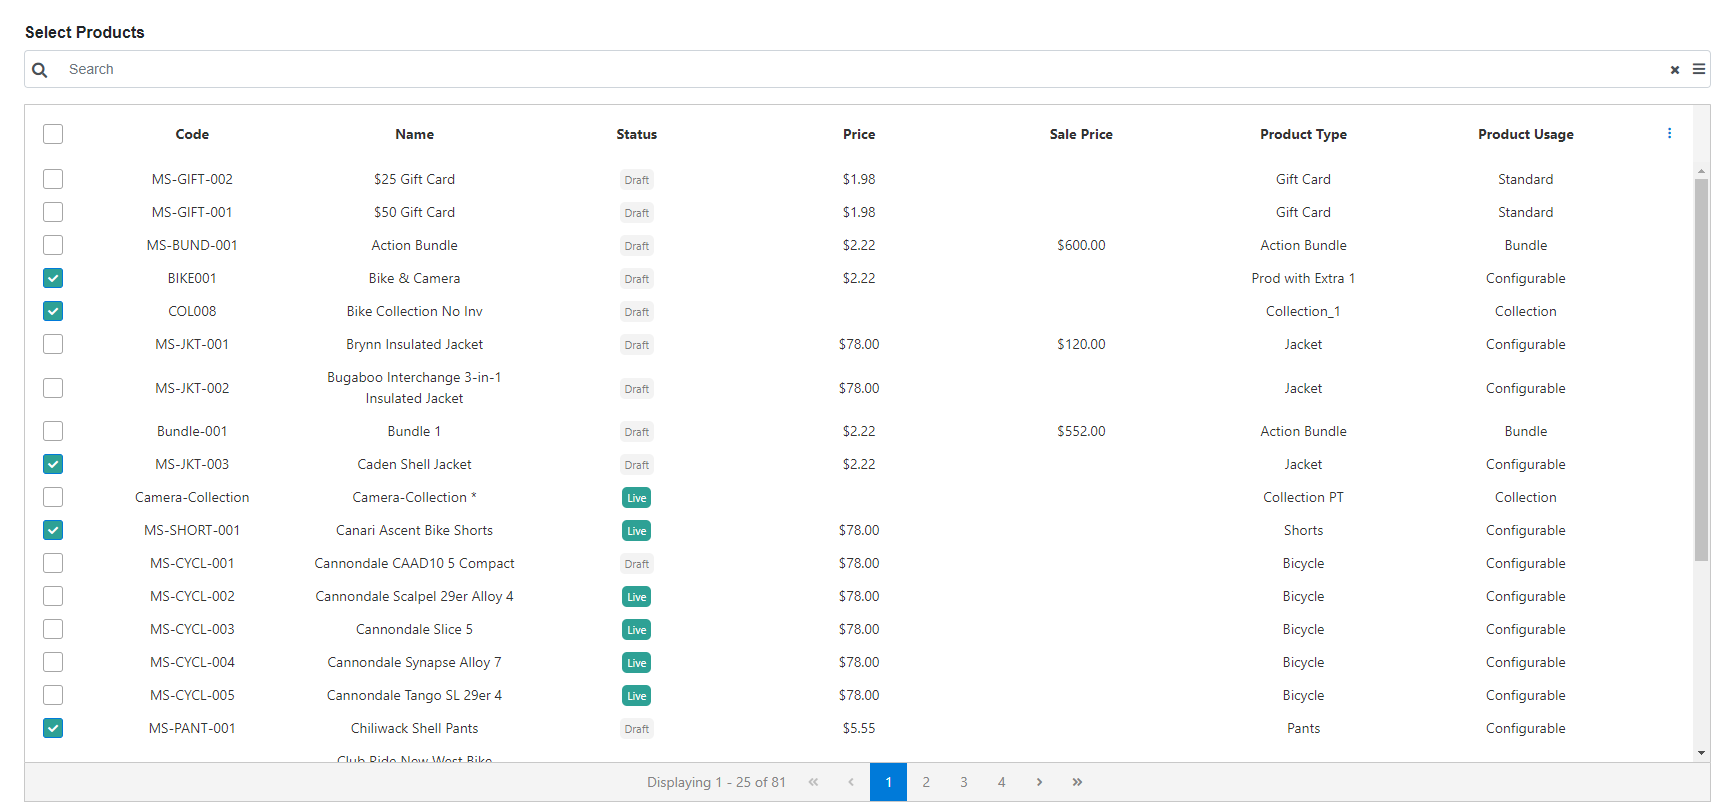
- In Select Products, click the checkboxes of the products you want to update. You can perform a search to locate particular products or expand the Advanced Filter menu on the search bar.
 Use the Advanced Filter to filter the product table with the options shown below. However, note that if you already selected a specific product type in Step 2 then you will not be able to filter by product type again here.
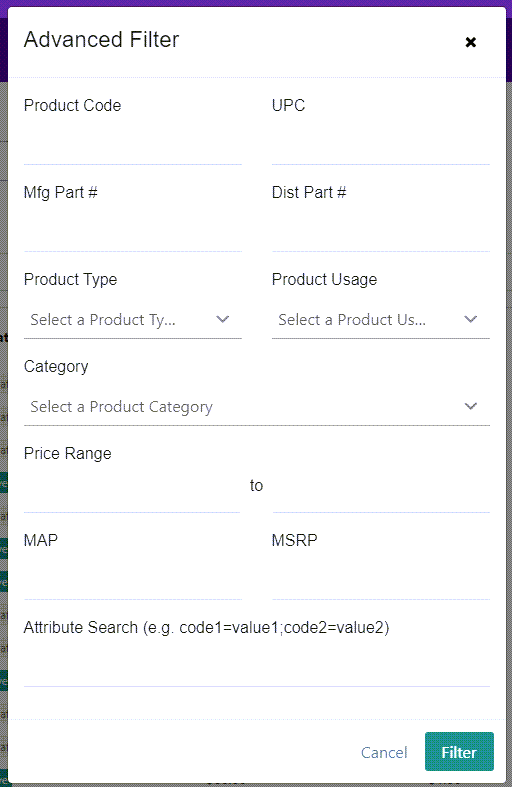
- Once you have selected the products you want to update, click on the Quick Edit button below the product table. You cannot progress to the final step without doing so.
- This locks the table and the button text will switch to Edit Selection. If you need to change the products you have selected, click that button to unlock the table.
- You can also click Clear Selection to uncheck everything and start over if needed.

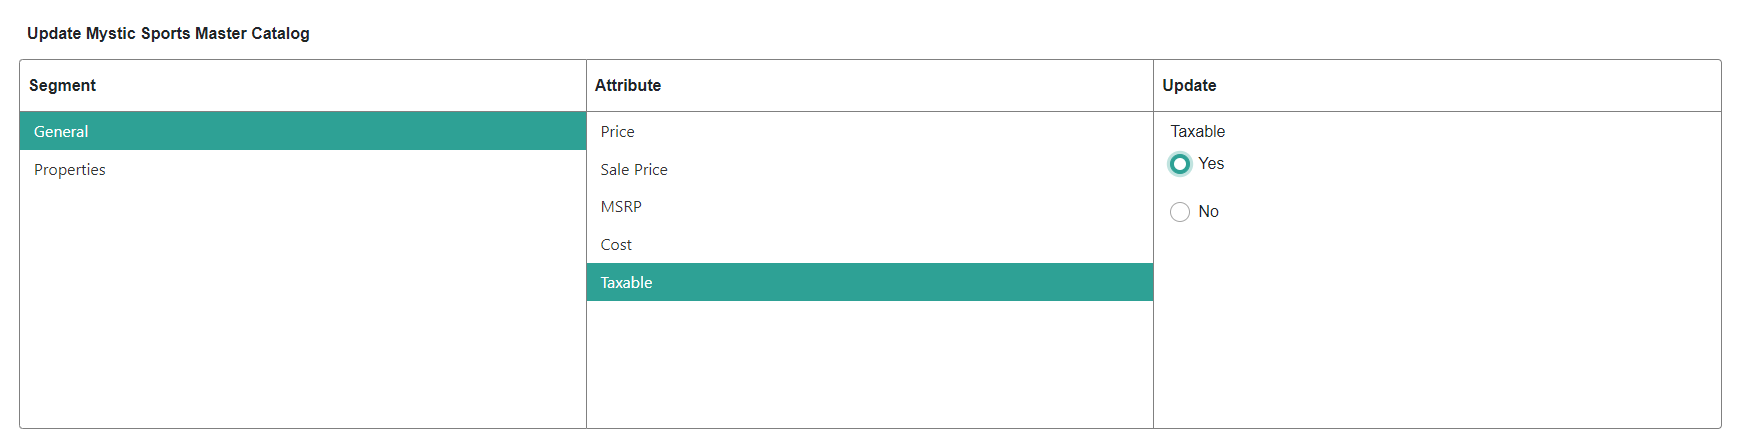
- In Update Attributes, select a segment, an attribute within that segment, and then set the new value.
- If an attribute has multiple values, such as a list of possible colors or sizes, you will be replacing all of the existing values already configured for the selected products with your new values.
- You can only update one attribute at a time, but if the attribute accepts multiple values then you will able to input that list of values.
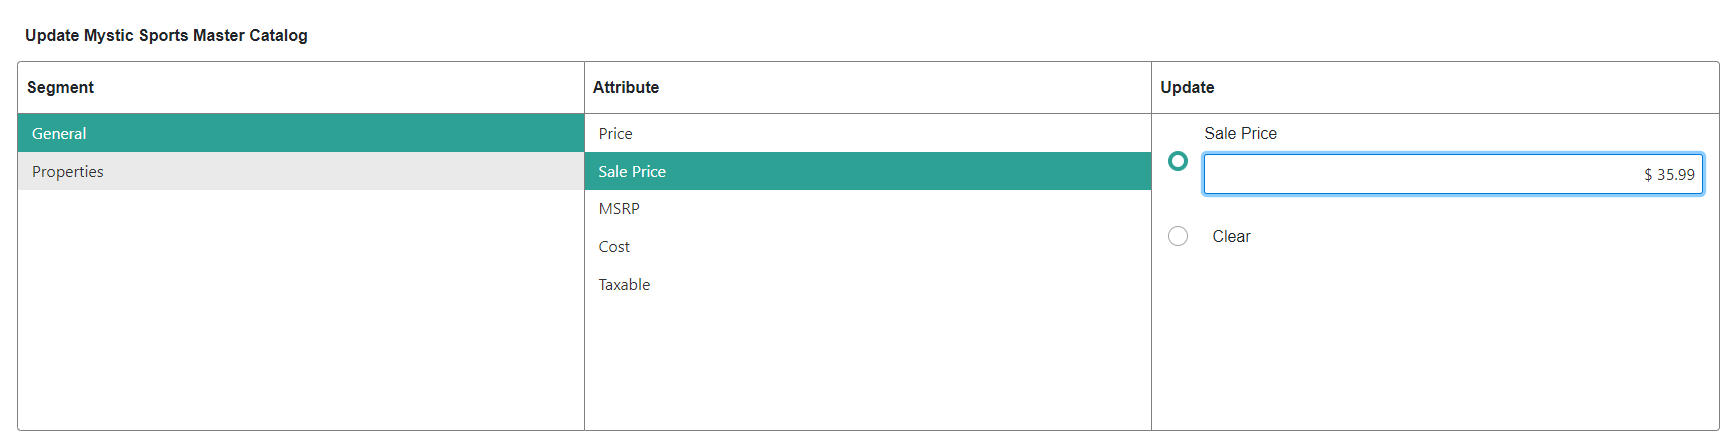
- For optional fields, you can click Clear to set the value as blank for all selected products. However, you cannot clear the value of a required field. For all Boolean fields, you can either check Yes or No.
- Depending on your Product Publishing Settings, you can either have the updated products publish immediately or become a product draft:
- If your Product Publishing settings are set to Live, click Save in the top right to complete your changes and they will be published live on your storefront.
- If your Product Publishing settings are set to Staged, you can click either Save or Save and Publish. Click Save to save your update but not yet publish it (allowing yourself to configure another attribute update) or Save and Publish if you want to immediately push all updates to your catalog.
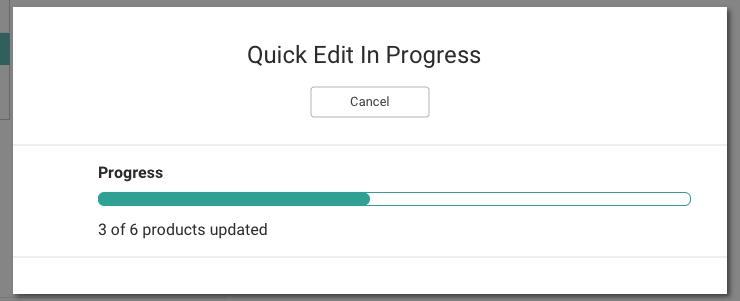
- After you save, you will be provided with a progress bar as well as a log of all updated products. You are able to cancel the update, but doing so will not revert any changes that were already completed before the cancellation.
- Upon completion, a log of product updates will be displayed. Any products that experienced an individual error during the update will be shown with a tooltip explaining the failure. If an entire batch in the update fails due to a server error, then no further updates will be attempted and an error will be displayed instead.


 Use the Advanced Filter to filter the product table with the options shown below. However, note that if you already selected a specific product type in Step 2 then you will not be able to filter by product type again here.


Update Product Types
The Update Product Types screen displays a form with four steps:
- Select Master Catalog
- Choose Product Type to Update
- Select Products to Update
- Choose Product Type to Change to
You must perform each of these steps in order. If you go back and change a previously completed step, then any selections you have made in the later steps will be cleared.
- Go to Main > Catalog > Products.
- Expand the Quick Edit menu in the top right.
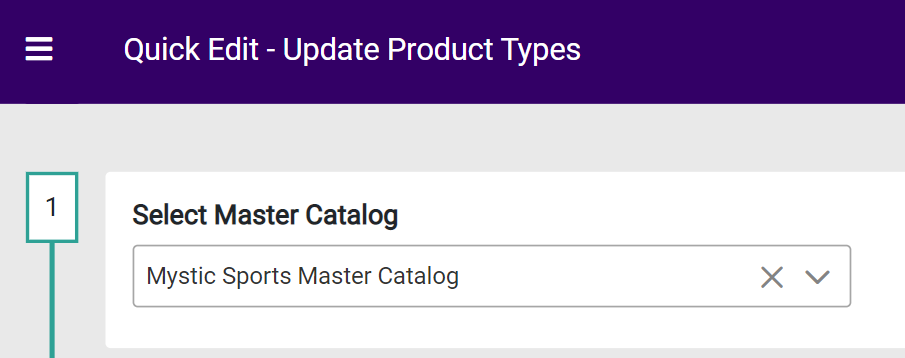
- Click Update Product Types. The page now displays the four steps for updating product types.
- In Select Master Catalog, pick a catalog to filter the product list by.
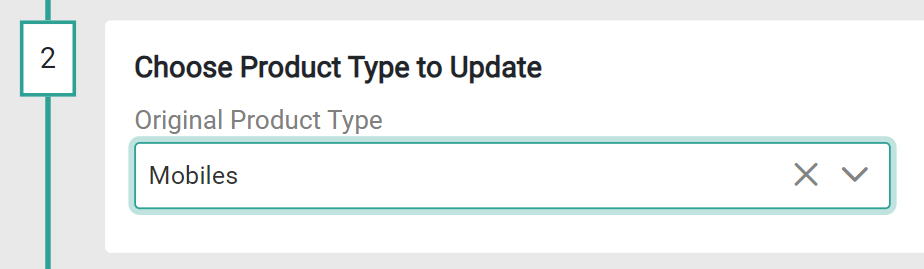
- In Choose Product Type to Update, select a specific type to determine the available product list.
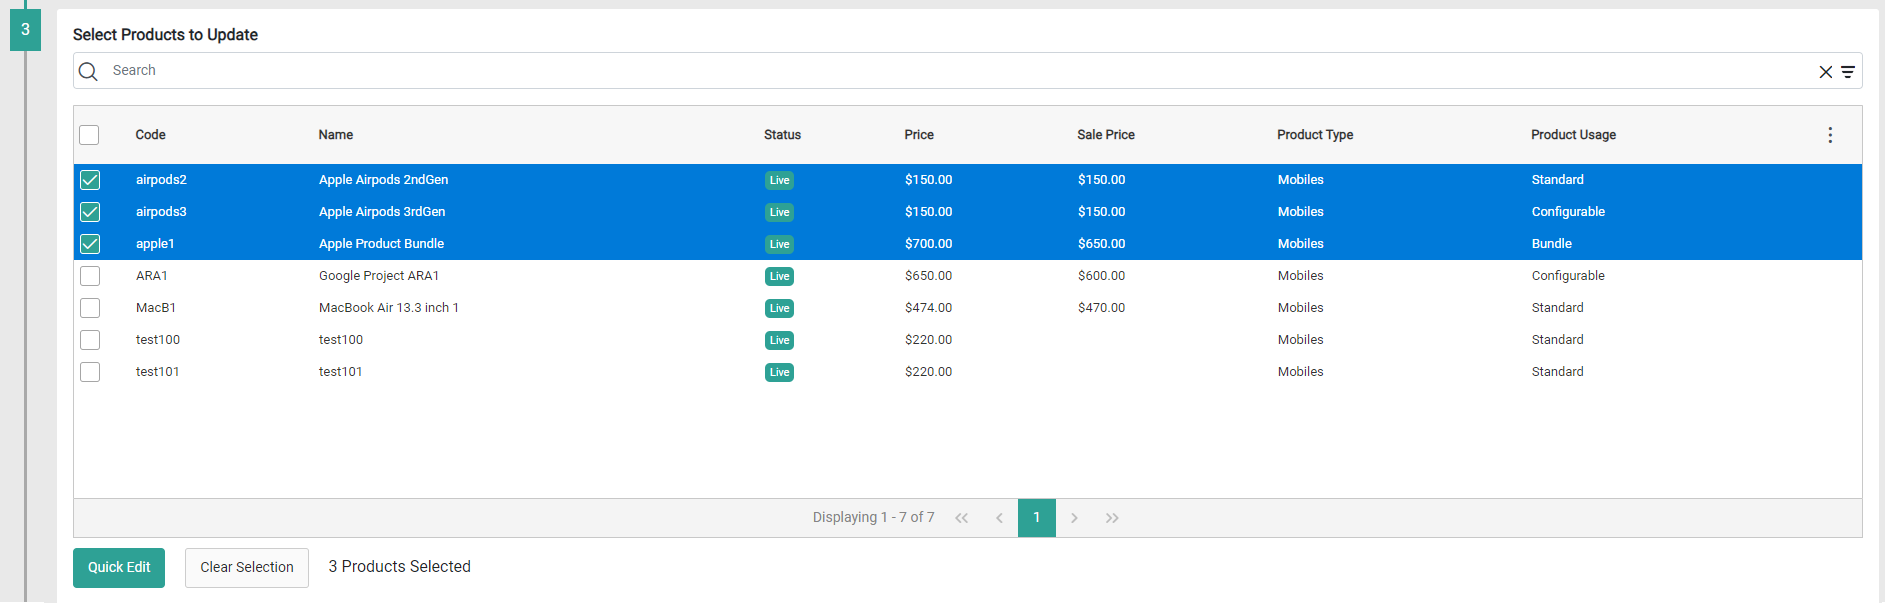
- In Select Products to Update, click the checkboxes of the products you want to update. You can perform a search to locate particular products or expand the Advanced Filter menu on the search bar.
 Use the Advanced Filter to filter the product table with the options shown below.
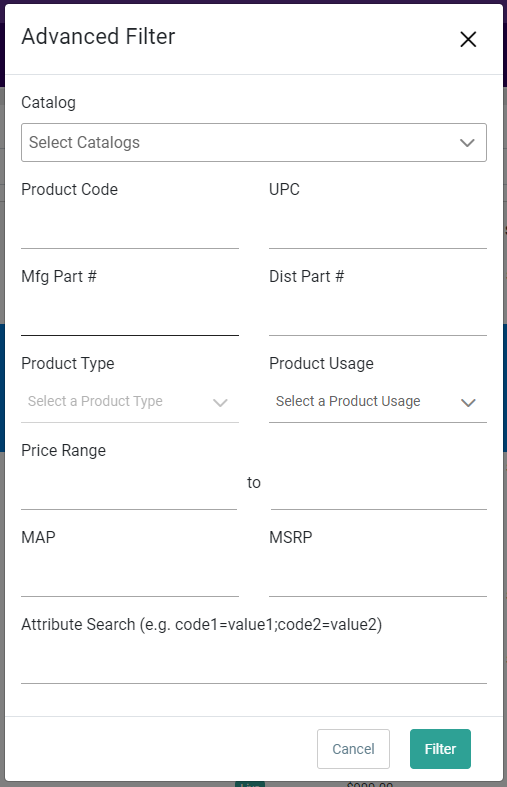
- Once you have selected the products you want to update, click on the Quick Edit button below the product table. You cannot progress to the final step without doing so.
- This locks the table and the button text will switch to Edit Selection. If you need to change the products you have selected, click that button to unlock the table.
- You can also click Clear Selection to uncheck everything and start over if needed.
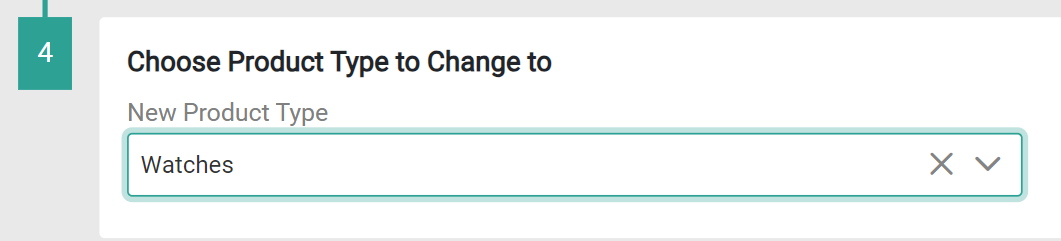
- In Choose Product Type to Change to, select a new product type from the drop-down.
- Click Save in the top right.
- A pop-up will allow you to preview the changes and check for any conflicts before confirming the update. You must select the products that you want to move forward with based on this conflict status. If all products are errored, then you will not be able to move forward with any updates and must instead Cancel the edit.
- Any products without a conflict will be selectable.
- Any products will minor conflicts will be marked with the Check Warnings status, but still be selectable if you want to move forward with updating them.
- Any products with serious conflicts will be displayed as an Error and you will not be able to select them. If you still want to update these products, then you should first resolve the conflict as indicated in the comment such as by editing the product configurations, pricing, or product search settings. Then you can return to the Quick Edit page and attempt the change for those products again.
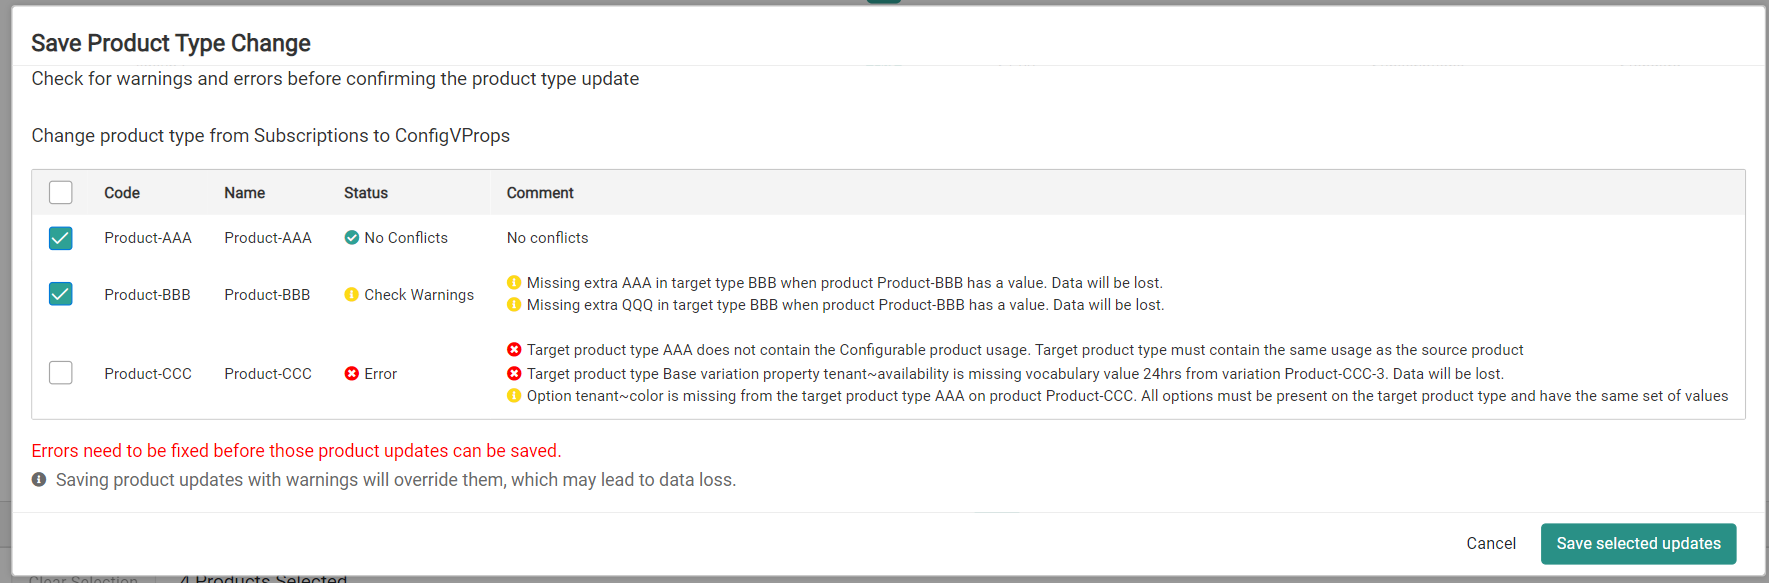
- Click Save selected updates to confirm your selections and continue.
- You will be provided with a progress bar as well as a log of all updated products. You are able to cancel the update, but doing so will not revert any changes that were already completed before the cancellation.
- Upon completion, a log of product updates will be displayed. Any products that experienced an individual error during the update will be shown with a tooltip explaining the failure. If an entire batch in the update fails due to a server error, then no further updates will be attempted and an error will be displayed instead.


 Use the Advanced Filter to filter the product table with the options shown below.


Assign Categories
Only Admins, SuperAdmins, or other Kibo users with Product Type Change user role can perform this action.
The Assign Categories screen displays a form with three steps:
- Select Child Catalog
- Select Products
- Assign Categories in Child Catalog
You must perform each of these steps in order. If you go back and change a previously completed step, then any selections you have made in the later steps will be cleared.
- Go to Main > Catalog > Products.
- Expand the Quick Edit menu in the top right.
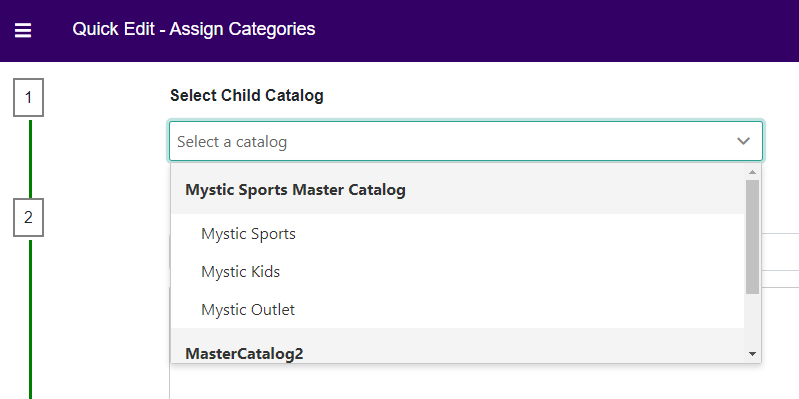
- Click Assign Categories. The page now displays the three steps for assigning categories.
- In Select Child Catalog, pick a catalog to filter the product list and assign categories within. You cannot select a master catalog, as categories are only managed at the child catalog level.
- In Select Products, click the checkboxes of the products you want to update. You can perform a search to locate particular products or expand the Advanced Filter menu on the search bar.Use the Advanced Filter to filter the product table with the options shown below.
- Once you have selected the products you want to update, click on the Quick Edit button below the product table. You cannot progress to the final step without doing so.
- This locks the table and the button text will switch to Edit Selection. If you need to change the products you have selected, click that button to unlock the table.
- You can also click Clear Selection to uncheck everything and start over if needed.
- In Assign Categories, use the check boxes in the left-hand column to indicate whether you want to:
- Replace the current category assignments on the selected products.
- Add a new category assignment to the selected products.
- Remove a category assignment from the selected products.
- You can only perform one of these actions per edit and selections will not persist if you switch between them.
- If you are replacing categories, then click Select in the right-hand column under Replace All Existing Categories to open the category picker.
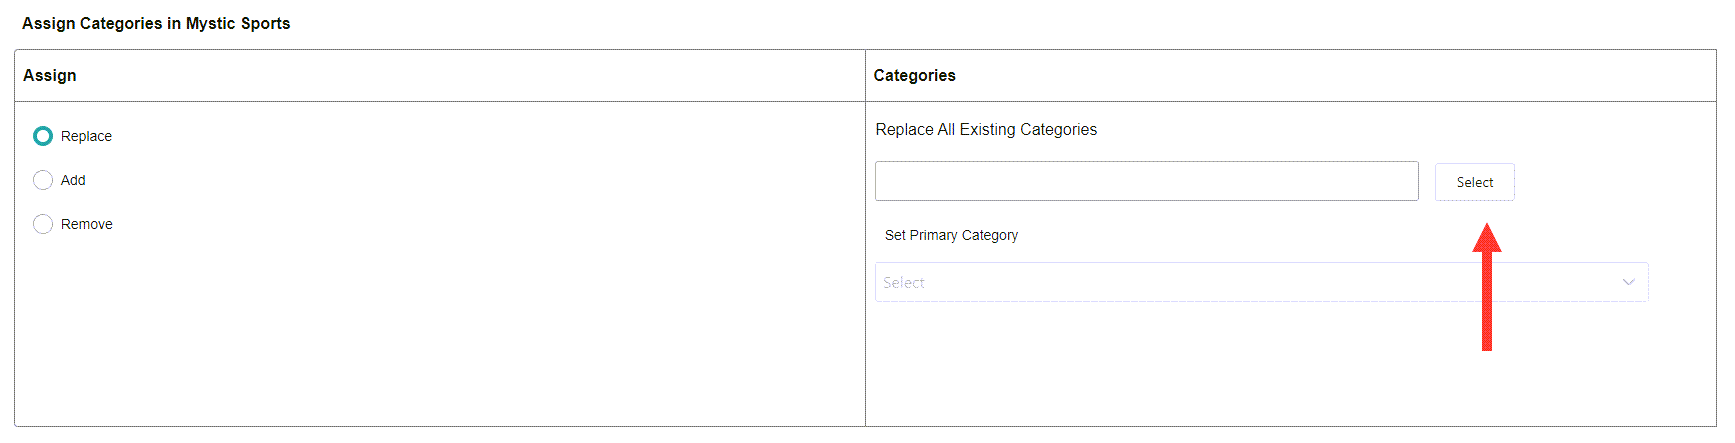
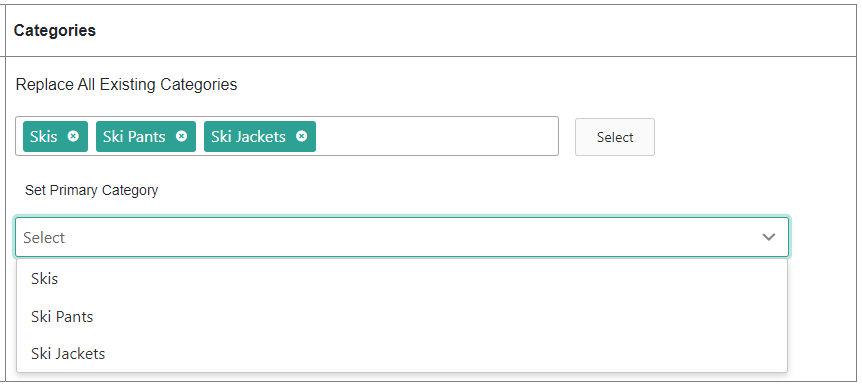
The picker will display all available static categories for these products. You can expand and hide category levels. Click the checkbox on at least one category and then Apply.

You then have the option of setting one of the selected categories as the products' new primary category. Use the drop-down menu in the right column under Set Primary Category to pick the primary category, or leave it blank if you don't want to assign a primary category to these products.
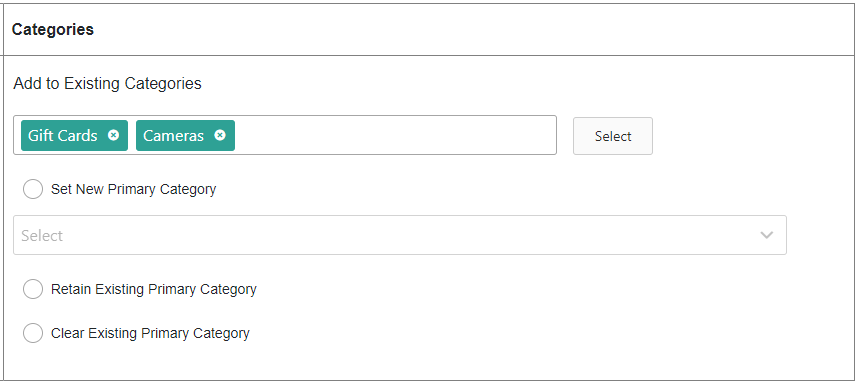
- If you are adding categories, then click Select in the right column under Add to Existing Categories to open the same category picker as shown above. After selecting new categories, you must then indicate whether you want to assign a new primary category to these products, retain existing primary category settings, or clear any existing primary category assignments without replacing them. If you choose to set a new primary category, use the dropdown to pick one of your selected categories after clicking the Set New Primary Category checkbox.
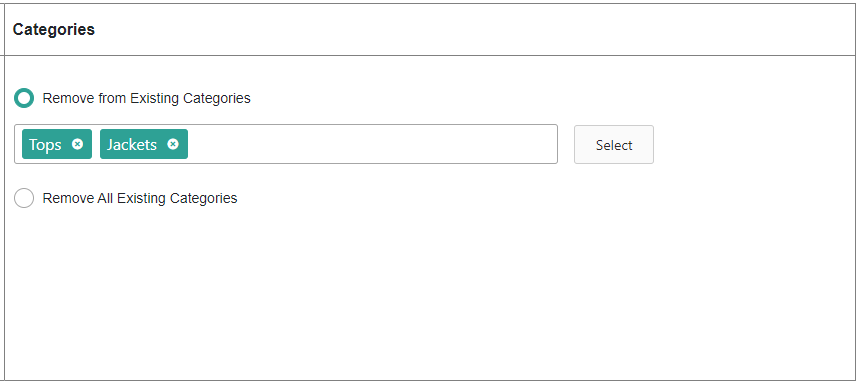
- If you are removing categories, then use the checkboxes to indicate whether you want to remove only specific categories or completely clear all existing category assignments from the products. If you want to remove specific categories, then click Select under Remove from Existing Categories to open the category picker. If the category being removed is not actually assigned to a product, there will not be an error message - the update will display as successful.
- If you are replacing categories, then click Select in the right-hand column under Replace All Existing Categories to open the category picker.
- Depending on your Product Publishing Settings, you can either have the updated products publish immediately or become a product draft:
- If your Product Publishing settings are set to Live, click Save in the top right to complete your changes and they will be published live on your storefront.
- If your Product Publishing settings are set to Staged, you can click either Save or Save and Publish. Click Save to save your update but not yet publish it (allowing yourself to configure another attribute update) or Save and Publish if you want to immediately push all updates to your catalog.
- After you save, you will be provided with a progress bar as well as a log of all updated products. You are able to cancel the update, but doing so will not revert any changes that were already completed before the cancellation.
- Upon completion, a log of product updates will be displayed. Any products that experienced an individual error during the update will be shown with a tooltip explaining the failure. If an entire batch in the update fails due to a server error, then no further updates will be attempted and an error will be displayed instead.


Assign Catalogs
The Assign Catalogs screen displays a form with three steps:
- Select Master Catalog
- Select Products
- Assign Catalogs in Master Catalog
You must perform each of these steps in order. If you go back and change a previously completed step, then any selections you have made in the later steps will be cleared.
- Go to Main > Catalog > Products.
- Expand the Quick Edit menu in the top right.
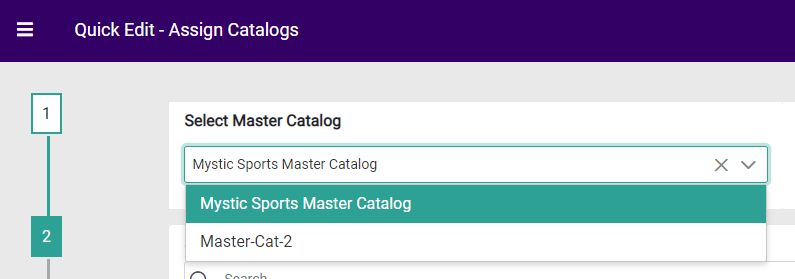
- Click Assign Catalogs. The page now displays the three steps for assigning catalogs.
- In Select Master Catalog, pick a master catalog to filter the product list by.
- In Select Products, click the checkboxes of the products you want to update. You can perform a search to locate particular products or expand the Advanced Filter menu on the search bar.Use the Advanced Filter to filter the product table with the options shown below. The catalog option allows you to filter products based on the child catalogs they belong to.
- Once you have selected the products you want to update, click on the Quick Edit button below the product table. You cannot progress to the final step without doing so.
- This locks the table and the button text will switch to Edit Selection. If you need to change the products you have selected, click that button to unlock the table.
- You can also click Clear Selection to uncheck everything and start over if needed.
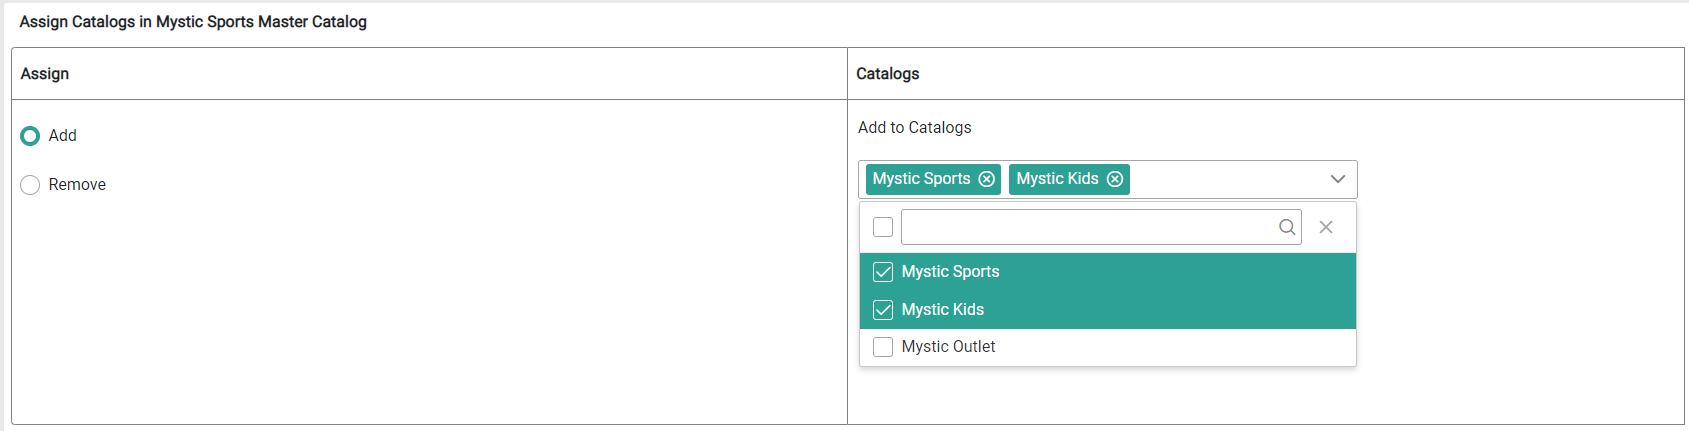
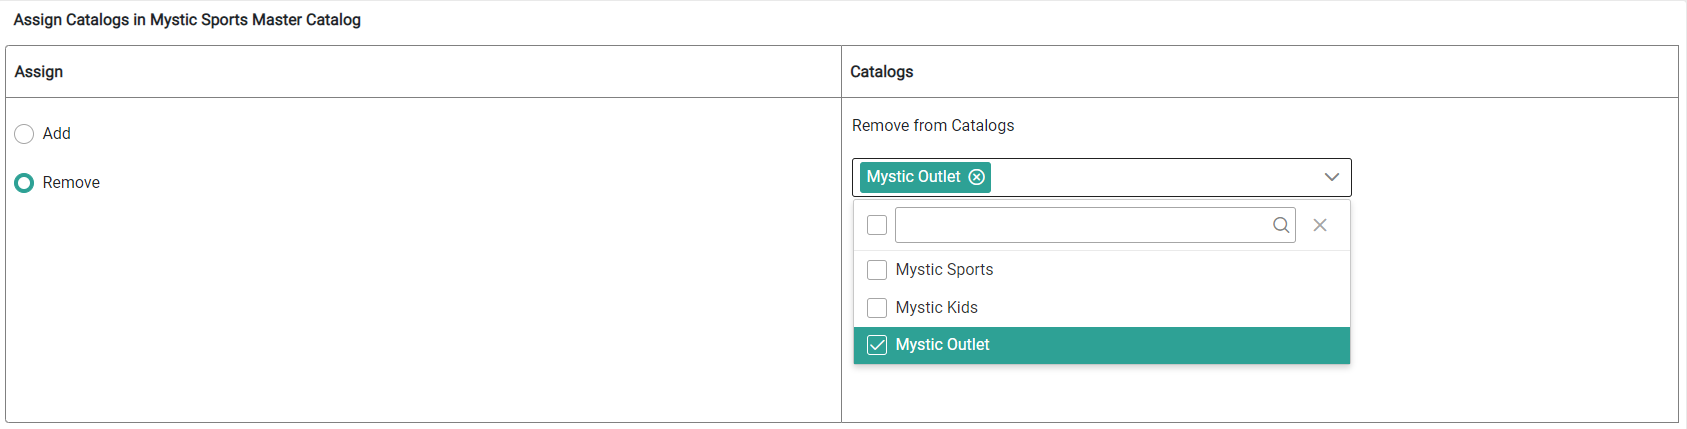
- In Assign Catalogs, use the checkboxes in the left-hand column to indicate whether you want to:
- Add one or more catalog assignments to the selected products.
- Remove one or more catalog assignments from the selected products.
- You can only perform one of these actions per edit and selections will not persist if you switch between them.
- If you are adding catalog assignments, click the drop-down in the right column and check the boxes of the catalogs you want to add the products to.
- If you are removing catalog assignments, click the drop-down in the right column and check the boxes of the catalogs you want to remove the products from.
- If you are adding catalog assignments, click the drop-down in the right column and check the boxes of the catalogs you want to add the products to.
- Depending on your Product Publishing Settings, you can either have the updated products publish immediately or become a product draft:
- If your Product Publishing settings are set to Live, click Save in the top right to complete your changes and they will be published live on your storefront.
- If your Product Publishing settings are set to Staged, you can click either Save or Save and Publish. Click Save to save your update but not yet publish it (allowing yourself to configure another attribute update) or Save and Publish if you want to immediately push all updates to your catalog.
- After you save, you will be provided with a progress bar as well as a log of all updated products. You are able to cancel the update, but doing so will not revert any changes that were already completed before the cancellation.
- Upon completion, a log of product updates will be displayed. Any products that experienced an individual error during the update will be shown with a tooltip explaining the failure. If an entire batch in the update fails due to a server error, then no further updates will be attempted and an error will be displayed instead.


