To process credit card transactions on your storefront, you must first set up a payment gateway and then assign that gateway to payment types regardless of whether your implementation is Order Management-only or includes eCommerce.
Payment gateways are created for each supported credit or gift card type, meaning that you can use different gateways for each individual card type or the same gateway with different credentials. Once gateways have been created, you can assign them through the Payment Type settings.
For information on how to configure new payment gateways for third-party payments and gift cards that aren't already supported, see the Payment Extensibility guide and Starter Kit.
Note that changes to these settings may not immediately take effect when processing orders. It may take up to 15 minutes for updates to be reflected in the system while the cache refreshes.
Supported Providers
A number of payment gateways are available out-of-the-box, while others require applications to be installed and configured in your Dev Center first. The table below lists the payment gateways provided by KCCP and which actions they support. You can also create your own applications and custom gateways through Payment Extensibility.
The credit cards below are available out-of-the-box and do not require you to install an application. The only configuration required is providing your account credentials as shown in the Add a Payment Gateway section of this guide. However, the digital wallets, third-party payments, and fraud gateways do require additional integration. See their linked documentation for more information.
| Payment Gateway | Tokenized (supports OMS-Only) | Auth | Re-Auth | Capture | Credit | 3DS |
|---|---|---|---|---|---|---|
| Credit Cards | ||||||
| Cybersource | Yes | Yes | Yes | Yes | Yes | No |
| Vantiv (Litle) | Yes | Yes | Yes | Yes | Yes | No |
| Authorize.net | Yes | Yes | Yes | Yes | Yes | No |
| CardConnect | No | Yes | Yes | Yes | Yes | No |
| Chase Paymentech | No | Yes | Yes | Yes | Yes | No |
| NoOp | No | Yes | Yes | Yes | Yes | No |
| Payeezy | No | Yes | Yes | Yes | Yes | No |
| Radial | No | Yes | No | No | No | No |
| Element | No | Yes | Yes | Yes | Yes | No |
| Trust Payments | No | Yes | Yes | Yes | Yes | No |
| Digital Wallets | ||||||
| ApplePay via Cybersource | No | Yes | No | Yes | Yes | No |
| ApplePay via Vantiv | No | Yes | No | Yes | Yes | No |
| Third Party Payments | ||||||
| Pay With Amazon | No | Yes | No | Yes | Yes | No |
| PayPal Express | No | Yes | No | Yes | Yes | No |
| Stripe | Yes | Yes | Yes | Yes | Yes | Yes |
| Fraud | ||||||
| Kount | N/A | N/A | N/A | N/A | N/A | N/A |
| Cybersource Decision Manager | N/A | N/A | N/A | N/A | N/A | N/A |
When viewing the list of all available options while configuring a new gateway, you may see "OMS Bundled." This is from the previous version of Order Management and should be ignored by most users. Likewise, options with the "xAuth" prefix should only be used by certain implementations upgraded from the previous version of eCommerce.
Add a Payment Gateway
To create a new payment gateway:
- Go to System > Settings > Payment Gateways.
- Click Add New Gateway.
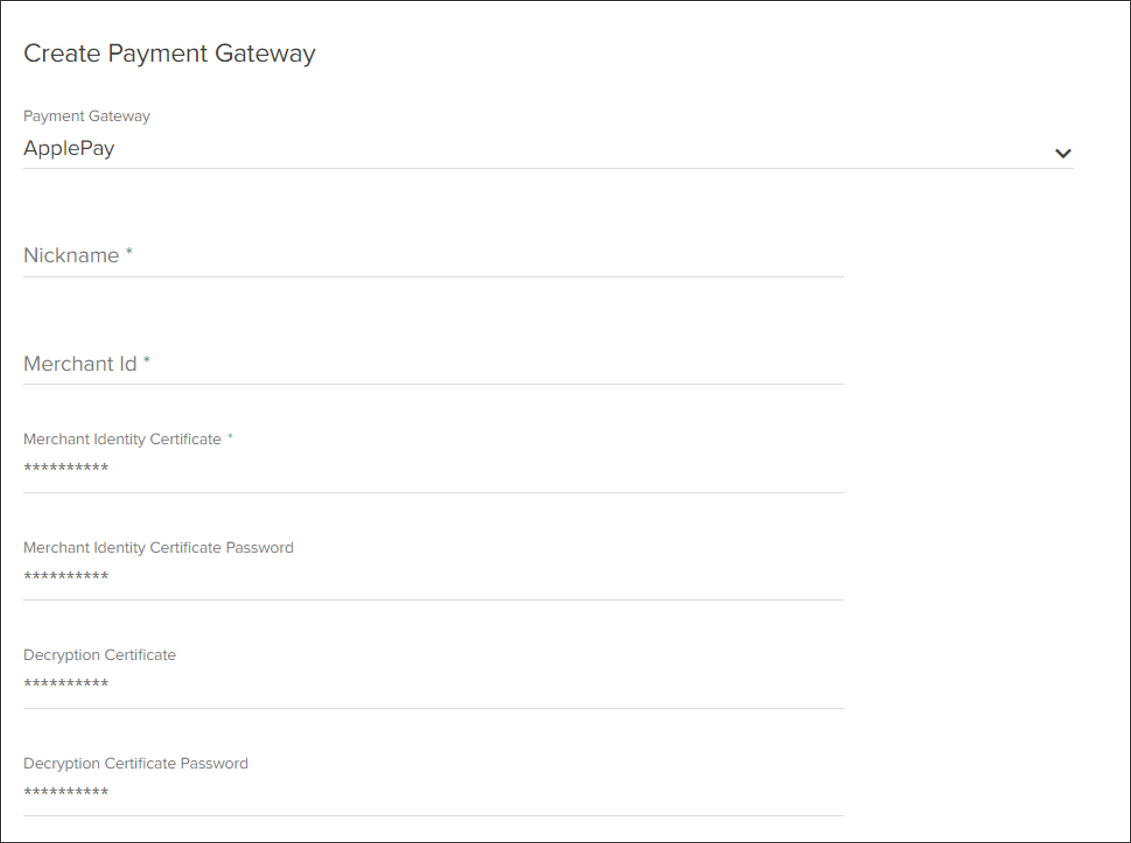
- Select a payment gateway provider from the drop-down menu.
- Based on the payment gateway selected, enter a nickname and the necessary authentication credentials. The nickname is used to identify that particular set of credentials and payment gateway when enabling payment types.
The Cybersource payment gateway requires additional actions on your part to complete this step. See the Cybersource Gateways section of this guide for more details.
- Click Save.

If you are creating special cases such as a no-operation, gift card, or Cybersource gateway then refer to the below sections for more details and additional steps.
No-Operation Gateways
A No-Operation, or "NoOp" gateway, is not a real gateway that connects to an external service. It does not require any credentials and will consider all actions submitted to it to be automatic successes, since it does not actually perform any operations.
These may be used in cases such as Order Management-only instances of KCCP, where the actual payment actions have been performed by the storefront service (such as Klarna, CrowdTwist, or Sezzle) and the payment information is only being passed into KCCP with the order data for fulfillment.

Gift Card Gateways
Sites can support payment via gift cards if the appropriate gateway has been enabled. These gift card gateways differ from standard credit cards, as they include functions specifically built to handle gift card payments. This includes an alternate type of payment capture and the ability to update card balances.
Remember that once you create a payment gateway for gift cards, you must enable it as the processing gateway in the Gift Card payment type settings.
This is different from "store credit" even if the credit has been given to a customer in the form of a merchant gift card - store credit on customer accounts is managed through the eCommerce features of KCCP, but KCCP does not track the balances of external gift cards being used to pay for orders.
Global Gateway
Global Gateway is a supported gift card provider. However, the payment gateway cannot be created unless its application has first been installed. The apps available in the Dev Center are Global Gateway Dev (used for testing environments) and Global Gateway Adapter (used for live environments). Once installed, then the Global Gateway option will be included in the dropdown options when creating a new payment gateway.
Cybersource Gateways
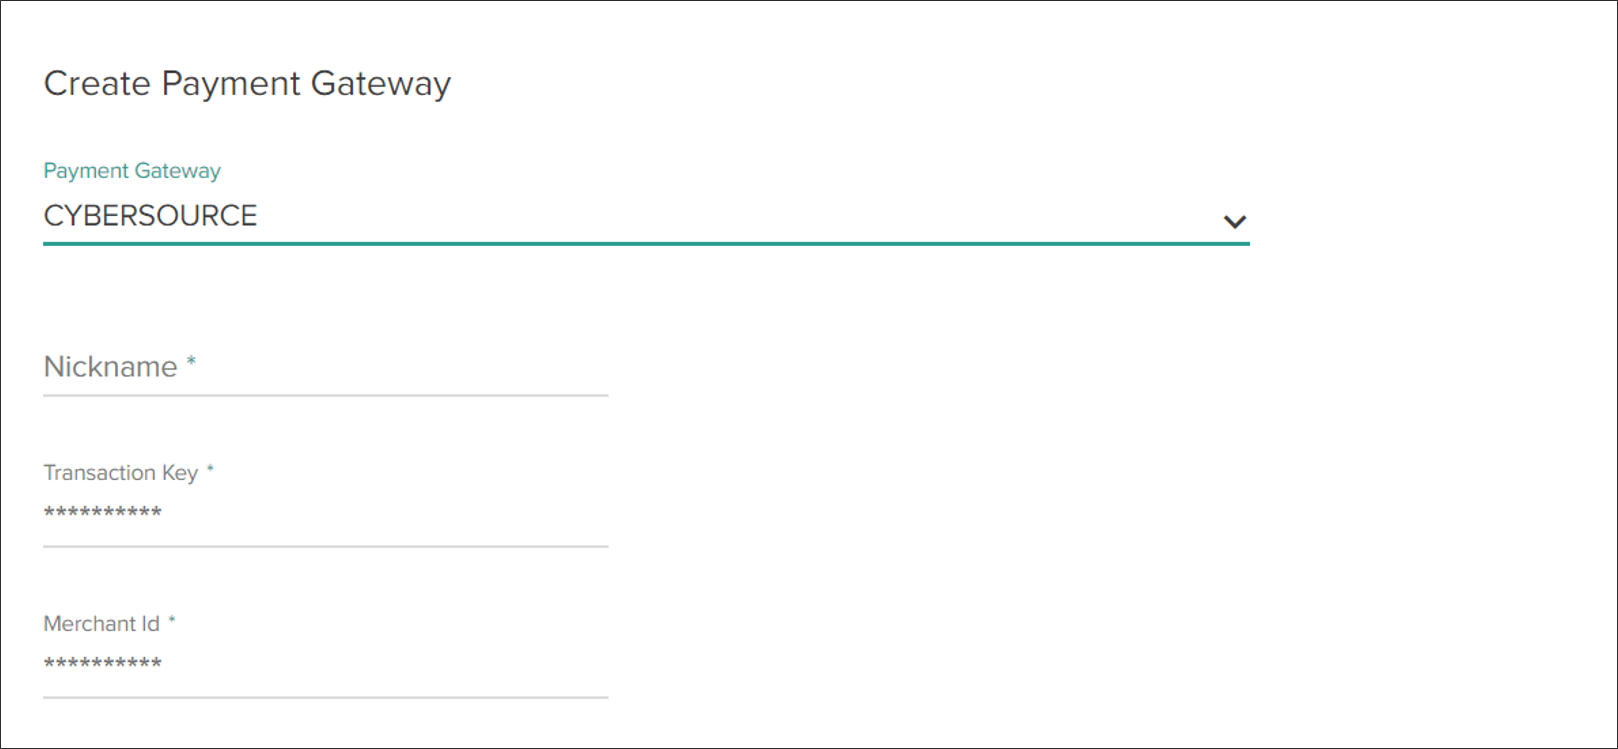
When configuring a Cybersource gateway, a Merchant ID and Transaction Key needs to be provided. These details should be retrieved from the Cybersource account and copy-pasted into the KCCP payment gateway settings.
- Log in to Cybersource. Note the Account ID and Merchant ID in the top banner of the dashboard – this is the Merchant ID that will soon be used for the gateway in KCCP.
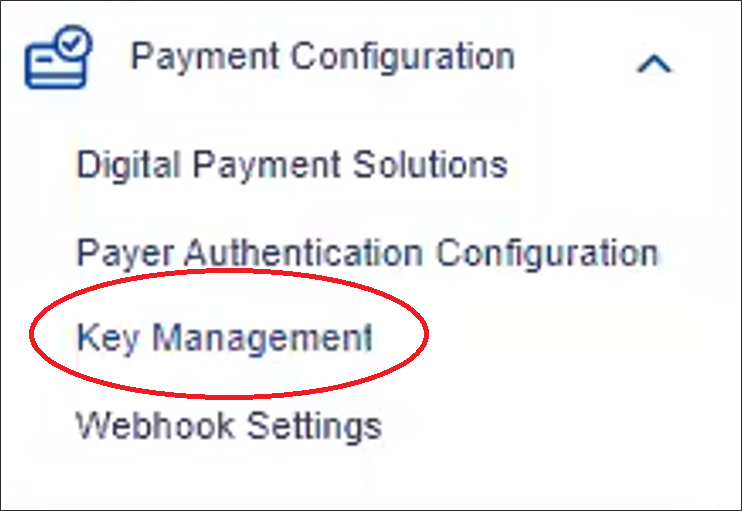
- Click Payment Configuration in the dropdown navigation menu on the left.
- Click Key Management.

- The Key Management page displays a list of all active keys. Filters can be applied to the table to display only certain types and subtypes of keys. The key type used for KCCP is "Transaction Processing," but a new key should always be generated for KCCP when first setting up the gateway.
- To create the new key, click Generate Key on the top right.

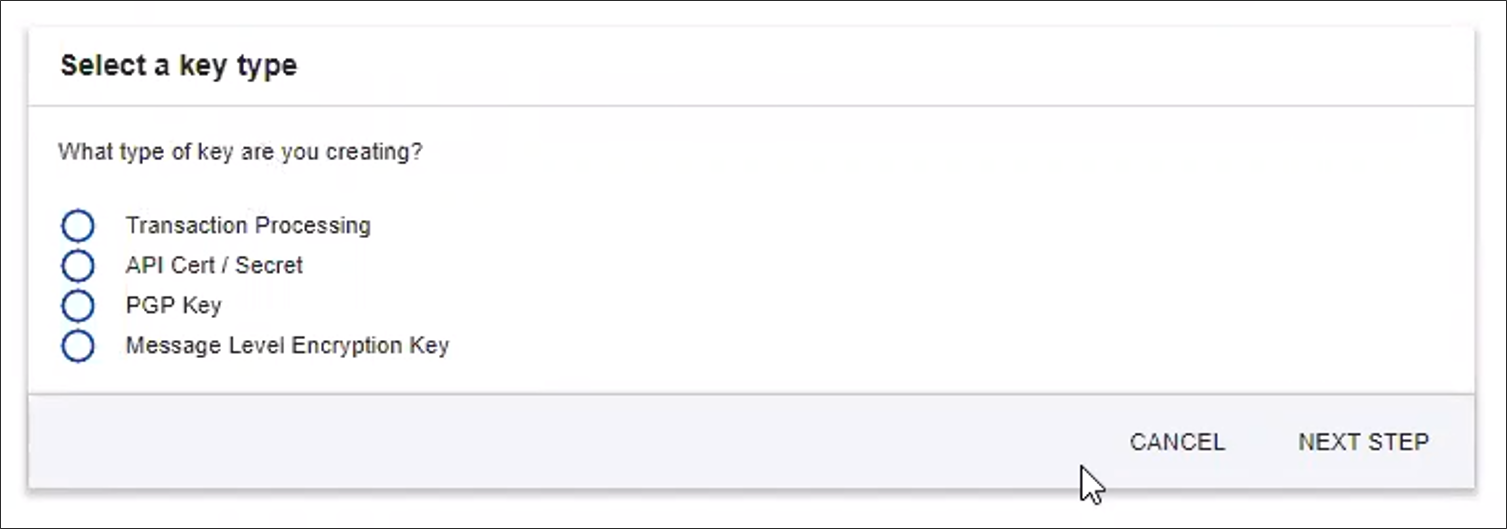
- Cybersource will ask what type and subtype of key should be created. Select "Transaction Processing" for the type.
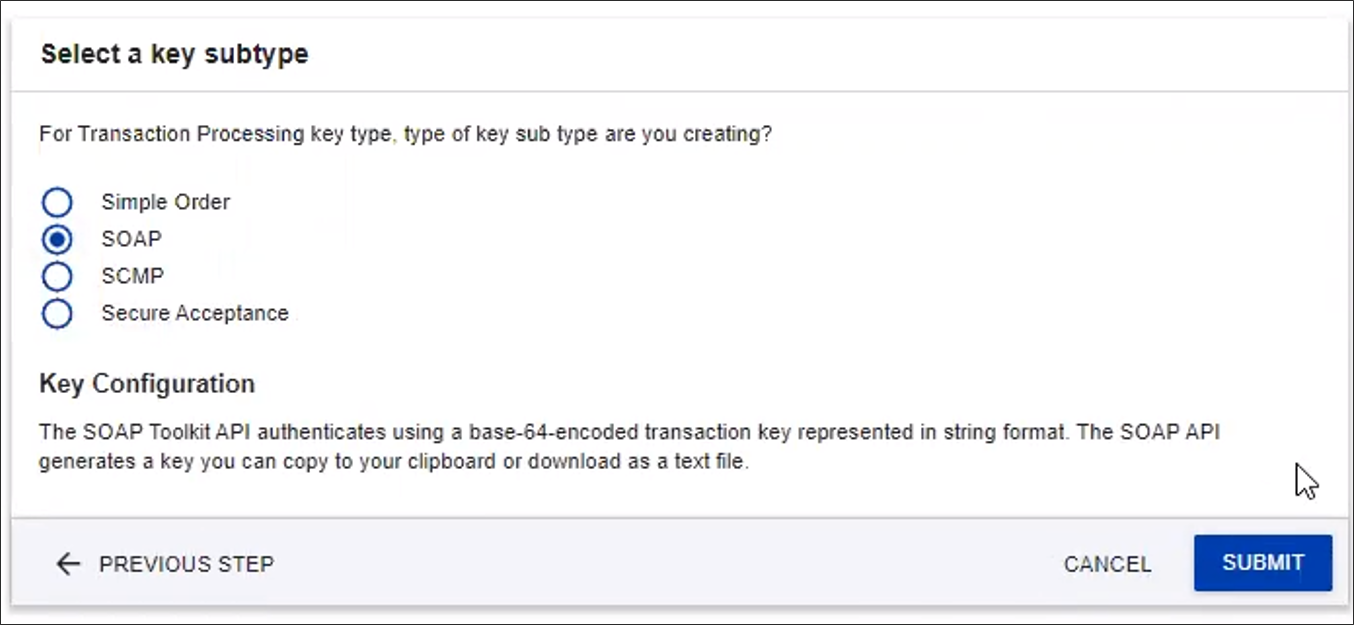
- Select "SOAP" for the subtype, then click Submit.
- The key will be displayed as an alphanumeric string that can either be copied or downloaded as a text file for later use.

- Return to the KCCP payment gateway configuration options at System > Settings > Payment Gateways.
- Create a gateway for the "CYBERSOURCE" gateway type and give it a nickname, such as "CS."
- Take the Merchant ID from Cybersource's account banner and the newly generated key and plug them in to the fields for Merchant ID and Transaction Key. This will allow KCCP to properly authenticate with Cybersource for processing payments.
- Click Save to finish setting up the gateway.


Once a gateway is saved, you can continue to the Payment Types settings to select the processing gateways for different types of credit cards.
Edit a Payment Gateway
- Go to System > Settings > Payment Gateways.
- Click the existing payment gateway that you want to edit.
- Make updates to the nickname or the authentication credentials. All authentication fields must be re-entered; partial updates result in blank fields being saved.
- Click Save to save your changes.
- Click Cancel to return to the Payment Gateways list.
The payment gateway type cannot be edited, meaning that you cannot change a gateway from one type to another. You must instead add a new gateway.
Configure Gateway to Recognize Branded Credit Cards
To add branded credit cards to a gateway:
- Go to System > Settings > Payment Gateways.
- Select the Payment Settings tab.
- Select a payment gateway.
- In the empty field below underneath payment gateway, enter the BIN number for the credit card you want your gateway to recognize.
- Click Add BIN to apply it to your gateway.


To remove branded credit cards:
- On the Payment Settings page, select a payment gateway.
- Find the BIN number of the credit card you want to remove in the list.
- Click the X to the right of that number.
- The branded credit card has now been removed.