 |
| Platforms: Legacy eCommerce, KCCP eCommerce and eCommerce+OMS |
MailChimp provides online services for crafting and generating refined email campaigns to promote your business to current and potential customers and shoppers. With a few images, written content, and selections, your emails go from simple data with a few links to stylish, informative marketing pieces sent to key audiences based on subscriptions and configured settings. MailChimp helps you generate better business by marketing to your eCommerce customers through campaigns, reducing costs and lost time and money spent on design.
The MailChimp application leverages MailChimp's services to integrate with your Kibo eCommerce customer accounts, subscribed shoppers, and completed orders. Through your Kibo app, you can sync your MailChimp mailing lists with eCommerce subscribers, build email campaigns in MailChimp, and generate emails using your subscribed mailing list customers in your eCommerce store.
Application Features
- Complete an initial sync between your MailChimp account with Kibo to share data between the services, including contacts and completed orders.
- Data syncs automatically occur between the systems per specific events including subscription opt in/opt out, creating customer account, creating new customer segments in eCommerce, adding/removing customers in segments, and completing an order. Additional syncs may be needed in case of MailChimp maintenance or server outages to verify all subscribers.
- Create and send email campaigns in MailChimp to your eCommerce customers.
- Review a history of manual data syncs between Kibo and MailChimp.
The following occurs between Kibo and the MailChimp app:
- As shoppers select to join the mailing list by subscribing, Kibo updates MailChimp with the opt-in setting for that customer.
- If a shopper clicks to unsubscribe from an email, MailChimp updates Kibo with the opt-out setting.
- A customer completes an order. Kibo sends an update automatically to MailChimp.
- A customer is added or removed from a customer segment in eCommerce. This data is updated for the account.
Install the App
For assistance installing the application, please reach out to your SI partner or Kibo's professional services and enablement team.
Configuration Requirements
To configure MailChimp to work seamlessly with eCommerce, you need specific items installed and settings provided. This guide details each step from requirements to final configuration for syncing contacts and generating email campaigns.
You must meet the following criteria to configure the MailChimp app:
- You must have the MailChimp application installed into your tenant.
- You must have an active MailChimp account with an API Key. When added, the available list and tenant names on your account display in the app.
- You must maintain all campaign designs, rules, and settings in your MailChimp account.
- You must create only one mailing list in MailChimp for use in eCommerce. Kibo supports one mailing list at this time.
- You can create customer segments at any time in eCommerce. This data updates into MailChimp as created, edited, and removed.
Initialize the App
Prior to creating campaigns and sending emails, you must initialize then enable the MailChimp app.
Configure MailChimp Account Settings
To initialize the app, you add the API Key and link one site to one list. Kibo only supports one site per tenant at this time.
- In Admin, go to System > Customization > Applications.
- Click MailChimp.
- Click the Configuration link to open configuration settings.
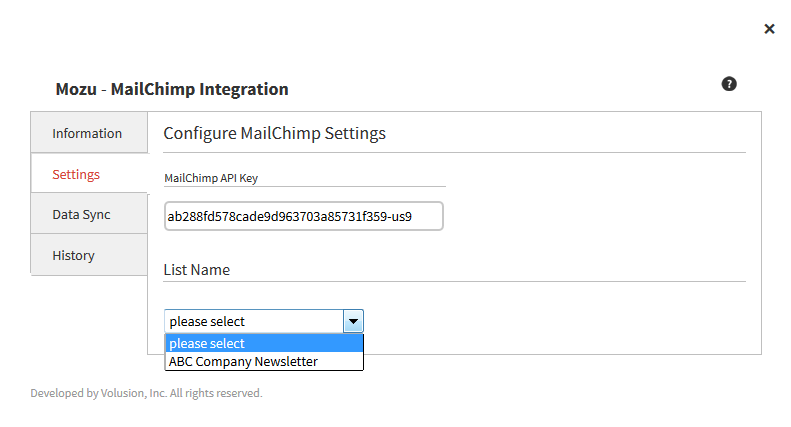
- On the Settings tab, enter your MailChimp API Key. To find this key:
- Log in to your MailChimp account.
- Go to the Account page and click Extras > API keys. A list of keys appears.
- If you do not see an existing API key, click Create a Key and follow the prompts.
- When you click outside of the field, Kibo contacts MailChimp to establish the connection. On success, a green checkmark displays. When selected, click out of the list to save the change.
- Data of available lists fills the List Name drop-down menu.
- Select a List Name to associate between Kibo and MailChimp. Kibo only supports one list per tenant at this time.
- When selected, the association automatically verifies and displays. The app page updates displaying Initialized: true.
Find the MailChimp API Key
- Copy and paste the long API Key into the Kibo App.
The API Key grants access to sync contacts and send email campaigns.
Enable the App
With the app initialized, you can enable the app:
- In Admin, go to System > Customization > Applications.
- Click MailChimp.
- Click Enable App on the MailChimp page.
Configure the App
To integrate your MailChimp services with Kibo, you need to sync the data. The applications require at least one import and export to connect and update. You can perform a manual sync of data through imports and exports. Any manual jobs add a completed log file to the History tab.
Once connected, MailChimp and Kibo share data for customer accounts and contacts. All new accounts are created in eCommerce. MailChimp manages and provides updated opt in/out settings from received email requests. All data is maintained in eCommerce and shared with MailChimp.
Import MailChimp Contacts
With your Kibo and MailChimp accounts newly connected, you should import your MailChimp contacts. The shared data updates the opt in/out settings for your eCommerce customer accounts/contacts. Once synced, if a MailChimp contact changes their status, it automatically syncs and updates to eCommerce.
- In Admin, go to System > Customization > Applications.
- Click MailChimp.
- Click the Configuration link to open configuration settings.
- On the Data Sync tab, select the Synchronization Type as Import MailChimp Customers.
- Click Schedule Sync. A job begins to update subscribed and unsubscribed customers with your contact list.
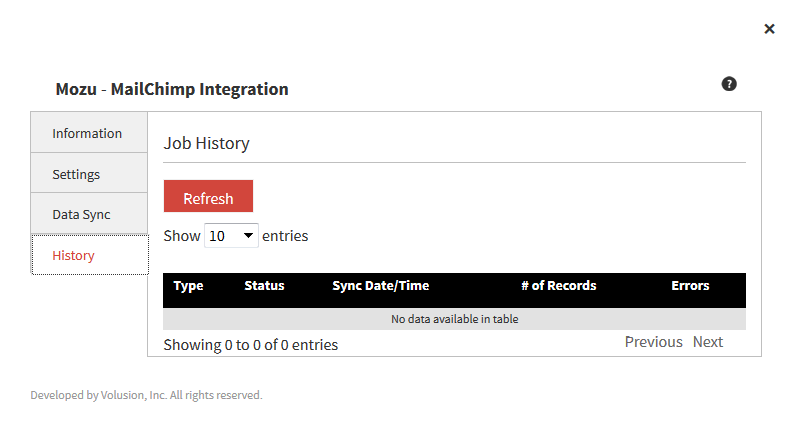
- A new record adds to the History tab.
Export Kibo eCommerce Customers
With your eCommerce and MailChimp accounts newly connected, you should export your eCommerce customers. These customer accounts add as new MailChimp contacts or update the subscription settings for current contacts. This data also includes any eCommerce customer segments.
Once synced, Kibo adds any current subscribers to MailChimp contacts. Any new or removed subscribers automatically update between eCommerce and MailChimp. Once synced, if an eCommerce customer changes their opt-in status, customer data changes in eCommerce, or the customer segment(s) change in eCommerce, it automatically syncs and updates to MailChimp.
- In Admin, go to System > Customization > Applications.
- Click MailChimp.
- Click the Configuration link to open configuration settings.
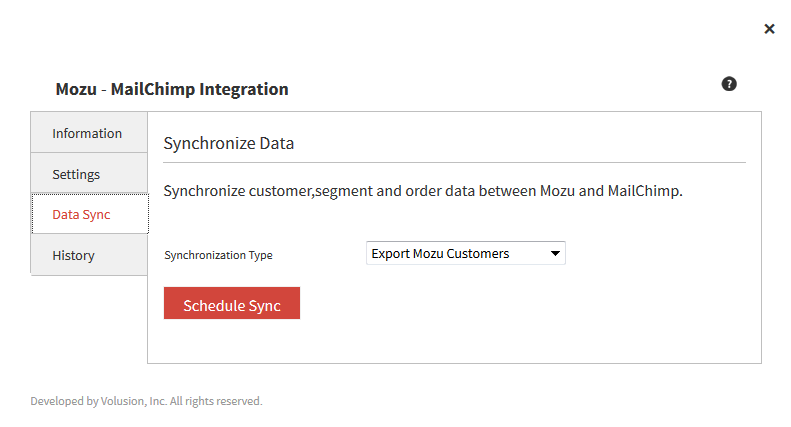
- On the Data Sync tab, select the Synchronization Type as Export Mozu Customers.
- Click Schedule Sync. A job begins to update subscribed and unsubscribed customers with your contact list.
- A new record adds to the History tab.
Export Kibo eCommerce Orders
With your Kibo and MailChimp accounts newly connected, you should export your Kibo orders. Only the completed orders are exported into Kibo.
- In Admin, go to System > Customization > Applications.
- Click MailChimp.
- Click the Configuration link to open configuration settings.
- On the Data Sync tab, set Synchronization Type to Export Mozu Orders.
- Click Schedule Sync. A job begins to export all completed order data associated with customers to MailChimp.
- A new record appears on the History tab.