 |
| Platforms: Legacy eCommerce, KCCP eCommerce and eCommerce+OMS
|
Talk to your customers from anywhere with Live Chat by Volusion. This simple theme integration give customers on your Kibo site a way to communicate with your sales and support representatives in real-time, without leaving your site. Your agents manage all chats through the completely web-based Volusion Live Chat portal, which supports multiple connections, logs all chat data, and provides analytics you can use to evaluate your support efforts.
Integration Features
- Assigns chats to specific agents or notifies all agents when a chat is available.
- Records shopper location, local time, weather, current website and referring website.
- Exports transcripts of all chat conversations.
- Supports transferring chats between agents, departments or support tiers.
- Supports pre-configured responses for frequently asked questions.
- Analyzes the performance of your agents and team.
Get a Live Chat Account
You must set up a Live Chat account to access the web portal your agents use to chat with customers. Go to volusion.com/ecommerce-live-chat-software and select the plan that is right for your business to start chatting.
Add Live Chat to Your Theme
You can Live Chat to your theme using code snippets.
- Log in to the Volusion Live Chat admin portal.
- Go to Settings and select Get the Code.
- Copy the code snippet or email it to your theme developer.
- In your theme code, create a JavaScript file for the code snippet. For example, if your theme is based on the Kibo Core theme, you can add the file:
scripts/modules/livechat.js - (Optional) Add any custom code to the JavaScript below the line:
/* Place your Volusion Live Chat JS API code below */>
For example, you can include your own logo in the Live Chat window. - Use the require_script Hypr tag to include the file in the templates for any pages from which you want shoppers to be able to access chat:
{% require_script "modules/livechat" %}For example, if you want Live Chat accessible from your Home, Category, and Product pages, add the above line to the following templates:home.hypr,category.hypr,parent-category.hypr, andproduct.hypr - Build your updated theme, upload it to Dev Center, and apply it to your site to begin using Live Chat functionality.
(Optional) Add Your Logo to the Live Chat Window
If desired, you can display your logo on the Live Chat window that appears to shoppers.
- In your
livechat.jsfile, find the comment:/* Place your Volusion Live Chat JS API code below */
- Add the following lines of script below the comment:
VolusionChat.setHeaderLogo('INSERTURLHERE'); VolusionChatChat.setHeaderLogo('INSERTURLHERE'); - Replace
INSERTURLHEREwith the URL for your logo. You can get this URL by uploading the image to the File Manager in Admin, clicking the three dots next to the image, and selecting Get Url.
Test Your Integration
You should test your Live Chat integration to ensure it works as expected.
- From Admin, go to Main > Content > Editor and view your Staged site. You should see the default green Chat button floating on the side of your storefront.
- Click Chat to begin a test chat. At this point, there should be two windows open - one on your storefront and one in Live Chat.
- Test the customer chat window and the agent chat window by entering a message and a response.
- Once you are satisfied with the look and feel of your Live Chat interface, you can publish your changes to your live site.
Configure Live Chat
Live Chat includes a number of features you can use to better connect with your customers. The following functionality is all accessed from the Volusion Live Chat admin portal.
Add Agents
When you sign up with Live Chat, you receive one agent that is assigned to the email address you signed up with. If you purchase the Professional Plan, you can add agents as follows:
- Go to Settings and select Agent Settings.
- On the Chat Agents tab, click Add Chat Agent.
- Select a chat system from the Chat System menu (Recommended: Volusion Live Chat Portal).
- Enter the Account Email associated with the new agent.
- Choose an Alias (the name that will appear to customers for this agent).
- Set a maximum number of chats that the agent can have open at one time. The default is 4.
- Click Save.
Your new agent is now set up and ready to chat! The agent will receive an email with instructions for logging in.
Create Widgets
Widgets in Live Chat are portals to different departments within your company. For example, you can have separate widgets for Sales and Support or separate widgets for support in different languages. Live Chat users on the Professional Plan can configure up to four widgets, and you can enable agents to transfer chats from one widget to another.
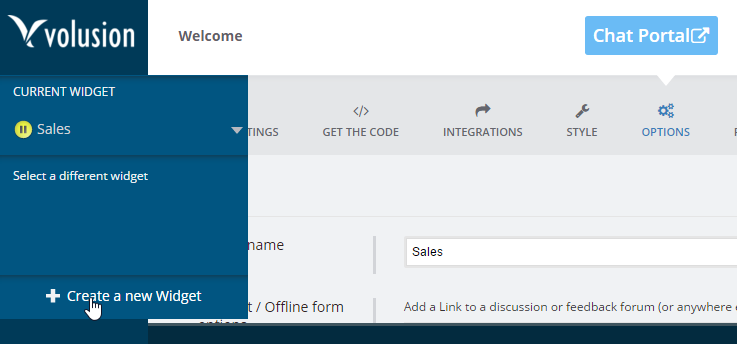
- Widgets appear directly under the Volusion logo in the Live Chat admin portal. Select a widget and click Create a new Widget to configure additional widgets.
- Go to Settings and select the Options tab.
- Select the widget to configure options for it. For example, you can:
- Show agents social media profiles for the shopper.
- Allow agents and shoppers to exchange files.
- Configure thank you notes to send to users when a chat ends.
- Allow shoppers to rate agents at the end of a chat.
- Specify an amount of time to wait before closing an idle chat.
Manage Chat Assignment
The Chat Assignment tab under Settings > Agent Settings includes a number of options you can use to manage how chats are assigned across all agents. For example, you can:
- Specify whether incoming chats are automatically assigned to a specific agent or if all agents receive notification of the new chat.
- (Professional Plan) Configure Routing by Tag to assign specific chats to the appropriate agent.
- Specify whether agents can reassign a chat to another agent.
- Configure an automatic response for customers who are waiting on an available agent.
- Globally set the maximum number of chats any one agent can manage at once.
- Configure Live Chat to display an "Unavailable" message when the number of customers waiting reaches a certain number.
- Schedule Live Chat hours (and days) of operation.
Configure Response Shortcuts
You can create pre-set responses to save agents from re-typing common replies every time they engage in a chat:
- Go to Settings and select Agent Settings.
- Go to the Shortcuts tab.
- Click Add New Shortcut.
- In the Command field, enter the command word that will trigger the shortcut.
- In the Message field, enter the full message that the shortcut will generate. For example, you might enter
"How"as the Command, and"How may I help you today?"as the Message. - Click Save Changes.
Agents can type shortcuts into the chat window in a few different ways:
- Type a backslash ("\") into the agent chat window to select from a list of available shortcuts. You can edit the shortcut message before sending it to the customer.
- Type a forward slash ("/") followed by a command and hit < Enter >/< Return > to immediately send the shortcut message to the customer. You cannot edit the message.
Enable Proactive Chat
If you enable proactive chat, Live Chat will automatically invite shoppers to chat with you after they've been on your site for a designated amount of time. You can also set other conditions that trigger the Proactive Chat feature, such as time of day, the number of pages a shopper has visited on your site, or the amount of time they've been browsing:
- Go to Settings and select Proactive Chat.
- Check the box to Enable Proactive Chat When a Chat Agent is Online.
- Set a time to delay re-engaging the same customer if they decline the proactive chat invite.
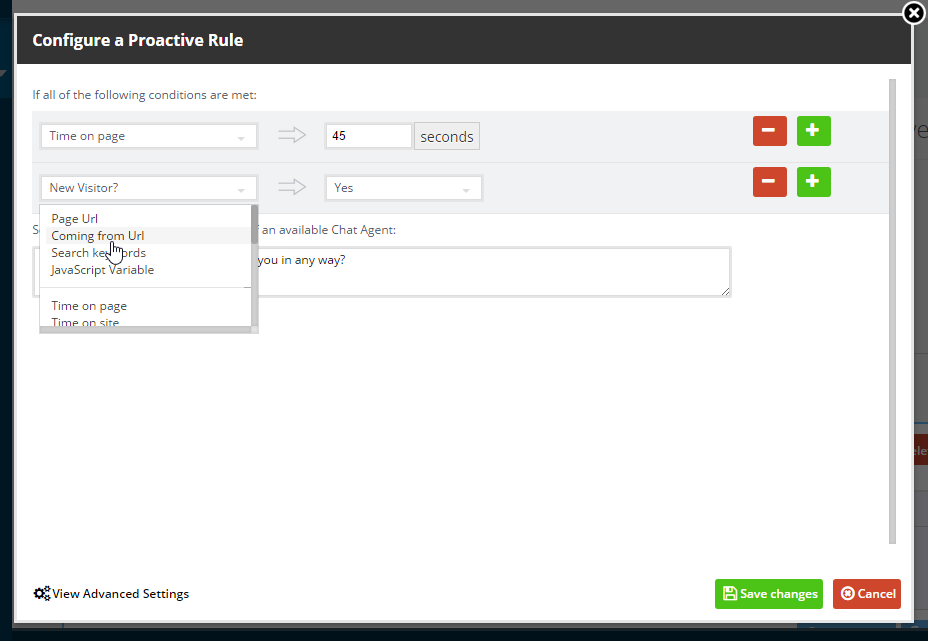
- Under Create and Edit Proactive Triggers, you can set conditions that will cause the proactive chat to appear or not appear to shoppers. Proactive chats are sorted by the message that appears to the user when the chat begins, and conditions at the bottom of the list are checked before conditions higher in the list. If you set a global or catch-all rule, make sure it appears at the top of the list so individual sub-page conditions will function when appropriate.
- Click Add proactive chat configuration to create a new message and configure triggers for the message. Click Edit to modify the triggers for an existing configuration.
- When you're finished, click Save Changes.
Customize the Appearance of Live Chat on Your Site
Go to Settings > Style to customize the appearance of Live Chat functionality on your site. For example, you can:
- Change the color and position of the Live Chat button, or upload your own unique button.
- Change the style of the chat box.
- Configure the form customers must fill out to start a chat. For example, you can require a user to supply their email address or enter a question or message to start a chat.
- Encrypt chat communications using SSL.
- Specify whether visitors hear sounds during a chat.
Use Live Chat
The following sections describe ways you and your agents interact with Live Chat on a daily basis.
Chat Portal
Agents interact with customers through the Chat Portal, which is accessible from the Live Chat admin portal or at https://volusionchat.appspot.com/client. The main page of the Chat Portal shows each agent their current stats, their Live Chat status (Available, Paused, or Offline), and offers easy access to keyboard shortcuts, other available agents, and additional Settings each agent can configure for their personal chat interface.
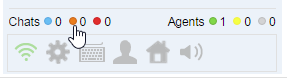
Agents can click the chat status bar in the bottom left corner of the screen to switch to the Live Chat Monitor, which shows each agent their total chats in progress, how many notifications of new chats they have received, and how many visitors are waiting in the queue.
What Your Agents See
When Live Chat agents engage with a customer, a Visitors panel appears on the left side of the Chat Portal and shows all chats currently in progress. When an agent selects a chat, the Live Chat Monitor on the right side of the screen is replaced with details about the shopper details, including their location, the platform or browser they're using, the number of times they've visited your site and/or engaged in a chat, and the URL they initiated the current chat from. The chat itself appears directly below the shopper details.
View Chat Logs
If you want to view the time, details, and transcript for a specific chat, you can do so from the Live Chat admin portal:
- Select Logs from the left-hand navigation.
- Locate the chat on the Chat Logs tab. You can find a chat by email address or by date and time.
- Click the Chat link in the far left column to view details.
- (Optional) Go to the Export Logs tab to view monthly export reports or to manually export chat logs to a CSV file.
Message and Chat Transcript Delivery Preferences
With the Live Chat Email integration, you can have chat transcripts and missed chats sent directly to your preferred help desk or CRM platform.
- Go to Settings and click Integrations.
- Enter the email address(es) you'd like to forward each transcript or offline message to. Be sure to separate multiple addresses with a comma.
- Use the Configure Integration section to further specify what transcript or message data is sent, and under what conditions.
- Click Save Changes.
If you need further assistance, please reach out to your SI partner or to Kibo's professional services and enablement team.