API Extensions enable Kibo to run custom functions whenever certain actions occur on the platform. In this tutorial, you learn how to create an application that displays custom shipping rates to shoppers during the checkout process. After completing this tutorial, you will know how to use API Extensions and the actions it provides to add custom functionality to your site.
All API extensions run with full trust at the SuperAdmin level, which means they are allowed all permissions and behaviors available on the platform by default. You do not have to manage behaviors for individual functions.
This guide will show you how to perform the below steps:
- Create an application to contain the action files—hereby referred to as the API Extension application.
- Set up the framework for the API Extension application using the ActionPack Generator for Yeoman, which generates the necessary project assets.
- Modify the JavaScript files generated by Yeoman to add your custom functionality to the appropriate action. In this case, the action is
http.commerce.catalog.storefront.shipping.requestRates.before, which occurs when shipping rates are requested in Kibo. - Use Grunt to build the project assets and upload them to the API Extension application.
- With the assets uploaded, install the application to a sandbox.
- From within the sandbox, use the Action Management JSON editor to enable the functionality of the application's action(s).
Once you are satisfied with an application, you certify it and deploy it to production just as you would any other application.
Before You Begin
Install the following software.
- Command Line Interface: Provides a console or terminal environment in which to execute commands. If you are developing on a Windows machine, Kibo recommends you use the Windows command prompt. However, due to known Windows compatibility issues in Node.js, you may encounter issues when using the API Extension tools (for example, the tools may not register your keystrokes). If you encounter such issues, Kibo recommends you use a third-party console emulator, such as cmder, which plays nicer with Node.js.
- Node.js: Provides a platform for creating scalable network applications. Includes the npm package manager, which you use in this tutorial to install additional tools.
- Grunt.js: Provides a task manager that automates repetitive tasks. In this tutorial, you use Grunt to build your project files and upload them to the Dev Center.
- Git (optional): Provides a version control system to manage your project files. When you set up your project files during the tutorial, you have the option of creating a Git repository for those files.
In addition to the listed software, you need access to a Admin Account that:
- Is configured with API Extensions. Contact your Kibo representative to configure your tenant with the API Extension framework.
- Contains a sandbox configured with a working catalog. To test your application, you will view the live site on the sandbox, add items to the cart, and initiate the checkout process.
1. Create the Application in Dev Center
The first step is to create an API Extension application. This application will contain the custom function associated with the request shipping rates action. Later in this tutorial, you upload code to this application. After that, any sandbox to which you install this application benefits from the custom functionality.
To create the application:
- In the Dev Center Console, click Develop > Applications.
- Click Create Application.
- Enter a Name and Application ID to identify your application. To keep your applications clearly organized, it is a best practice to use the same name for both fields.
- Click Save.
- Double-click your new application to edit it.
- Note the Application Key. You will need this value later in the tutorial.
You just finished setting up the necessary application in Dev Center. In the next part of the tutorial, you will set up the project files.
2. Set Up the Framework for the Application
Now that you created the API Extension application in Dev Center, you can begin coding the actions for the application. To save time, you use a tool called Yeoman, and its associated extension, to scaffold the project files quickly and efficiently. The Yeoman tool generates a directory structure, a set of JavaScript templates that correspond to the actions you choose to install, and a test framework that helps you validate your code before uploading it to Dev Center.
Install the Yeoman Generator
Use npm to install the Yeoman tool:
- Open a command prompt.
- Enter
npm install -g yo@4.3.0to install the Yeoman tool. - Enter
npm install -g generator-mozu-actions grunt-clito install the extension for Yeoman.
Scaffold the Project Files
Decide where you want to store the project files, and then run the Yeoman Generator to generate the necessary assets in your project folder:
- Create or navigate to the directory that you intend to use as your project folder during development.
- Open a command prompt in this directory.
- If you are using Google Cloud Platform, run
export MOZU_HOMEPOD=https://www.usc1.gcp.kibocommerce.combefore continuing with yo. - Enter
yo mozu-actionsto run the Yeoman Generator.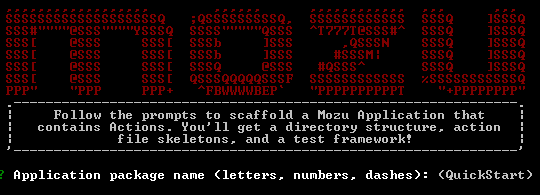
- Enter a name for your project. If you publish your application on npm for public consumption, this is the package name that other people will see.
- Enter a description of your application.
- Enter an initial version for your project or accept the default value in parentheses.
- Enter the Application Key for your application.
- Enter the email address you use to log in to Dev Center.
- Enter the password you use to log in to Dev Center.
- Select your developer account.
- Choose whether to create a Git repository for your project folder, if applicable.
- Specify a repository URL, if applicable.
- Choose a test framework. For this tutorial, choose Mocha.
- Enter Y to enable actions on install. This option saves you time by automatically enabling actions in the Action Management JSON Editor each time you install or update the application. If you don't enable this option, you will have to manually configure the JSON code before your application takes effect on a sandbox.
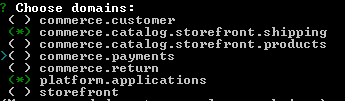
- Choose which domains to add to your project. Use the arrow keys to scroll up and down and use the spacebar to enable or disable a specific domain. Press the
Enterkey when you are done choosing. For this tutorial, enable the following domains:- commerce.catalog.storefront.shipping
- platform.applications
- For each domain you selected, choose which actions to add to your project. For this tutorial, enable the following actions:
- http.commerce.catalog.storefront.shipping.requestRates.before
- embedded.platform.applications.install

- Select One (simple mode) when prompted. This option specifies that you only want to create one action file for actions that can run more than one custom function. If you ever want to take advantage of the ability of certain actions to run more than one custom function, select Multiple (advanced mode). You can then provide unique names for any number of functions attached to the action, separated by commas. For example, for an action that supports multiple custom functions, such as
http.storefront.routes, selecting Multiple (advanced mode) and typingfunctionA, functionB, functionCcreates three action files instead of one. The generator names the action files based on the function names you provide (ex:functionA.js) instead of defaulting to the name of the action (ex:http.storefront.routes.js) that the functions are attached to. In addition, the unique function names are automatically updated in the appropriate manifest file in thesrcdirectory.


After you select your actions, Yeoman generates the necessary files in your project folder.

If at a later point you want to add more actions to your project, open a command prompt in your project root and enter yo mozu-actions:action. This command lets you add additional actions to your existing project files without having to go through the rest of the setup prompts. Note that for the new actions to take effect, you have to either reinstall the application to your sandbox (if you chose to automatically enable actions on install when you ran the Yeoman Generator the first time) or manually update the Action Management JSON editor with the new actions.
Also note that if Kibo adds new API Extension actions at a later date, you need to update the Yeoman Generator before you can scaffold the newly released actions. To update the Yeoman generator, use the npm update -g generator-mozu-actions command.
In the next part of the tutorial, you add code to the JavaScript files in the assets folder in order to provide custom shipping rates to shoppers.
3. Code the Action
Now that you have the necessary project files in place, add the code to return custom shipping rates any time a shopper goes through the checkout process. For the purposes of this tutorial, the custom shipping rates are retrieved by making an API call to an external random number generator and by accessing configuration data from the Action Management JSON Editor. These methods of retrieving shipping rates are not very practical but are useful for educational purposes, illustrating how you can utilize external services within API Extension applications as well as obtain JSON configuration data from within your sandbox. The tutorial also demonstrates how you can leverage an external npm library to manipulate one of the shipping method labels.
Locate the JavaScript File
Yeoman generates JavaScript files for every action you selected during configuration. The JavaScript files are organized by the domain the action belongs to. For this tutorial, locate the http.commerce.catalog.storefront.shipping.requestRates.before.js file:
- Within your project folder, navigate to the
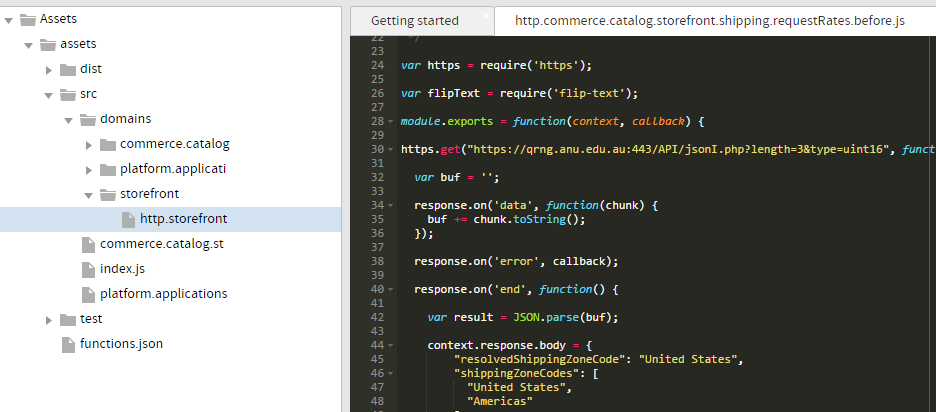
assets/src/domainsdirectory to view the domain folders that Yeoman generated. - Open the
commerce.catalog.storefront.shippingfolder, and then openhttp.commerce.catalog.storefront.shipping.requestRates.before.jsfor editing. This file corresponds to the action that manipulates the HTTP request and response when a shipping rate request occurs on your site. The following image shows the default code included in the file.

Add the Custom Code to the Action
Edit the JavaScript file to add custom functionality:
- Add code to match the following code block:
// Require the https library, which is already installed with API Extensions var https = require('https'); // Require the flip-text library, which you must then install using 'npm install --save flip-text'. This command adds the library as a dependency in your package.json file. var flipText = require('flip-text'); module.exports = function(context, callback) { // Request an array of one random number from an online generator https.get("https://qrng.anu.edu.au:443/API/jsonI.php?length=1&type=uint8", function(response) { // Process the response from the random number generator and place the 'data' value in 'result' var buf = ''; response.on('data', function(chunk) { buf += chunk.toString(); }); response.on('error', callback); response.on('end', function() { var result = JSON.parse(buf); // Access the context of the 'http.commerce.catalog.storefront.shipping.requestRates.before' action to modify the shipping rates for the site context.response.body = { "resolvedShippingZoneCode": "United States", "shippingZoneCodes": [ "United States", "Americas" ], "rates": [ { "carrierId": "custom", "shippingRates": [ { "code": "Rate1", "content": { "localeCode": "usd", "name": "Random Number" }, // Use the random number (divided by 10 to filter larger numbers) as the first shipping amount "amount": result.data[0] / 10, "shippingItemRates": [], "customAttributes": [], "messages": [], "data":{test:"random", prop2:"object data"} }, { "code": "Rate2", "content": { "localeCode": "usd", "name": "Number from Configuration" }, // Use the 'shippingAmount' value from the action-level configuration data as the second shipping amount "amount": context.configuration.shippingAmount, "shippingItemRates": [], "customAttributes": [], "messages": [], "data":{test:"random", prop2:"object data"} }, { "code": "Rate3", "content": { "localeCode": "usd", // Use the flip-text library to display shipping method label upside down "name": flipText("Upside Down Number from Configuration") }, // Use the 'shippingAmount2' value from the application-level configuration data as the third shipping amount "amount": context.configuration.shippingAmount2, "shippingItemRates": [], "customAttributes": [], "messages": [], "data":{test:"random", prop2:"object data"} } ], "customAttributes": [] } ] }; context.response.end(); callback(); }); }); }; - Save the file.
- Note that the code references an external library, 'flip-text'. To install this library, open a command prompt and enter
npm install --save flip-text. This command installs the flip-text library and lists the library as a dependency in your project'spackage.jsonfile.
4. Build the Project Assets
After coding the action's custom functionality, use Grunt to validate and build the project assets. If there are no errors, Grunt uploads the assets to Dev Center. To learn more about the available Grunt commands, click here.
- Open a command prompt in the root of your project folder.
- Enter
grunt. - When prompted, enter the password you use to log in to Dev Center.
- Verify that the build is successful and that the files upload without errors.


View the Assets in Dev Center
After you run Grunt, you can view the uploaded assets in Dev Center:
- Log in to Dev Center.
- Click Develop > Applications.
- Open your application.
- Open the Packages tab.
- Click Assets.
- Expand the folders to view the uploaded files, which should match the assets.
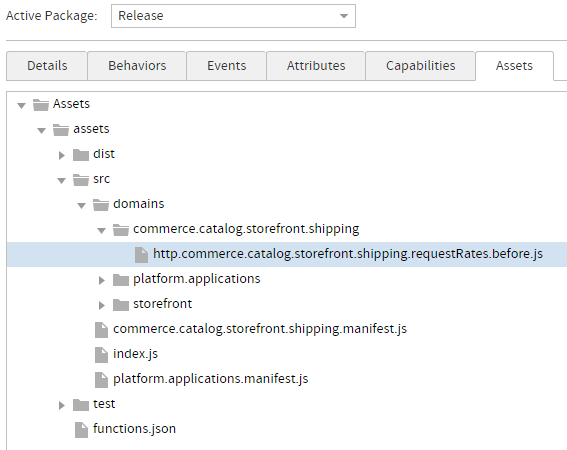
- Double-click a file to confirm any edits you have made.


With your assets uploaded to Dev Center, you can now install them to the sandbox of your choice.
5. Install the Application to a Sandbox
In this part of the tutorial, you install the application to the sandbox of your choice, making the custom shipping functionality available to that sandbox:
- In Dev Center, open your application to view its details.
- Click Install.
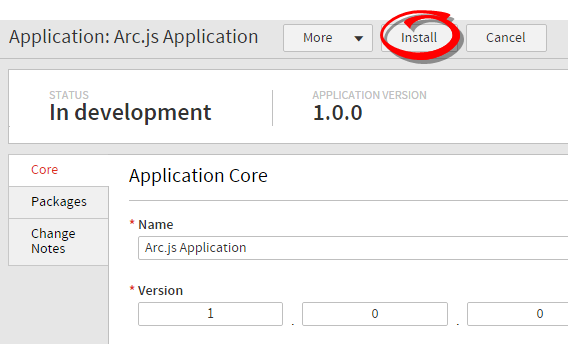
- Select a sandbox to install the application to.
- Click OK.
- After a successful installation, open the Core tab. You can view which sandboxes you've installed the application to under Application installations.


After installing the application, you need to enable its functionality from within the sandbox itself. You complete this task in the next part of the tutorial.
Note: Setting Up Enable Actions on Install
When setting up your API Extensions application, you can install the function automatically without manually changing the Action Management Definition JSON. This Enable actions on install? option will add a custom function to the embedded.platform.applications.install action when set to Yes. This option is first encountered during the project scaffolding process of Step #2.
If enabling this option does not work, make sure that these lines are included in any one of your manifest files (e.g. assets/src/storefront.manifest.js):
'embedded.platform.applications.install': {
  actionName: 'embedded.platform.applications.install',
  customFunction: require('./domains/platform.applications/embedded.platform.applications.install.js')
}
This will make sure that the manifest includes the auto enable code when installing your application to a sandbox.
6. Enable the Action
After you install the application to a sandbox, enable its functionality from within the sandbox using Kibo's built-in JSON editor. In short, this editor is where you specify which installed actions to enable, which configuration parameters the actions use, and which log level the actions write to.
To open the Action Management JSON editor:
- Under Application installations in your application's Core tab, double-click the sandbox to which you installed the application. The sandbox opens to the Admin dashboard.
- Got to System > Customization > API Extensions to bring up the JSON editor.
Because you chose to automatically enable actions when you ran the Yeoman Generator, the JSON editor should be prepopulated with the code required to enable the action (as shown in the following image) so you don't have to take additional steps to enable the action. However, you do have to specify the custom configuration data for your shipping rates, as detailed in the next section.

Add Custom Configuration Data
The example in this tutorial obtains a random shipping rate from an online service, but it also obtains shipping rates from configuration data that you set in the Action Management JSON Editor. Complete the following steps to add this configuration data:
- Add a
"configuration"array to the"customFunctions"array. This array provides configuration data to a specific function. If the data from this configuration conflicts with the application-level configuration data, the data from this configuration takes precedence. - Add a
"shippingAmount": 17key-value pair to the array you created. - Add an
"applicationKey"field and a"configuration"array to the"configurations"array. This array provides configuration data to the entire application. - In the array you created, enter the application key for your application and add a
"shippingAmount2": 25key-value pair.
Your JSON should match the following code block:
{
    "actions": [
        {
            "actionId": "http.storefront.pages.global.request.after",
            "contexts": [
                {
                    "customFunctions": [
                        {
                            "applicationKey": "YOUR APPLICATION KEY HERE",
                            "functionId": "http.storefront.pages.global.request.after",
                            "enabled": true,
                            "configuration": {
                                "shippingAmount": 17
                            }
                        }
                    ]
                }
            ]
        }
    ],
    "configurations": [
        {
            "applicationKey": "YOUR APPLICATION KEY HERE",
            "configuration": {
                "shippingAmount2": 25
            }
        }
    ],
    "defaultLogLevel": "info"
}
You added configuration data that the request shipping rates action can access and are now ready to test the custom functionality of your API Extension application.
Next Steps
You should now be ready to create more advanced functionality using actions. Remember to leverage the reference help as you create your own API Extension application.