It's easy to start building applications. This tutorial takes you through the process of creating an application record in Dev Center, subscribing your application to events, specifying which behaviors your application can execute, and installing your application to a sandbox. Specifically, the application in this tutorial sends push notifications to an endpoint whenever a new product category is created on your tenant.
You must have a Developer Account to proceed with this tutorial. Refer to Set Up Your System for more information.
Before You Begin
You need access to a Dev Account that contains a provisioned sandbox.
Step 1: Create an Application Record
You can think of application records as containers for your application. You should provide a name for your application record that uniquely identifies the application it houses. Application records generate unique security credentials for your application. You use these security credentials in your source code to authenticate. Within application records, you can also subscribe your application to listen to specific events, and assign behaviors to your application so that it has permission to perform the operations you want it to execute.
To create an application record:
- Log in to Dev Center.
- Click Develop > Applications.
- Click Create Application.
- In the Create application dialog box, do the following:
- In the Name text box, enter "Hello World".
- In the Application ID text box, enter "mycompany_helloworld", which appends the reverse domain name for your Dev Account. The allowed characters include numbers, letters, and underscore.
- Click Save.
Step 2: Create an Endpoint
For purposes of this tutorial, you need to configure an endpoint to listen for notifications sent from your application. To do this quickly, you can use RequestBin or a similar service, but keep in mind that for a real-world use case, you should investigate a more robust solution for creating endpoints:
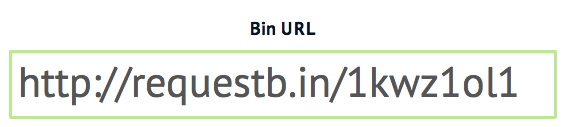
- In a browser, go to http://requestb.in/.
- Click Create a RequestBin.
- Copy the generated Bin URL.
Leave the RequestBin browser window open. You’ll come back to it to test your application at the end of this tutorial.
Step 3: Subscribe to Events
Since the purpose of this application is to send notifications to an endpoint whenever a new product category is created, you must subscribe to the appropriate category event:
- In Dev Center, click Develop > Applications.
- In the Application grid, double-click the Hello World application you just created.
- Click Packages.
- On the Events tab, click Add Event Subscription.
- In the Add Event Subscription dialog box, do the following:
- In the Endpoint text box, paste the Bin URL you copied in the previous procedure.
- In the Event category list, select Category.
- In the Event list, select Category Created.
- Click Save.
To learn more about events, refer to the Event Subscription topic.
Step 4: Register Behaviors
Behaviors determine what operations your application can perform once installed in a particular tenant. To enable the application to send a notification to your endpoint whenever a new product category is created, your application needs permission to read product category data:
- Within your application record, click Packages.
- On the Behaviors tab, click Select Behaviors.
- In the Select Behaviors dialog box, under Behavior category, select Product.
- Under Behavior name, enable the Product Category Read and Product Category Create checkboxes and click Save.
Step 5: Install the Application
After you have configured your desired events and behaviors, you can install your application to a sandbox:
- In your application record, click Install.
- Select a sandbox to install your application to and click OK.
- Click Sandboxes. Right-click the sandbox where you installed your application and click View sandbox.
- In Admin, click System > Customization > Applications.
- Verify that the Hello World application appears in the list.
- Double-click the application and click Enable Application to enable your application on the sandbox.
Step 6: Test the Application
Now that you’ve created, configured, and installed the application, test it to verify that it works.
- In Dev Center, click Sandboxes.
- Right-click the sandbox where you installed your application and click View sandbox.
- Go to Main > Catalog > Categories.
- Click Create New Category.
- Enter "Fall Clearance".
- Click Save.
- Go back the RequestBin browser window.
- Refresh the page.
- Verify that the event notification displays in the list.
The event notification sent by the application to the external source (RequestBin) includes a correlationId value that represents the ID of the newly created product category. Using the correlation ID in the event payload from RequestBin, an external program could view the details of the product category by passing the ID in an HTTP request.
Step 7: Code Your Application
The focus of this tutorial has been to familiarize you with application records, how to configure events and assign behaviors, and how to install and enable applications on a sandbox. Of course, an integral part of application development is creating the source code for your application. To accomplish this, Kibo recommends you use an SDK. The SDK topics walk you through the process of creating an application that displays information about customer accounts.
After you complete this tutorial, run through one of the SDK guides to learn the fundamentals of developing applications, including authenticating and using the APIs.
Where to Go Next
After you complete this tutorial, you should review the following topics.
- Application Development Requirements: Learn about authentication, access and refresh tokens, and request headers.
- Application Development Best Practices: Learn about application security and performance optimization.