Dynamic categories allow you to specify dynamic expressions that control the products that belong to them.
For example, you want to create a category that contains all products that have been in your catalog for 30 days or less. You can create a dynamic category that specifies to include all products that have been in your catalog for 30 days or less.
Dynamic Category Types
There are two types of dynamic categories:
- Dynamic precomputed: The product membership is calculated when products are indexed in the catalog.
- Dynamic realtime: The product membership is calculated in realtime and on demand when a shopper navigates to the realtime category page.
Refer to the following table for more information about the differences between the two types of dynamic categories:
| Feature | Dynamic Precomputed | Dynamic Realtime |
|---|---|---|
| Can have products statically assigned | No | No |
| Can have child categories | No | No |
| Can have products assigned via a membership expression | Yes | Yes |
| Can evaluate a product's Sale Price and Sale Price Type (price after discount applied) as part of membership expression | No | Yes |
| Can evaluate catalog list prices as part of the membership expression | Yes | Yes |
| Can evaluate product properties as part of the membership expression | Yes | Yes |
| Can be created using variant properties | No | No |
| Navigating to a parent category displays products included in the child category | Yes | No |
| Can be used as target criteria for a discount | Yes | No |
| Becomes a complex search filter at runtime | No | Yes |
Precomputed Categories
The product membership of precomputed categories is calculated when products are indexed in the catalog, such as when products are added, updated, or deleted from the catalog, and also when the categories themselves are updated, such as when their expressions change.
For example, you have a precomputed category that includes all products that have a property of red, and you currently have a red dress in your catalog. This red dress is included in your precomputed category; however, if you removed the property of red from the dress and saved the change, this dress would be removed from the precomputed category when you save the change. Note that precomputed categories can reference other precomputed categories; however, Kibo eCommerce recommends limiting the amount of precomputed categories the parent precomputed category references.
Realtime Categories
The product membership of realtime categories is calculated in realtime and on demand when a shopper navigates to the realtime category. When the shopper navigates to the realtime category, Kibo eCommerce performs a query for products in the catalog that should be included in the category. This allows Kibo eCommerce to evaluate dynamic product fields such as product pricing after discounts have been applied.
For example, you have a realtime category that includes all products that have a discounted sale price, and you currently have a discount on all dresses. When a shopper navigates to this realtime category, Kibo eCommerce performs a query to identify the products that have a discounted sale price, and it finds the dresses that are discounted. These dresses then appear on the realtime category page. Note that you cannot target realtime categories for discounts.
Specify Dynamic Category Type
The Product Membership field controls whether the dynamic category is precomputed or realtime.
To specify a precomputed dynamic category, set the Product Membership field to Precomputed.
To specify a realtime dynamic category, set the Product Membership field to Realtime.
Create Dynamic Categories
To create a new dynamic category:
- Go to Main > Catalog > Categories.
- Select Create New Category > Dynamic Category.
- Enter a Category Name. This name will display on your storefront, and is the only required field.
- Complete the Description field. The description field is not visible to your shoppers initially; however, you can make it visible depending on your theme. Use these fields to help a user understand what products they’ll find in this category.
- Set a Category Code if desired. If left blank, a code will be generated for you.
- Select a Status for the category - Active, Disabled, or Scheduled. If you select Scheduled, then the options to select an Active Start Date and Active End Date will appear.
- If you are creating a new sub-category, select the Parent Category.
- Determine whether the dynamic category is precomputed or realtime using the Product Membership drop-down menu. The Product Membership drop-down menu controls the dynamic category type and its behaviors. Refer to Dynamic Category Types for more information about the two types of dynamic categories.
- Determine whether to hide the category on your storefront with the Hide category on store front checkbox. This is useful if you have a seasonal category that should only display at certain times of the year.
- Create an expression to define the product membership of the category.
You can either manually create the expression, or use the visual expression builder to create the expression. Refer to Dynamic Category Expressions for more information about manually or visually creating dynamic category expressions. - Select a Category Image.
- Use the available fields to enter SEO information:
Field Name SEO Effect SEO Friendly URL The default URL structure for products is yourSite.com/{slug}/p/{productCode}and for categories isyourSite.com/{slug}/c/{categoryId}. The slug (or SEO-friendly URL) gives you the ability to add a meaningful component to the URL structure in order to boost search results.Page Title By default, this value is not used by Kibo eCommerce. However, your theme developer has access to this value through a Hypr variable, so with minor theme changes, you can expose a different page title on your storefront than the title you supply for the meta title. Meta Title Maps to the HTML meta title tag. While most search engines place little value on this tag, most Kibo eCommerce themes inject the value of the meta title tag into the HTML title tag.
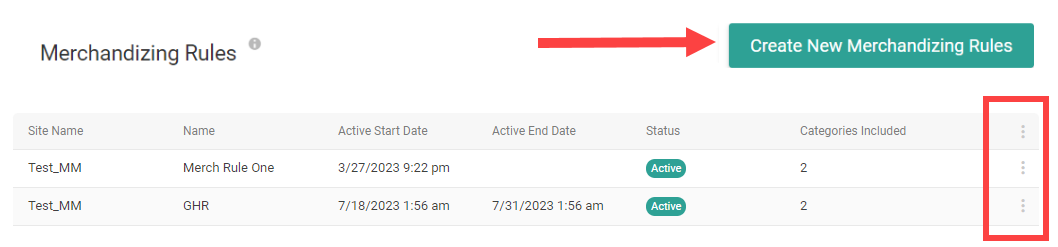
The HTML title tag is used by search engines and browsers to display the title of the page, and is critical to SEO. Search engines place very high importance on the correlation between a page's title tag and its content.Meta Description Maps to the HTML meta description tag, which is used by search engines to summarize the content of the page. Keywords Maps to the HTML meta keywords tag, which is used to tell search engines what the page is about. From an SEO-perspective, search engines place little value on this tag, but the Kibo eCommerce search implementation uses these keywords to help construct search results for pages on your storefront. - If desired, click Create New Merchandizing Rules to open another tab and create a merchandizing rule to control your product ranking in this category. Any merchandizing rules that are added to this category will be displayed in a table, where you can edit or delete them by expanding its action menu on the right.
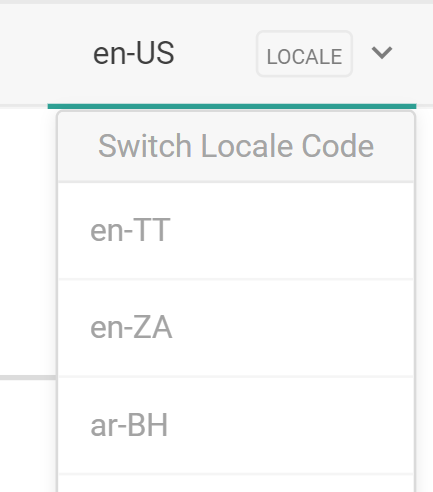
- If you have enabled multiple locales for this catalog, you can switch locales using the dropdown menu in the top right. This allows you to localize the category name, description, meta information, and SEO for that language. The category code, merchandizing rules, category attributes, and other settings will not be displayed or editable, as those are only configurable on the default locale for the catalog.
- Click Save.


If you view the dynamic category on your Staged site, the default sort order may be different than the default sort order on your Live site. This is because the Staged site may be using a different default sort by value than your Live site. Your Live site's default sort by value is determined by your theme. You can confirm the products that are included in both the Staged and Live versions of the dynamic category by clicking Preview under the Expression section. Refer to Preview the Expression Results for more information about previewing the dynamic category expression results.
Duplicate Dynamic Categories
You can duplicate categories to quickly create new categories that are based on existing ones.
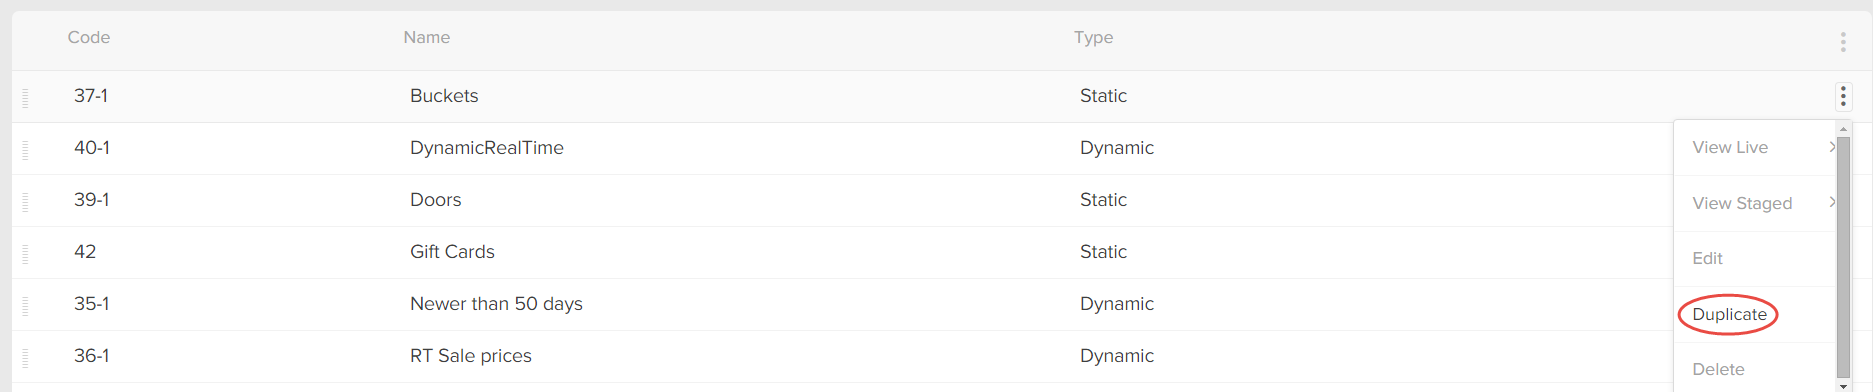
To duplicate a category:
- Go to Main > Catalog > Categories.
- Expand the actions menu next to a category.
- Select Duplicate.
You can then edit the duplicated category to meet your needs.
Disable Dynamic Categories
You can temporarily or permanently disable categories so that they can't be used in various contexts and are filtered out of default views within Admin.
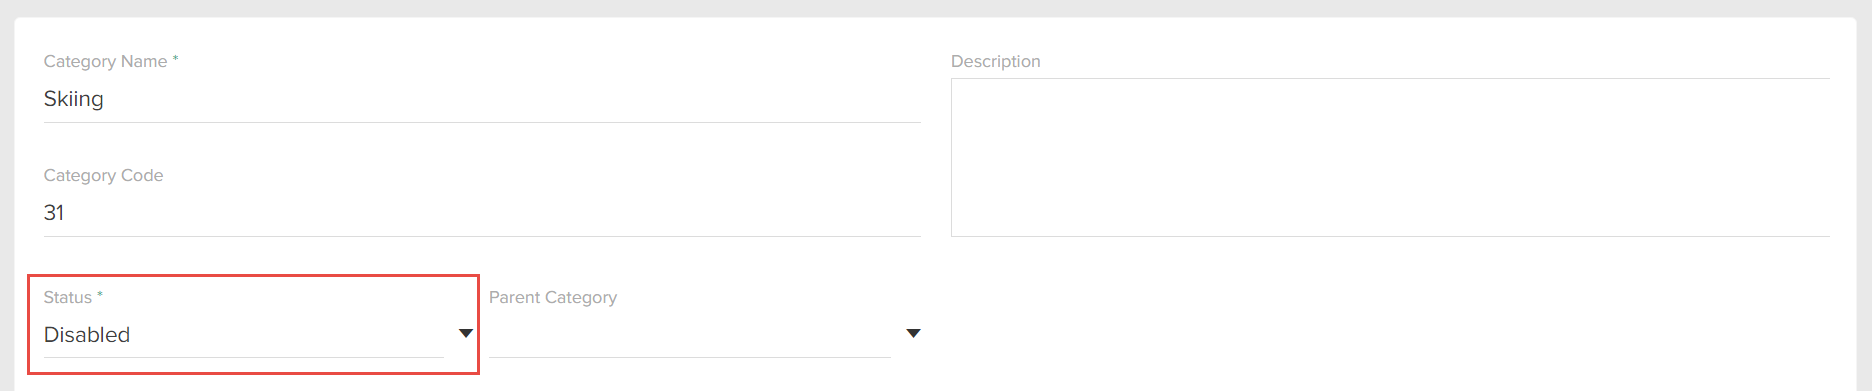
To disable a category:
- Go to Main > Catalog > Categories.
- Select the applicable category you want to disable.
- In the Status drop-down menu, select Disabled.
Keep the following in mind when you disable a category:
- The category disappears from the default view in the Category grid in Admin.
- Subcategories—Subcategories of the disabled category are also disabled. When creating child categories, if you select a disabled category as the child category's parent, then the child category is disabled and is read-only until you either set the parent category as active or remove the parent category from the child category.
- Storefront—If the disabled category was previously shown on the storefront, the category is automatically removed from storefront navigation. Navigating directly to the category URL is subject to your existing URL routes and/or URL redirects. If you don't have any routes or redirects defined, then navigating to the category URL either in your live storefront or staging preview returns a 404 error code.
- Discounts—If the disabled category was previously targeted by a discount, the products in it are no longer eligible for the discount.
- Admin Category Pickerss—Disabled categories are displayed in category pickers in Admin, but are marked as Disabled.
- Dynamic Categories—If you disable a dynamic category, the previewing the dynamic expression results still displays associated products correctly. If you reference a disabled category in a dynamic expression, the expression evaluates as if the disabled category does not exist.
Schedule Categories
You can schedule child categories by specifying a time period in which they will be displayed on the storefront, rather than manually setting a category as active or disabled.
For instance, you may want a "Halloween Decor" category to be displayed only in the weeks leading up to Halloween. You would set the appropriate start and end date in the category settings, and Halloween Decor would then be automatically activated and deactivated on the storefront at those dates.
Schedule Settings
Whether you are creating a new category or editing an existing one, the Status dropdown in the category configurations will display a “Scheduled” option. Selecting this status will then allow you set a Start Date and End Date (including a time) as shown below.
If no end date is scheduled, then the category will still be displayed on the required start date. The end date will be considered “indefinite” and so the category will remain visible until either an end date is set or it is manually disabled.

When scheduling categories, be aware of the following behaviors:
- If products in the category are also scheduled but their dates do not align with the category’s dates, then the product will not be displayed.
- If there are no products in the category, then the empty category will still be displayed on the storefront during that scheduled period.
- If you are scheduling a parent category that contains sub-categories, then the sub-categories will only be displayed on the storefront when the scheduled parent category is also displayed.
Viewing Scheduled Categories
Once configured, the category will be displayed in the table with the Scheduled status.

You can show or hide the additional Start Date and End Date columns, which are hidden by default. Expand the menu in the top right of the table to select the column display options.

You can also use the search bar's Advanced Filter option to search for categories in the Scheduled status (as well as filter by start or end date), or directly input a query for scheduled categories. For example:
- To retrieve any scheduled categories, use ?filter=activeStartDate ne null OR activeEndDate ne null
- To retrieve categories scheduled for a specific period, in this case from June 24 to June 30, use ?filter=activeStartDate gt 2021-06-24T18:01:00-0500 AND activeEndDate lt 2021-06-30T18:01:00-0500
API Integration
The Category API contains fields for status, activeDateStart, and activeDateEnd. This allows you to add, update, and retrieve scheduled category information via API instead of UI.
A category.updated event will fire when any configured start or end date is reached, triggering the activation or deactivation of the category on the storefront.
Preview Dynamic Categories
You can preview category pages on the storefront, though this is only supported for Active categories (not Disabled or Scheduled). Previewing a category page is handy if you want to view how the category displays your site and how the products assigned to the category, whether statically or dynamically, appear on the category page.
Even though there is no "publish" setting for categories and they cannot be added to publish sets, the ability to preview that category for a future date in staging does allow for elements (such as products that may have a set Publish Date) to be previewed. For example, a user may want to see what a category called Dresses looks like between December 1 and December 31, in the future where a lot of products that are party dresses will be set to go live.
You can only preview category pages (which determine the look and feel of categories), not the categories themselves. When you create or edit a category, the changes take effect immediately, meaning that you can't stage category data or edit categories and preview them before the product data is updated.
To preview a category page:
- Go to Main > Catalog > Categories.
- Expand the actions menu next to a category.
- Select View Staged > Site.