

Watch: Dev Center Overview
Get an introduction to the Kibo Dev Center
- Node.js: Provides a platform for creating scalable network applications. Includes the npm package manager, which you’ll use to install additional software and tools.
- Yeoman: Provides an ecosystem of generators for scaffolding web applications. Kibo provides several generators for quickly creating and updating the basic structure of applications and themes, including specifying build configurations and retrieving dependencies.
- Grunt.js: Provides a platform for automating build tasks. Kibo development tools use Grunt plugins for checking, building, and optimizing applications and themes and uploading theme to Dev Center.
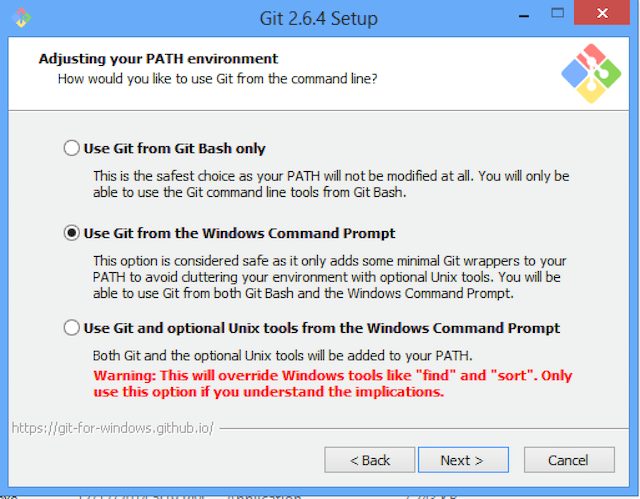
- Git: Provides a version control system for managing your theme files. The Theme Generator uses Git to configure repositories for your local projects. Kibo uses Git to release theme updates, making Git an essential part of your upgrade path.
| Third-Party Software | Kibo Tools |
|---|---|
| Yeoman |
- Actions Generator: Generates the application directory structure, JavaScript templates that correspond to the actions you choose to install, and a test framework for validating your code before uploading it to Dev Center.
- Theme Generator: Generates the theme directory structure, common theme files, build process, and test framework for validating your code before uploading it to Dev Center. This tool also configures your local directory as a Git repository and can connect other theme Git repositories as remotes to make upgrading themes easier.
- Kibo Application Generator: Configures code in an existing application or theme directory with a new Dev Center application key so you can upload the files to your developer account.
- Create a New Theme
- Merge Updates from the Latest Kibo Core Theme
- Upgrade a Legacy Theme
- Configure an Existing Theme to Sync with Dev Center
- mozutheme: Runs “compile” or “check” commands (depending on your configuration) during the build process. This task is built into the Theme Utility Helpers for compiling and maintaining themes.
- mozusync: Takes an environment configuration (supplied either manually in Gruntfile.js or through mozu.config.json) and synchronizes application or theme files in a local directory with Dev Center.
- Theme Utility Helpers: Provides a library of common tasks for checking, compiling, and maintaining themes.
- API Extension Utility Helpers: Provides a library for running common tasks in API Extension actions.
- API Extension Action Simulator: Provides unit and integration tests for API Extension actions.
- Sync Utility Helpers: Provides the library for the mozusync Grunt task.
- Node.js SDK: Provides the base library for all Node.js communication with the API.
- Multipass: Provides an authentication storage plugin for the Node.js SDK.
Theme Generator
Themes are designed to leverage inheritance, so all of your theme development should extend the latest Core theme. We recommend using the Theme Generator to manage your theme assets. The Theme Generator:- Creates new themes that inherit from the latest Core theme or clones an existing theme from a Git repository to a local directory. You can also use the generator to upgrade existing themes. Refer to Upgrade a Legacy Theme for more information.
- Configures your local theme directory as a Git repository.
- Connects the Core theme Git repository (or any other theme Git repository) to your theme as a remote so you can merge upstream changes.
Create a New Theme
The Theme Generator is a Yeoman plugin that generates the scaffolding (e.g., directory structure, reference files, and build files) necessary to package a theme and upload it to Dev Center. It’s designed to augment, not overwrite, existing themes. If you have a theme that extends the Core theme, you can safely run this tool in that directory without overwriting your existing files. Whenever Kibo releases a Core theme upgrade, you can use this tool to merge changes from the Core theme ( or any other theme Git repository) with your theme. To create a brand new theme that inherits from the latest Core theme:- Open a terminal (OS X) or a command prompt (Windows).
- Install the Yeoman command-line tool globally:
npm install -g yo - Install the Grunt command-line tool globally:
npm install -g grunt-cli - Install the Theme Generator globally:
npm install -g generator-mozu-theme - Create a new folder for your theme on your local machine and navigate to it:
mkdir your_theme && cd your_theme - Run the Yeoman generator inside your theme directory:
/your_theme/$ yo mozu-theme - If you have an old version of the tool installed, you’ll be prompted to update it. Press
<Ctrl+C>to exit the application and enter the following command:npm install -g generator-mozu-theme - Select Brand new theme.
- Enter the public name of your theme.
- (Optional) Enter a short description of your theme.
- Enter the initial version.
- Select Mozu Core Theme as the base theme from which your new theme will inherit.
- Select which version of the Core theme from which your new theme will inherit.
- Enter your theme’s Dev Center Application Key. If you’re using a package other than Release, make sure you enter the correct Application Key. Package names are appended to the Application Key of each package for identification purposes. The build tools rely on the Application Key to upload files to the right place in Dev Center.
- Enter your Developer Account login email.
- Enter your Developer Account password.
- Select your developer account.
- Compress your local theme project into a .zip file.
- Log in to Dev Center.
- Click Develop > Themes.
- Double-click the theme where you want to upload files.
- Click the Packages tab.
- Select the package you want to upload files to from the Active Package drop-down menu.
- Click More > Upload.
- Drag and drop your theme .zip file into the Upload files dialog box.
- Wait for confirmation that the upload is complete.
- Click Done.
- You should see the contents of your theme in the Packages tab.
Merge Updates from the Latest Core Theme
If the latest Core theme is already connected to your repository as a remote, you can merge changes from the Core repository into your theme. You must resolve any merge conflicts that arise and commit your changes to complete the upgrade process. Kibo recommends conducting user acceptance, automated unit, and end-to-end testing of your site to ensure the latest Core theme works for your site. To merge updates from the latest Core theme:- Examine the merged Github Pull Requests to see what individual features are coming over from the latest Core theme. You can also use the Compare View in Github to compare different versions of the Core Theme.
- Open a terminal or command prompt and navigate to your local theme directory.
- Enter
grunt mozutheme:checkto see if any updates are available.\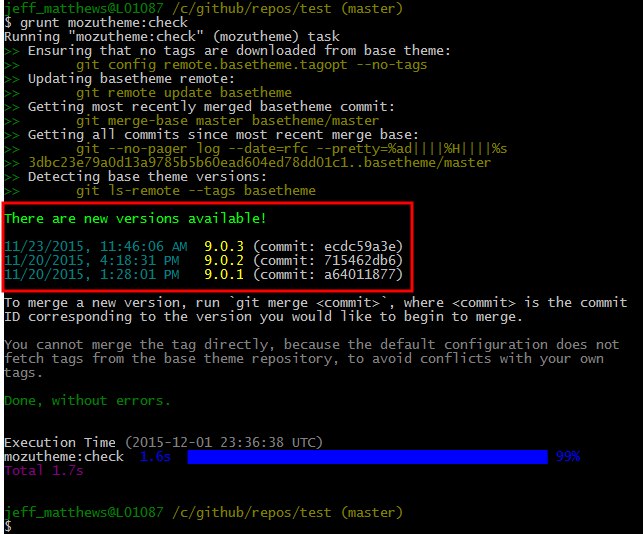
- Select the version you’d like to merge with your theme and use the following command syntax to merge:
git merge <commitID> - Replace
<commitID>with the value displayed next to the selected version:\
- Resolve all merge conflicts and ensure your repository is in a clean state before proceeding.
- Install your upgraded Core-based theme on a development sandbox and activate it.
- Activate Debug Mode in the storefront by adding the query parameter
debugMode=trueto any storefront URL. For example,yourSite.com/about-us?debugMode=true. - Visually examine your theme for problems.
- Test your site for issues:
- View a category
- Search for products
- Configure a product
- Manipulate the cart
- Check out and place an order
- Make changes to your account page, etc.
- Make any necessary corrections based on visual or console errors.
- Continue testing and developing until your theme is free from errors and regressions.
Upgrade a Legacy Theme
You must manually upgrade themes that extend legacy versions of the Core theme (version 8 and earlier) to use the latest Core theme instead. The Theme Generator connects the latest Core theme to your repository as a remote so you can merge changes from the Core Git repository into your theme. You must resolve all merge conflicts and commit your changes to complete the upgrade process. Kibo recommends conducting user acceptance, automated unit, and end-to-end testing of your site to ensure the latest Core theme works for your site. To upgrade a legacy theme:- Examine the merged Github Pull Requests to see what individual features are coming over from the latest Core theme. You can also use the Compare View in Github to compare different versions of the Core Theme.
- Run the Theme Generator to upgrade your theme to inherit from the latest Core theme:
- Open a terminal or command prompt and navigate to your local theme directory.
- Enter
yo mozu-theme. - Select Upgrade now.
- Resolve all merge conflicts and ensure your repository is in a clean state before proceeding.
- Install your upgraded Core-based theme on a development sandbox and activate it.
- Activate Debug Mode in the storefront by adding the query parameter
debugMode=trueto any storefront URL. - Visually examine your theme for problems.
- Test your site for issues:
- View a category
- Search for products
- Configure a product
- Manipulate the cart
- Check out and place an order
- Make changes to your account page, etc.
- Make any necessary corrections based on visual or console errors.
- Continue testing and developing until your theme is free from errors and regressions.
Build and Sync Files with Dev Center
You need to build and upload your theme files to Dev Center in order to apply your theme to a site. You can manually compress and upload your theme files, but we recommend using the theme build tools instead. To prepare and upload your theme files using the build tools:- Open a terminal (OS X) or a command prompt (Windows).
- Navigate to the root directory containing your theme files.
- Run a Grunt plugin command:
grunt do and what are the common options you can use with it?
grunt:
- Checks your JSON and JavaScript for syntax and style errors
- Compares your theme with the remote base theme and notifies you if updates are available for merging
- Compiles your theme’s JavaScript according to the
./build.jsfile that you either inherit or override - Uploads changed files to (Undefined variable: DevCenterName) into the theme specified by the Application Key you provided when configuring the Theme Generator tool
- If you’ve added new files at the root level of your theme directory, you must add each file name to the
mozusync.upload.srcsection ofGruntfile.jsto upload them using thegruntcommand.
grunt build-production:
- Checks your JSON and JavaScript for syntax and style errors
- Compiles your theme’s JavaScript according to the
./build.jsfile that you either inherit or override - Compress and minify the compiled JavaScript for production
- Creates a
.zipcontaining your theme files suitable for sharing or manually uploading within Dev Center (The ZIP file you upload contains only the contents of the theme folder that have changed and not the theme folder itself.)
grunt mozusync:wipe && grunt:
- Cleans up the theme in Dev Center by deleting all files and then re-uploading your theme files
grunt watch:
- Listens for any changes to your theme files
- If you save a change to a theme file,
gruntautomatically builds and uploads your theme to Dev Center.
Application Generator
You may download a theme, application, or API Extension action from a colleague or from a public repository that hasn’t been configured to sync with Dev Center. You can configure existing code to upload to your Developer Account just by adding amozu.config.json file in the working directory.
Configure an Existing Theme to Sync with Dev Center
- Open a terminal (OS X) or a command prompt (Windows).
- Install the Yeoman command-line tool globally:
npm install -g yo - Install the Application Generator globally:
npm install -g generator-mozu-app - Navigate to your local working directory.
- Run the generator:
yo mozu-app
Options
--configure: Only create amozu.config.jsonfile. Use this option to add existing code to an application in your developer account.--skip-install: Skips the automatic execution of npm install after scaffolding has finished.--skip-prompts: You may find yourself rerunning the generator in the same directory multiple times. Use this option to save answers to the prompts so you want to quickly rerun the generator without prompts. This option won’t work if you’ve never run the generator in this directory.--quick: Equivalent to--skip-install --skip-prompts.--internal: Allows integration with nonproduction environments. The prompts will include an extra question about which environment to sync with.