

Watch: Inventory Overview
Get an introduction to inventory management in Kibo
Enable Inventory
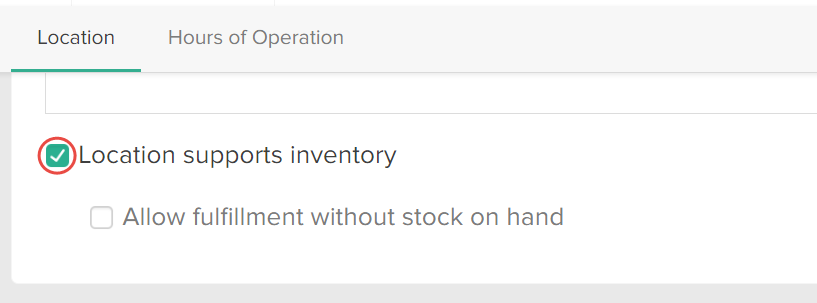
You must enable inventory support for one or more of your locations and then enable products for stock tracking before you can create inventory records and set quantities. To enable inventory support for a location:- Go to Main > Orders > Locations.
- Click a location to open its configuration details.
-
Under the Location section, enable Location supports inventory.
-
(Optional) Decide whether you want to Allow fulfillment without stock on hand.
This allows you to fulfill orders without sufficient on-hand quantities. This is useful if you want to mark items as fulfilled before entering newly arriving stock quantities in Kibo eCommerce. Refer to Fulfill Items Without Sufficient Stock for more information. - Click Save.
- Go to Main > Catalog > Products.
- Click a product to open its configuration details.
- Go to Product Editor > Inventory and enable Track stock level.

- Click Save.
Create Inventory Records
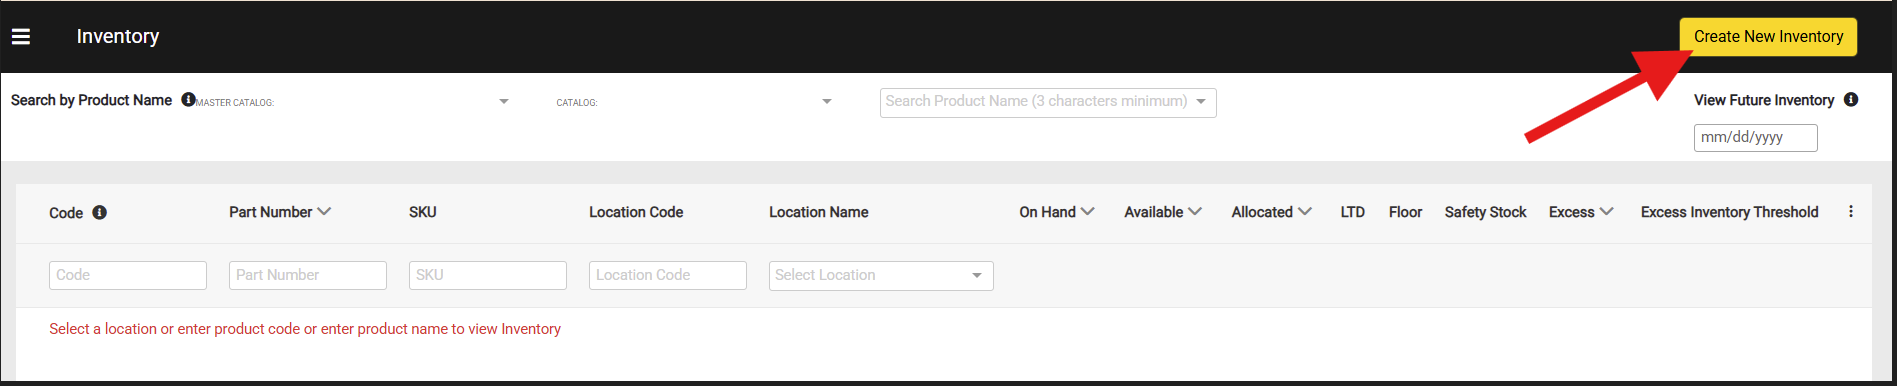
You can create inventory records and set quantities from the Inventory UI.- Go to Main > Orders > Inventory.
-
Click Create New Inventory. This will add an empty row to the table.
-
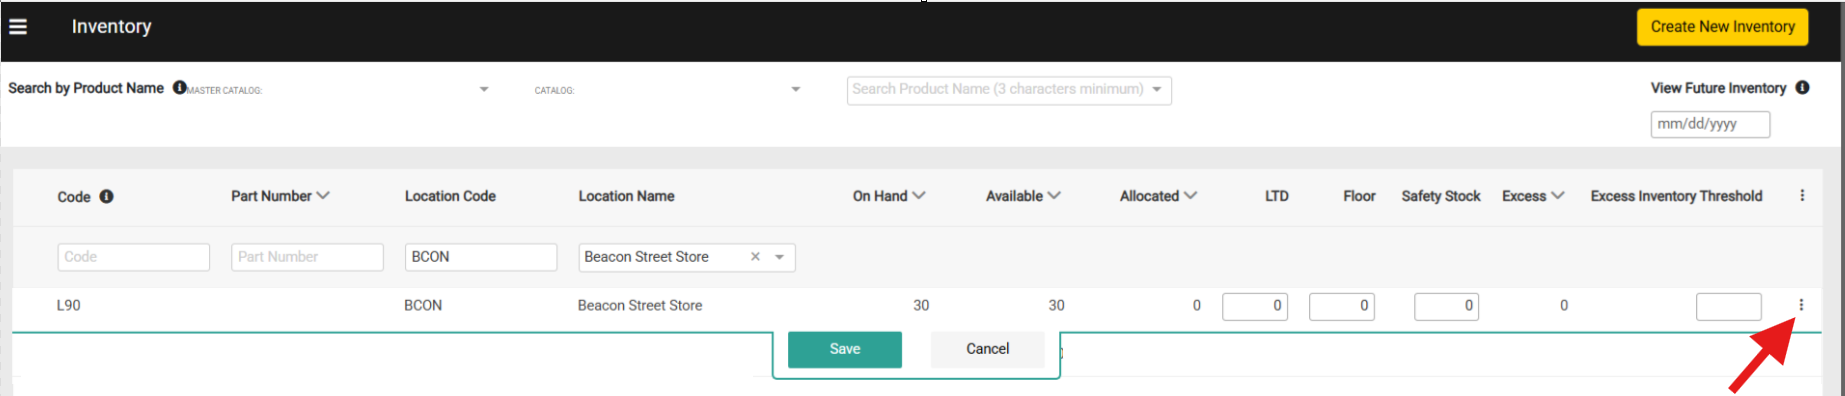
Enter a product code and select a location, then enter the On Hand and any other inventory values you want to include such as LTD, Floor, Safety Stock or Excess Inventory Threshold. The below example shows a basic inventory record without additional granular inventory fields or tags.
 If you want to set Safety Stock levels automatically upon inventory refreshes, based on criteria such as product types and location groups, you can use Safety Stock Rules.
- Click Save.
Adjust Inventory Quantities
You can adjust the On Hand, LTD, Floor, Safety Stock and Excess Inventory Threshold quantity of existing inventory records at any time via the Inventory UI. You can also update inventory quantities via the Refresh and Adjust APIs or inventory import process instead.- Go to Main > Orders > Inventory.
- Either select the Location Name from the drop-down menu or enter a Product Code to view inventory levels.
- Expand the actions menu on the far right of an inventory row and click Edit. This will make the fields editable for you to enter a new quantity.
- Note that if the inventory record includes granular fields or tagged inventory, the total cannot be edited at the top level. You must update the quantity for a specific granular field or tag instead.
- Note that if the inventory record includes granular fields or tagged inventory, the total cannot be edited at the top level. You must update the quantity for a specific granular field or tag instead.
- Click Save.