> ## Documentation Index
> Fetch the complete documentation index at: https://docs.kibocommerce.com/llms.txt
> Use this file to discover all available pages before exploring further.
# Vendor Onboarding
When an operator invites you to join their dropship network, you receive an email with a registration link. The sections below walk through the full onboarding journey on the Vendor Portal, from confirming the invitation to completing all four onboarding steps.
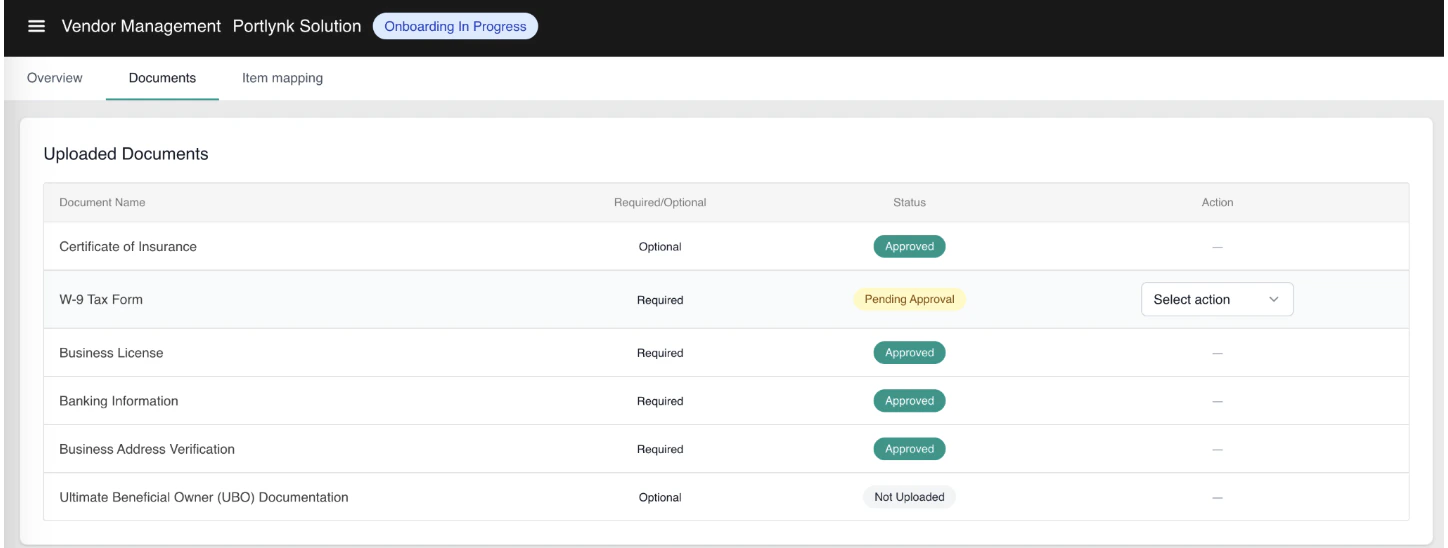
See the four-step vendor onboarding process and the operator review and approval workflow
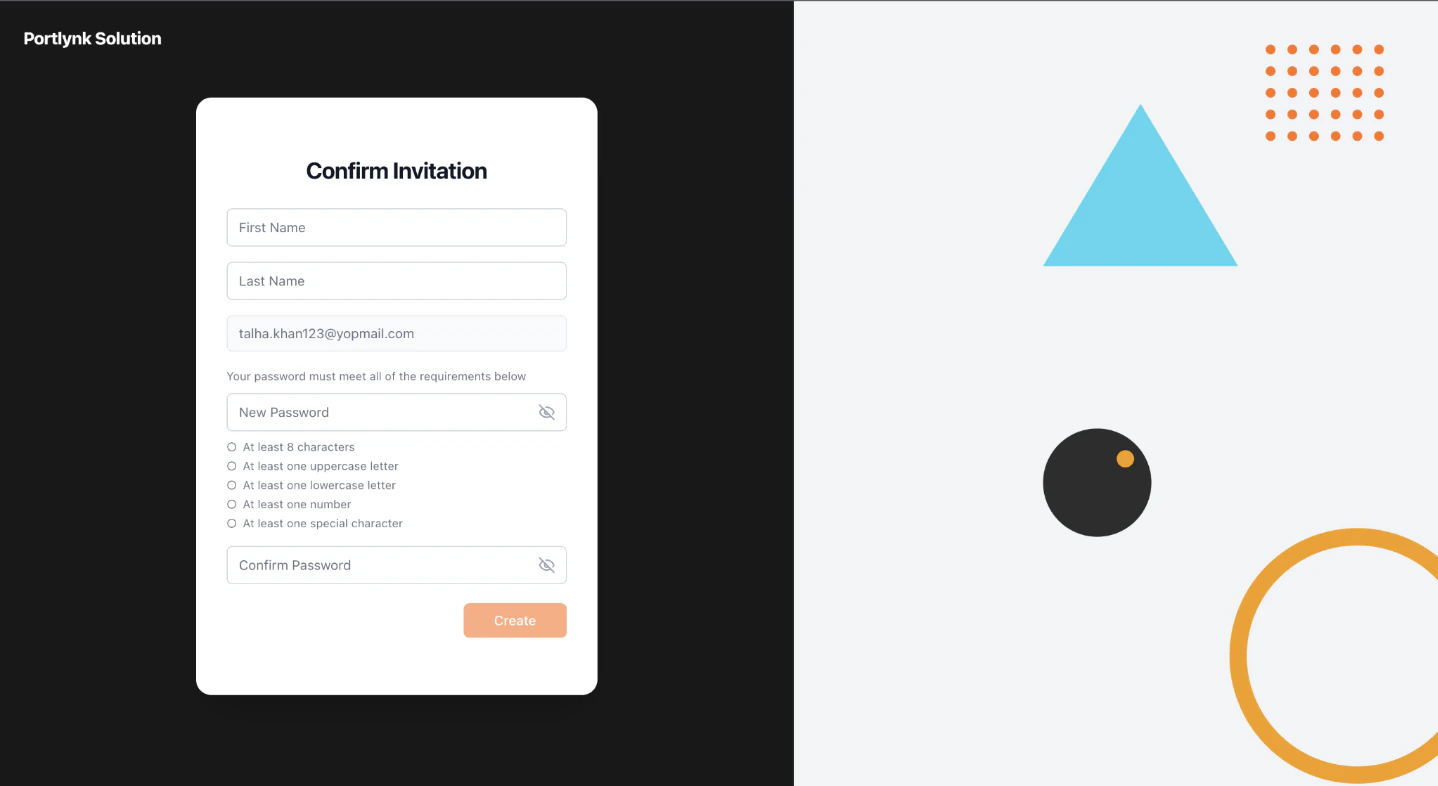
## **Confirm Your Invitation and Register**
1. Open the invitation email and click **Join Now**.
2. On the Confirm Invitation page, complete:
* **First Name** and **Last Name**.
* **Email** — pre-filled from the invitation and not editable.
* **New Password** — must satisfy all of the requirements listed below the field (minimum length, uppercase letter, lowercase letter, number, special character).
* **Confirm Password** — must match.
3. Click **Create** to register.
After registration you are signed in and taken to the Onboarding Module, where the four-step onboarding stepper appears in the left rail. The header displays your vendor name and the status chip Onboarding In Progress
 ## **Step 1: Provide Basic Corporate Information**
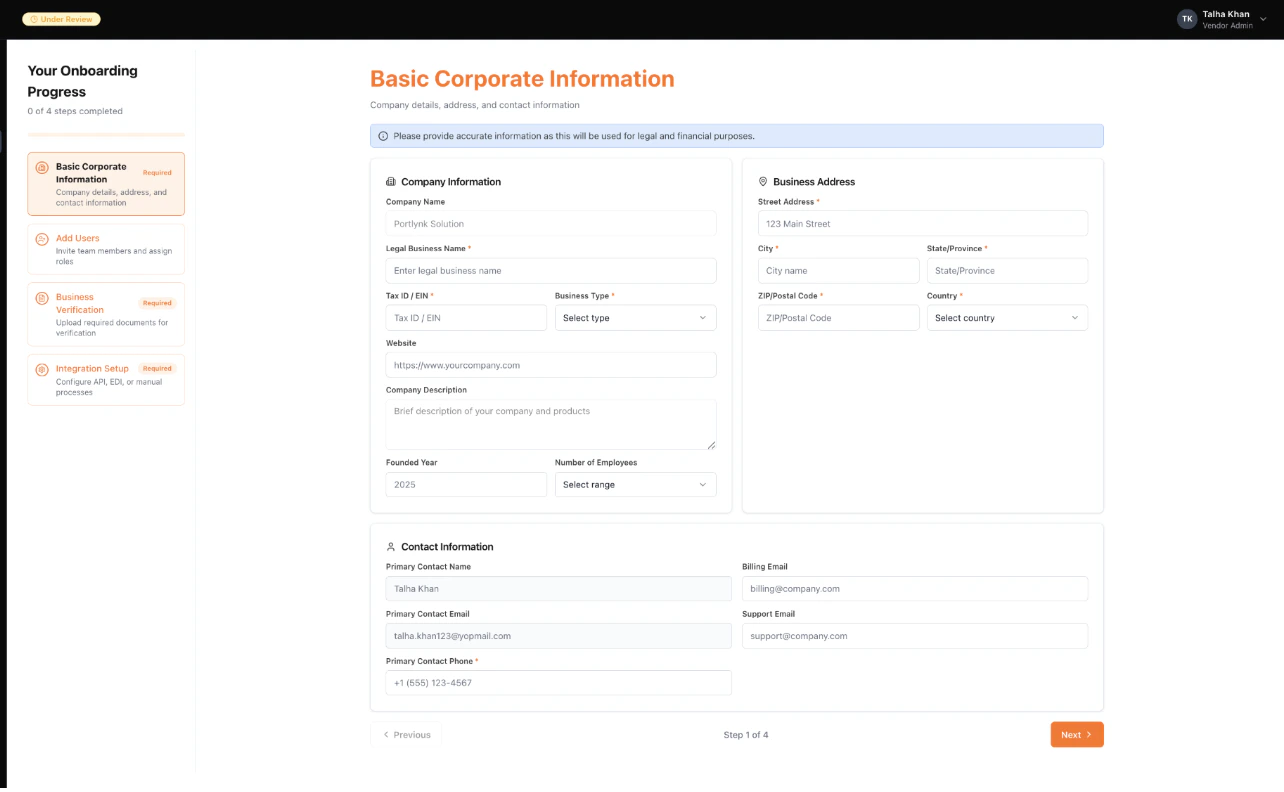 ### **Company Information**
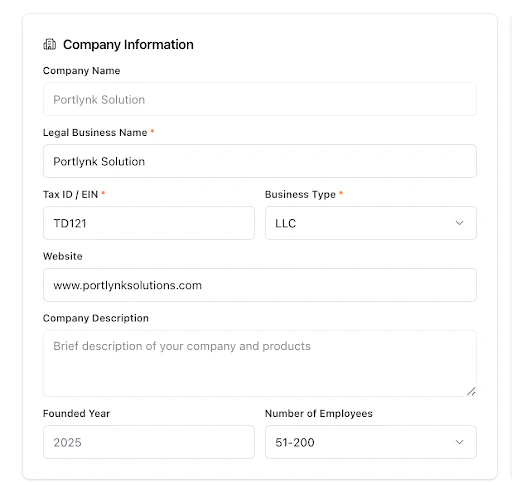
* **Company Name** — pre-populated from the invitation.
* **Legal Business Name** — the official registered name used for legal and financial records.
* **Tax ID / EIN** — the unique identifier used for tax reporting.
* **Business Type** — your legal structure, selected from the dropdown.
* **Website** — your primary web presence.
* **Company Description** — a brief narrative describing your products and operations.
* **Founded Year** and **Number of Employees** — captured for operator reference.
### **Company Information**
* **Company Name** — pre-populated from the invitation.
* **Legal Business Name** — the official registered name used for legal and financial records.
* **Tax ID / EIN** — the unique identifier used for tax reporting.
* **Business Type** — your legal structure, selected from the dropdown.
* **Website** — your primary web presence.
* **Company Description** — a brief narrative describing your products and operations.
* **Founded Year** and **Number of Employees** — captured for operator reference.
 ### **Business Address**
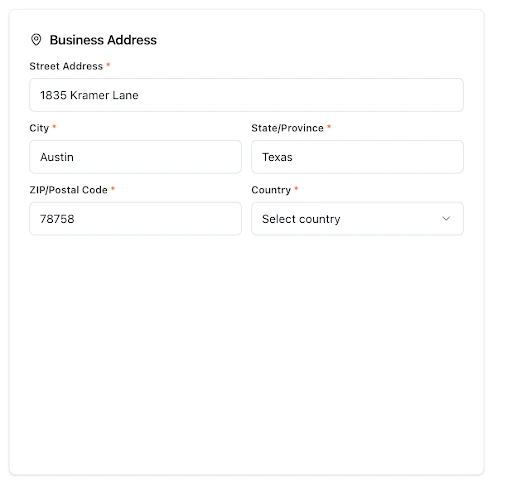
Enter your company's mailing address: Street Address 1, City, State / Province, ZIP / Postal Code, and Country. This is the address surfaced on the Vendor Information block and on invoices.
### **Business Address**
Enter your company's mailing address: Street Address 1, City, State / Province, ZIP / Postal Code, and Country. This is the address surfaced on the Vendor Information block and on invoices.
 ### **Contact Information**
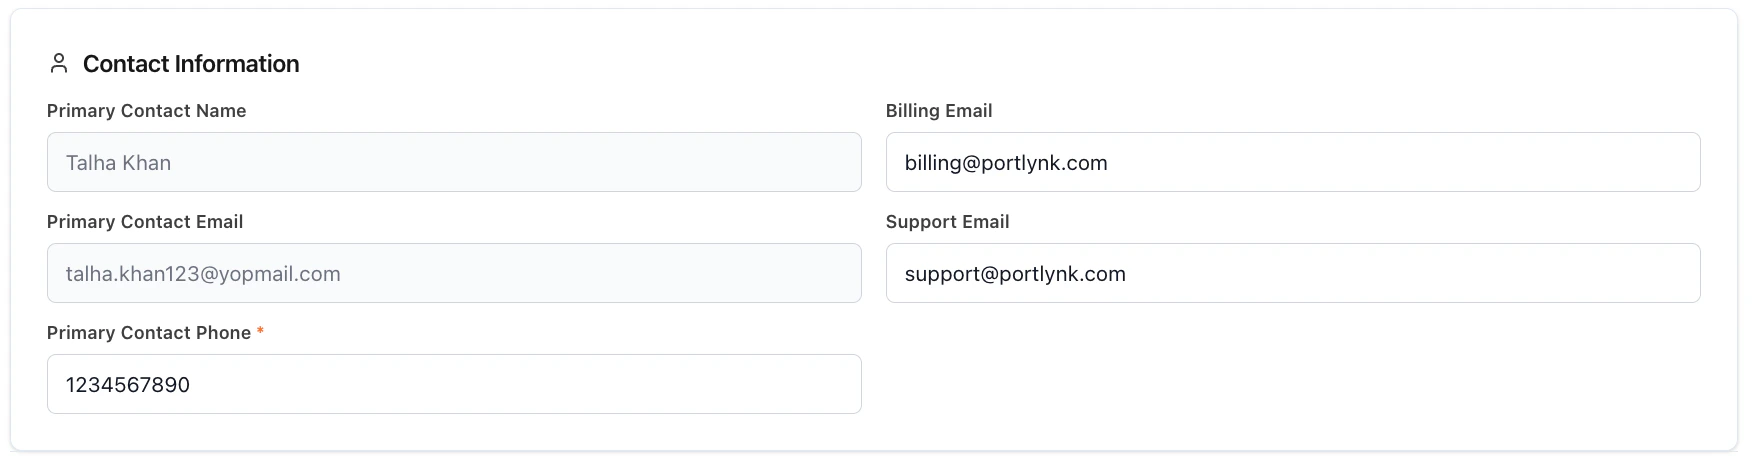
* **Primary Contact Name**
* **Primary Contact Email**
* **Primary Contact Phone** — required. The operator cannot mark the vendor Active until this phone number is on record.
* **Billing Email** — routes invoice-related correspondence.
* **Support Email** — routes support-related correspondence.
### **Contact Information**
* **Primary Contact Name**
* **Primary Contact Email**
* **Primary Contact Phone** — required. The operator cannot mark the vendor Active until this phone number is on record.
* **Billing Email** — routes invoice-related correspondence.
* **Support Email** — routes support-related correspondence.
 \
Click **Next** to advance to Step 2. Step 1 turns green in the left rail to confirm completion.
## **Step 2: Add Users (Optional)**
Step 2 lets you invite additional users into your Vendor Portal. The step is optional — you can click Next without adding any users and revisit later. The Vendor Portal supports two roles:
\
Click **Next** to advance to Step 2. Step 1 turns green in the left rail to confirm completion.
## **Step 2: Add Users (Optional)**
Step 2 lets you invite additional users into your Vendor Portal. The step is optional — you can click Next without adding any users and revisit later. The Vendor Portal supports two roles:
 * **Vendor Admin** — full administrative access. Can manage all products and orders, access financial reports, manage team members and permissions, and configure integrations and settings.
* **Vendor User** — limited access for daily operations. Can view and manage products, process orders, and view reports. Cannot manage team or settings, and cannot invite other users.
### **Invite a User**
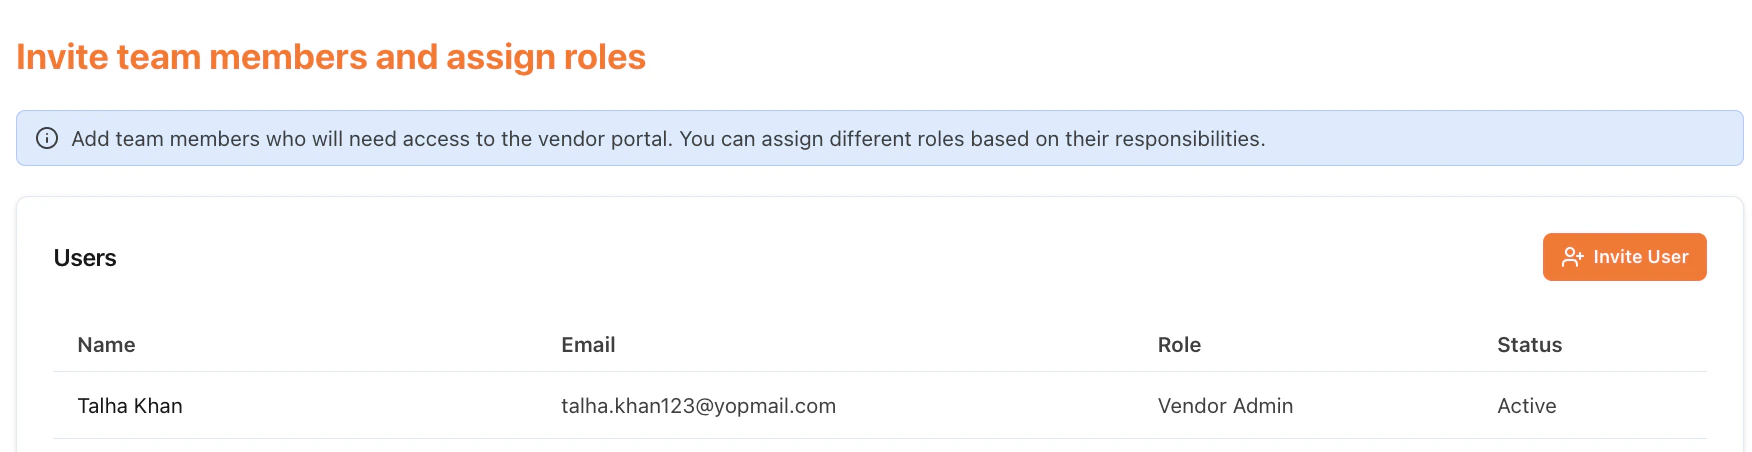
1. Click **Invite User** in the top-right of the step.
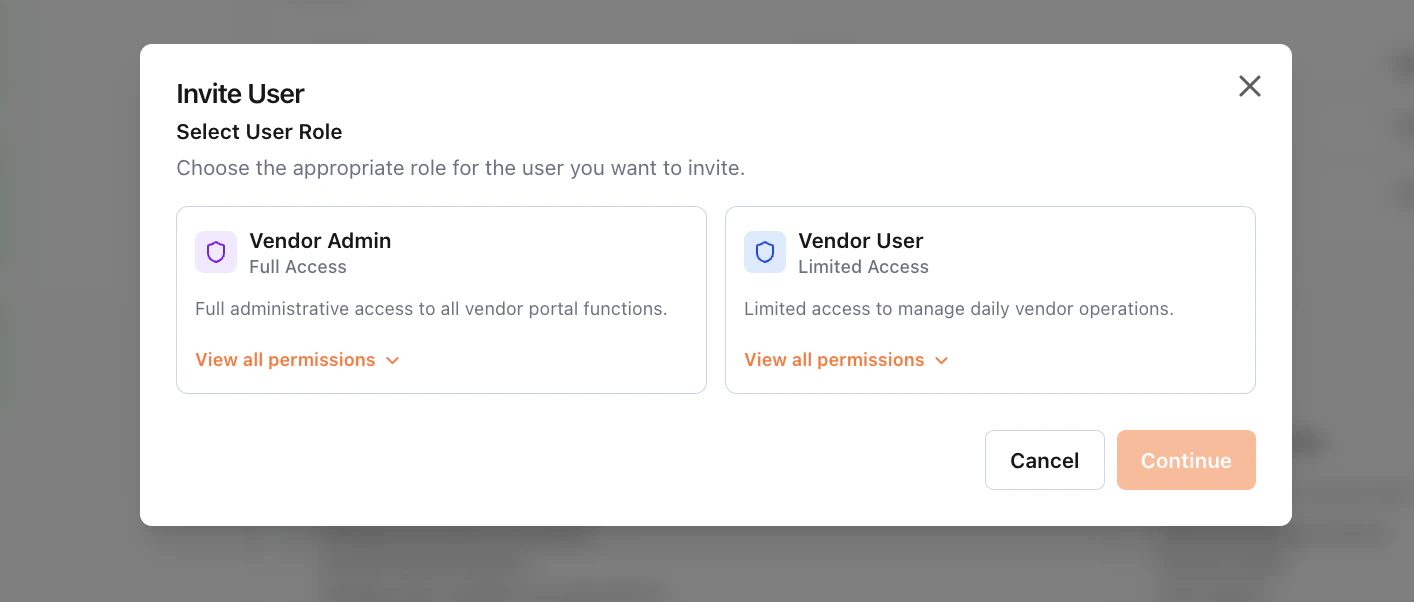
2. Choose the role for the user — **Vendor Admin** or **Vendor User** — and click **Continue**.
* **Vendor Admin** — full administrative access. Can manage all products and orders, access financial reports, manage team members and permissions, and configure integrations and settings.
* **Vendor User** — limited access for daily operations. Can view and manage products, process orders, and view reports. Cannot manage team or settings, and cannot invite other users.
### **Invite a User**
1. Click **Invite User** in the top-right of the step.
2. Choose the role for the user — **Vendor Admin** or **Vendor User** — and click **Continue**.
 3. Enter the user's details:
* **First Name** and **Last Name** — required.
* **Email Address** — required. Becomes the user's login.
* **Company** — optional.
3. Enter the user's details:
* **First Name** and **Last Name** — required.
* **Email Address** — required. Becomes the user's login.
* **Company** — optional.
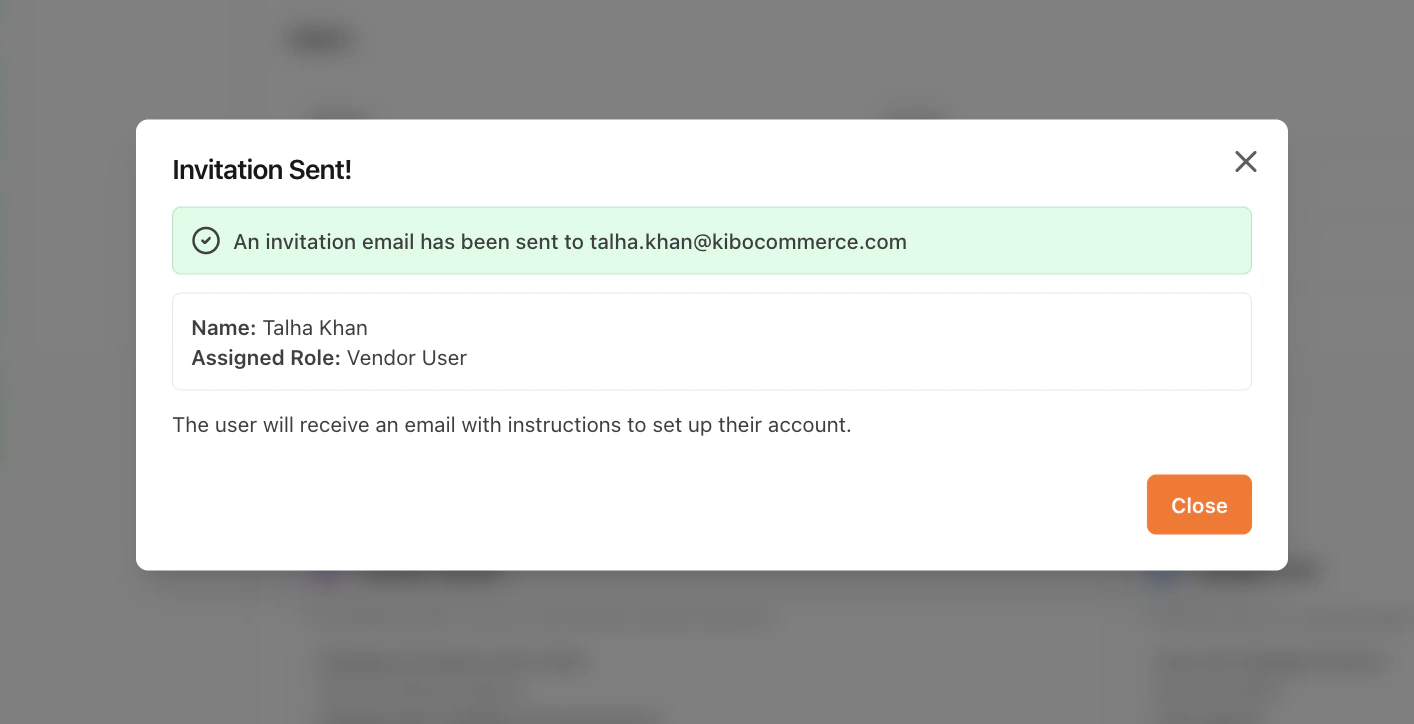
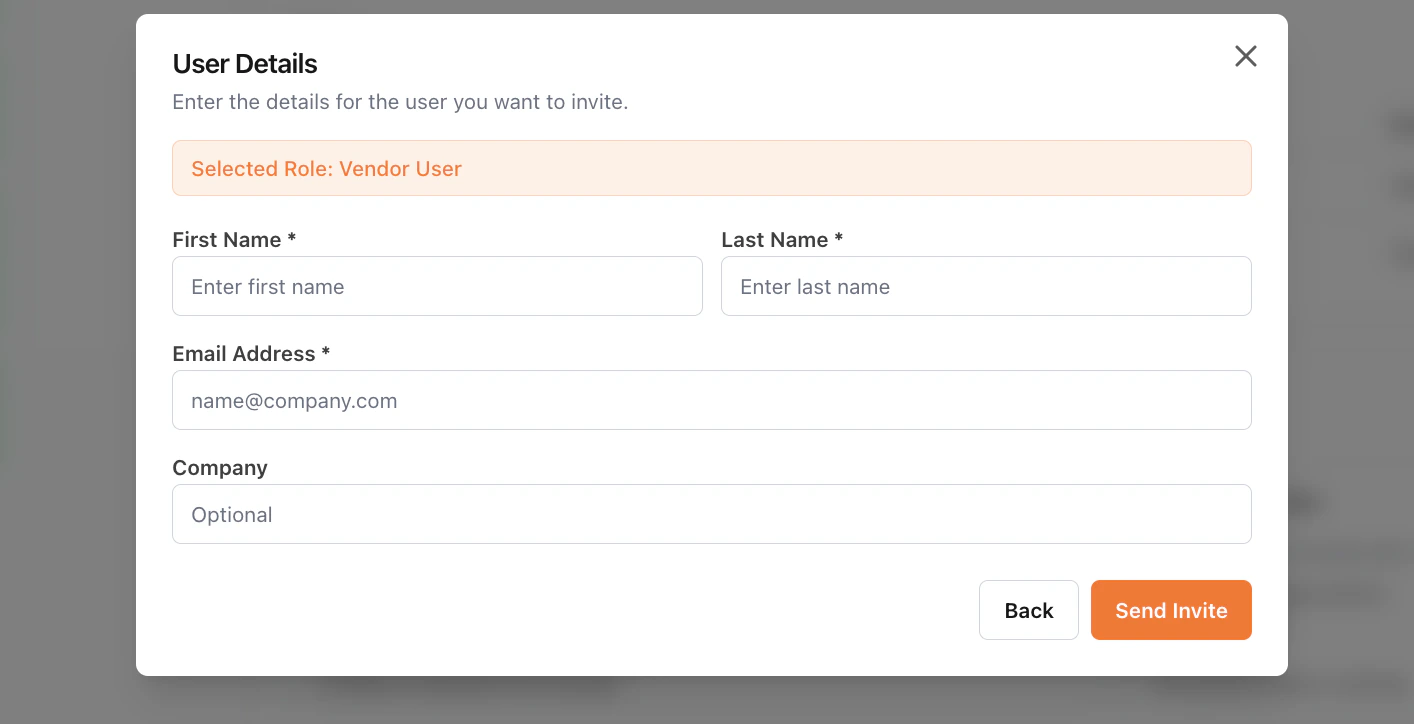 Click **Send Invite**. A confirmation popup appears showing the invited user's name and assigned role.
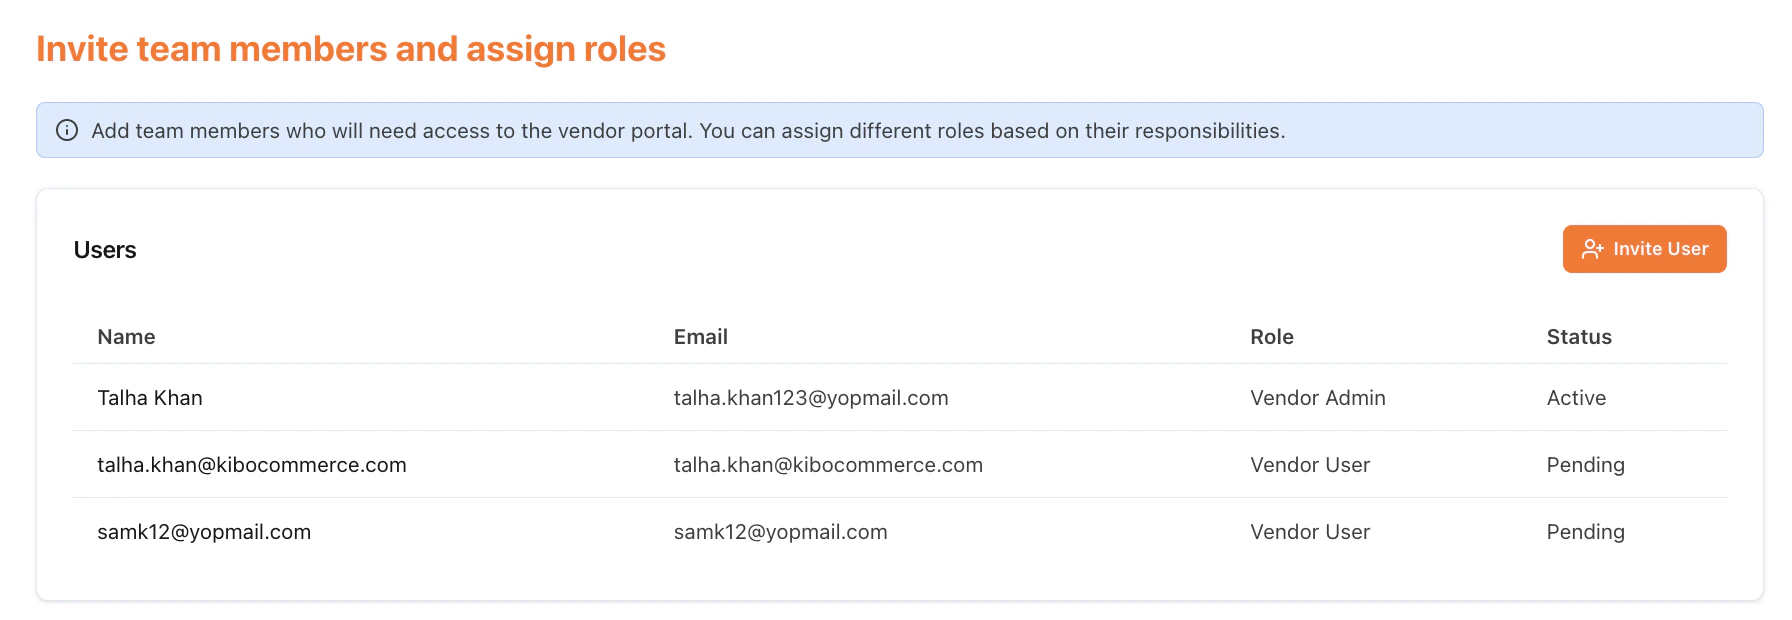
 4. In the user list, the new user appears with the status **Pending**. Once they accept the invitation and register, the status flips to **Active**.
 6. Click **Next** to advance to Step 3.
## **Step 3: Upload Business Verification Documents**
Step 3 is where you upload the compliance documents your operator has configured. The set of documents you see here is operator-configured: each document type carries an operator-defined title and a Required or Optional flag. Required documents must be uploaded before you can complete onboarding.
1. For each document row, click **Upload** and select your file. The maximum size is 5 MB; oversized files are blocked with a "File too large" error.
2. On a successful upload, a green confirmation banner appears, the file name is shown below the document title, and the document status changes to **Pending Review**. The operator now sees the document on their side for approval.
6. Click **Next** to advance to Step 3.
## **Step 3: Upload Business Verification Documents**
Step 3 is where you upload the compliance documents your operator has configured. The set of documents you see here is operator-configured: each document type carries an operator-defined title and a Required or Optional flag. Required documents must be uploaded before you can complete onboarding.
1. For each document row, click **Upload** and select your file. The maximum size is 5 MB; oversized files are blocked with a "File too large" error.
2. On a successful upload, a green confirmation banner appears, the file name is shown below the document title, and the document status changes to **Pending Review**. The operator now sees the document on their side for approval.
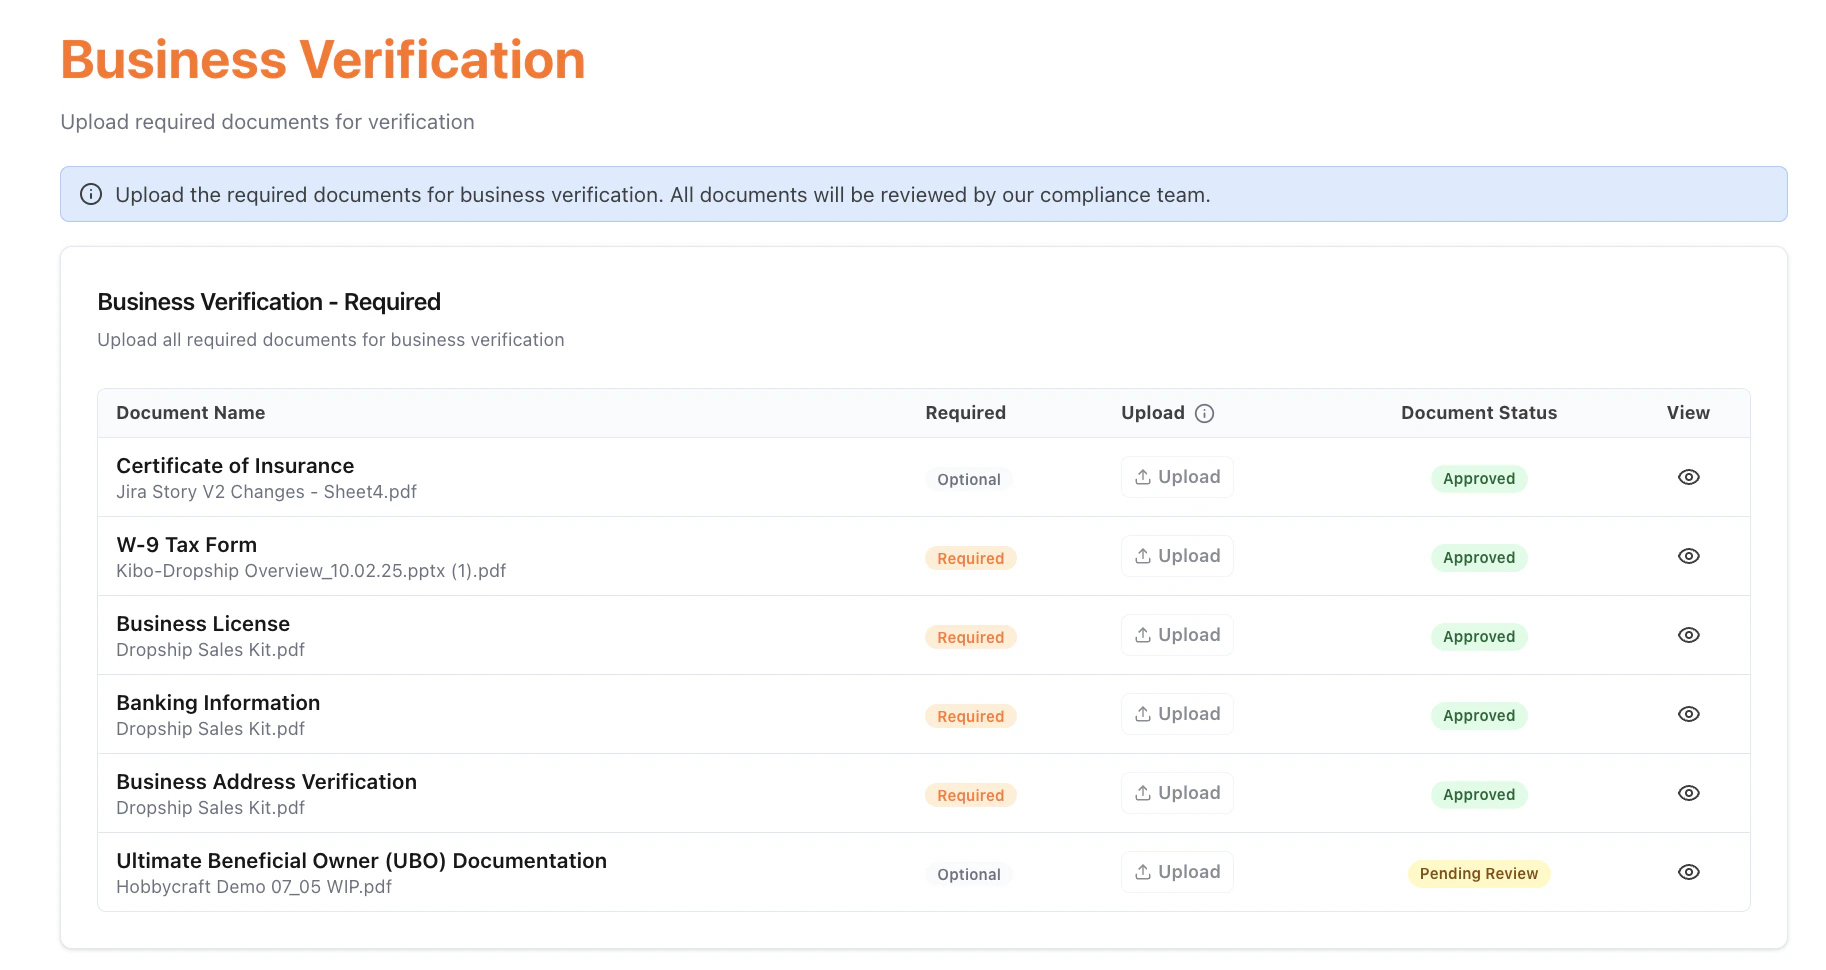 3. Use the eye / view icon on each row to preview your uploaded file at any time.
Document statuses you may see:
* **Not Uploaded** — no file has been uploaded yet.
* **Pending Review** — the file is uploaded and waiting for operator review.
* **Approved** — the operator has approved the document. The Upload control is disabled.
* **Rejected** — the operator has rejected the document with a comment. The Upload control becomes enabled again so you can replace the file. See **Re-upload a Rejected Document** later in this guide.
Once all required documents are uploaded, click **Next** to advance to Step 4.
## **Step 4: Choose Integration Setup**
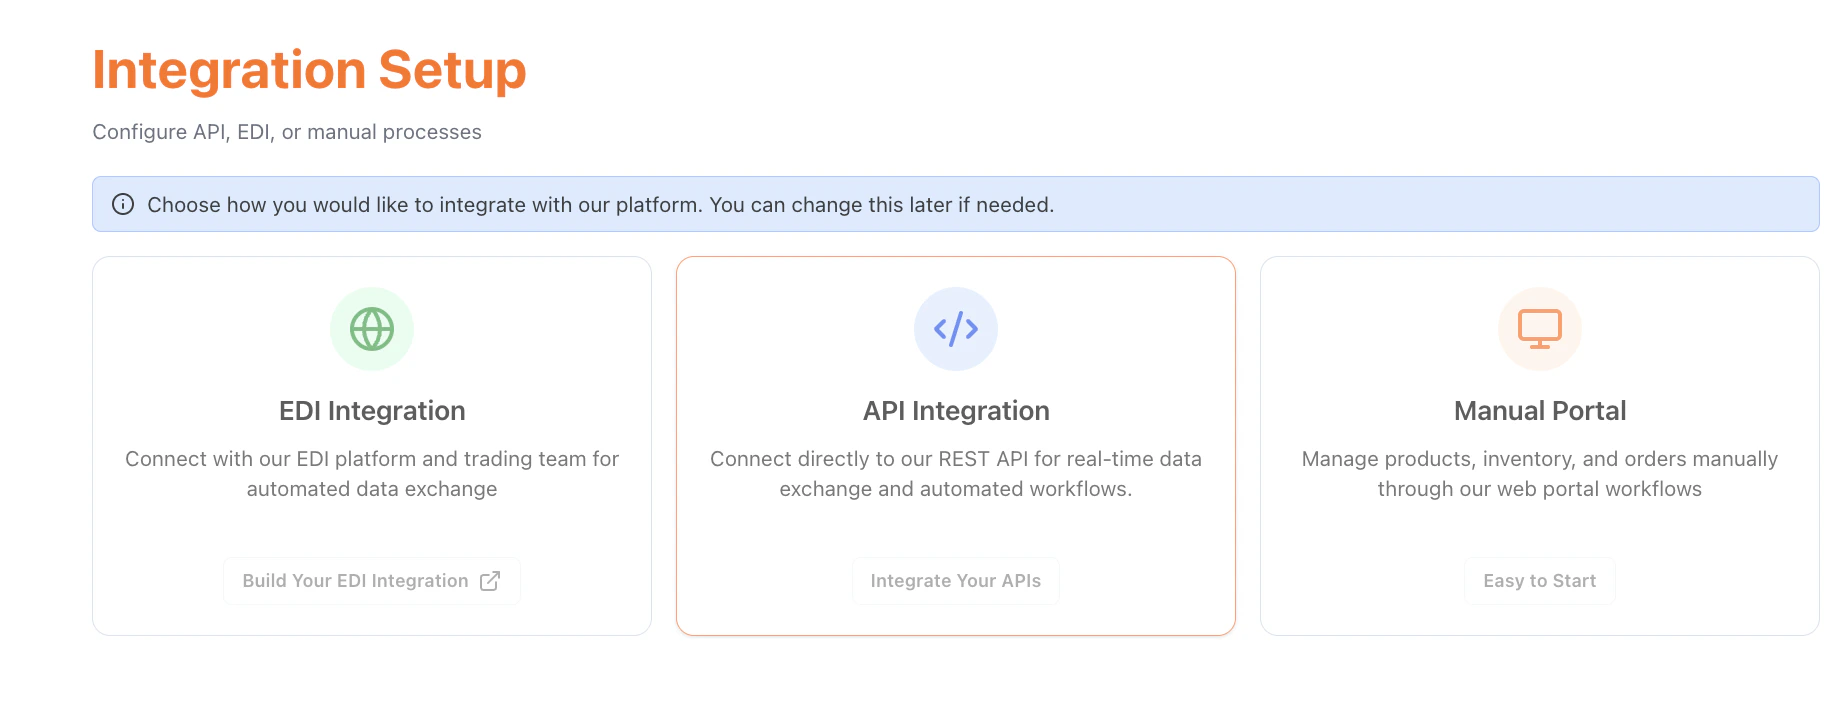
Step 4 is where you declare how your systems will integrate with the operator's Kibo platform. Three integration modes are supported:
3. Use the eye / view icon on each row to preview your uploaded file at any time.
Document statuses you may see:
* **Not Uploaded** — no file has been uploaded yet.
* **Pending Review** — the file is uploaded and waiting for operator review.
* **Approved** — the operator has approved the document. The Upload control is disabled.
* **Rejected** — the operator has rejected the document with a comment. The Upload control becomes enabled again so you can replace the file. See **Re-upload a Rejected Document** later in this guide.
Once all required documents are uploaded, click **Next** to advance to Step 4.
## **Step 4: Choose Integration Setup**
Step 4 is where you declare how your systems will integrate with the operator's Kibo platform. Three integration modes are supported:
 ### **Option A — EDI Integration**
If you operate an EDI environment, choose EDI Integration. You will be redirected to the EDI Orderful page to complete the trading-partner connection. Dropship's EDI integration uses 850 Purchase Order, 855 Acknowledgement, 856 ASN, and 846 Inventory.
### **Option B — API Integration**
1. Click **API Integration**.
2. The API Integration Setup page lists four service categories — **Catalog Listing**, **Locations**, **Inventory**, and **Orders**. Each row has a documentation link and an Integration Complete button.
### **Option A — EDI Integration**
If you operate an EDI environment, choose EDI Integration. You will be redirected to the EDI Orderful page to complete the trading-partner connection. Dropship's EDI integration uses 850 Purchase Order, 855 Acknowledgement, 856 ASN, and 846 Inventory.
### **Option B — API Integration**
1. Click **API Integration**.
2. The API Integration Setup page lists four service categories — **Catalog Listing**, **Locations**, **Inventory**, and **Orders**. Each row has a documentation link and an Integration Complete button.
 \
3\. For each service, complete the integration on your side, then click **Integration Complete** on its row. A Confirm Completion popup asks you to confirm.
4. Click **Yes**. The row's status badge turns green to reflect Integration Complete.
5. Repeat for each of the four services, then click **Complete**.
### **Option C — Manual Portal**
If you do not have EDI or API integration capability, choose Manual Portal. You will operate entirely within the Vendor Portal UI: managing your inventory, and locations manually, and processing orders from the Orders tab.
1. Click **Manual Portal**.
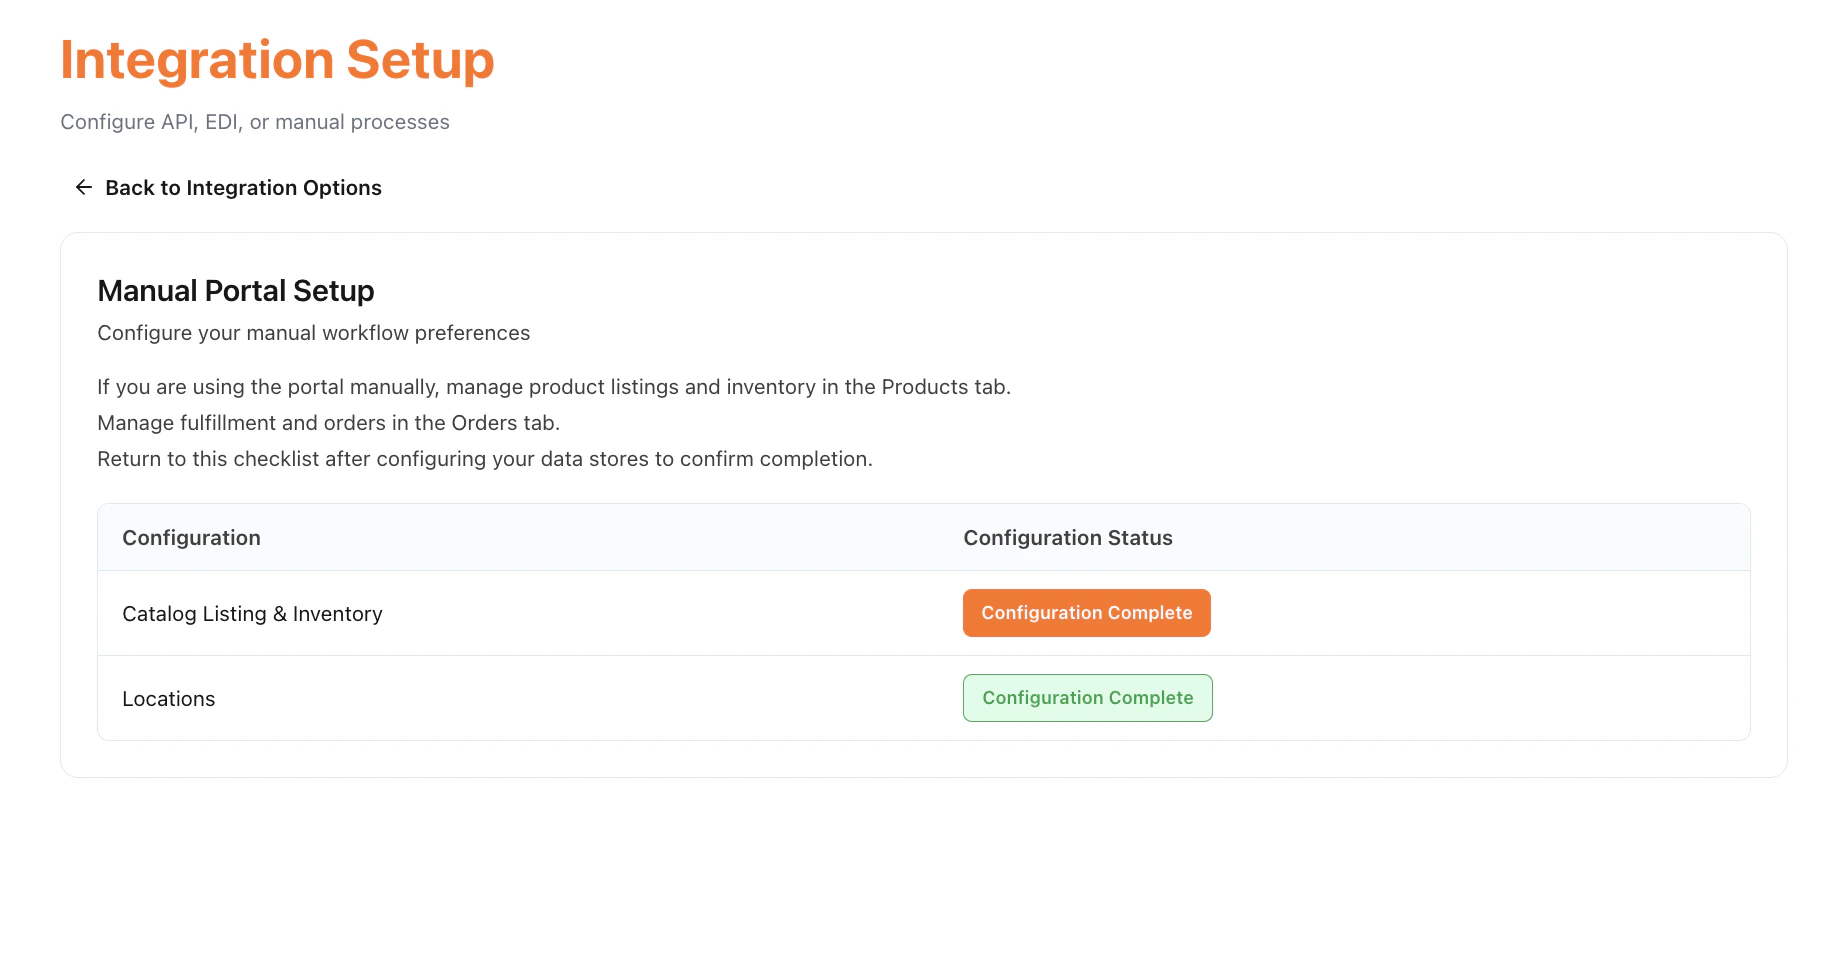
2. The Manual Portal Setup screen lists **Catalog Listing & Inventory** and **Locations** as configuration items, each with a Configuration Complete acknowledgement.
3. Acknowledge each item and click **Complete**.
**Note:** A vendor that selects EDI or API can still use the Vendor Portal for any task — the manual portal remains accessible alongside the automated integration
## **Onboarding Complete**
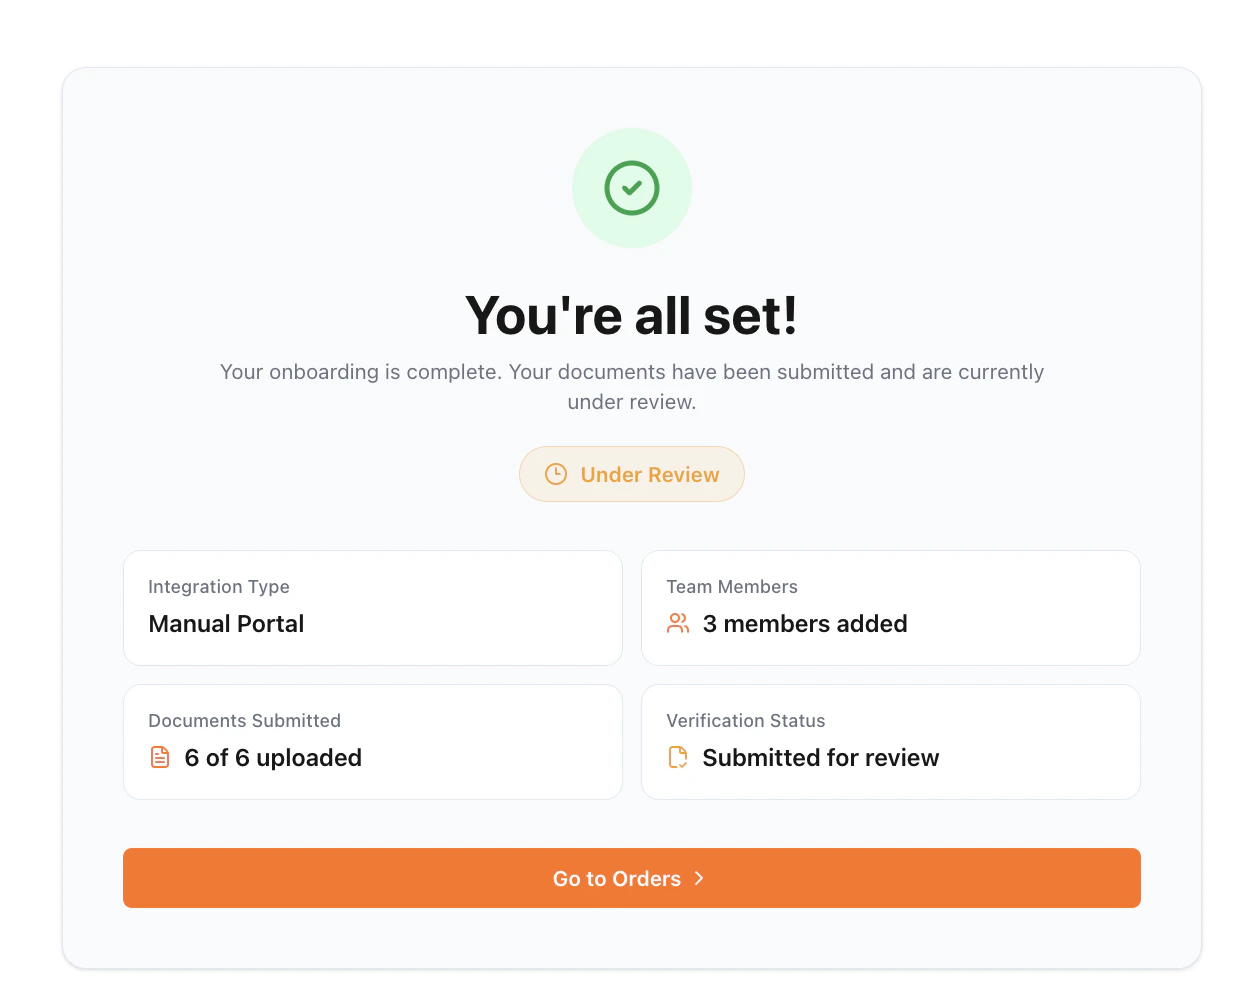
After completing Step 4, the Onboarding Module displays a "You're all set!" summary showing your Integration Type, the count of team members added, the count of documents uploaded, and the Verification Status. From here you can click **Go to Orders** to begin processing orders (once your operator activates you).
\
3\. For each service, complete the integration on your side, then click **Integration Complete** on its row. A Confirm Completion popup asks you to confirm.
4. Click **Yes**. The row's status badge turns green to reflect Integration Complete.
5. Repeat for each of the four services, then click **Complete**.
### **Option C — Manual Portal**
If you do not have EDI or API integration capability, choose Manual Portal. You will operate entirely within the Vendor Portal UI: managing your inventory, and locations manually, and processing orders from the Orders tab.
1. Click **Manual Portal**.
2. The Manual Portal Setup screen lists **Catalog Listing & Inventory** and **Locations** as configuration items, each with a Configuration Complete acknowledgement.
3. Acknowledge each item and click **Complete**.
**Note:** A vendor that selects EDI or API can still use the Vendor Portal for any task — the manual portal remains accessible alongside the automated integration
## **Onboarding Complete**
After completing Step 4, the Onboarding Module displays a "You're all set!" summary showing your Integration Type, the count of team members added, the count of documents uploaded, and the Verification Status. From here you can click **Go to Orders** to begin processing orders (once your operator activates you).
 You do not have to wait for operator approval to continue using the Vendor Portal. You can immediately begin building locations while the operator reviews your documents.
### **Re-upload a Rejected Document**
If your operator rejects a document, Action Required banner at the top of every page in the Vendor Portal is visible, with a View details link that takes you back to the Business Verification step.
You do not have to wait for operator approval to continue using the Vendor Portal. You can immediately begin building locations while the operator reviews your documents.
### **Re-upload a Rejected Document**
If your operator rejects a document, Action Required banner at the top of every page in the Vendor Portal is visible, with a View details link that takes you back to the Business Verification step.
 1. Click **View details** in the Action Required banner. You arrive on the Business Verification page.
2. The rejected document's status badge displays Rejected
1. Click **View details** in the Action Required banner. You arrive on the Business Verification page.
2. The rejected document's status badge displays Rejected
 3. Click the eye / view icon to preview the rejected file with the rejection reason in red at the top.
 4. Click **Upload** on the rejected row and select a corrected file. On a successful re-upload, the status changes to **Pending Review** and the operator is notified to review again.
 5. On the operator side, the document re-enters the operator's Documents tab as Pending Approval and can be approved or rejected again.