> ## Documentation Index
> Fetch the complete documentation index at: https://docs.kibocommerce.com/llms.txt
> Use this file to discover all available pages before exploring further.
# Return Attributes
Custom return attributes allow you to capture additional information during return creation and processing. This can help improve return handling and reporting. For example, you could configure attributes to track any of this information at the return level:
Understand return processing and reverse logistics
* RmaNumber
* Restocking instructions
* HarmonizedCode (specific to drop ship vendors)
* Number of cartons the items will be packaged in (B2B specific)
* Is the item factory sealed or not
* Is the item shipped with original packing or just the contents
* Incomplete item returned (Total Wine - 6 pack returned with only 5 bottles)
## Return Attributes Dashboard
View existing return attributes on the Order Attributes page located at **System** > **Schema** > **Return** **Attributes**. You can change the columns displayed in the table by expanding the dropdown menu on the far right of the table headers, which allows you to toggle on additional columns such as Applies To or toggle certain columns off.
**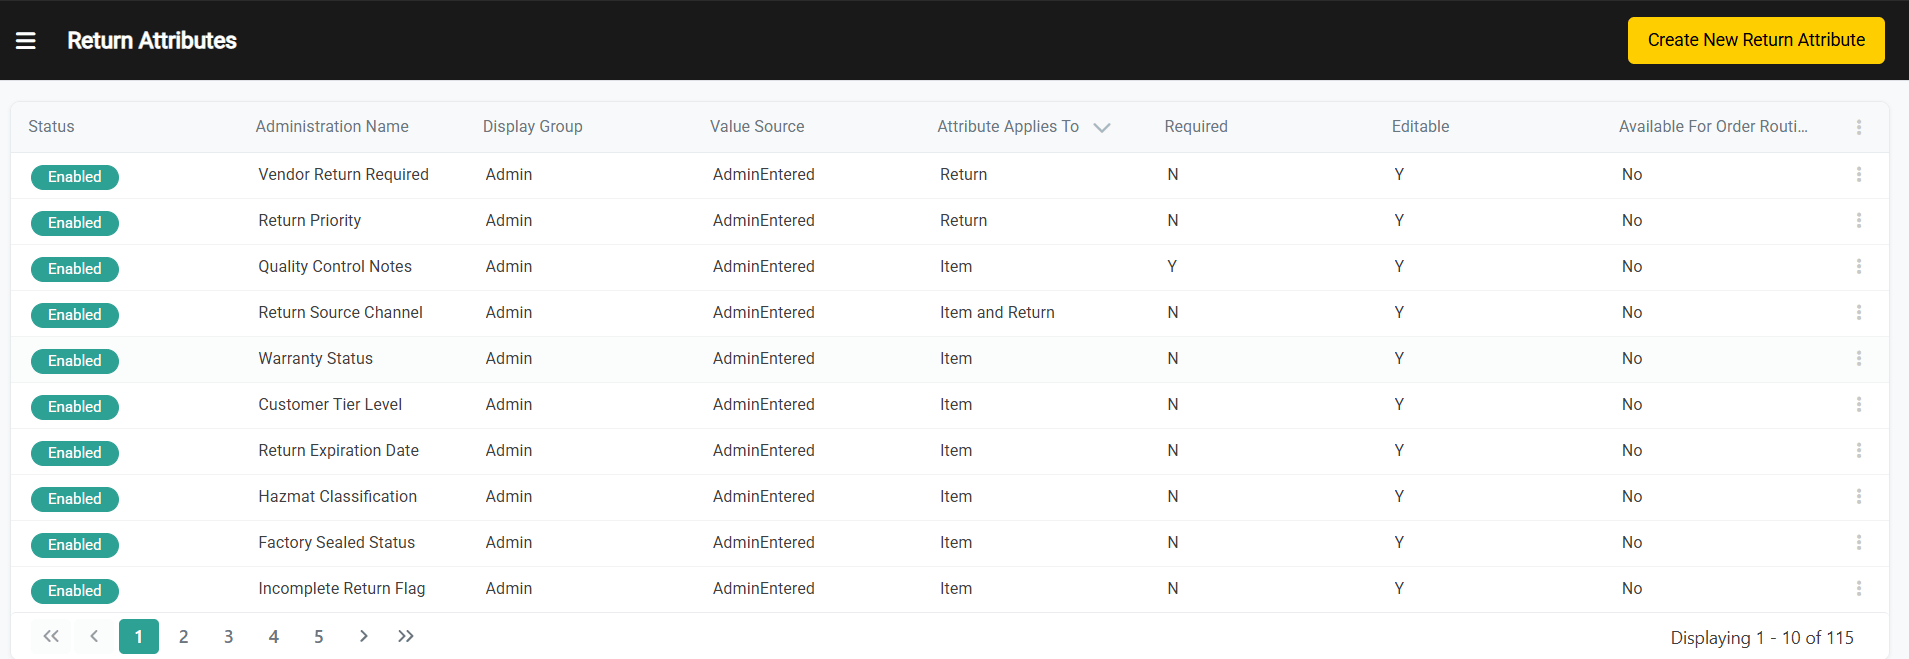 **
To edit an existing attribute or enable one that is currently disabled, expand the dropdown menu on the far right of that attribute and click **Edit** or **Enable**. Alternatively, you can click an attribute in the table and be taken to its settings which includes a toggle to enable/disable it.
## Create Return Attribute
The attribute definition determines whether the attribute displays on the Admin and/or storefront, who can enter a value and whether it's required. To define a new order attribute:
2. Go to **System** > **Schema** > **Return** **Attributes**.
3. Click **Create New Return Attribute**.
4.
**
To edit an existing attribute or enable one that is currently disabled, expand the dropdown menu on the far right of that attribute and click **Edit** or **Enable**. Alternatively, you can click an attribute in the table and be taken to its settings which includes a toggle to enable/disable it.
## Create Return Attribute
The attribute definition determines whether the attribute displays on the Admin and/or storefront, who can enter a value and whether it's required. To define a new order attribute:
2. Go to **System** > **Schema** > **Return** **Attributes**.
3. Click **Create New Return Attribute**.
4.  In the General section, complete the following:
1. Enter an **Attribute** **Name**.
2. Enter a **Code**.
3. Use the **Display Group** drop-down menu to specify one of the following options.
* **Admin Only:** The attribute only displays in Admin.\
If you select this option, you can only select **Admin Entered** for the **Value Source**.
* **Admin & Storefront:** The attribute displays both in Admin and on the storefront.
4. Use the **Value Source** drop-down menu to specify one of the following options.
* **Shopper Entered:** The shopper can provide a value for the attribute.
Admin users can still edit or enter values for shopper entered attributes.
* **Admin or Shopper Entered:** Either the Admin user or shopper can provide a value for the attribute.
* **Admin Entered:** The Admin user is the only one who can provide a value for the attribute.
5. If you selected **Shopper Entered** or **Admin or Shopper Entered** for the **Value Source**, provide a **Storefront Label**. This is the label that shoppers will see for the attribute on the storefront.
6. In the **Apply Attribute To** setting, indicate whether this attribute is set at the item level, return level, or both. If not set, it will default to the return level.
7. Select a value for each of the following attribute **Options.**
* **Required:** If enabled, the attribute requires a value on all returns, and returns cannot be created until a value is provided. The default is disabled (not required).
* **Editable:** If enabled (which is the default), the attribute value can be edited once a user provides a value.
* **Hidden from shopper:** If enabled, the attribute is hidden on the storefront. The attribute can still have a value populated, but it is not displayed to shoppers. The default is disabled (show on storefront).
5. In the Input section, use the **Input Type** drop-down menu to specify the input type for the attribute. You can choose a list, text box, text area, yes/no, or date for the type. Depending on the input type and data type you select, other fields might display that require additional information.
If you select a Yes/No type for the attribute, the value defaults to No if a user does not explicitly set the value.
6. Click **Save**.
##
In the General section, complete the following:
1. Enter an **Attribute** **Name**.
2. Enter a **Code**.
3. Use the **Display Group** drop-down menu to specify one of the following options.
* **Admin Only:** The attribute only displays in Admin.\
If you select this option, you can only select **Admin Entered** for the **Value Source**.
* **Admin & Storefront:** The attribute displays both in Admin and on the storefront.
4. Use the **Value Source** drop-down menu to specify one of the following options.
* **Shopper Entered:** The shopper can provide a value for the attribute.
Admin users can still edit or enter values for shopper entered attributes.
* **Admin or Shopper Entered:** Either the Admin user or shopper can provide a value for the attribute.
* **Admin Entered:** The Admin user is the only one who can provide a value for the attribute.
5. If you selected **Shopper Entered** or **Admin or Shopper Entered** for the **Value Source**, provide a **Storefront Label**. This is the label that shoppers will see for the attribute on the storefront.
6. In the **Apply Attribute To** setting, indicate whether this attribute is set at the item level, return level, or both. If not set, it will default to the return level.
7. Select a value for each of the following attribute **Options.**
* **Required:** If enabled, the attribute requires a value on all returns, and returns cannot be created until a value is provided. The default is disabled (not required).
* **Editable:** If enabled (which is the default), the attribute value can be edited once a user provides a value.
* **Hidden from shopper:** If enabled, the attribute is hidden on the storefront. The attribute can still have a value populated, but it is not displayed to shoppers. The default is disabled (show on storefront).
5. In the Input section, use the **Input Type** drop-down menu to specify the input type for the attribute. You can choose a list, text box, text area, yes/no, or date for the type. Depending on the input type and data type you select, other fields might display that require additional information.
If you select a Yes/No type for the attribute, the value defaults to No if a user does not explicitly set the value.
6. Click **Save**.
##  Disable Return Attributes
If you no longer want to use an attribute on new returns, you can disable it. The attribute value will still be displayed on past returns, but you won't be able to edit or select the attribute value unless it is re-enabled.
1. Go to **System** > **Schema** > **Return** **Attributes**.
2. Expand the actions menu next to the applicable attribute and select **Disable**. If prompted, confirm to disable the attribute.
Disable Return Attributes
If you no longer want to use an attribute on new returns, you can disable it. The attribute value will still be displayed on past returns, but you won't be able to edit or select the attribute value unless it is re-enabled.
1. Go to **System** > **Schema** > **Return** **Attributes**.
2. Expand the actions menu next to the applicable attribute and select **Disable**. If prompted, confirm to disable the attribute.