> ## Documentation Index
> Fetch the complete documentation index at: https://docs.kibocommerce.com/llms.txt
> Use this file to discover all available pages before exploring further.
# Getting Started
Before integrating any headless third-party storefronts with Kibo, you will need to set up your Dev Center for development projects and familiarize yourself with the Kibo APIs.
## First Steps
You must have access to a dev account. If no account currently exists for your implementation, go [here](https://kibocommerce.com/get-started/) and fill out the form to request a demo. A representative will contact you with more information. After Kibo provisions your Dev Account, you’ll receive an email invitation with instructions for logging in to Dev Center.
Once a dev account exists, the account owner has administrative permissions to [invite additional users](/pages/administration#manage-users). For more information about how to configure a dev account, see the instructions in [Set Up Your System](/pages/set-up-your-system#configure-account-information).
## Welcome to the Dev Center
Once you have access to a dev account, you can log in at [http://developer.mozu.com/login](http://developer.mozu.com/login)
This interface is an online portal for creating applications and theme records as well as uploading, installing, and testing code before deploying it to a production site. It’s separate from your local development environment where you write code and manage source control repositories.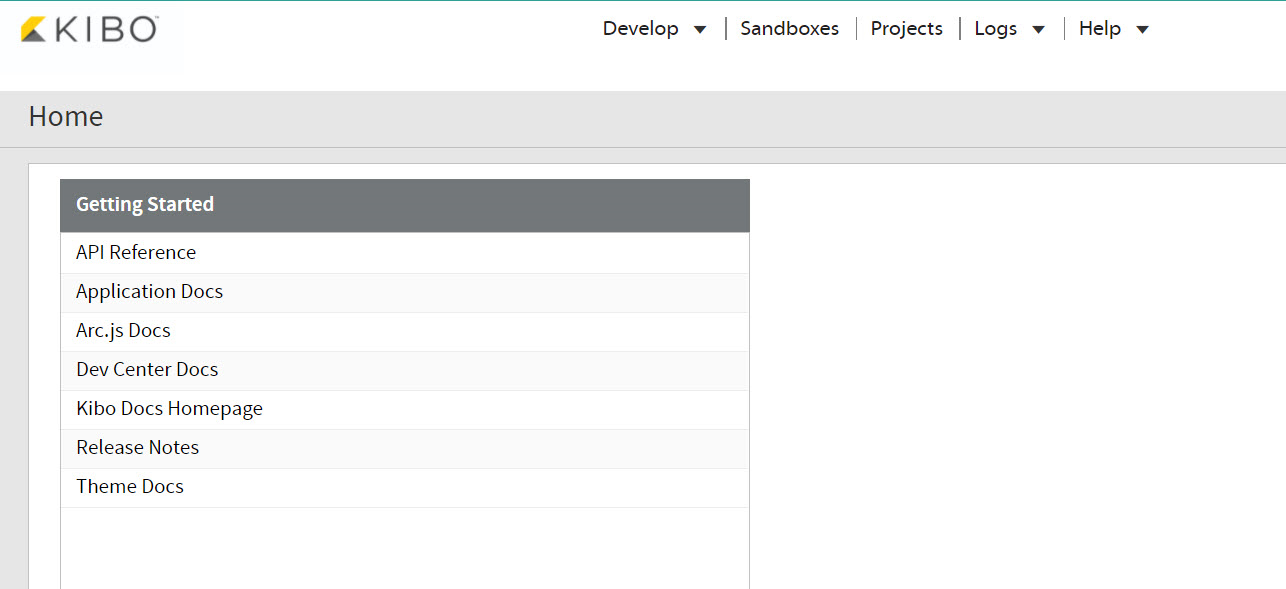 ## Provisioning a Sandbox
Once you have received a dev account, you will need to provision an empty sandbox to work in.
1. Log in to [Dev Center](http://developer.mozu.com/login).
2. Click **Sandboxes** > **Create Sandbox**.
3. Enter a name to identify the sandbox.
4. Select a template from the drop-down menu. The type of template you select depends on the type of testing you need to conduct:
* To quickly set up a new environment with a pre-configured master catalog, catalog, and site defaults, select a Kibo -supplied template (displayed in blue in the template drop-down list).
* To clone one of your existing sandboxes, select it from the template list (displayed in black in the template drop-down list).
* To build your own master catalog, catalogs, and sites, start with a blank environment by selecting **None** from the template drop-down list.
## Provisioning a Sandbox
Once you have received a dev account, you will need to provision an empty sandbox to work in.
1. Log in to [Dev Center](http://developer.mozu.com/login).
2. Click **Sandboxes** > **Create Sandbox**.
3. Enter a name to identify the sandbox.
4. Select a template from the drop-down menu. The type of template you select depends on the type of testing you need to conduct:
* To quickly set up a new environment with a pre-configured master catalog, catalog, and site defaults, select a Kibo -supplied template (displayed in blue in the template drop-down list).
* To clone one of your existing sandboxes, select it from the template list (displayed in black in the template drop-down list).
* To build your own master catalog, catalogs, and sites, start with a blank environment by selecting **None** from the template drop-down list.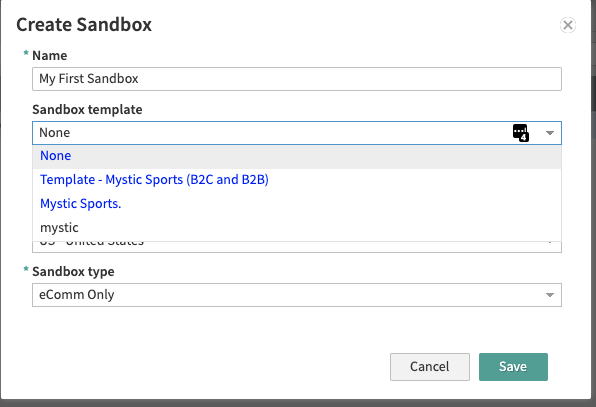 5. Select the locale, currency, and country codes for the site’s catalog.
6. Click **Save**.
### Viewing a Sandbox
Once created, you will be able to view the sandbox at any time to test your code. This is also how you can obtain your live site URL and Admin host.
1. Log in to Dev Center.
2. Click **Sandboxes**.
3. Locate your sandbox in the grid and double click it. This will open the sandbox information page.
4. Click the **Details** tab shown below.
5. Now you can view the catalog structure in the sandbox. Expand the hierarchy to the Site layer (in the Type column) and right click the row.
6. Note the **Tenant or** **Sandbox Id** as well as the **Master Catalog**, **Catalog**, and **Site Id.** These values, along with the Application Info, will be used later when trying to access your Sandbox.
7. Click **View in Admin** or **View live site**.
8. If prompted, log into Admin.
5. Select the locale, currency, and country codes for the site’s catalog.
6. Click **Save**.
### Viewing a Sandbox
Once created, you will be able to view the sandbox at any time to test your code. This is also how you can obtain your live site URL and Admin host.
1. Log in to Dev Center.
2. Click **Sandboxes**.
3. Locate your sandbox in the grid and double click it. This will open the sandbox information page.
4. Click the **Details** tab shown below.
5. Now you can view the catalog structure in the sandbox. Expand the hierarchy to the Site layer (in the Type column) and right click the row.
6. Note the **Tenant or** **Sandbox Id** as well as the **Master Catalog**, **Catalog**, and **Site Id.** These values, along with the Application Info, will be used later when trying to access your Sandbox.
7. Click **View in Admin** or **View live site**.
8. If prompted, log into Admin.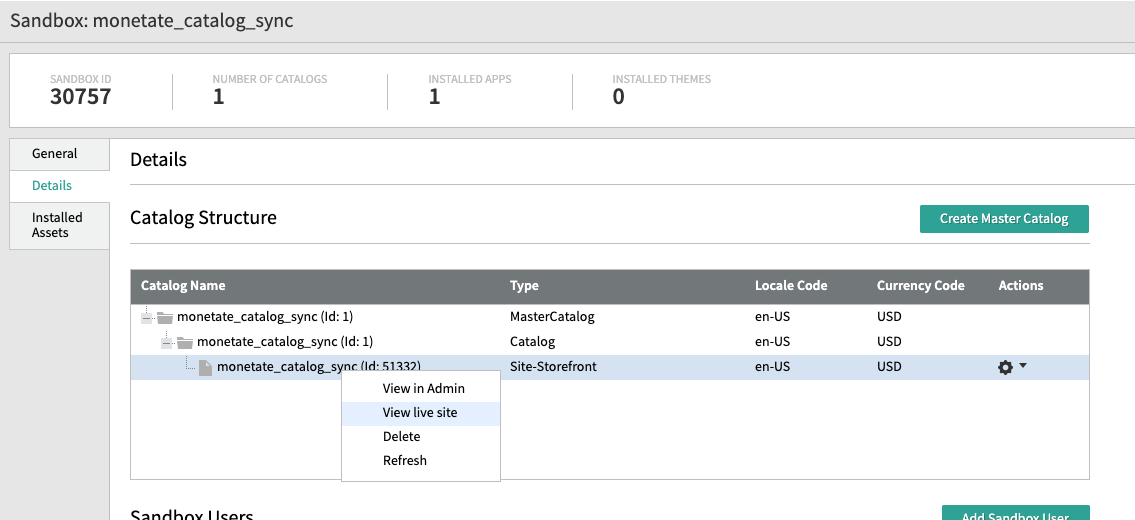 ### Applications
You can think of application records as containers for your application. Your application will generate an **Application Key** and **Shared Secret** which will be used to authenticate requests to Kibo API's. Each application is configured with a set of **Behaviors** that grant your application permission to different APIs. Once the application is created and configured, it needs to be installed to an environment.
#### Create Application
1. Log in to Dev Center.
2. Click **Develop** > **Applications**.
3. Click **Create Application**.
4. In the Create application dialog box:
1. Enter "Headless Storefront" in the Name field.
2. Enter "headless\_storefront" in the Application ID field
5. Click **Save**.
#### View Application Credentials
1. Log in to Dev Center.
2. Click **Develop** > **Applications**.
3. Click your application in the list.
4. Locate the **Application Key** and **Shared Secret** on the Application Details view.
### Applications
You can think of application records as containers for your application. Your application will generate an **Application Key** and **Shared Secret** which will be used to authenticate requests to Kibo API's. Each application is configured with a set of **Behaviors** that grant your application permission to different APIs. Once the application is created and configured, it needs to be installed to an environment.
#### Create Application
1. Log in to Dev Center.
2. Click **Develop** > **Applications**.
3. Click **Create Application**.
4. In the Create application dialog box:
1. Enter "Headless Storefront" in the Name field.
2. Enter "headless\_storefront" in the Application ID field
5. Click **Save**.
#### View Application Credentials
1. Log in to Dev Center.
2. Click **Develop** > **Applications**.
3. Click your application in the list.
4. Locate the **Application Key** and **Shared Secret** on the Application Details view.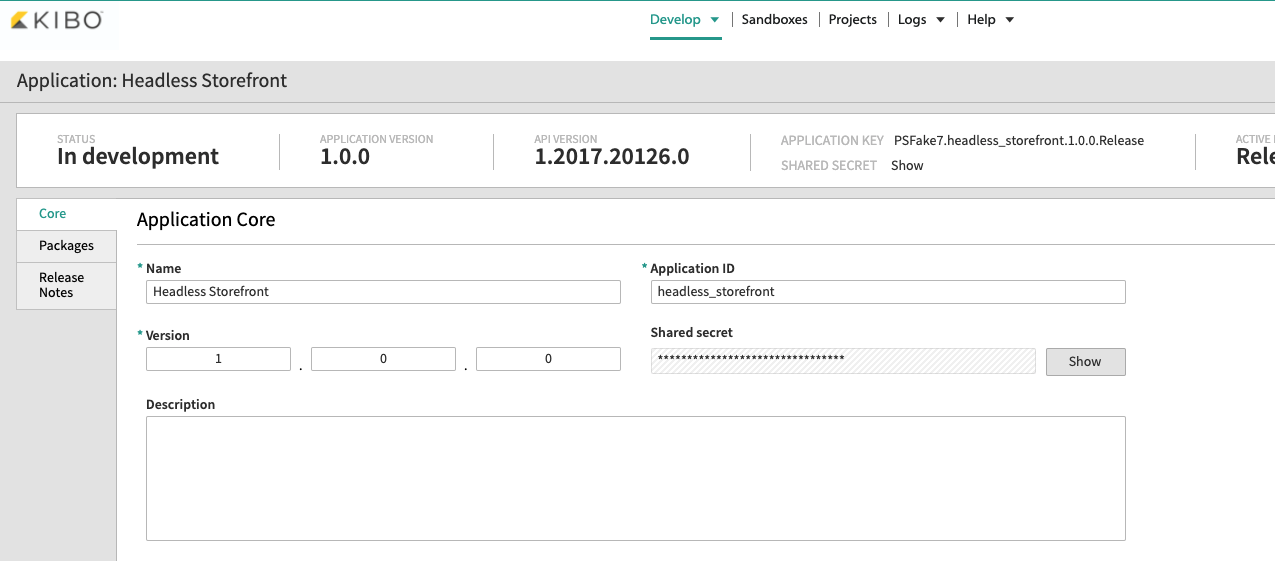 #### Configure Behaviors
Behaviors determine what operations your application can perform, for example, to fetch Product data the "**Product Read**" behavior is required.
1. Within your application record, click **Packages**.
2. On the **Behaviors** tab, click **Select Behaviors**.
Your application **Behaviors** will depend on what features your headless application is consuming, the best practice is to only enable permissions you need.
An example set of **Behaviors** for a headless storefront is shown below:
#### Configure Behaviors
Behaviors determine what operations your application can perform, for example, to fetch Product data the "**Product Read**" behavior is required.
1. Within your application record, click **Packages**.
2. On the **Behaviors** tab, click **Select Behaviors**.
Your application **Behaviors** will depend on what features your headless application is consuming, the best practice is to only enable permissions you need.
An example set of **Behaviors** for a headless storefront is shown below: #### Install Application
After you have configured your desired events and behaviors, you can install your application to a sandbox:
1. In your application record, click **Install**.
2. Select a sandbox to install your application to and click **OK**.
### Loading Test Data
1. If you selected **None** for the Sandbox Template you can load a simple data set via the **kibo-sandbox-data CLI** by running the below command:
```
npm i -g @kibocommerce/kibo-sandbox-data-cli
```
2. In setting up the cli you will need to specify the Tenant / Catalog / Site values from above.
3. For usage instructions see the corresponding [NPM](https://www.npmjs.com/package/@kibocommerce/kibo-sandbox-data-cli) Readme info.
## Next Steps
Refer to the following documentation for the next steps:
* Get familiar with [Kibo API Documentation](/api-overviews/openapi_overview_overview)
* Check out the [API walkthroughs](/api-overviews/getting-started) and learn how to [sort/filter API requests](/pages/sorting-and-filtering-apis)
* Learn about the [React storefront](/pages/react-storefront)
* Learn about the [Vercel (Next) storefront](/pages/nextjs-commerce)
* Learn about the [Vue storefront](/pages/vue-storefront)
* Contact us through the [Kibo Support](https://help.kibocommerce.com/)
#### Install Application
After you have configured your desired events and behaviors, you can install your application to a sandbox:
1. In your application record, click **Install**.
2. Select a sandbox to install your application to and click **OK**.
### Loading Test Data
1. If you selected **None** for the Sandbox Template you can load a simple data set via the **kibo-sandbox-data CLI** by running the below command:
```
npm i -g @kibocommerce/kibo-sandbox-data-cli
```
2. In setting up the cli you will need to specify the Tenant / Catalog / Site values from above.
3. For usage instructions see the corresponding [NPM](https://www.npmjs.com/package/@kibocommerce/kibo-sandbox-data-cli) Readme info.
## Next Steps
Refer to the following documentation for the next steps:
* Get familiar with [Kibo API Documentation](/api-overviews/openapi_overview_overview)
* Check out the [API walkthroughs](/api-overviews/getting-started) and learn how to [sort/filter API requests](/pages/sorting-and-filtering-apis)
* Learn about the [React storefront](/pages/react-storefront)
* Learn about the [Vercel (Next) storefront](/pages/nextjs-commerce)
* Learn about the [Vue storefront](/pages/vue-storefront)
* Contact us through the [Kibo Support](https://help.kibocommerce.com/)