> ## Documentation Index
> Fetch the complete documentation index at: https://docs.kibocommerce.com/llms.txt
> Use this file to discover all available pages before exploring further.
# Create Offline Orders
Both eCommerce and Order Management users can create offline orders to assist shoppers. This is different from [Cart Takeover](/pages/cart-takeover) because instead of returning the cart to the customer to finish the checkout process themselves, you will enter payment information on behalf of the shopper if possible and then submit the order.
Learn how to create offline orders in the KIBO Order Admin
If you are using Customer Sets, keep in mind that you can only create offline orders for customers that are assigned to the same customer set as the site on which you are creating the order. Refer to [Offline Orders and Customer Sets](/pages/structure-customer-sets) for more information.
## Create the Order
In Admin, complete the following steps to create an order for an offline shopper:
1. Go to **Main** > **Orders** > **Orders**.
2. Click **Create New Order**.
3. If you have more than one site, select the appropriate site from the drop-down menu that appears.
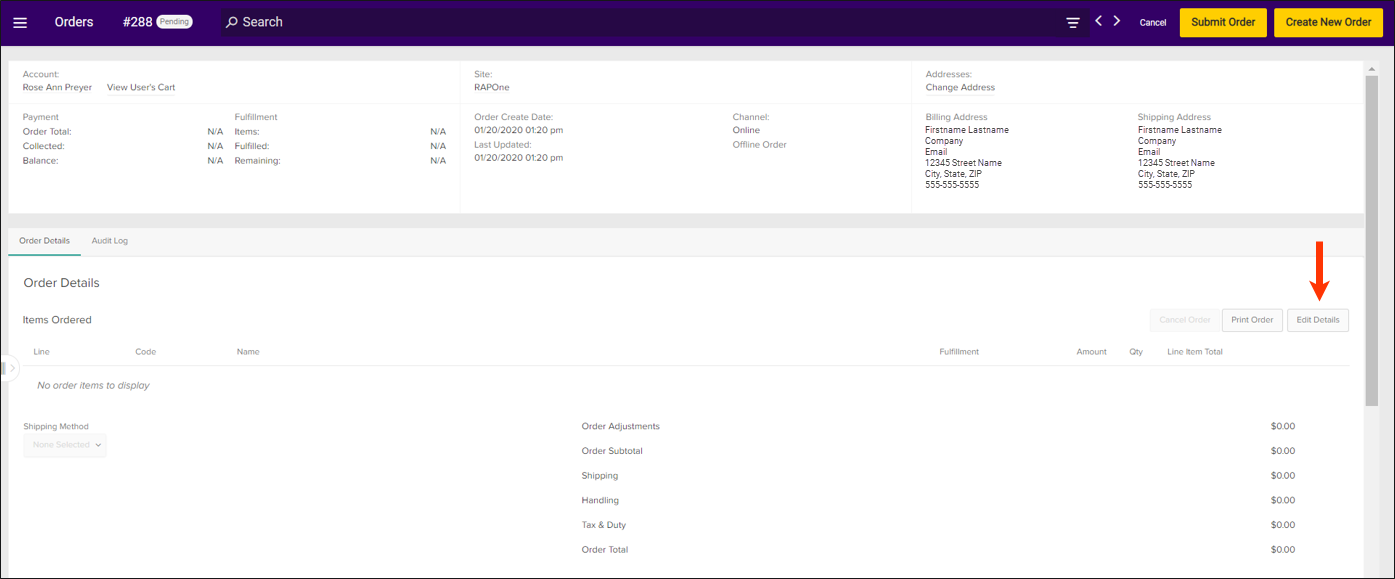
4. This will take you to the following page. The scrolling panel on the left is a list of existing orders, which you can hide by dragging the resize icon. The panel on the right is your new order details. 5. Select an existing shopper from the **Customer Search** drop-down, or click **Create New Customer** to enter new shopper information. The page will update with customer details in the order information.
* You can only select existing shoppers from the drop-down menu that are associated with the same customer set as the site you previously selected.
* If you create a new customer, complete all necessary fields in the Create Customer and Edit Address dialog boxes. When creating a new customer, at least one phone field (Home, Work, or Mobile) is required. Each customer must have a default billing and a default shipping address, but these defaults can be the same address. If you don't specify at least one phone number and both a default billing and default shipping address, errors will be returned during the order creation process.
6. In the **Order Details** section, click **Edit Details**.
5. Select an existing shopper from the **Customer Search** drop-down, or click **Create New Customer** to enter new shopper information. The page will update with customer details in the order information.
* You can only select existing shoppers from the drop-down menu that are associated with the same customer set as the site you previously selected.
* If you create a new customer, complete all necessary fields in the Create Customer and Edit Address dialog boxes. When creating a new customer, at least one phone field (Home, Work, or Mobile) is required. Each customer must have a default billing and a default shipping address, but these defaults can be the same address. If you don't specify at least one phone number and both a default billing and default shipping address, errors will be returned during the order creation process.
6. In the **Order Details** section, click **Edit Details**.
 7. Complete the following items in the Order Details dialog box that appears:
* Use the product search box under **Name** to specify a product.
* If the product has configurable options, select the customer's desired options in the pop-up that appears and click **Save**.
* If the product is enabled for [substitutions](/pages/substitute-products-overview "Substitute Products"), indicate whether the customer allows substitutions or not using the drop-down menu that appears underneath the product name.
* Select the item's **Fulfillment** method. There is a "Direct Ship" option for Ship to Home (STH) and individual location options for Buy Online Pickup in Store (BOPIS), including BOPIS variations such as Delivery.
* If STH, you should also select the **Shipping Method** from the dropdown below the table of line items.
* Inventory totals are displayed in the fulfillment options. The Direct Ship option will display an aggregate total, while the BOPIS options will display the total at that specific location. If the total includes [future inventory](/pages/future-inventory "Future Inventory"), the value will be underlined and hovering over it will then reveal a breakdown of future and current inventory levels.
7. Complete the following items in the Order Details dialog box that appears:
* Use the product search box under **Name** to specify a product.
* If the product has configurable options, select the customer's desired options in the pop-up that appears and click **Save**.
* If the product is enabled for [substitutions](/pages/substitute-products-overview "Substitute Products"), indicate whether the customer allows substitutions or not using the drop-down menu that appears underneath the product name.
* Select the item's **Fulfillment** method. There is a "Direct Ship" option for Ship to Home (STH) and individual location options for Buy Online Pickup in Store (BOPIS), including BOPIS variations such as Delivery.
* If STH, you should also select the **Shipping Method** from the dropdown below the table of line items.
* Inventory totals are displayed in the fulfillment options. The Direct Ship option will display an aggregate total, while the BOPIS options will display the total at that specific location. If the total includes [future inventory](/pages/future-inventory "Future Inventory"), the value will be underlined and hovering over it will then reveal a breakdown of future and current inventory levels. * Specify a quantity for the product and click **Add**.
* (**Optional**) Apply a line item adjustment to the product price.
* Repeat steps a-e for additional products in the order.
* Select a shipping method for the order.
* (**Optional**) Add a coupon to the order or enter customer notes.
* (**Optional**) Indicate that the order is a gift by providing an order-level gift message. You can also enable **Include gift message for specific items** and then select the item(s) that you want to provide specific gift messages for.
* Specify a quantity for the product and click **Add**.
* (**Optional**) Apply a line item adjustment to the product price.
* Repeat steps a-e for additional products in the order.
* Select a shipping method for the order.
* (**Optional**) Add a coupon to the order or enter customer notes.
* (**Optional**) Indicate that the order is a gift by providing an order-level gift message. You can also enable **Include gift message for specific items** and then select the item(s) that you want to provide specific gift messages for.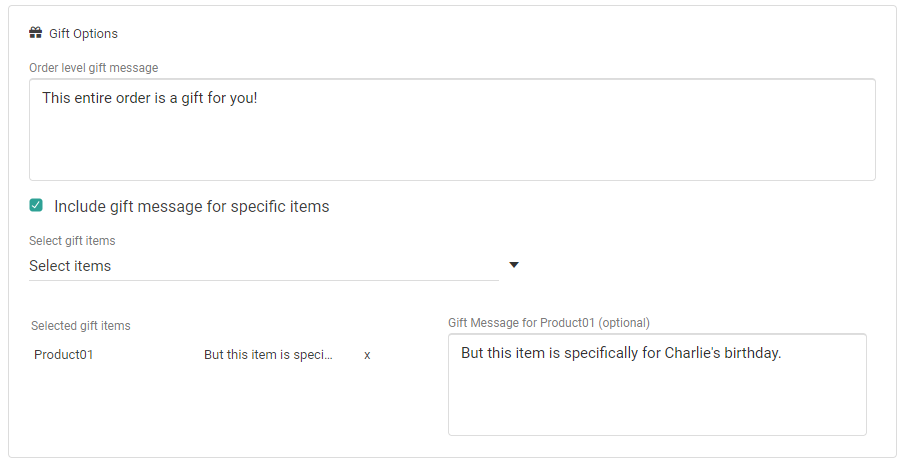 * (**Optional**) Add a price list to the order. Refer to [Price List and Orders](/pages/price-lists-and-orders) for more information about associating a price list with an order.
* (**Optional**) Make an adjustment to the order total or shipping cost. You can also view a breakdown of the individual shipping, handling, tax, and duty subtotals by expanding the icons next to those fields.
* (**Optional**) Add a price list to the order. Refer to [Price List and Orders](/pages/price-lists-and-orders) for more information about associating a price list with an order.
* (**Optional**) Make an adjustment to the order total or shipping cost. You can also view a breakdown of the individual shipping, handling, tax, and duty subtotals by expanding the icons next to those fields.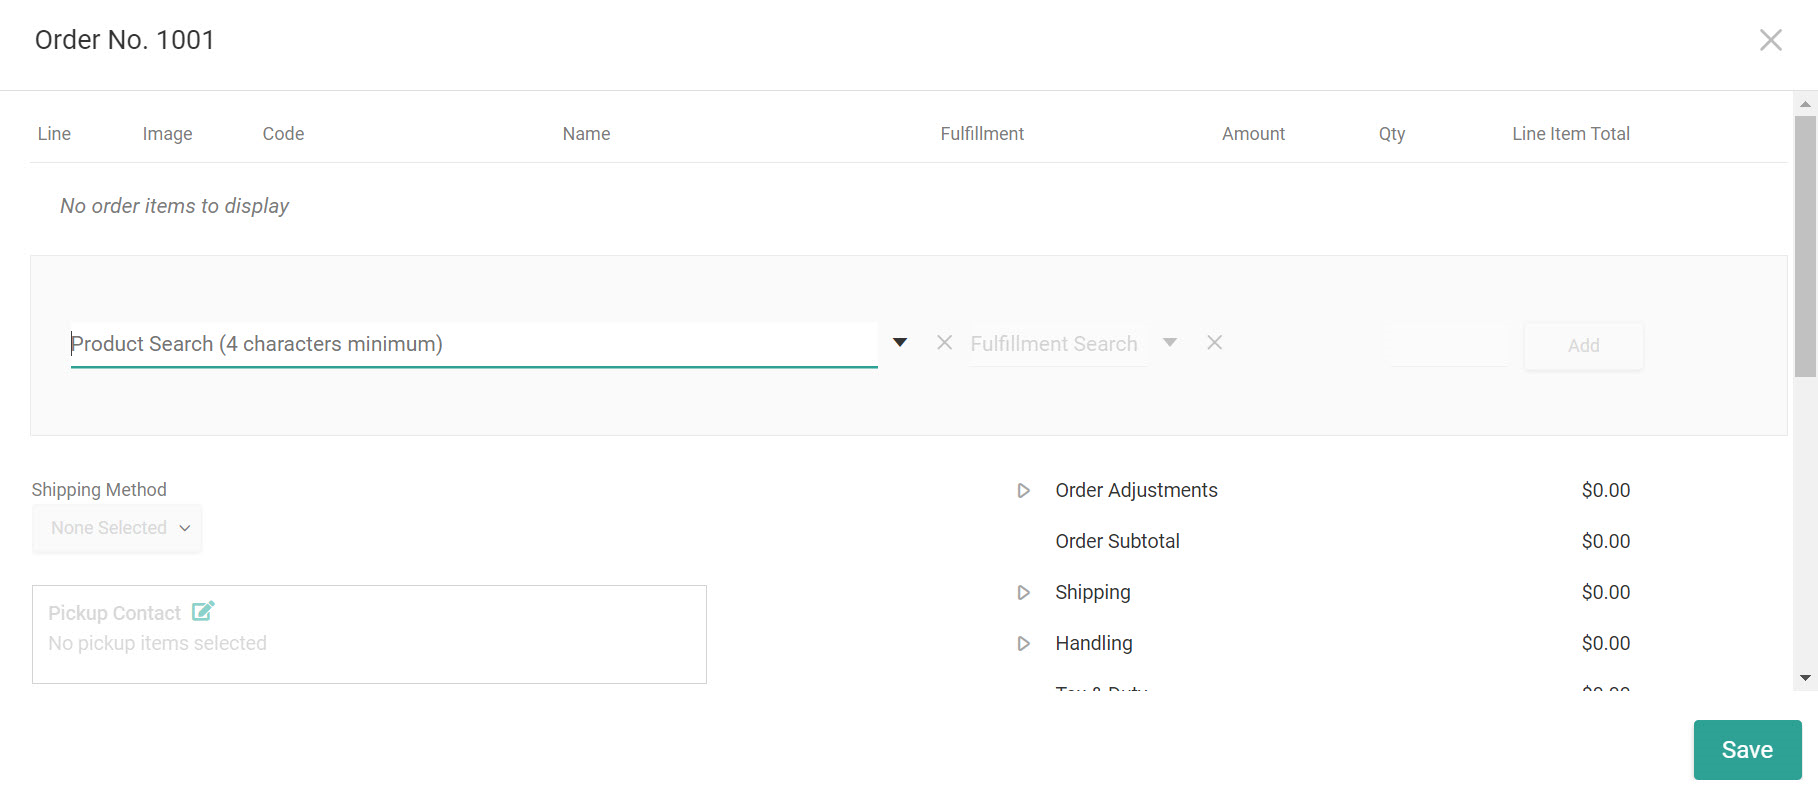 8. Click **Save** to close the Edit Details modal.
9. The **Payments** tab will now be available.
* Here, click **Add Payment** to enter the customer's credit card information. Fill in all of the fields and then click **Save**.
8. Click **Save** to close the Edit Details modal.
9. The **Payments** tab will now be available.
* Here, click **Add Payment** to enter the customer's credit card information. Fill in all of the fields and then click **Save**. * Alternatively, expand the drop-down menu to add a different payment type.
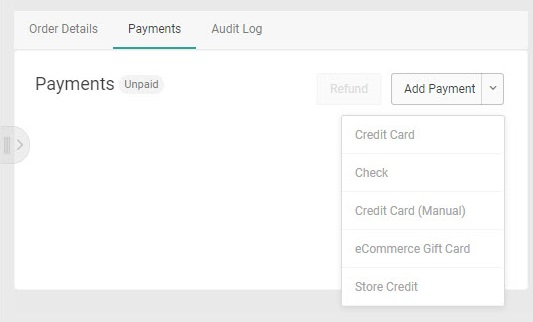 10. After payment information is saved, click **Submit Order** to place the order and add it to the system.
You should generally submit an offline order after entering order details and payment information. However, it is possible to submit an order as soon as soon as it has the basic order details (products and shopper information).
10. After payment information is saved, click **Submit Order** to place the order and add it to the system.
You should generally submit an offline order after entering order details and payment information. However, it is possible to submit an order as soon as soon as it has the basic order details (products and shopper information).