> ## Documentation Index
> Fetch the complete documentation index at: https://docs.kibocommerce.com/llms.txt
> Use this file to discover all available pages before exploring further.
# Setting Up the Website Builder
> Understand how the Website Builder connects to your frontend app, then get the Next.js starter kit running and create your first page.
In this guide, we'll explore how the Website Builder works from a developer's perspective, then get the Next.js starter kit running locally and create a first page — confirming the full stack is wired up correctly.
**What you'll learn:**
* How the editor and your Next.js app connect
* How to clone and install the Website Builder Next.js starter kit
* How to configure API keys and environment variables
* How to create a page in the Admin editor and see it rendered
**Prerequisites:**
* Access to a Kibo CMS Admin instance
* Node.js 20.9+ and npm/yarn installed
* Familiarity with Next.js App Router — the starter kit uses App Router, not Pages Router
## How It All Fits Together
Before writing any code, it's worth understanding how the Website Builder actually works — because it's a bit different from what you might expect.
When a content editor opens the Website Builder in Kibo CMS Admin, they see a canvas where they can drag components onto a page, configure their inputs in a sidebar, and hit Publish. That's the editorial experience.
On the developer side, the picture is different — and it's what makes the Website Builder stand out from most page builders.
**The editor doesn't have its own components or styles.** Instead, it's always connected to a separate frontend app that you own — in this case a Next.js project. When the editor opens, it loads your Next.js app inside an iframe. The component palette, the live preview, all of it is your real app running right there.
This means all your component code and all your styles live in your Next.js project. Kibo CMS only stores the page structure — which components are on the page and what input values the editor set for each one. It has no idea what a "Hero" or "Banner" looks like, and it never needs to.
We cover how to create and register your own editor components in the [Custom Components](/pages/cms-custom-components) guide.
The practical upside: no style clashes, no fighting the platform, full ownership of your code. And because editors are looking at your actual app, the WYSIWYG is genuine — not a simulation.
```mermaid theme={null}
flowchart TB
subgraph admin["Kibo CMS Admin"]
subgraph editor["Website Builder Editor"]
sidebar["sidebar
(inputs)"]
iframe["your Next.js app (iframe)
real components · real styles"]
end
end
subgraph nextjs["Your Next.js App (running separately)"]
sdk["@webiny/website-builder-nextjs SDK"]
end
editor <-->|"postMessage (SDK)"| nextjs
```
The `@webiny/website-builder-nextjs` SDK is what connects the two sides — it handles the communication between the editor and your app when editing, and fetches published page documents from Kibo CMS when rendering pages for visitors.
## Step 1: Open the Admin App
Navigate to your Kibo CMS Admin URL. You'll need it running and accessible before creating pages later in this guide.
## Step 2: Clone the Starter Kit
The official Next.js starter kit wires up the SDK, routing, and rendering so you have a working base to build from.
```bash title="Terminal" theme={null}
git clone https://github.com/webiny/website-builder-nextjs.git my-website
cd my-website
npm install
```
Before running `npm install`, make sure the `@webiny/website-builder-nextjs` and `@webiny/sdk` versions in `package.json` match your Kibo CMS version. You can find your Kibo CMS version in the Admin app under **Support → About**.
For example, if your Kibo CMS version is `6.2.1`, your `package.json` should have:
```json title="package.json" theme={null}
{
"dependencies": {
"@webiny/website-builder-nextjs": "~6.2.1",
"@webiny/sdk": "~6.2.1"
}
}
```
## Step 3: Gather Your Credentials
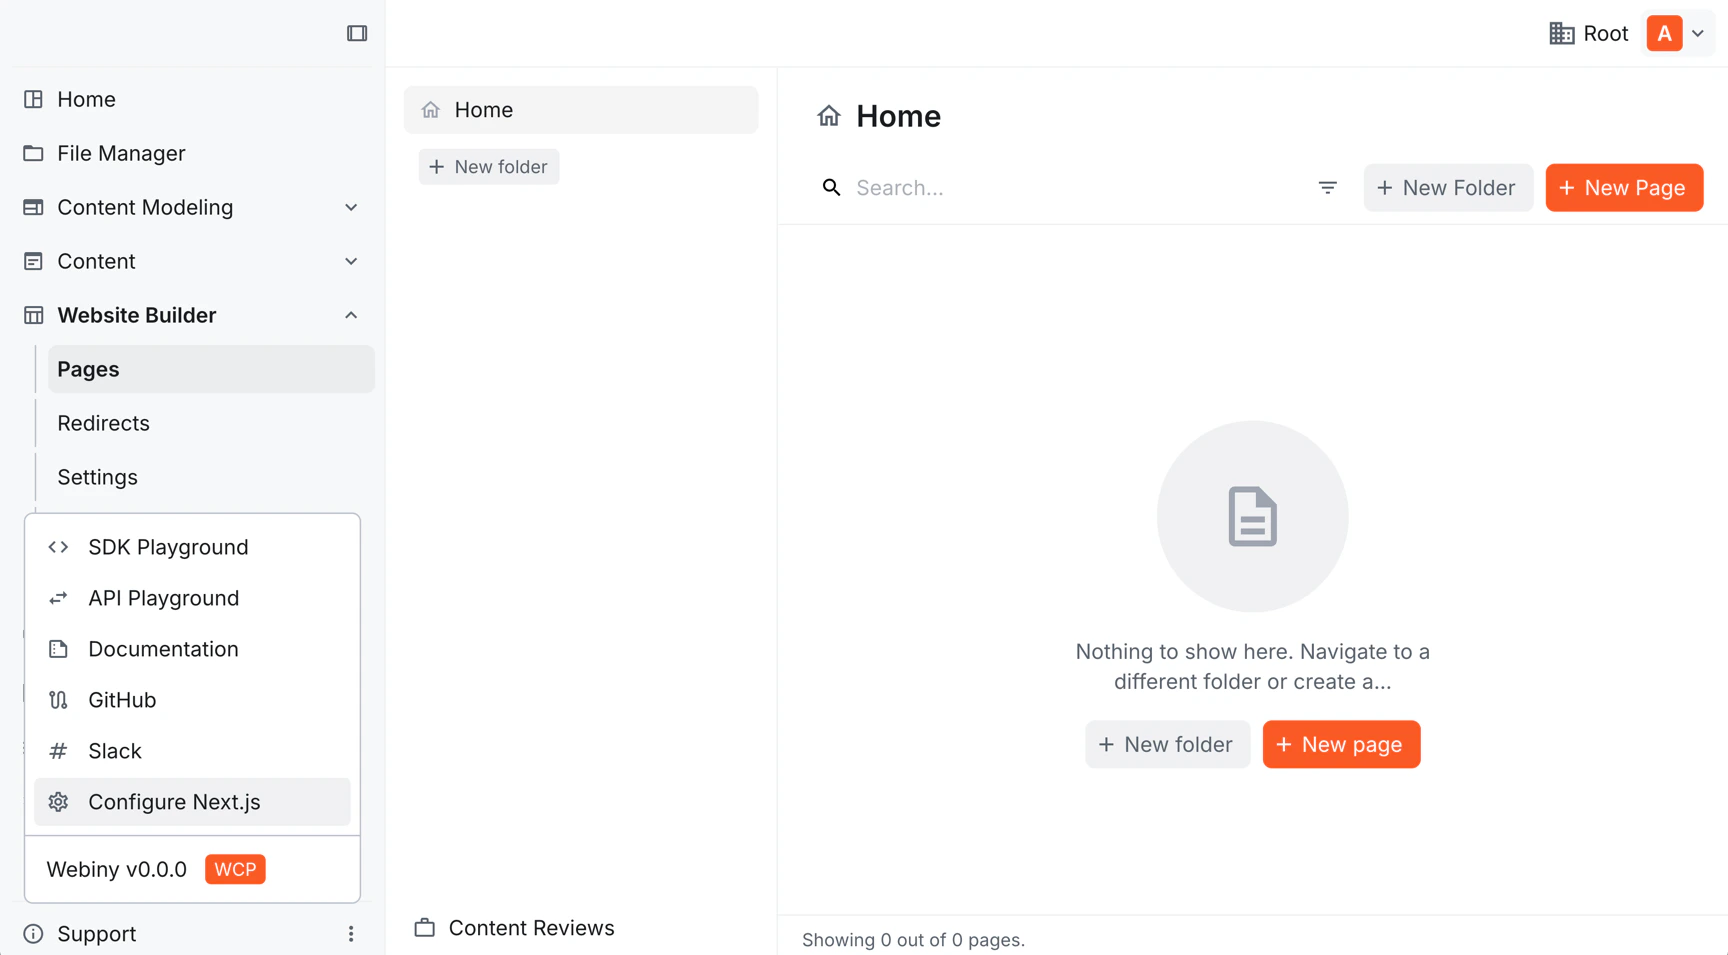
To connect the starter kit to your Kibo CMS project, you'll need an API key, API host URL, and tenant ID. The easiest way to get these is through the **Configure Next.js** shortcut in Kibo CMS Admin — click **Support** in the bottom-left corner and select **Configure Next.js**.
 A dialog appears with the three environment variables already filled in and ready to copy:
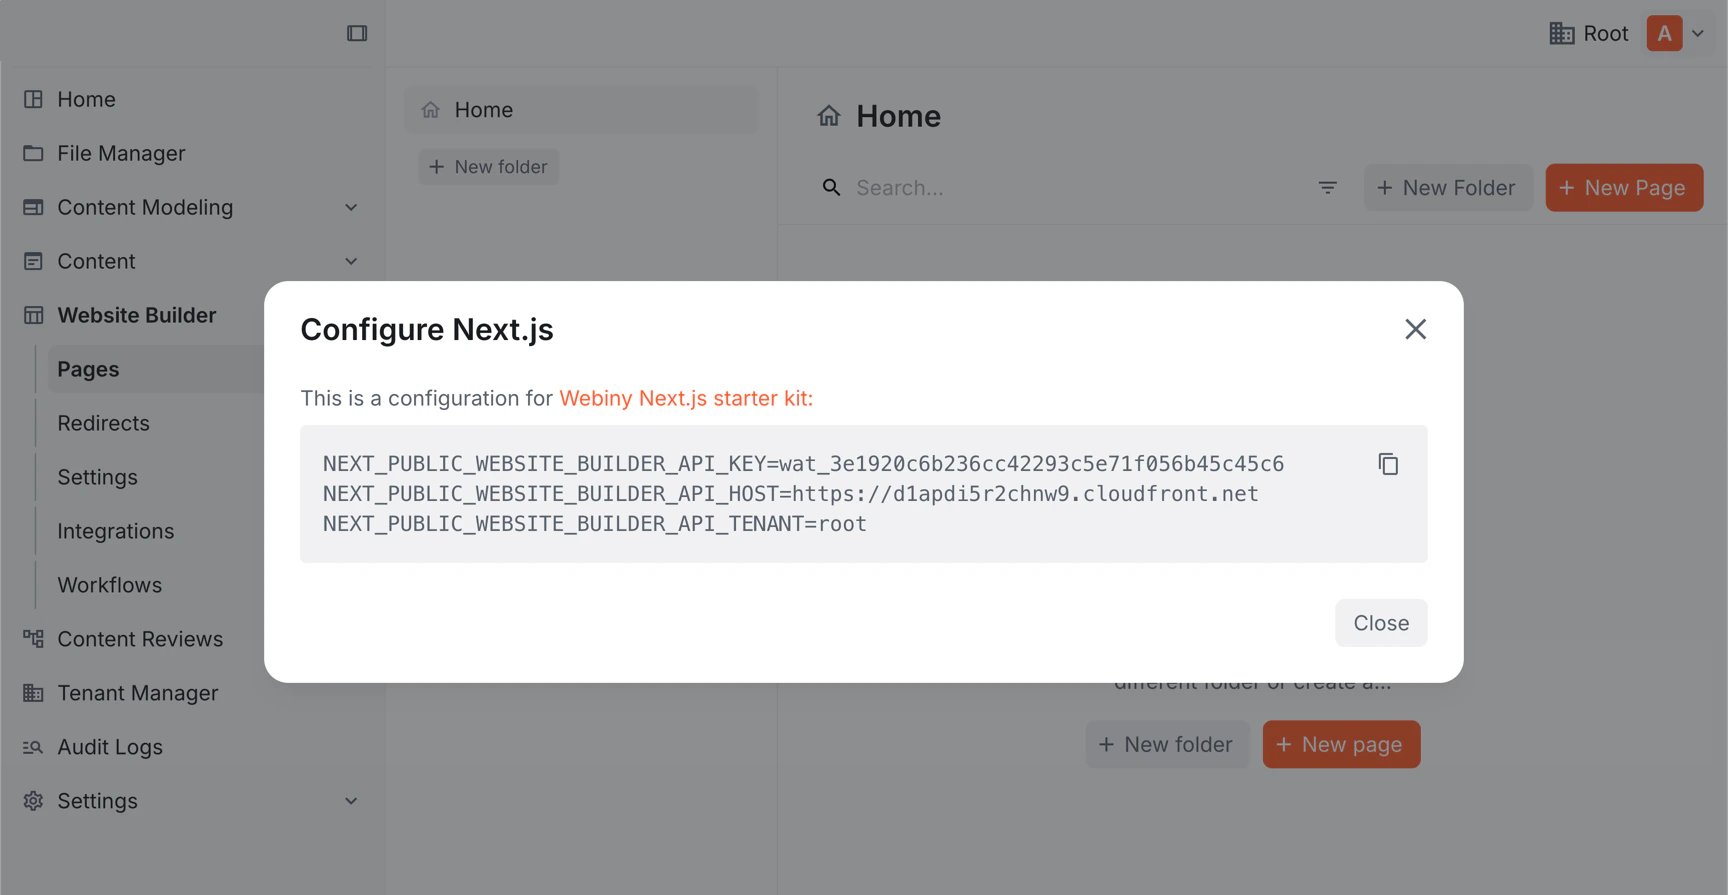 Click the copy icon and paste the block directly into your `.env` file in the next step.
If your Admin is running on a non-localhost domain, the dialog will also include a
`NEXT_PUBLIC_WEBSITE_BUILDER_ADMIN_HOST` variable — make sure to copy that too.
### API Key Is Auto-Created
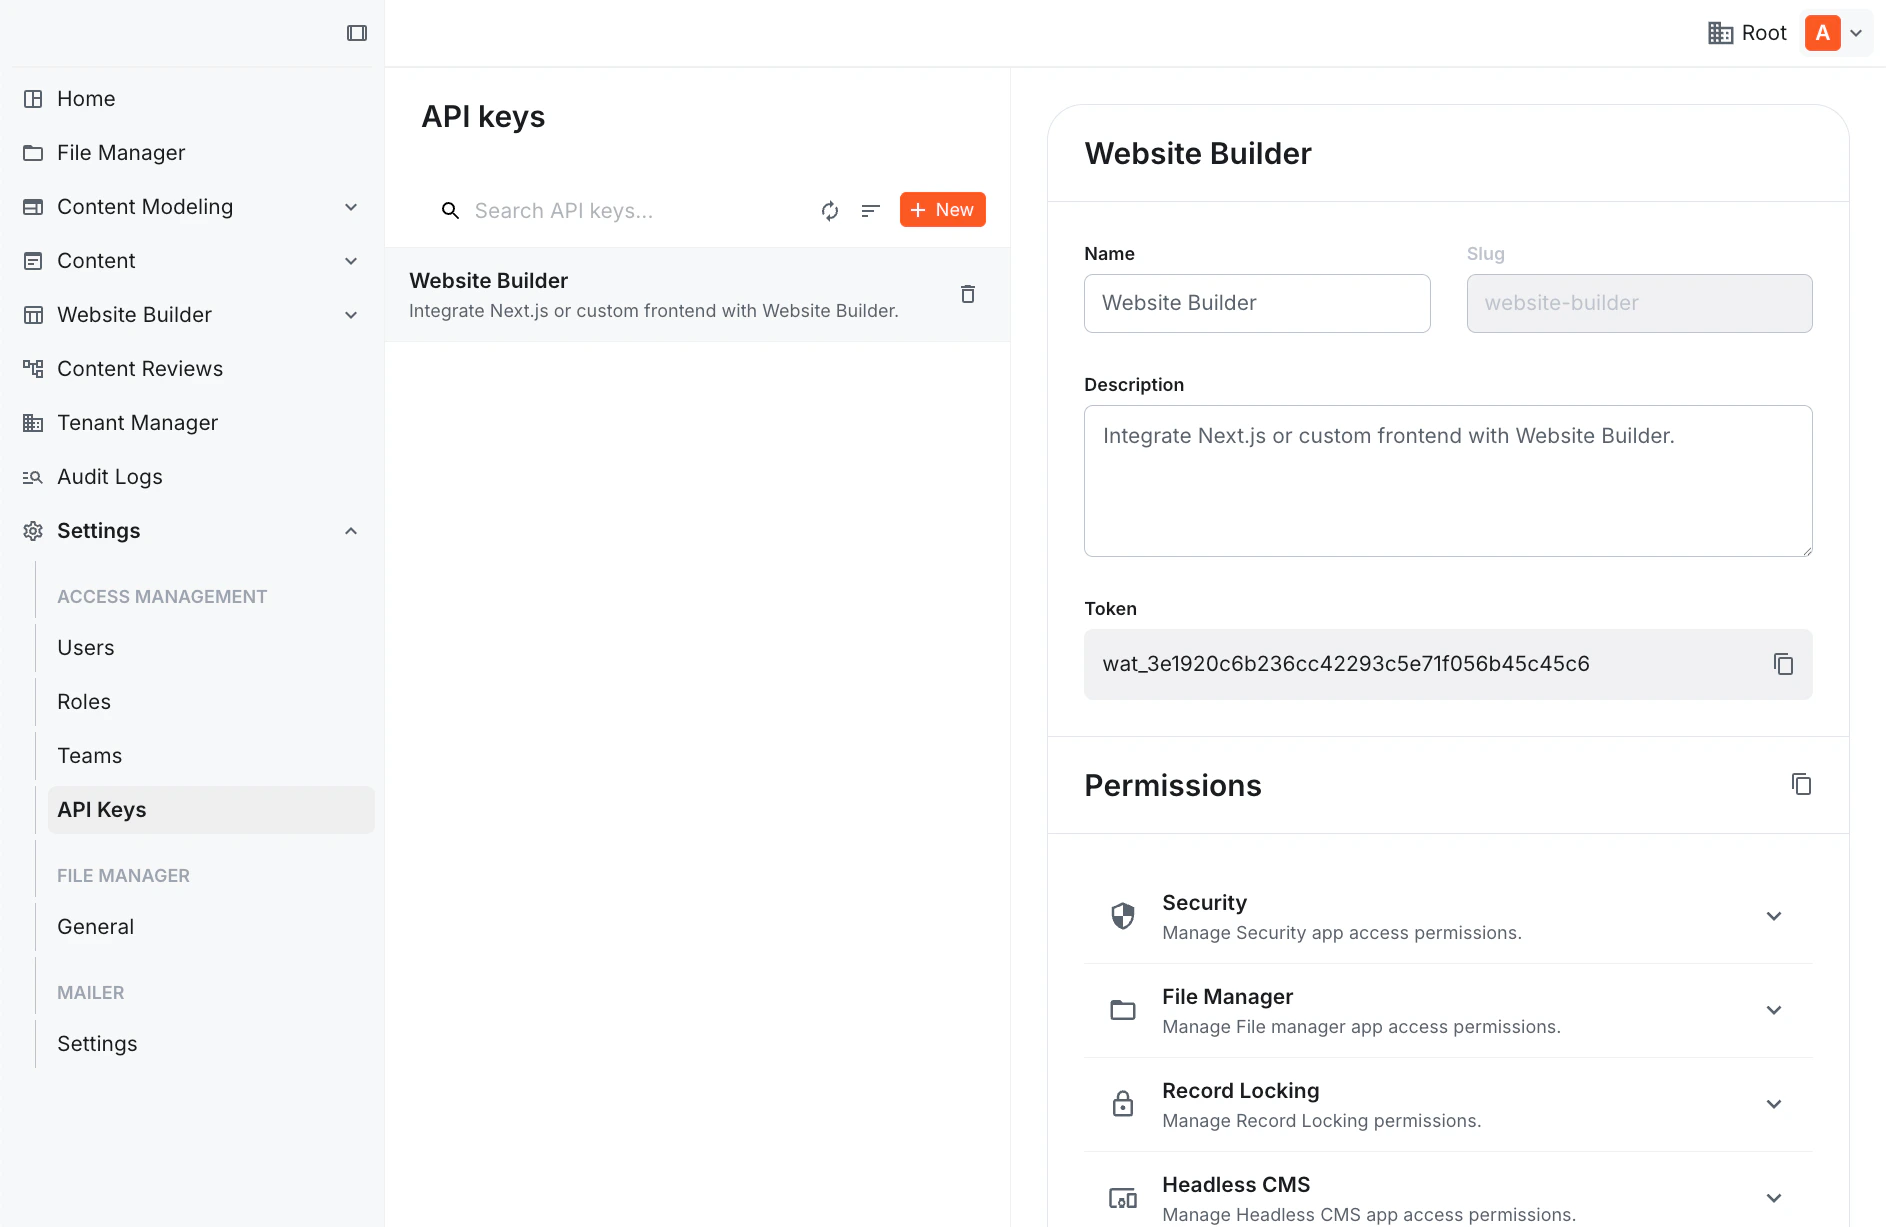
Unlike the Headless CMS where you manually create an API key and configure its permissions, the Website Builder API key is created automatically for the current tenant — you'll find it under **Settings → Access Management → API Keys** as "Website Builder". It's a read-only key, intentionally scoped that way since it's meant to be used in external frontend apps like your Next.js project.
Click the copy icon and paste the block directly into your `.env` file in the next step.
If your Admin is running on a non-localhost domain, the dialog will also include a
`NEXT_PUBLIC_WEBSITE_BUILDER_ADMIN_HOST` variable — make sure to copy that too.
### API Key Is Auto-Created
Unlike the Headless CMS where you manually create an API key and configure its permissions, the Website Builder API key is created automatically for the current tenant — you'll find it under **Settings → Access Management → API Keys** as "Website Builder". It's a read-only key, intentionally scoped that way since it's meant to be used in external frontend apps like your Next.js project.
 ## Step 4: Configure Environment Variables
Create a `.env` file in the root of your Next.js project:
```dotenv title=".env" theme={null}
NEXT_PUBLIC_WEBSITE_BUILDER_API_KEY=your_api_key_here
NEXT_PUBLIC_WEBSITE_BUILDER_API_HOST=https://your-cloudfront-url.cloudfront.net
NEXT_PUBLIC_WEBSITE_BUILDER_API_TENANT=root
```
All three variables are prefixed with `NEXT_PUBLIC_` because they are used on the client side
during live editing. The Content SDK also reads them server-side at build/request time.
## Step 5: Start the Dev Server
```bash title="Terminal" theme={null}
npm run dev
```
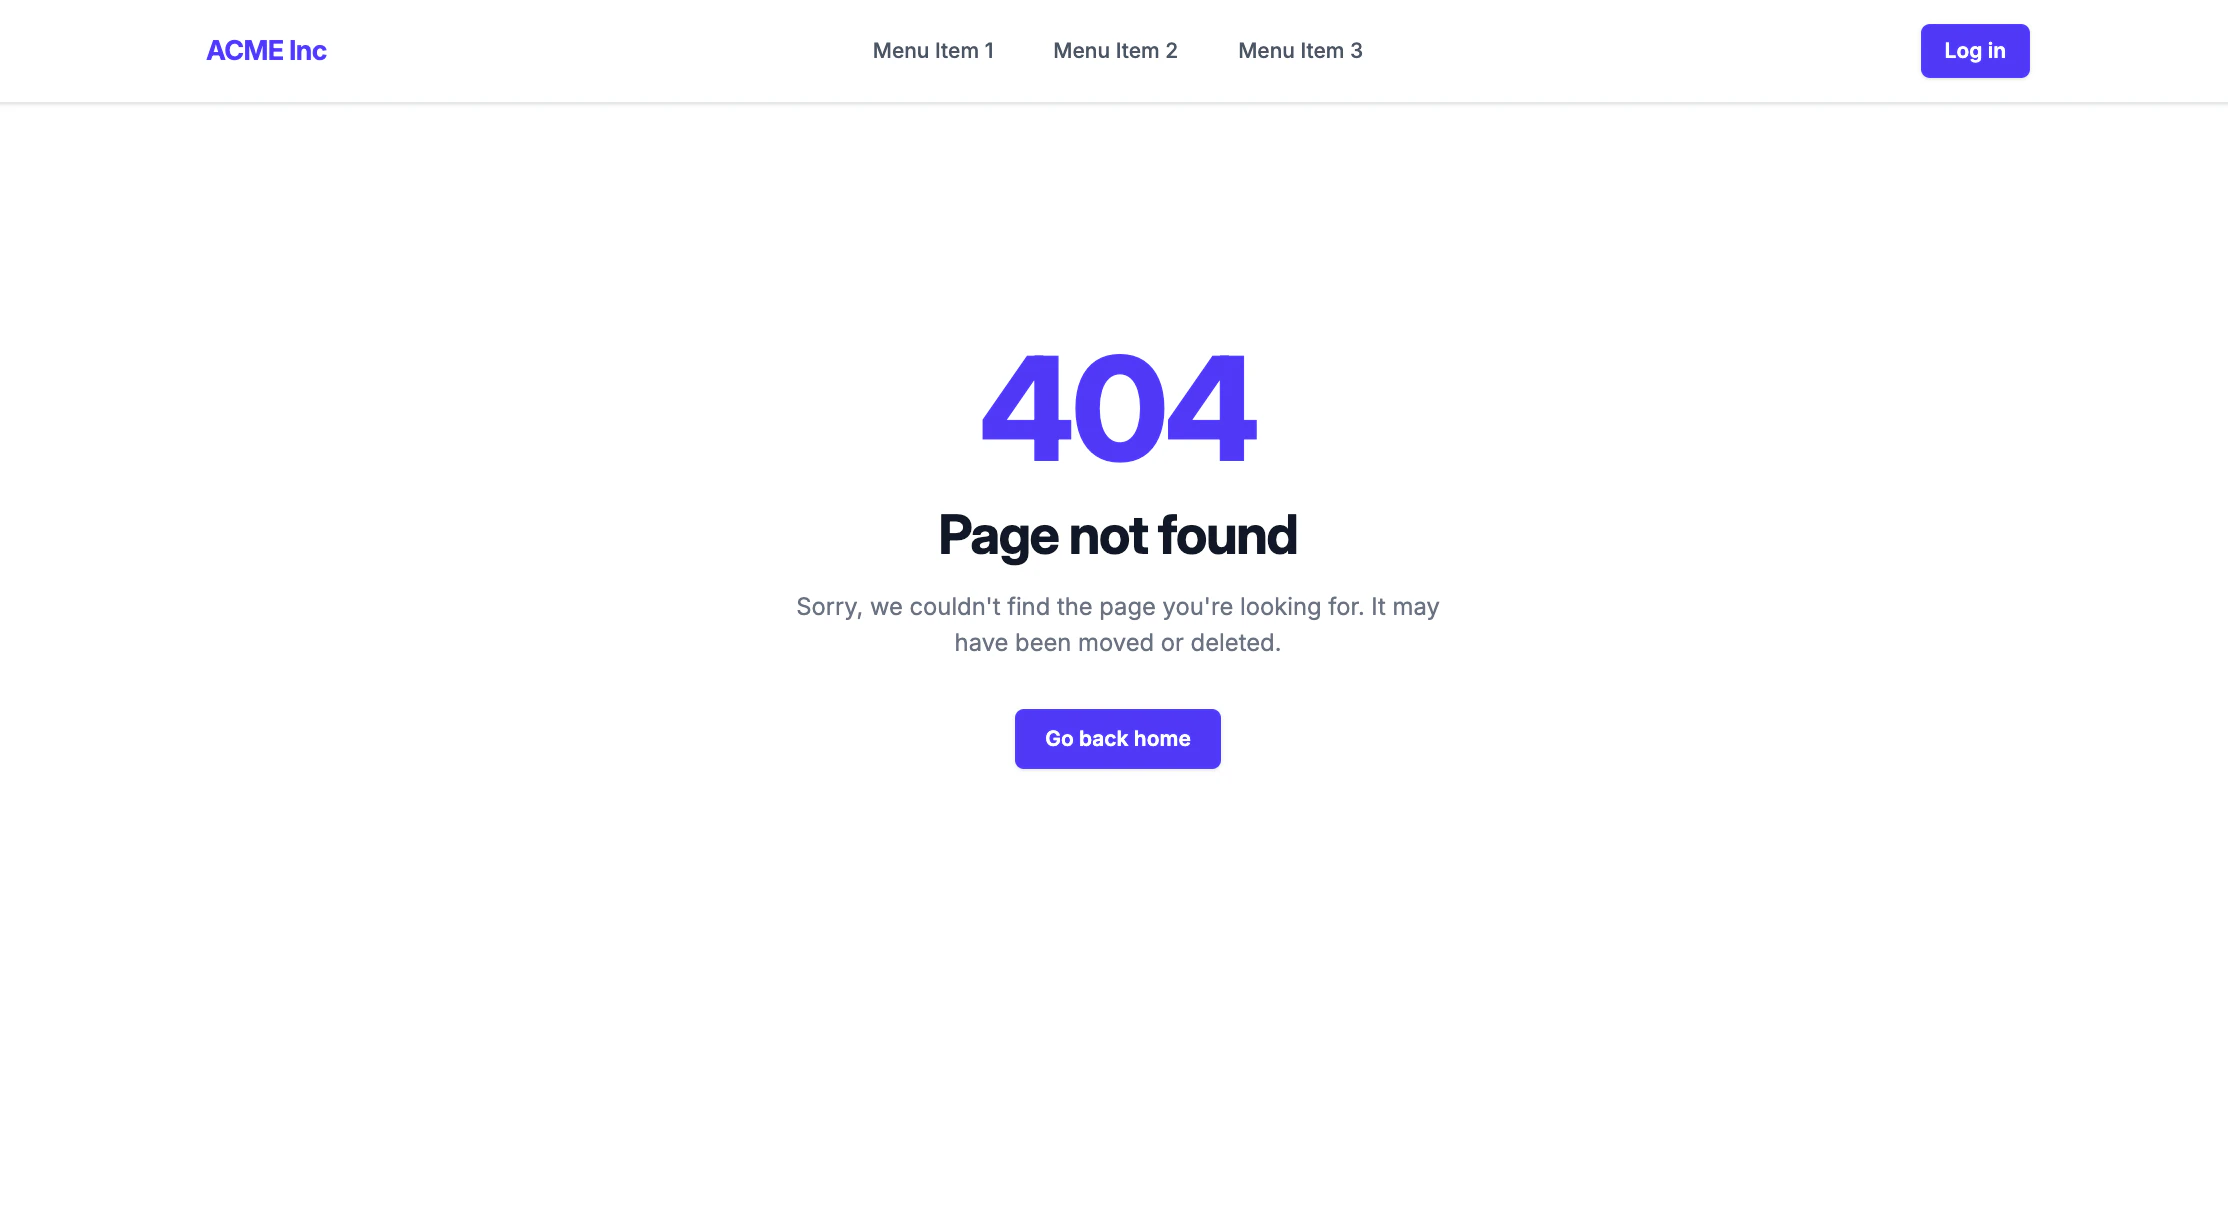
Open [http://localhost:3000](http://localhost:3000). At this point you'll see a "Page not found" message — that's expected because there are no pages in your Website Builder yet.
## Step 4: Configure Environment Variables
Create a `.env` file in the root of your Next.js project:
```dotenv title=".env" theme={null}
NEXT_PUBLIC_WEBSITE_BUILDER_API_KEY=your_api_key_here
NEXT_PUBLIC_WEBSITE_BUILDER_API_HOST=https://your-cloudfront-url.cloudfront.net
NEXT_PUBLIC_WEBSITE_BUILDER_API_TENANT=root
```
All three variables are prefixed with `NEXT_PUBLIC_` because they are used on the client side
during live editing. The Content SDK also reads them server-side at build/request time.
## Step 5: Start the Dev Server
```bash title="Terminal" theme={null}
npm run dev
```
Open [http://localhost:3000](http://localhost:3000). At this point you'll see a "Page not found" message — that's expected because there are no pages in your Website Builder yet.
 ## Step 6: Create Your First Page
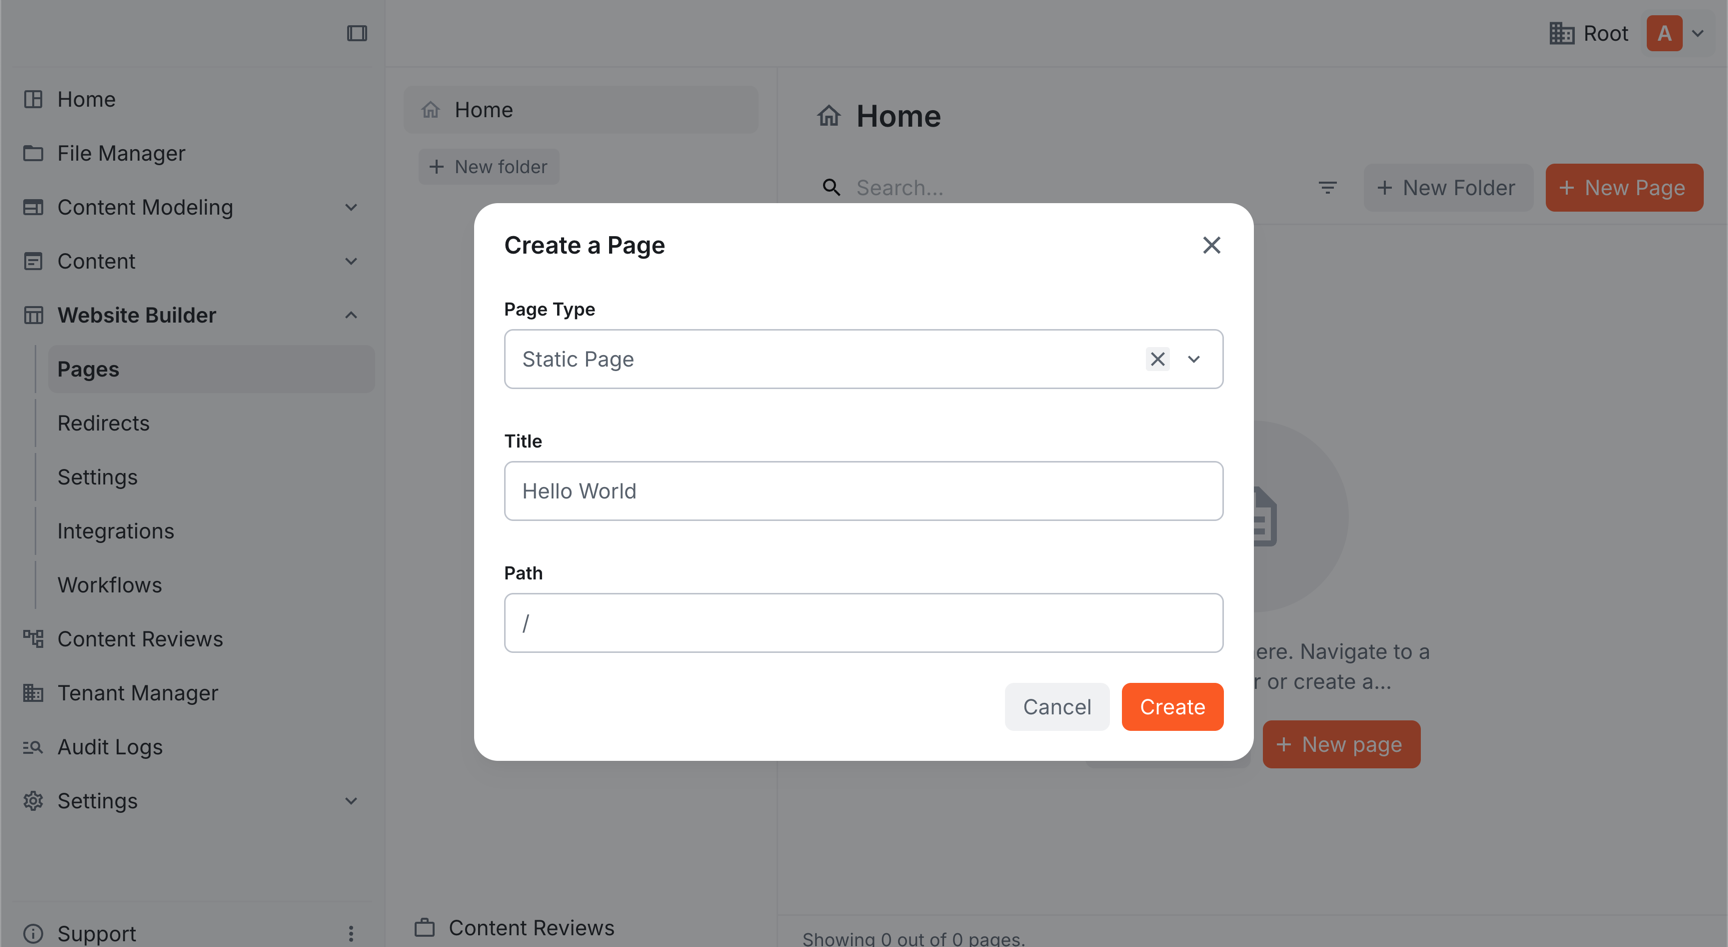
1. Open your Kibo CMS Admin app.
2. In the sidebar, go to **Website Builder → Pages**.
3. Click **New Page**.
4. Set the **title** to "Hello World" and the **path** to `/` (the homepage), then click **Create**.
## Step 6: Create Your First Page
1. Open your Kibo CMS Admin app.
2. In the sidebar, go to **Website Builder → Pages**.
3. Click **New Page**.
4. Set the **title** to "Hello World" and the **path** to `/` (the homepage), then click **Create**.
 5. You'll land in the page editor. In the component palette on the left, find the **Custom** group and drag the **Hero #1** component onto the canvas. It renders with placeholder content straight away — no configuration needed for now.
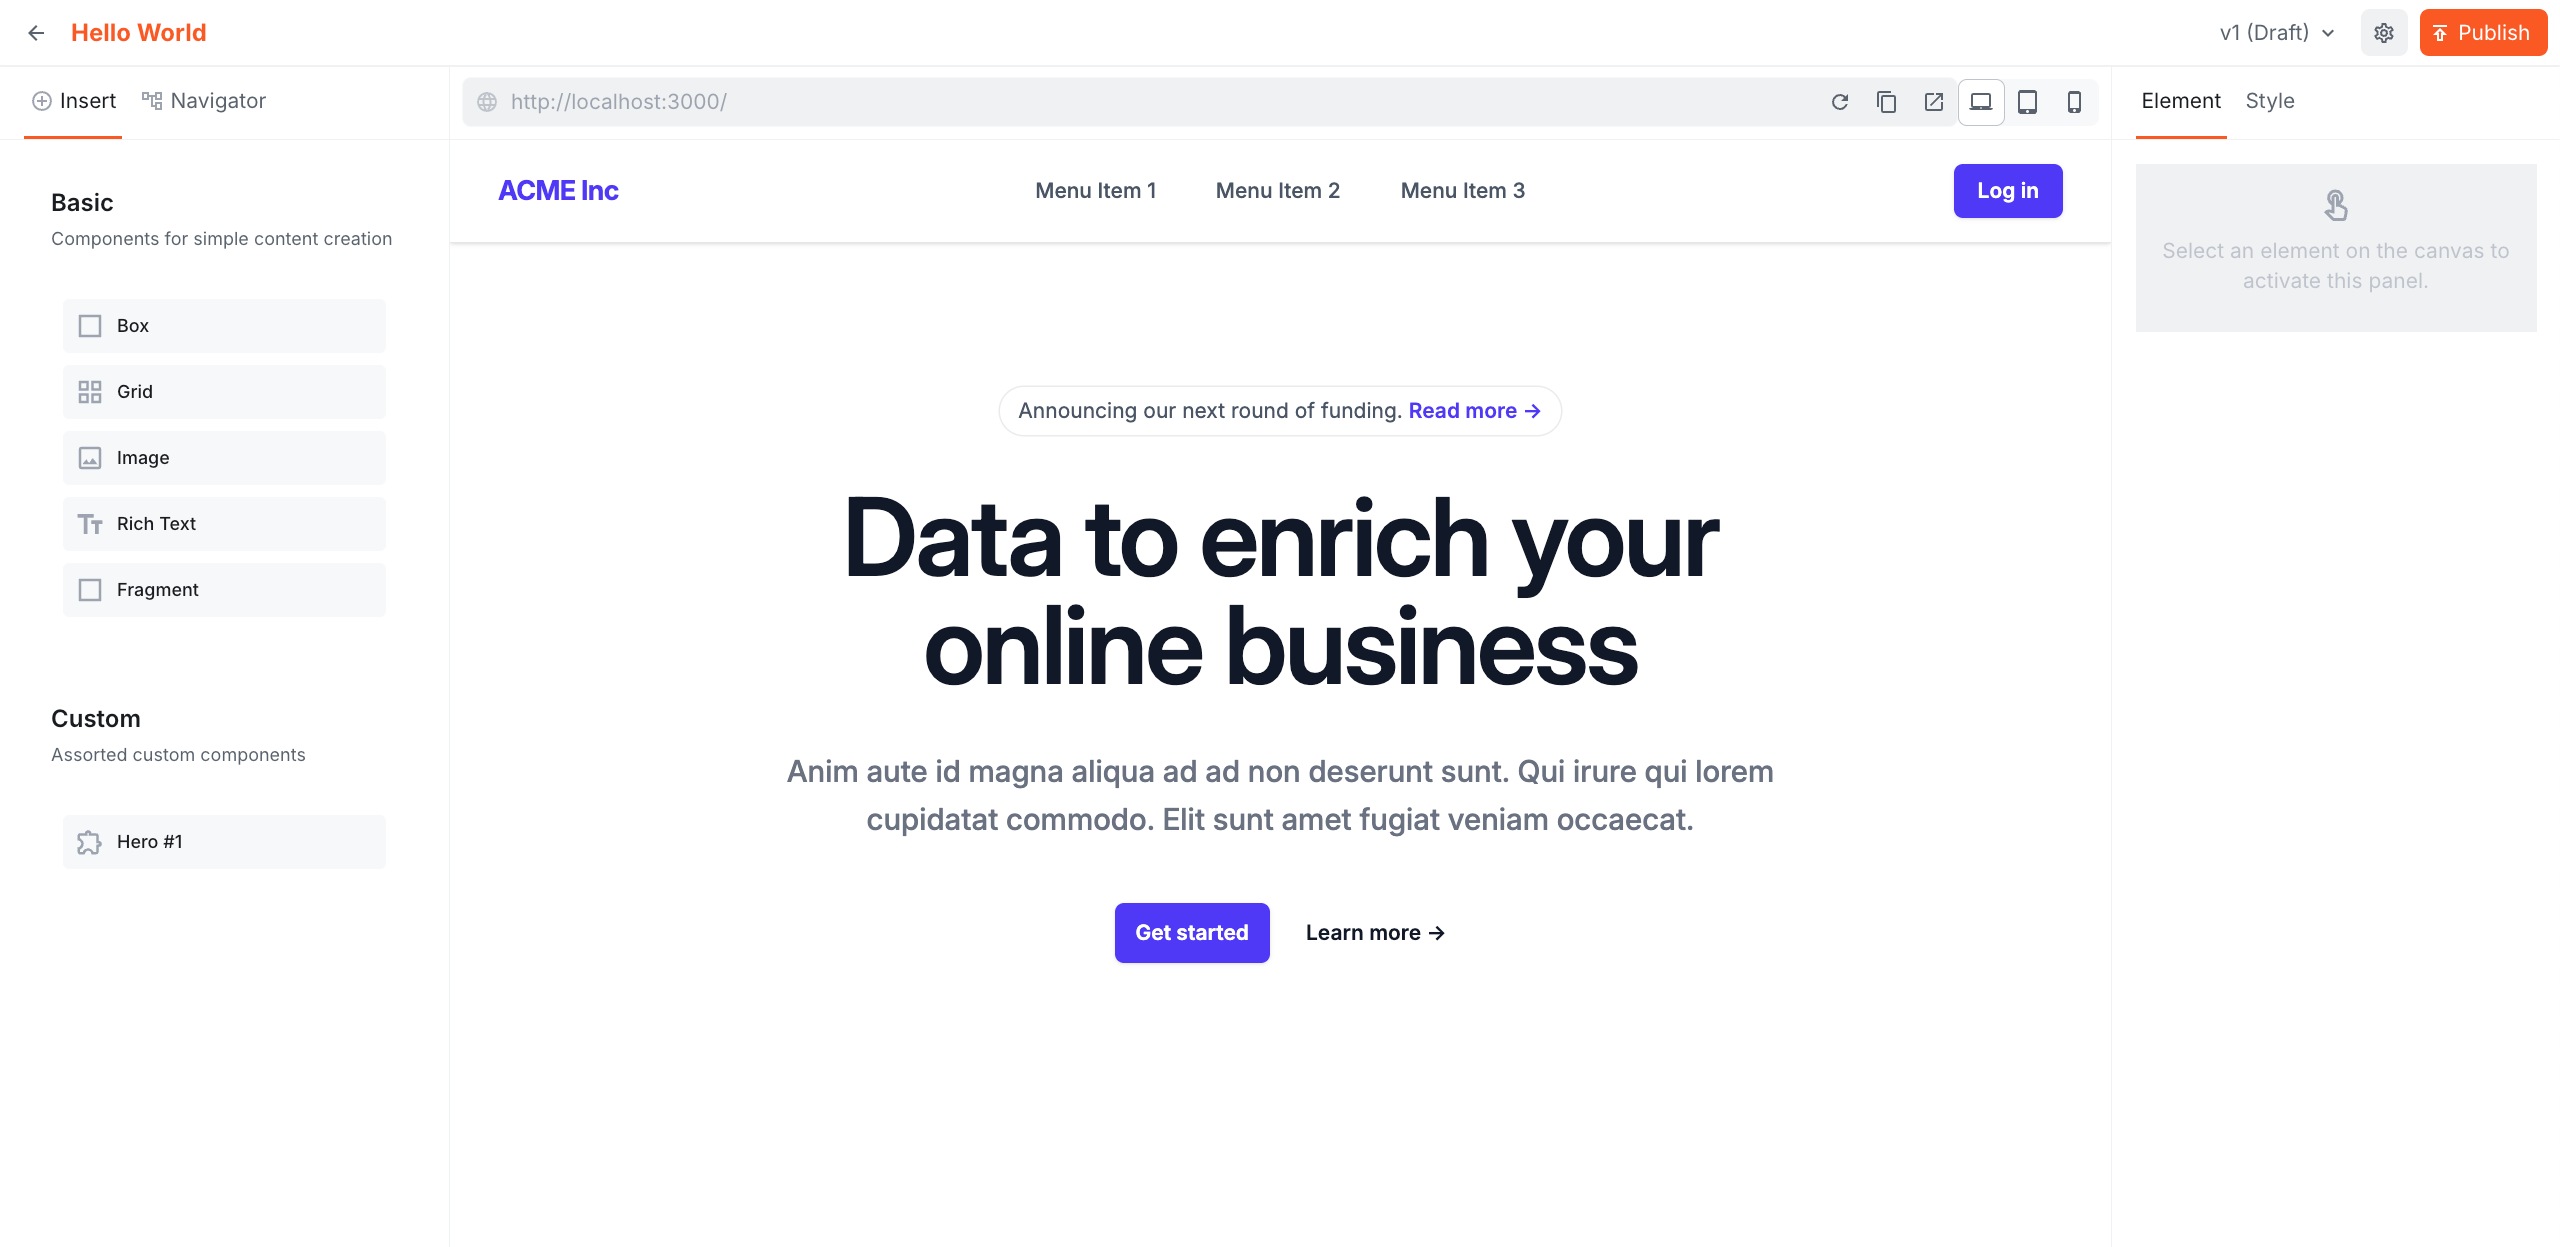 6. Click **Publish**.
## Step 7: See It Rendered
Go back to [http://localhost:3000](http://localhost:3000) and refresh. You should now see the hero section rendered by your Next.js app.
6. Click **Publish**.
## Step 7: See It Rendered
Go back to [http://localhost:3000](http://localhost:3000) and refresh. You should now see the hero section rendered by your Next.js app.
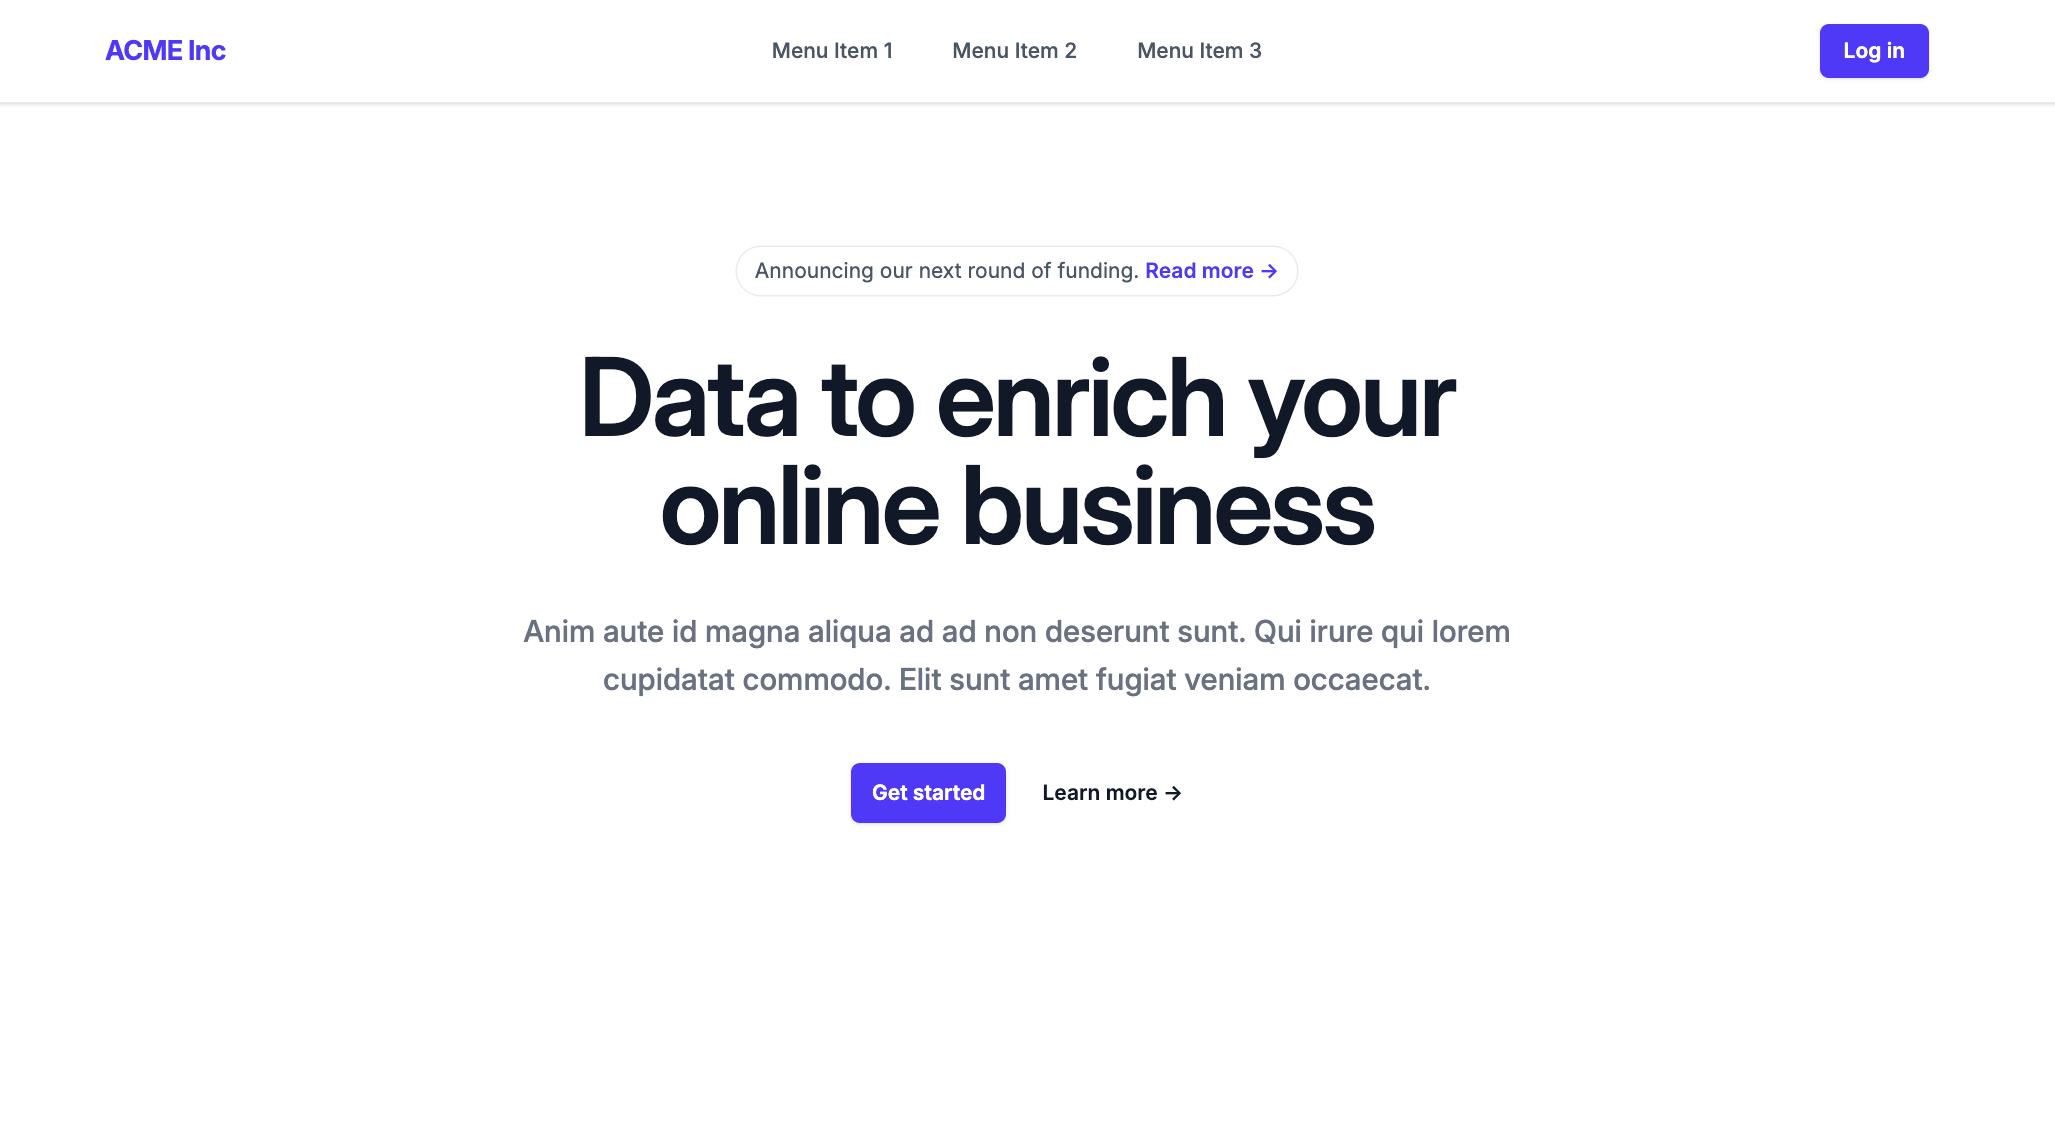 You've successfully rendered your first Website Builder page. Content authored in Kibo CMS Admin, delivered through your own Next.js app — that's the full loop working end to end.
## Project Structure
Here's what's in the starter kit and what each part does:
```txt title="Project structure" theme={null}
src/
app/
[[...slug]]/
page.tsx # Catch-all route — renders every Website Builder page
api/
preview/ # Enables Next.js draft mode for Website Builder preview
redirects/ # Serves redirect rules defined in Website Builder Admin
layout.tsx
components/
DocumentRenderer.tsx # Wires editorComponents into the SDK renderer
Header.tsx
NotFound.tsx
PageLayout.tsx
contentSdk/
initializeContentSdk.ts # SDK init
groups.ts # Component group registration
ContentSdkInitializer.ts # Client component wrapper for SDK init
getTenant.ts # Reads tenant ID from request headers
index.ts
editorComponents/
index.tsx # Register your components here
Hero1.tsx # Built-in Hero component
theme/
theme.css # CSS variables + typography classes
theme.ts # createTheme() call
tailwind.css
utils/
normalizeSlug.ts
constants.ts
middleware.ts # Handles preview mode, tenant routing, redirects
```
The two folders you'll spend most time in are `editorComponents/` (building and registering components) and `theme/` (styling). Everything else is infrastructure the starter kit handles for you.
## How the Rendering Works
The starter kit's catch-all route (`src/app/[[...slug]]/page.tsx`) handles all page rendering:
```typescript title="src/app/[[...slug]]/page.tsx (simplified)" theme={null}
export default async function Page({ params }) {
const { slug = [] } = await params;
// Initialize the SDK with credentials from env vars
initializeContentSdk();
// Fetch the published page document from Kibo CMS
const page = await contentSdk.getPage("/" + slug.join("/"));
// DocumentRenderer maps component names → your React components
return ;
}
```
`initializeContentSdk` (in `src/contentSdk/initializeContentSdk.ts`) calls `contentSdk.init()` with your env var credentials and registers the component groups. `DocumentRenderer` takes the page document — a JSON tree of component names and their input values — and renders it by looking up each name in your registered `editorComponents` array.
## Troubleshooting
### Still seeing "Not found!" after publishing
* Make sure you set the page **path** to `/` exactly.
* Check the browser console for API errors — a CORS or auth error means your env vars may be wrong.
* Restart the dev server after editing `.env`.
### Editor shows a blank canvas
* Make sure your Next.js dev server is running on `http://localhost:3000`.
## Summary
* The Website Builder editor loads your Next.js app in an iframe — components and styles live entirely in your project.
* Clone the starter kit and configure the three required env vars.
* Create a page in the Admin editor using the built-in Hero #1 component and see it rendered in the Next.js app.
* The catch-all route + `initializeContentSdk` + `DocumentRenderer` is how every page gets rendered.
You've successfully rendered your first Website Builder page. Content authored in Kibo CMS Admin, delivered through your own Next.js app — that's the full loop working end to end.
## Project Structure
Here's what's in the starter kit and what each part does:
```txt title="Project structure" theme={null}
src/
app/
[[...slug]]/
page.tsx # Catch-all route — renders every Website Builder page
api/
preview/ # Enables Next.js draft mode for Website Builder preview
redirects/ # Serves redirect rules defined in Website Builder Admin
layout.tsx
components/
DocumentRenderer.tsx # Wires editorComponents into the SDK renderer
Header.tsx
NotFound.tsx
PageLayout.tsx
contentSdk/
initializeContentSdk.ts # SDK init
groups.ts # Component group registration
ContentSdkInitializer.ts # Client component wrapper for SDK init
getTenant.ts # Reads tenant ID from request headers
index.ts
editorComponents/
index.tsx # Register your components here
Hero1.tsx # Built-in Hero component
theme/
theme.css # CSS variables + typography classes
theme.ts # createTheme() call
tailwind.css
utils/
normalizeSlug.ts
constants.ts
middleware.ts # Handles preview mode, tenant routing, redirects
```
The two folders you'll spend most time in are `editorComponents/` (building and registering components) and `theme/` (styling). Everything else is infrastructure the starter kit handles for you.
## How the Rendering Works
The starter kit's catch-all route (`src/app/[[...slug]]/page.tsx`) handles all page rendering:
```typescript title="src/app/[[...slug]]/page.tsx (simplified)" theme={null}
export default async function Page({ params }) {
const { slug = [] } = await params;
// Initialize the SDK with credentials from env vars
initializeContentSdk();
// Fetch the published page document from Kibo CMS
const page = await contentSdk.getPage("/" + slug.join("/"));
// DocumentRenderer maps component names → your React components
return ;
}
```
`initializeContentSdk` (in `src/contentSdk/initializeContentSdk.ts`) calls `contentSdk.init()` with your env var credentials and registers the component groups. `DocumentRenderer` takes the page document — a JSON tree of component names and their input values — and renders it by looking up each name in your registered `editorComponents` array.
## Troubleshooting
### Still seeing "Not found!" after publishing
* Make sure you set the page **path** to `/` exactly.
* Check the browser console for API errors — a CORS or auth error means your env vars may be wrong.
* Restart the dev server after editing `.env`.
### Editor shows a blank canvas
* Make sure your Next.js dev server is running on `http://localhost:3000`.
## Summary
* The Website Builder editor loads your Next.js app in an iframe — components and styles live entirely in your project.
* Clone the starter kit and configure the three required env vars.
* Create a page in the Admin editor using the built-in Hero #1 component and see it rendered in the Next.js app.
* The catch-all route + `initializeContentSdk` + `DocumentRenderer` is how every page gets rendered.